How to Fold a Dress Shirt (Wrinkle-Free Travel and Storage)

By ShowMeStepByStepPublished

Based on a video by SUITCAFE.

A dress shirt only stays crisp in your suitcase if you fold it the same way the store folded it the first time. The trick is buttoning the front, working face-down on a flat surface, and bringing both sides in before you ever touch the bottom. Do it once and the shirt looks fresh out of the package; rush it and you'll be ironing in the hotel room.

This walkthrough from SUITCAFE is the cleanest demo of the factory fold on YouTube. Two simple side folds, two bottom folds, and a flip - and you have a flat rectangle that stacks in a drawer or slides into a packing cube without wrinkling.

If you're working through a whole closet reset, pair this with how to fold a fitted sheet, how to fold socks, how to fold towels, and how to fold underwear. One consistent folding system across the whole drawer is what makes the organization stick.

Step-by-Step Guide

1

Step 1: Start with a buttoned, smooth shirt

1:40
Step 1: Step 1: Start with a buttoned, smooth shirt

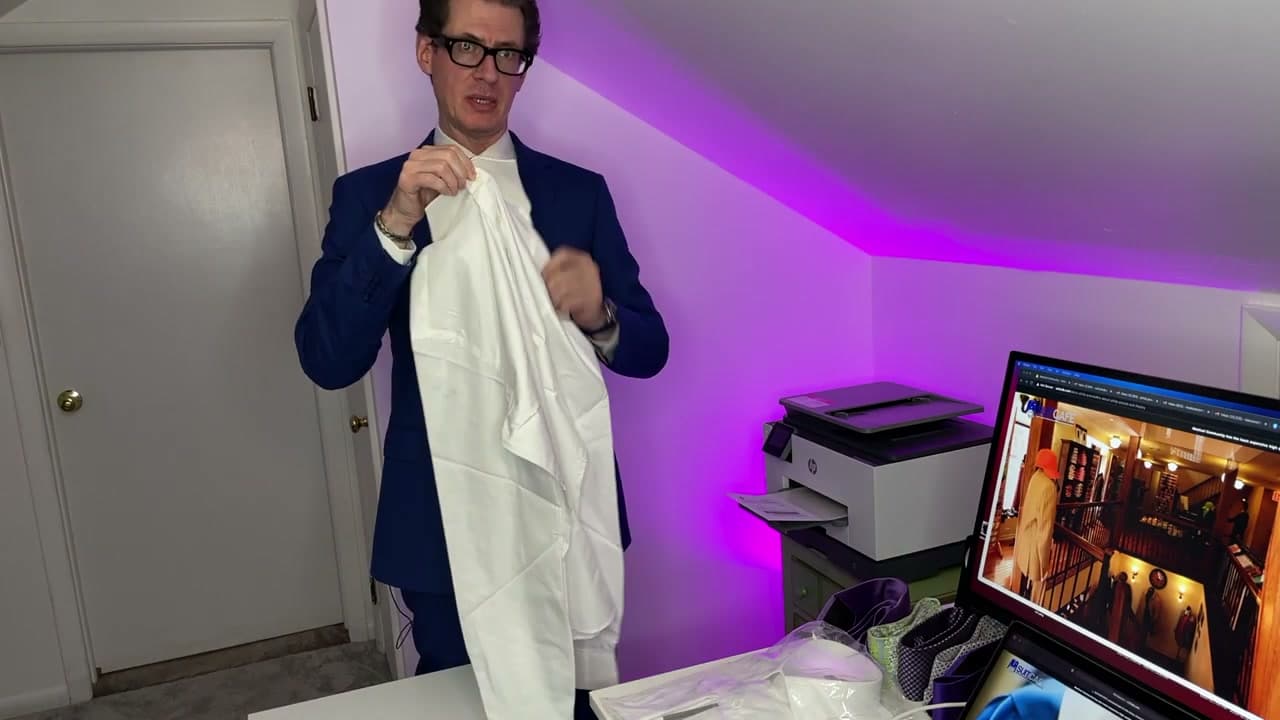
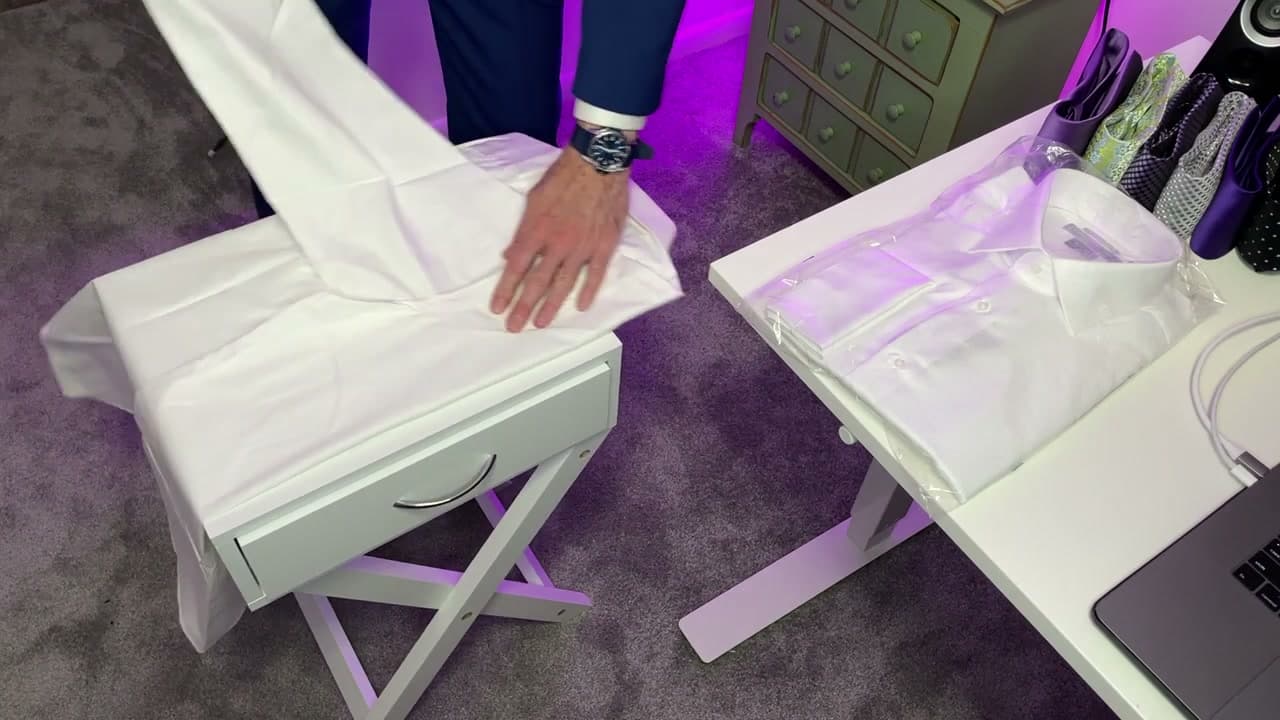
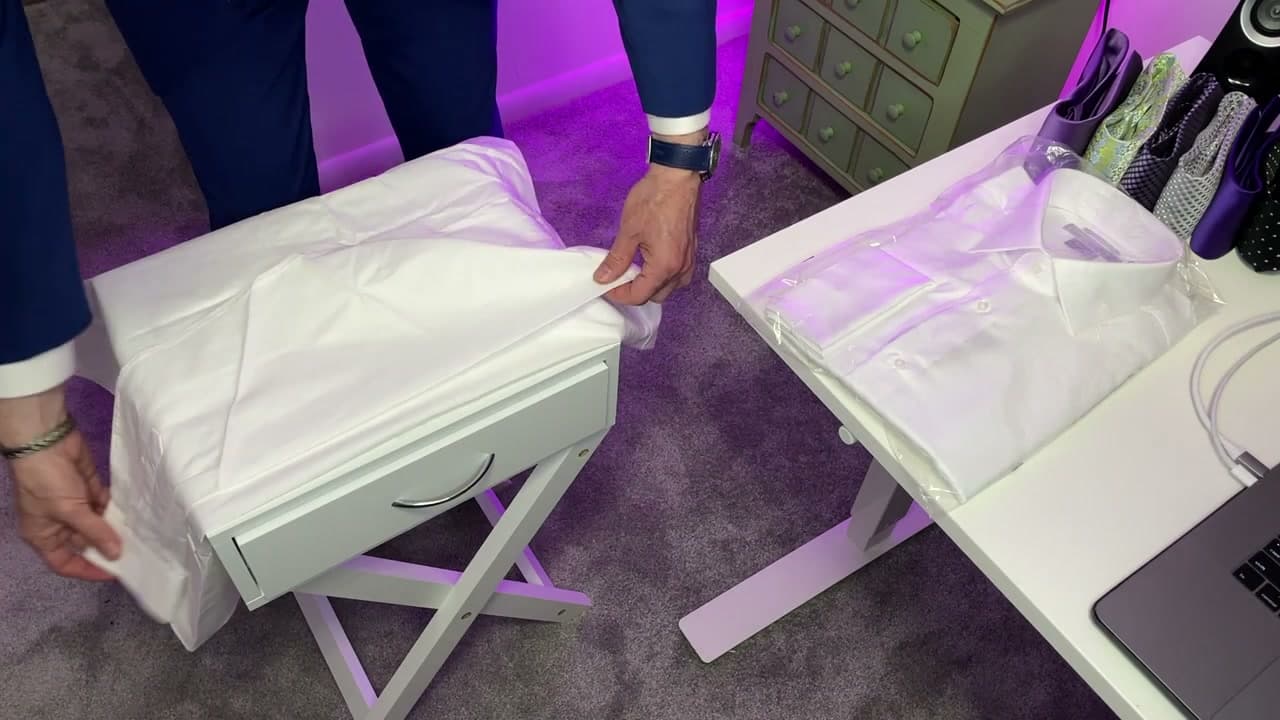
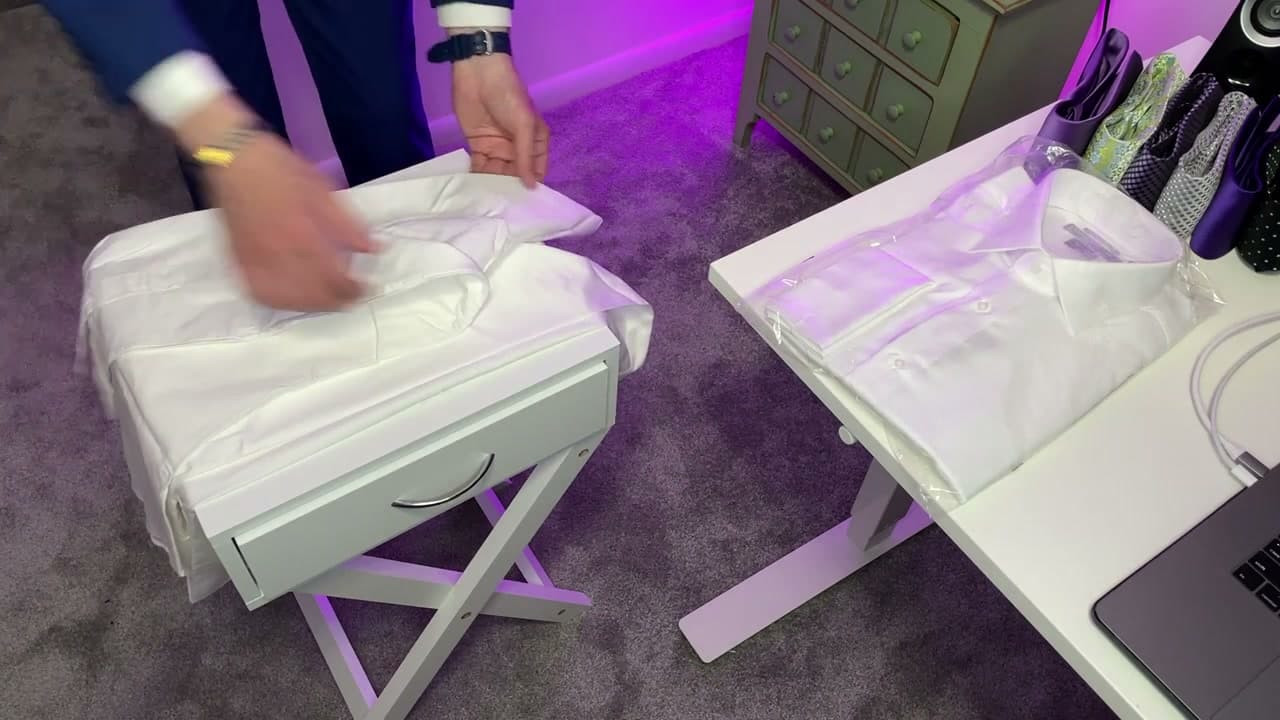
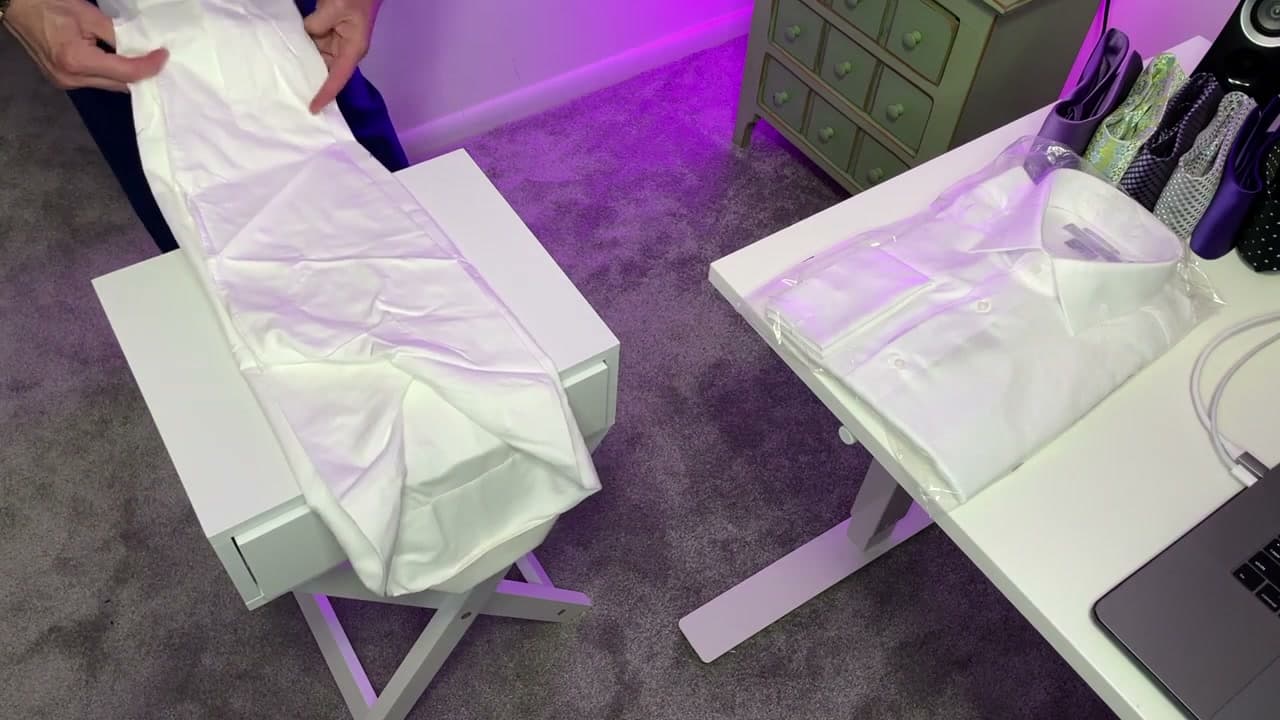
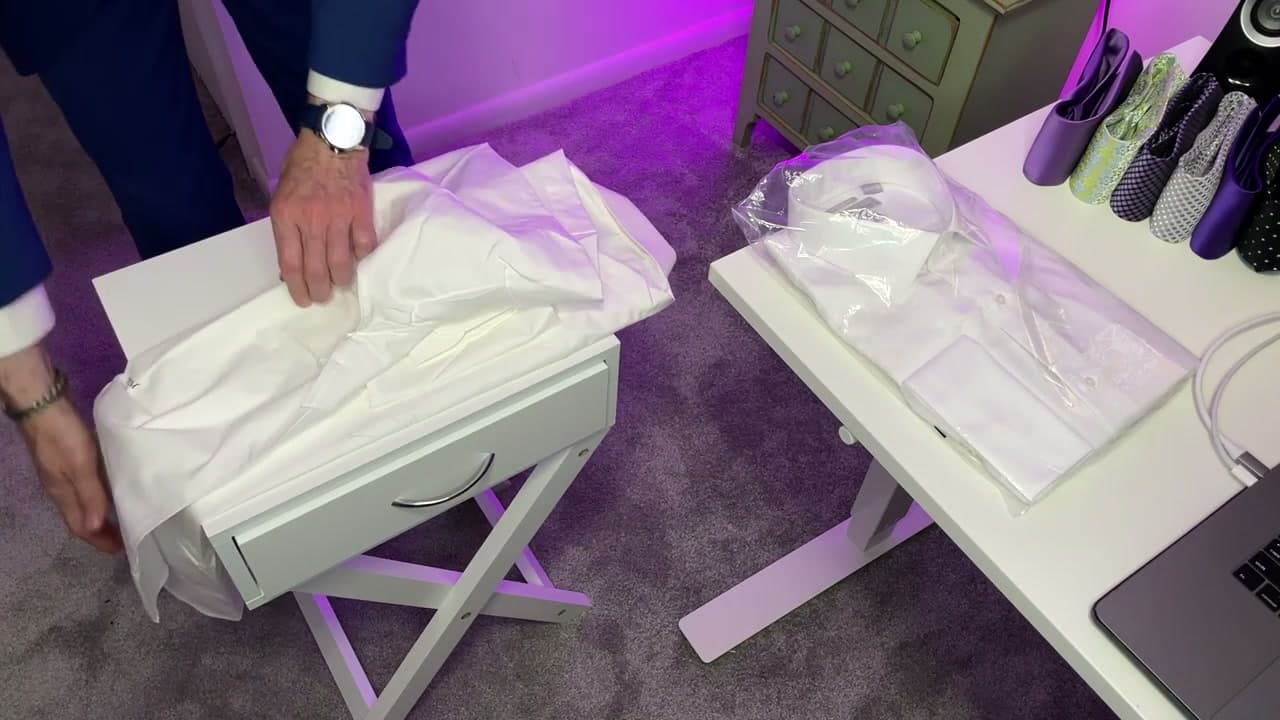
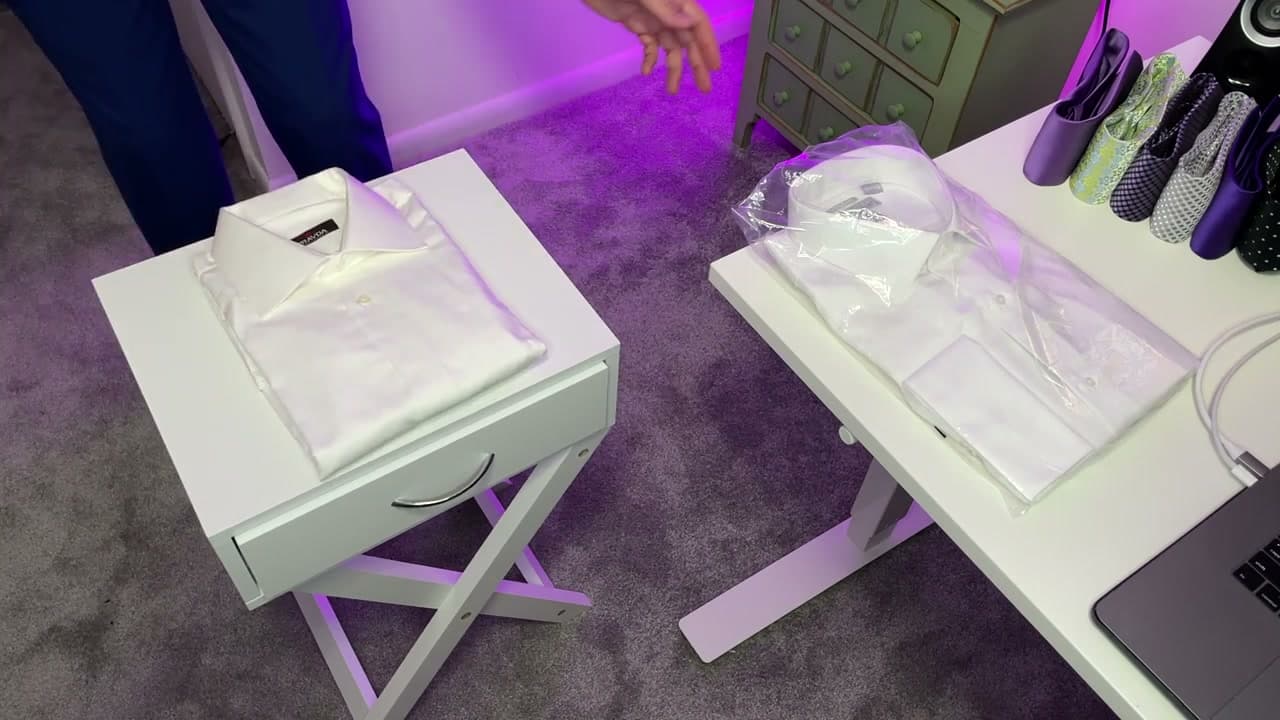
Button the collar button and at least the third button down the placket. Buttoning is what holds the shirt together through the fold and keeps the front placket lying straight. Skip this and the front gapes open while you're trying to line up the sides, and you'll end up with a fold that bulges through the middle.

If the shirt came out of the dryer or hamper, give it a quick steam or shake out the worst of the wrinkles before you start. A folded wrinkle stays a wrinkle.

Tip

You don't need every button done. Three or four buttons is enough to hold the front together. The cuff buttons don't matter for the fold.

2

Step 2: Lay the shirt face-down and smooth out wrinkles

2:50
Step 2: Step 2: Lay the shirt face-down and smooth out wrinkles

Flip the shirt over so the back faces up and the buttons are pressed against the surface. A bed, a dresser top, or a folding board all work - just give yourself a flat area wider than the shoulders.

Run your hands across the shoulders, back, and tail. Press out every wrinkle now. Any crease left in the fabric here ends up baked into the finished fold, and once you start folding you can't get back at the back of the shirt without starting over.

Tip

The collar should sit flat against the surface, not curled under. Smooth the collar deliberately so it lies flush with the back panel.

Products used in this step

3

Step 3: Fold one side in toward the center

2:56
Step 3: Step 3: Fold one side in toward the center

Grab one side of the shirt at the shoulder seam and fold it inward, lining the side seam up roughly with the center of the back. Keep the fabric flat against the table as you fold - lifting it bunches the back panel up underneath.

The fold should land about a third of the way across the shirt. The sleeve will end up sticking out at an angle off the new vertical edge - that's normal. You'll deal with it in the next step.

Tip

Use the shoulder seam as your guide, not the sleeve. The seam tells you where the body of the shirt actually ends.

Products used in this step

4

Step 4: Fold the sleeve back down along the new edge

3:28
Step 4: Step 4: Fold the sleeve back down along the new edge

Take the sleeve you just folded across and bring the cuff back down so the sleeve runs parallel to the side of the shirt. The cuff should sit near the shirt tail, pointing down.

This is the move that makes the factory fold work. It tucks the sleeve inside the silhouette of the fold instead of letting it bunch up on top, which is what gives the finished shirt that flat, rectangular profile.

Tip

If the cuff is bulky or buttoned up tight, fold the sleeve at the elbow first to flatten it, then bring the cuff down. A bulky cuff stacked on top of a folded sleeve creates a lump that shows through.

5

Step 5: Repeat the fold on the other side

4:00
Step 5: Step 5: Repeat the fold on the other side

Do the exact same fold on the opposite side. Bring the shoulder seam in toward the center, then fold the sleeve back down along the new edge. Use the first side as a mirror - the two sides should look identical when you're done.

You end up with a long rectangle the width of the back panel, with both sleeves tucked along the sides and the collar at the top. This is the foundation of the fold; the next two steps just package it.

Tip

If the two sides don't line up - one too wide, one too narrow - undo and redo. An uneven foundation makes the finished bundle lean and pop open in the suitcase.

Products used in this step

6

Step 6: Fold the bottom hem up to the collar

5:40
Step 6: Step 6: Fold the bottom hem up to the collar

Take the shirt tail and fold it up about a third of the way toward the collar. Then fold up again so the bottom hem meets just below the collar. Two folds keep the finished package shorter than a single fold and stop the shirt from creasing right across the chest.

Press each fold flat as you go. The flatter the bottom, the flatter the finished bundle, and the easier it is to stack or slide into a packing cube.

Tip

If your suitcase or drawer is short, fold into thirds instead of two big folds. Three smaller folds make a more compact rectangle.

7

Step 7: Flip the shirt over to reveal the finished fold

6:24
Step 7: Step 7: Flip the shirt over to reveal the finished fold

Flip the whole bundle over. The collar and front placket should be facing up, looking just like a shirt fresh out of the package. Press your hands across the top to settle the fold.

You have a tight, flat rectangle ready for a suitcase, a drawer, or a packing cube. For travel, slide the folded shirt into a packing cube or lay it flat across the bottom of the suitcase. For a closet drawer, stand the fold on its edge so the collar faces up - that way you can see every shirt at a glance instead of digging through a stack.

Tip

For really long trips, layer a thin sheet of tissue paper or a plastic dry-cleaner bag between two folded shirts. The slippery layer cuts down on friction wrinkles when the suitcase shifts.

Products Used

Your Guide

SUITCAFE

As an Amazon Associate we earn from qualifying purchases. Links on this page may be affiliate links - clicking them and buying doesn't change your price, but helps support ShowMeStepByStep.

Tags

What's next

Weekly Digest

Liked this lifestyle tutorial?

Pick the categories you want to hear about. Weekly digest of new step-by-step tutorials. No spam, easy unsubscribe.

Send me tutorials about

We only email about new tutorials. Easy unsubscribe anytime.