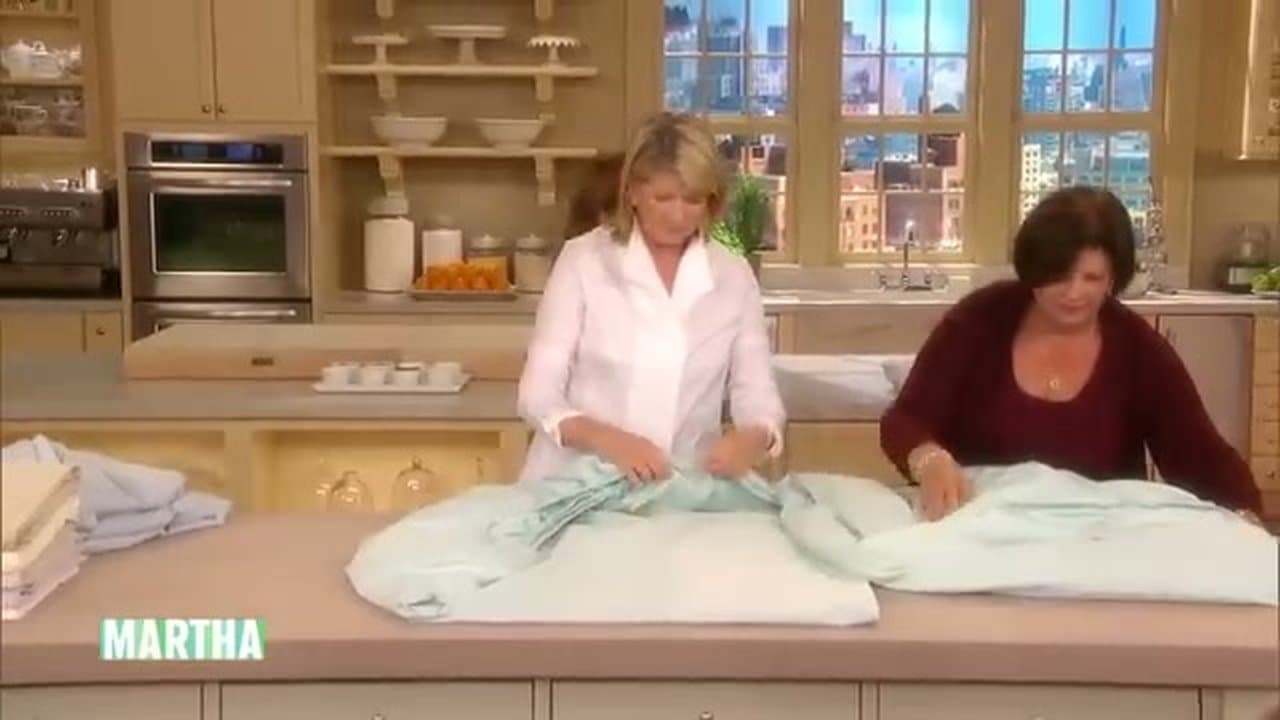
How to Fold a Fitted Sheet

By ShowMeStepByStepPublished Updated

Based on a video by Martha Stewart.

Folding a fitted sheet is the laundry task everyone gives up on. The elastic edges fight you. There's no flat side to start from. And the instructions you find online usually make it sound like you need three hands.

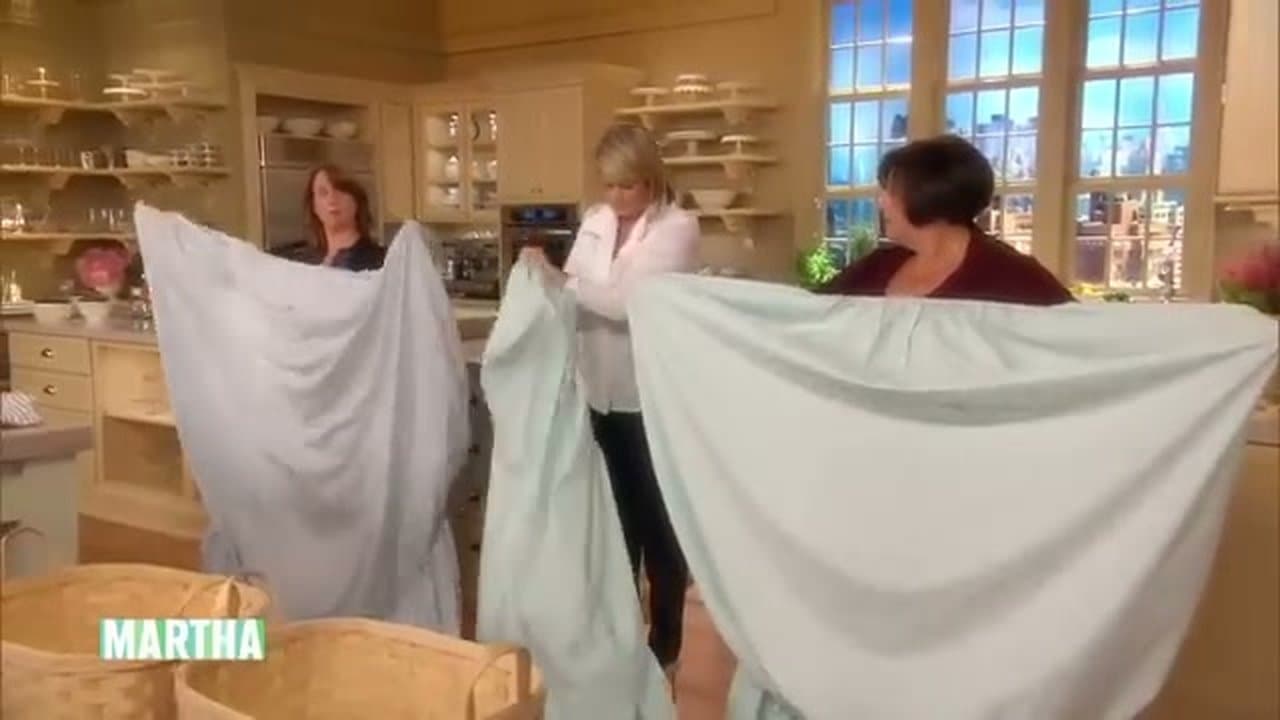
Martha Stewart's housekeeping expert Hosana demonstrates a method that actually works. The video is a comedy bit, which makes it funny to watch but also means the camera doesn't always hold on the technique - so the steps below break the method down in more detail than the video does.

The whole trick is nesting one corner inside another until all four corners are stacked on your left hand. Once they are, the sheet folds into a neat rectangle almost on its own. It takes a few tries to get the corner-nesting motion right. Stick with it. For other laundry-room wins, see how to wash a pillow and how to iron a dress shirt like a pro.

Variations by sheet size and type

Queen and king fitted sheets. Same exact method, just more fabric to manage. Lay the sheet flat on a bed or large table to make the corner-nesting easier (you don't need to do the entire fold standing up). The four-corner stack at the end will be bulkier; just press it flatter as you fold into thirds. Allow an extra 30 seconds compared to a twin sheet.

Twin and twin XL fitted sheets. The easiest size to fold. You can do the whole thing standing with the sheet held in front of you. Twin XL (common in college dorms) is the same width as twin but 5 inches longer, so the final folded rectangle is slightly taller - everything else identical.

Deep-pocket fitted sheets (for thick mattresses or toppers). The elastic is loose enough that nesting the corners feels sloppier, but the method still works. The first corner-flip is the trickiest because the deep pocket has more slack; pin the seam straight with your thumb when you nest the second corner so the edge doesn't twist.

Crib and toddler sheets. Small enough to fold like a regular flat sheet if you tuck the elastic in first. Lay flat, push all four elastic corners toward the center, then fold the resulting square in half twice. Skip the corner-nesting entirely.

Satin, silk, or sateen fitted sheets. Slippery fabric resists the nesting motion. Work on a slightly textured surface (a folded blanket on top of a bed) so the fabric doesn't slide off your hand mid-flip. Otherwise the method is the same.

Common questions about folding fitted sheets

Five questions we get most often about getting fitted sheets to fold flat without giving up and shoving them in the linen closet.

Why is folding a fitted sheet so hard?

The elastic-hemmed corners are what make the sheet stay on the mattress, and they're what make folding awkward. Every other piece of laundry has flat edges to align; a fitted sheet has four pocketed corners that pull the rest of the fabric in unpredictable directions. The corner-nesting method works because it converts those four 3D corners into one stacked corner before you start folding the flat parts.

How do I fold a king-size fitted sheet by myself?

Same nested-corners method, just lay the sheet on a bed or table partway through. After step 3 of the technique, set the partially-nested sheet flat on a bed, then complete the corner-flips while it's lying down. You're not strong-arming a giant sheet through the air; you're working it into shape on a surface.

Should I iron my fitted sheets?

Almost never. The elastic edges can't take the heat, and the cotton-elastic blend at the seams will shrink unevenly. If you absolutely need crease-free sheets, iron only the flat sections (top and bottom faces) with the iron on cotton setting, and avoid the elastic corners entirely. Most fitted sheets release wrinkles within a few hours on the bed; just put them on damp from the dryer and skip the iron.

How do I store folded fitted sheets so they stay neat?

The bedsheet-set trick: fold the matching flat sheet and pillowcases first, then place the folded fitted sheet on top, and tuck the entire stack inside one of the pillowcases. The pillowcase holds the set together and keeps the fitted sheet from unfolding under its own weight. Plus you find the matching set immediately.

Why has the elastic on my fitted sheet stretched out?

Heat damage from a too-hot dryer is the usual cause. Polyester elastic loses its memory at high temperatures and never quite recovers. Wash fitted sheets in cold or warm water and tumble dry low (or hang to dry). If the elastic is already shot, you can sometimes restore tension by sewing a new piece of 1/4-inch elastic into the corner pocket, but for most people a fresh sheet is cheaper than the hour of sewing.

Step-by-Step Guide

1

Set Up the Sheet Inside-Out With Two Adjacent Corners

1:08
Step 1: Set Up the Sheet Inside-Out With Two Adjacent Corners

Hold the fitted sheet by two adjacent corners, one in each hand. The sheet should be inside-out so the elastic edges face you. The two corners you're holding are on the same short end of the sheet.

The whole technique is about nesting corners inside each other so they stack up cleanly. Getting this starting position right matters more than it seems - if the sheet is right-side out, the corners won't nest.

Watch this moment in the video.

Tip

If you're not sure whether the sheet is inside-out, check one of the corners. The elastic should be visible on the outside. If the corner looks smooth with no elastic showing, you're right-side out - flip the whole sheet.

2

Flip the Right Corner Onto the Left and Nest Them

1:20
Step 2: Flip the Right Corner Onto the Left and Nest Them

Take the corner in your right hand and fold it over onto the corner in your left hand. Don't lay it on top - tuck the right corner inside the left one.

The motion flips the right corner right-side out and nests it inside the left corner. Now you have two corners stacked on your left hand, one tucked inside the other. This is the move that makes the whole technique work.

Watch this moment in the video.

Tip

Your left hand is the anchor for the whole rest of the fold. Don't take it out of the nested corners until all four are stacked. Most failed fits sheets happen because someone lets go to adjust something.

3

Pull the Seam Straight and Shake to Line Up the Edge

1:45
Step 3: Pull the Seam Straight and Shake to Line Up the Edge

Grab the folded seam that just formed and pull it out straight with your right hand. Give the sheet a light shake.

This lines up the bottom edge so you're working with a cleaner shape for the remaining corners. Keep your left hand inside the nested corners the whole time. If you pull your hand out to adjust, you'll lose the grip and have to start from Step 1.

Watch this moment in the video.

Tip

If the sheet is bunching rather than laying flat after you shake it, the nested corners aren't fully tucked. Reach in with your right hand and push the inner corner deeper into the outer one.

4

Find the Third Corner Along the Elastic Edge and Flip It On

2:15
Step 4: Find the Third Corner Along the Elastic Edge and Flip It On

Run your right hand along the elastic edge of the sheet from where you are until you hit the next corner (the third one).

Lift it up to meet your left hand and flip it on top of the two corners you already have nested. This is where it's easiest to get twisted. Take your time.

If you feel the sheet twisting under your hand, pause and straighten it before you commit the flip.

Watch this moment in the video.

Tip

The elastic edge is your guide. Follow it like a railroad track. If you lose contact with the elastic, you're probably wandering into the flat middle of the sheet, and you'll end up on the wrong edge.

5

Nest the Fourth Corner on Top

2:55
Step 5: Nest the Fourth Corner on Top

Find the final corner the same way: run your right hand along the elastic edge until you hit it. Pick it up and flip it on top of the others.

All four corners should now be nested on your left hand, one tucked inside the next, with the elastic edges facing outward. If one corner sticks out at a weird angle, reach in and straighten it so all four sit flush against each other.

Watch this moment in the video.

Tip

Once all four corners are stacked, the bundle starts to feel like a small square lump. That's normal. It means the nesting worked.

6

Lay Flat and Tuck the Elastic Edges Into a Rectangle

3:20
Step 6: Lay Flat and Tuck the Elastic Edges Into a Rectangle

Lay the bundle flat on a surface (a bed or counter works). You should see a rough rectangle with two straight sides (the seams) and two curved elastic sides.

Tuck the curved elastic edges inward so the sheet forms a clean rectangle. This is the step that separates a tidy folded sheet from a blob.

If the rectangle is lopsided, it usually means one corner isn't fully nested. Flip the sheet and straighten that corner before folding.

Watch this moment in the video.

Tip

A flat surface makes this step easier by a factor of ten. Trying to tuck elastic edges while holding the sheet up against your body is how you end up with a wrinkled blob.

7

Fold Into Thirds and Stack

3:45
Step 7: Fold Into Thirds and Stack

Fold the rectangle in half lengthwise, then fold it into thirds like you'd fold a letter. You'll end up with a neat rectangle that stacks on a shelf.

If your linen closet is deep rather than wide, fold into thirds in both directions instead for a taller, squarer bundle.

Store with the elastic side down so the fold doesn't open up when you pull other sheets out.

Watch this moment in the video.

Tip

Store your sheet set together by tucking the folded flat sheet and pillowcases inside the folded fitted sheet. One tidy bundle, easy to grab, no mismatched sets floating around.

Products used in this step

Products Used

☐ The Checklist

How to Fold a Fitted Sheet

Tools
2
Materials
2
Steps
7
Video
4 min

Your Guide

Martha Stewart

As an Amazon Associate we earn from qualifying purchases. Links on this page may be affiliate links - clicking them and buying doesn't change your price, but helps support ShowMeStepByStep.

Tags

Test your knowledge

Did the lesson stick? Find out in 2 minutes.

5 quick questions covering what you just read. No signup, no score saved — just a gut check.

Quick reference

Key takeaways from How to Fold a Fitted Sheet

5 questions, answers, and one-line explanations. Tap to expand.

  1. 1.Key concept that makes this possible?

    Answer: Nest corners together

    Once all four corners are nested on one hand, the elastic edges form a rough rectangle and you fold normally.

  2. 2.Inside-out or right-side-out when you start?

    Answer: Inside-out

    Inside-out is what lets corners nest. Right-side out and the elastic prevents tucking; you'll fight it forever.

  3. 3.After flipping right corner onto left, what next?

    Answer: Tuck right inside left

    The tuck-inside is the key motion. Layering on top makes a bigger pile but doesn't lock the corners together.

  4. 4.Why keep your hand inside through the whole process?

    Answer: Pulling out unravels it

    The nesting only works while you hold it together. Slip your hand out for a second and the stack unravels.

  5. 5.Final target shape?

    Answer: A clean rectangle

    Two straight seam sides + two curved elastic sides. Tuck the elastic in to square the rectangle, then fold in thirds.

What's next

Related collections

Curated theme pages that include this tutorial.

Weekly Digest

Liked this lifestyle tutorial?

Pick the categories you want to hear about. Weekly digest of new step-by-step tutorials. No spam, easy unsubscribe.

Send me tutorials about

We only email about new tutorials. Easy unsubscribe anytime.