How to Fold Underwear (Drawer-Saving Folding Method)

By ShowMeStepByStepPublished

Based on a video by How to Get Your Shit Together.

An underwear drawer that looks tidy on Sunday is a wadded mess by Wednesday. The fix isn't dividers. It's the fold. Compact, locked-in bundles stand on their ends and don't unravel when you grab the pair next to them - which is what keeps the drawer organized between laundry days.

This walkthrough from How to Get Your Shit Together covers three folding methods so you can match the fold to the style. Bikini briefs and regular panties get the basic fold-and-tuck. Boxer briefs and boyshorts get a roll-and-tuck because the thicker fabric holds a roll better than a flat fold. Lace, mesh, and thong styles get smaller folds and skip the tuck.

If you're refolding the whole drawer, pair this with how to fold socks, how to fold towels, and how to fold a fitted sheet. Using the same Marie-Kondo-style filing system across the whole drawer is what makes the organization stick.

Step-by-Step Guide

1

Step 1: Lay the underwear flat

0:32
Step 1: Step 1: Lay the underwear flat

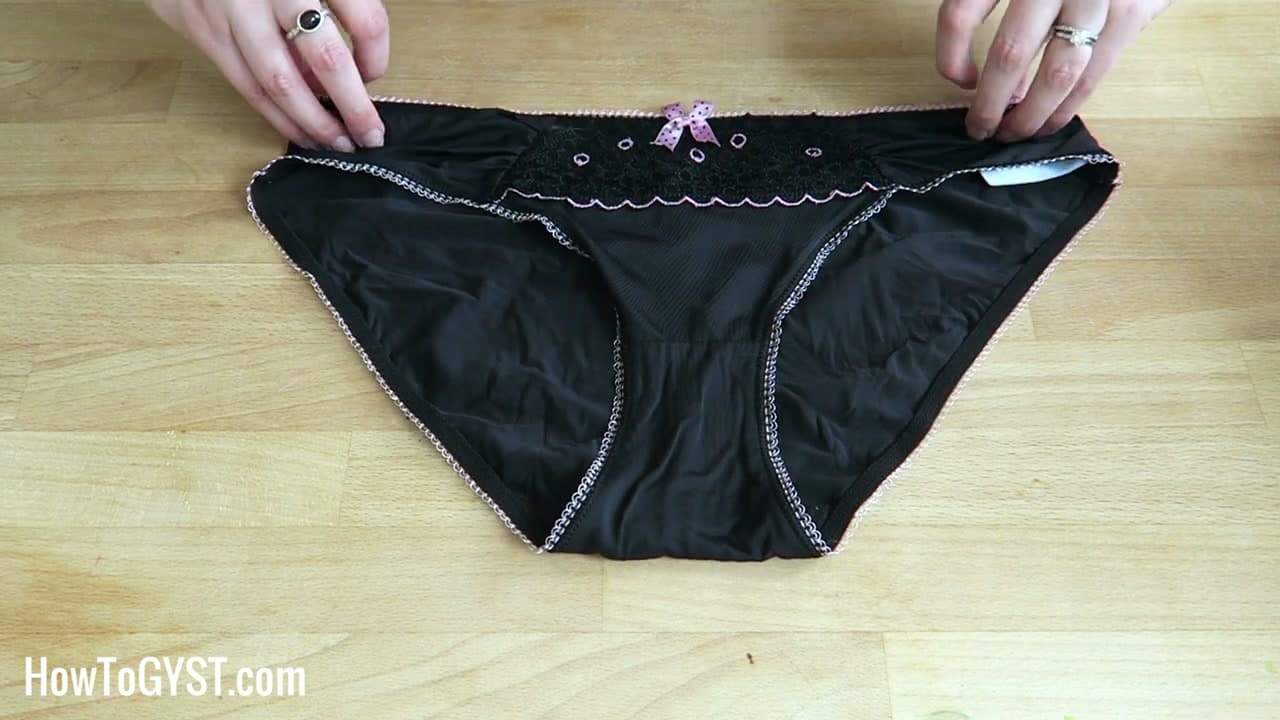
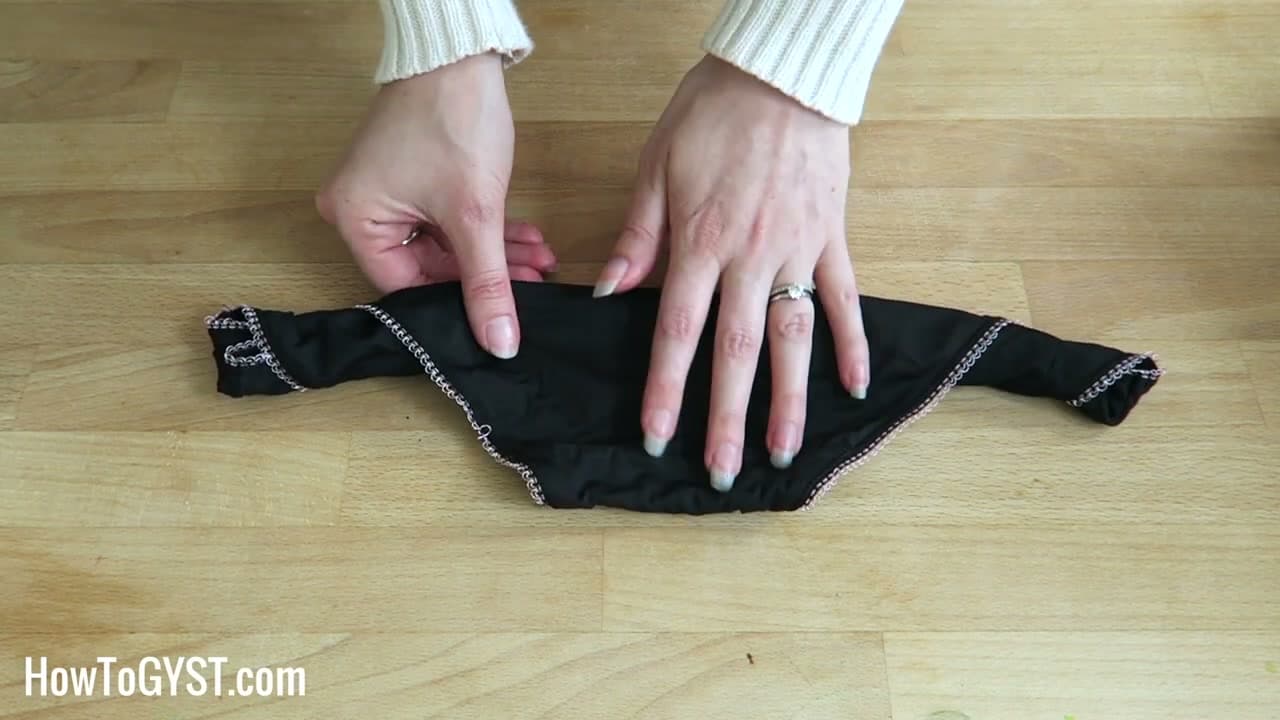
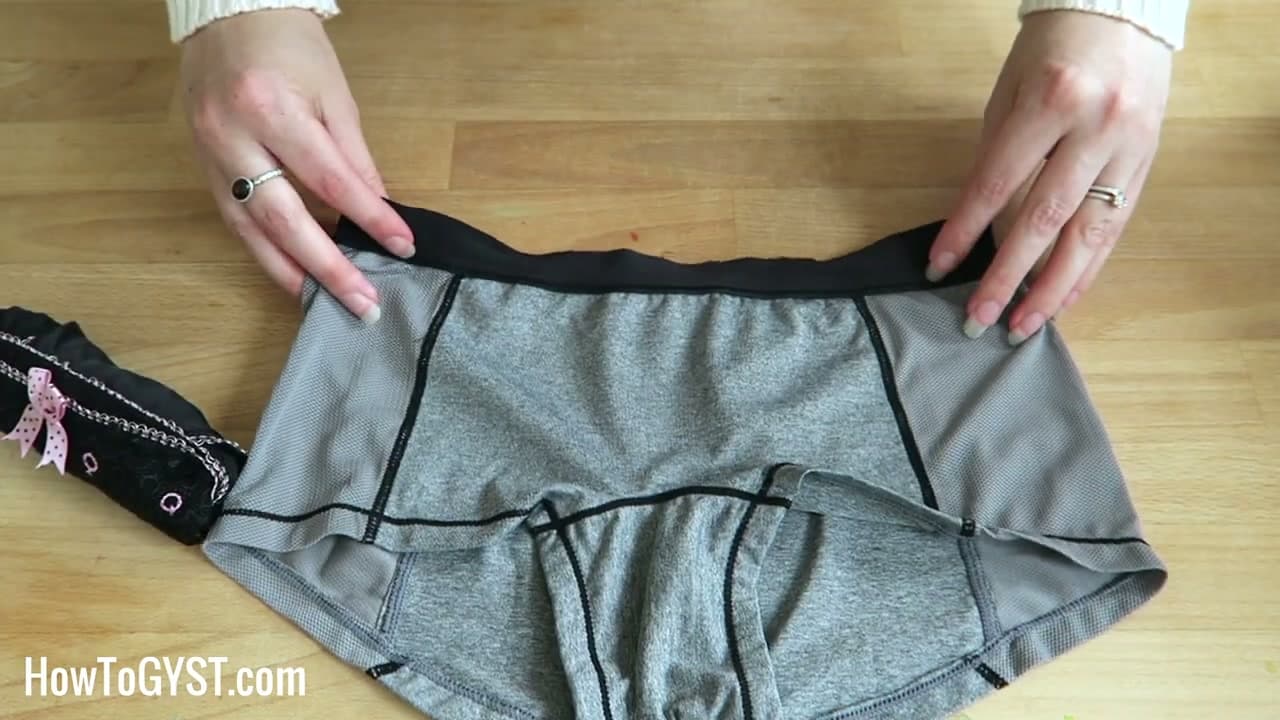
Start with a clean pair of bikini briefs on a hard, flat surface - a folded towel on a dresser, the top of the dryer, or a made bed all work. Smooth out wrinkles so the waistband sits as a straight line and the leg openings are crisp.

The flat surface is doing real work here. Trying to fold underwear in the air, on a stack of clothes, or against your chest leaves wrinkles in the fabric that prevent the finished bundle from staying tucked. A few seconds of smoothing now saves the bundle from popping open later.

Tip

If the underwear came straight out of the dryer twisted, give it a quick stretch by holding the waistband at both sides and pulling lightly outward. The elastic relaxes and the fabric flattens.

Products used in this step

2

Step 2: Fold one side toward the center

0:44
Step 2: Step 2: Fold one side toward the center

Bring one side in toward the middle, folding the leg opening across the crotch panel. This first fold turns the triangle shape of the underwear into a taller rectangle and tucks the leg opening out of sight.

Keep the waistband edge straight as you fold. The waistband is what locks the bundle shut at the end, so any twist or pucker here shows up in the final bundle.

Tip

For high-cut or string-bikini styles where the leg openings sit close to the waistband, fold a smaller side - bring the leg in to about a third of the way across rather than all the way to center.

Products used in this step

3

Step 3: Fold the other side to match

0:48
Step 3: Step 3: Fold the other side to match

Fold the second side over the same way. The two leg openings now overlap in the middle and the underwear sits as a narrow strip about a third of its original width.

Press the fabric flat with your fingers as you go. A tight rectangle here is what makes the next fold stay closed - any air pocket at this stage turns into a bulge that pushes the bundle open when you try to file it.

Tip

If your underwear has a satin or silk panel that won't lay flat, give it a quick press with your palm before moving on. The smoother panel won't twist inside the bundle.

4

Step 4: Fold up from the bottom

1:00
Step 4: Step 4: Fold up from the bottom

Bring the gusset end up toward the waistband. Stop about an inch shy of the waistband, then fold the bottom edge up once more so it sits just below the waistband elastic. You're now looking at a small, flat rectangle with the waistband elastic running across the top edge.

The exact number of folds depends on the size - smaller panties might only need one fold from the bottom, larger or fuller-coverage styles might need two. The rule is: stop when the bundle is about the height of the waistband elastic itself.

Tip

If the waistband ends up bulging or twisted at this stage, unfold one step and re-smooth. A clean waistband line at the top is what lets you tuck the bottom edge in cleanly.

Products used in this step

5

Step 5: Tuck the bottom into the waistband

1:18
Step 5: Step 5: Tuck the bottom into the waistband

Pinch the waistband elastic open with one hand and slide the folded bottom edge underneath the elastic. The waistband snaps closed over the bottom edge and locks the whole bundle shut.

The finished packet is roughly the size of a deck of cards and stands on its end with the waistband facing up. Stand it next to the others in a drawer organizer and you'll see the pattern, color, or trim of every pair at a glance. That's what makes this method worth the extra ten seconds per pair.

Tip

If the bundle keeps popping open, you didn't tuck far enough. Slide the bottom edge a full inch under the waistband - the elastic needs real fabric to grip onto. A shallow tuck slips loose the moment the drawer slides.

6

Step 6: Boxer briefs - fold the legs inward

1:25
Step 6: Step 6: Boxer briefs - fold the legs inward

Boxer briefs and boyshorts use the same idea with one adjustment. Lay them flat with the waistband across the top edge, then fold both leg sections inward toward the center crotch panel so the leg openings disappear behind the fold.

Press the fabric flat to flatten out the seam bulk where the leg panels meet the crotch. Boxer briefs use thicker fabric than bikini briefs, so the bulk at the seams matters more - a few seconds of pressing here keeps the final bundle from springing open.

Tip

For long-leg boyshorts, fold the legs in slightly past center so the leg ends overlap. The overlap gives the roll something to grip in the next step.

7

Step 7: Roll boxer briefs and tuck

1:45
Step 7: Step 7: Roll boxer briefs and tuck

Roll the boxer brief tightly from the bottom up to the waistband. Keep tension on the roll - a loose roll falls apart in a drawer. When you reach the waistband, tuck the rolled bundle into the elastic.

Boxer briefs hold their shape best when rolled rather than flat-folded. The roll squeezes out air, the rolled cylinder is harder to deform than a flat stack, and the waistband still locks the bundle shut. Finished bundle stands on its end the same way the basic fold does.

Tip

If the roll keeps unwinding before you get the waistband over it, slow down. Roll an inch, press flat, roll another inch. The pressing seats the fabric so the next inch of roll has something to grip.

8

Step 8: Lace and thong styles - smaller folds

3:05
Step 8: Step 8: Lace and thong styles - smaller folds

Lace, mesh, and thong underwear are tiny to start, so the folds shrink with them. Lay flat, fold each side in to roughly the width of the gusset (the crotch panel), then fold up from the bottom in thirds.

Thongs and G-strings can skip the waistband tuck entirely - the smaller fabric area holds together once it's stacked next to its neighbors. For fuller lace styles like cheekies or lace boyshorts, do the waistband tuck the same as a bikini brief.

Tip

Lace is fragile - don't press it flat as hard as you would cotton. A light pat with the palm is enough to seat the folds without stretching the lace pattern.

9

Step 9: File bundles in a drawer organizer

3:30
Step 9: Step 9: File bundles in a drawer organizer

Stand each finished bundle on its end with the waistband facing up and file them in a drawer organizer. An IKEA SKUBB box, a fabric storage bin, or sectioned drawer dividers all work. The bundles support each other once you've filled the box, which keeps them from falling over even as you take pairs out.

This is the Marie-Kondo-style vertical filing system that turns an underwear drawer from a daily wad-and-dig into a tidy lineup you can shop. Organize by color, by style, or by occasion - the bundles stay put either way. When you do a fresh load of laundry, refold each pair the same way and slot it back into the box.

Tip

If you're refolding a whole drawer for the first time, do it in one sitting on a clean surface like a made bed. Mid-drawer mixed bundles look messy and discourage you from keeping it up - a one-time reset is what makes the habit stick.

Products Used

Your Guide

How to Get Your Shit Together

As an Amazon Associate we earn from qualifying purchases. Links on this page may be affiliate links - clicking them and buying doesn't change your price, but helps support ShowMeStepByStep.

Tags

What's next

Weekly Digest

Liked this lifestyle tutorial?

Pick the categories you want to hear about. Weekly digest of new step-by-step tutorials. No spam, easy unsubscribe.

Send me tutorials about

We only email about new tutorials. Easy unsubscribe anytime.