How to Install Gutters in 7 Steps

Also in:Adulting

By ShowMeStepByStepPublished Updated

Based on a video by DIY Homestead Projects.

A gutter install quote can land north of $1,500 for a single-story house. The materials at the big-box store run about a tenth of that. If you have a steady second ladder, a partner, and a free Saturday, you can do this job yourself with hand tools - no expensive crimper, no power miter, no specialty gear.

This walkthrough uses 5-inch aluminum K-style gutter in 10-foot sections, the most common DIY setup. End caps go on with sealant and rivets. Long runs splice together with a 6-inch overlap. The downspout outlet drops in through a hole you cut with aviation snips. Hangers screw into the fascia every 24 inches, and the whole thing slopes a quarter inch per ten feet toward the downspout so the water actually moves.

Safety first. You are on a ladder at eave height with metal in your hands. Set the ladder feet on level ground, never on the last two rungs, and have a partner hold the bottom and feed gutter sections up. Wear safety glasses - the snips throw aluminum slivers and the rivet gun pops the mandrel back at you. Long runs over about 12 feet take two people on two ladders. Do not solo it.

If you already have gutters and they are leaking instead of missing, the fix-it route is covered in our other plumbing and home-fix tutorials. This guide is for a fresh install.

Step-by-Step Guide

1

Step 1: Plan the Run, Count Sections, and Mark the Slope Direction

11:20
Step 1: Step 1: Plan the Run, Count Sections, and Mark the Slope Direction

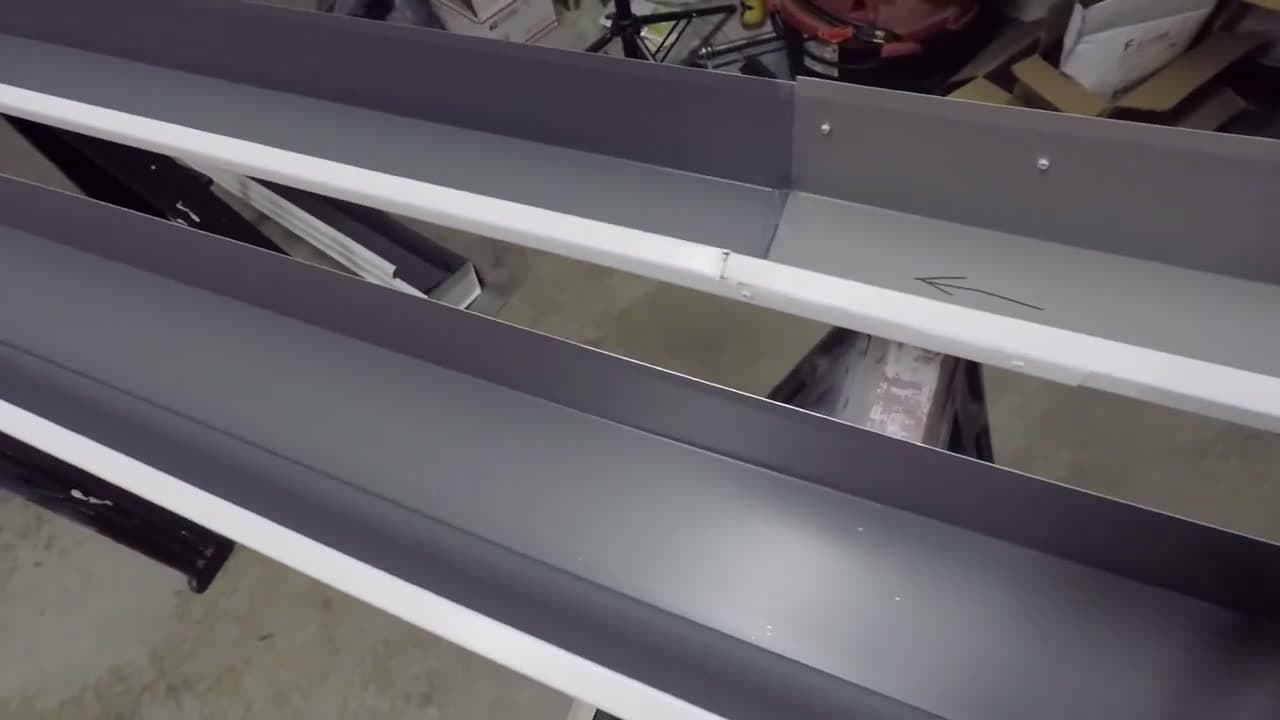
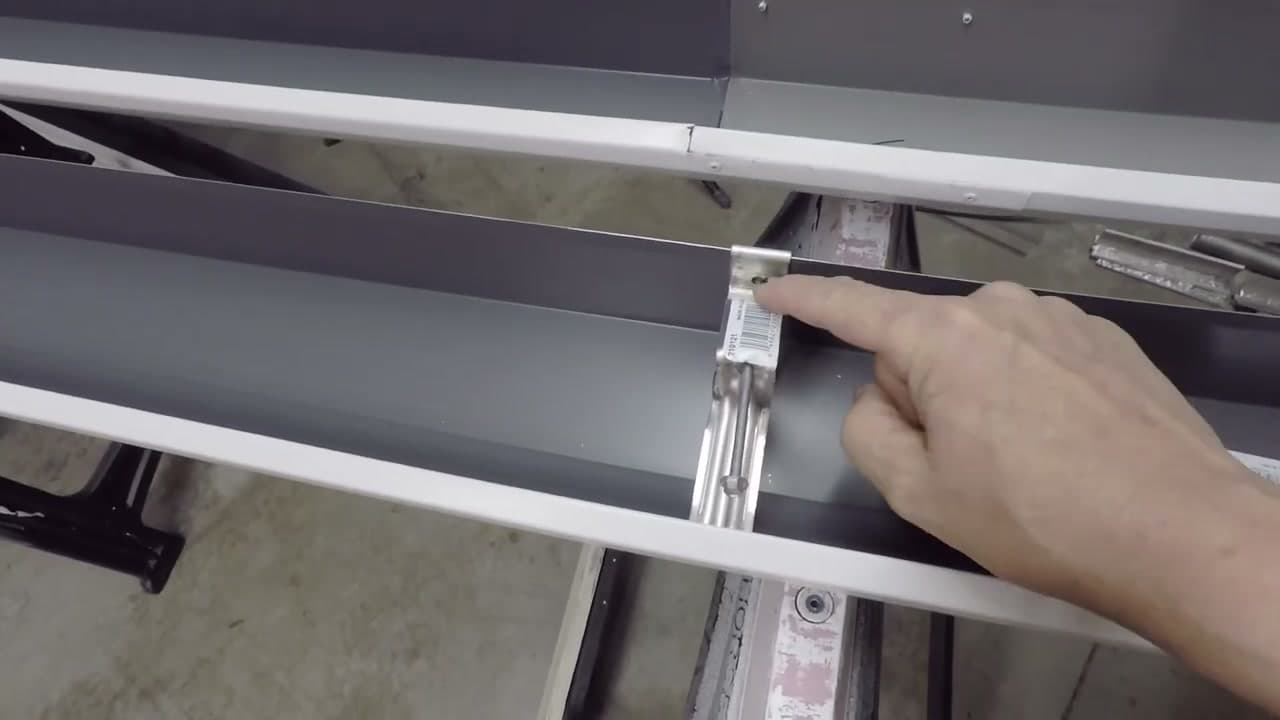
Walk the side of the house with the tape and write down the total length of each run. Gutter comes in 10-foot sections, so a 23-foot run is two sections plus one splice. Pick where the downspout drops - usually a corner near a downhill landscaping bed, never over a walkway. The water has to flow toward that drop, so the far end is the high point and the downspout end is the low point. Watch at 11:20. Sketch the run on paper, mark an arrow on each section in Sharpie pointing toward the downspout end, and pre-cut everything to length before you climb the ladder.

Tip

Aim for a slope of about a quarter inch per 10 feet toward the downspout. On a long run you can split the slope and put the downspout in the middle, but that needs two outlets.

2

Step 2: Seal and Rivet the End Caps to Each Gutter Section

3:00
Step 2: Step 2: Seal and Rivet the End Caps to Each Gutter Section

The end cap is what stops water from spilling out the closed end of the run. Slide the cap over the gutter end, hold it flush, and drill four 1/8-inch holes through the cap into the gutter lip - two top, two bottom, one front. Pop a rivet in each hole with the rivet gun. Then run a continuous bead of GS121 sealant in the groove on the back side of the cap before you set it. Watch at 3:00. Smooth the bead with a wet finger so it is one solid line, no gaps. After the rivets are in, run a second interior bead all the way around the seam from inside the gutter.

Tip

GS121 takes up to 14 days to fully cure in cold weather. Build the sections in a heated garage if you can - working in 35-degree air will leave you with sealant that never sets up.

3

Step 3: Splice Long Runs with a 6-Inch Overlap

6:00
Step 3: Step 3: Splice Long Runs with a 6-Inch Overlap

Long runs need a splice every 10 feet. Skip the splice kit at the store and do this instead. The upstream section drops down into the downstream section so water flows through the joint without leaking. Mark 6 inches in from the cut end of the downstream piece. Cut the outer lip off that 6-inch flap with snips so the upstream section can sit on top. Watch at 6:00. Slide the two sections together until the 6-inch overlap closes up flush, then drill four pilot holes through the overlap and pop rivets through them. Two heavy beads of sealant go between the layers before you rivet, plus one final bead down the inside seam.

Tip

Watch the slope arrow on the sections. The upstream piece always sits on top of the downstream piece so water can never run uphill into a seam.

4

Step 4: Cut the Downspout Hole with Aviation Snips

8:20
Step 4: Step 4: Cut the Downspout Hole with Aviation Snips

The downspout drops through a round or oval hole in the bottom of the gutter. Set the drop outlet on the bottom of the gutter where you want the downspout - typically 4 to 6 inches in from the end cap. Trace around the inner ring with a Sharpie. Drill a 3/8-inch starter hole inside the traced line, then work the snips around the line and pop the disc out. Watch at 8:20. Do not worry if the cut edge is rough - the drop outlet flange will cover it. Test-fit the outlet and trim the hole a bit at a time if the outlet does not seat flush.

Tip

Use the snips that match the curve direction - left-cut for a right curve, right-cut for a left curve. Forcing straight snips around a circle bends the metal up and ruins the trace line.

5

Step 5: Install the Downspout Outlet with Sealant and Rivets

10:05
Step 5: Step 5: Install the Downspout Outlet with Sealant and Rivets

Run a continuous bead of GS121 around the underside of the drop outlet flange, drop it into the hole, and press it flat. Drill four holes through the flange into the gutter and pop a rivet in each. Watch at 10:05. Inside the gutter, run one more bead all the way around the outlet flange where it meets the gutter floor and smooth it flat. This is the most-leak-prone joint in the whole run, so do not skimp on sealant here. Let the assembled section sit overnight in a warm spot before you carry it outside.

Tip

If the GS121 has set a skin but is not fully cured, the section is safe to handle gently. Do not load it into a truck bed full of tools that will rattle the joints loose.

6

Step 6: Mount Hangers Along the Gutter at 24-Inch Spacing

11:30
Step 6: Step 6: Mount Hangers Along the Gutter at 24-Inch Spacing

Hidden hangers clip under the front lip of the gutter and screw through the back wall into the fascia. They are the only thing holding the run up, so the spacing matters. Mark a hanger location every 24 inches along the back wall of the gutter from inside the cabinet. Watch at 11:30. Snap each hanger over the outer lip and slide it down until the back tab sits flat against the gutter back wall. The screw goes through that back tab into the fascia board. Pre-installing the hangers on the ground saves you balancing them on a ladder later.

Tip

If your roof gets heavy snow or ice, tighten the hanger spacing to 18 inches. The extra hangers handle the snow load that pulls the front edge down.

7

Step 7: Hang the Gutters on the Fascia with a Partner

12:30
Step 7: Step 7: Hang the Gutters on the Fascia with a Partner

This is the two-ladder part. Set the high end first. Drive the first hanger screw into the fascia 1/8 inch above your level mark - that single screw holds the run while you work down the line. Your partner on the second ladder supports the far end so the gutter does not bow. Move down the run, driving one hanger screw at a time and stepping the slope down a quarter inch every 10 feet. Watch at 12:30. Once the run is up, pour a bucket of water in the high end and watch it flow to the downspout. Standing water anywhere means a sagging hanger - back the screw out, raise the gutter slightly, and drive it again.

Tip

Do not stand on the gutter, ever, even after the install. Aluminum K-style is rated to hold water weight, not your weight. If you need higher access, use a longer extension ladder.

Products Used

☐ The Checklist

How to Install Gutters in 7 Steps

Tools
10
Materials
8
Steps
7
Video
13 min

Your Guide

DIY Homestead Projects

As an Amazon Associate we earn from qualifying purchases. Links on this page may be affiliate links - clicking them and buying doesn't change your price, but helps support ShowMeStepByStep.

Tags

What's next

Weekly Digest

Liked this home improvement tutorial?

Pick the categories you want to hear about. Weekly digest of new step-by-step tutorials. No spam, easy unsubscribe.

Send me tutorials about

We only email about new tutorials. Easy unsubscribe anytime.