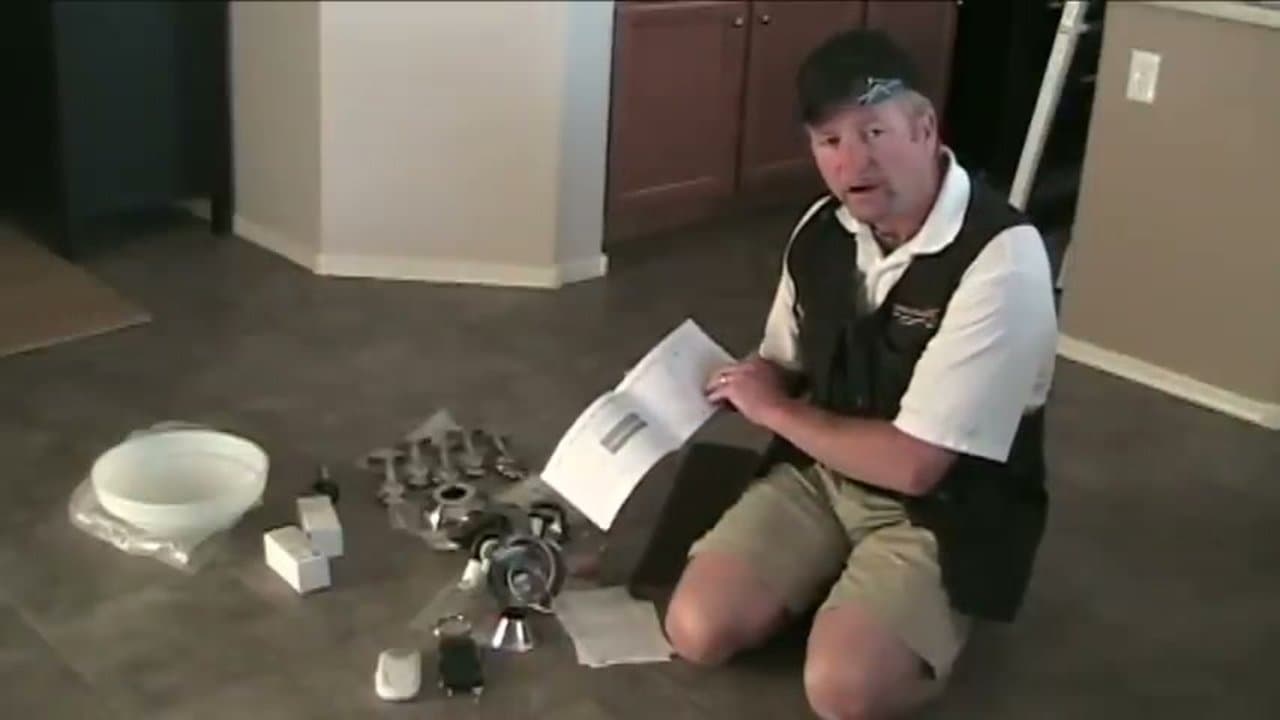
Ceiling fan installation is a weekend DIY job once you understand the three wires you are connecting and the one box swap most people skip. Turn off the breaker, swap to a fan-rated electrical box if you do not already have one, match black to black (hot), white to white (neutral), green or bare to green (ground), and the blue lead to the light kit. This guide walks the full ceiling fan installation - mount, wire, balance, and test - and covers downrod vs flush mount, wire color decoding, and adding a light kit with a pull chain.
This 8-step DIY guide is a licensed electrician's method. It covers the box check, wire identification (hot, neutral, ground), receiver wiring, DIP-switch pairing, mounting the bracket, installing blades, and the final safety test. No electrician required if you can flip a breaker and use a non-contact voltage tester.
Total time is about 90 minutes for a confident DIYer, half a Saturday for a first timer. The biggest beginner mistakes are skipping the fan-rated box swap, coiling the receiver antenna inside the canopy (kills remote range), and pinching wires during the final canopy seat. This tutorial flags every one of those before you make them. If your fan ships with a separate light kit (most do), follow this guide for the fan body, then jump to how to install a ceiling fan with a light kit for the light attachment. For other electrical DIY projects, see how to replace a light switch, how to install a dimmer switch, and how to install a thermostat.
Frequently Asked Questions
Do I need a fan-rated box for a ceiling fan?
Yes, always. A standard round light-fixture box is rated for static weight only and will eventually pull loose from the ceiling under the dynamic load of a spinning fan. Fan-rated boxes are stamped "FOR USE WITH CEILING FANS" and attach to a brace bar that spans the joists. If the existing box is just a light box, swap it out before continuing. The National Electrical Code (NEC 314.27) requires it, and most fan manufacturers void the warranty if you skip this step.
How much weight does a fan-rated box need to hold?
NEC says 50 pounds minimum for any ceiling fan, and 70 pounds if your fan is heavier than 35 pounds. Most residential ceiling fans run 15 to 25 pounds, so a standard 50-pound rated brace box is fine. Check the spec on the box itself; the rating is printed inside.
What if my ceiling box has no ground wire?
Older homes (pre-1960s wiring) often lack a ground. You have two safe options: have an electrician run a new ground to the box, or use a fan rated for ungrounded installation and bond the fan's metal mounting hardware to a known grounded metal box. Don't just leave the fan's green ground wire floating. It's the path that protects you if a hot wire ever shorts to the housing.
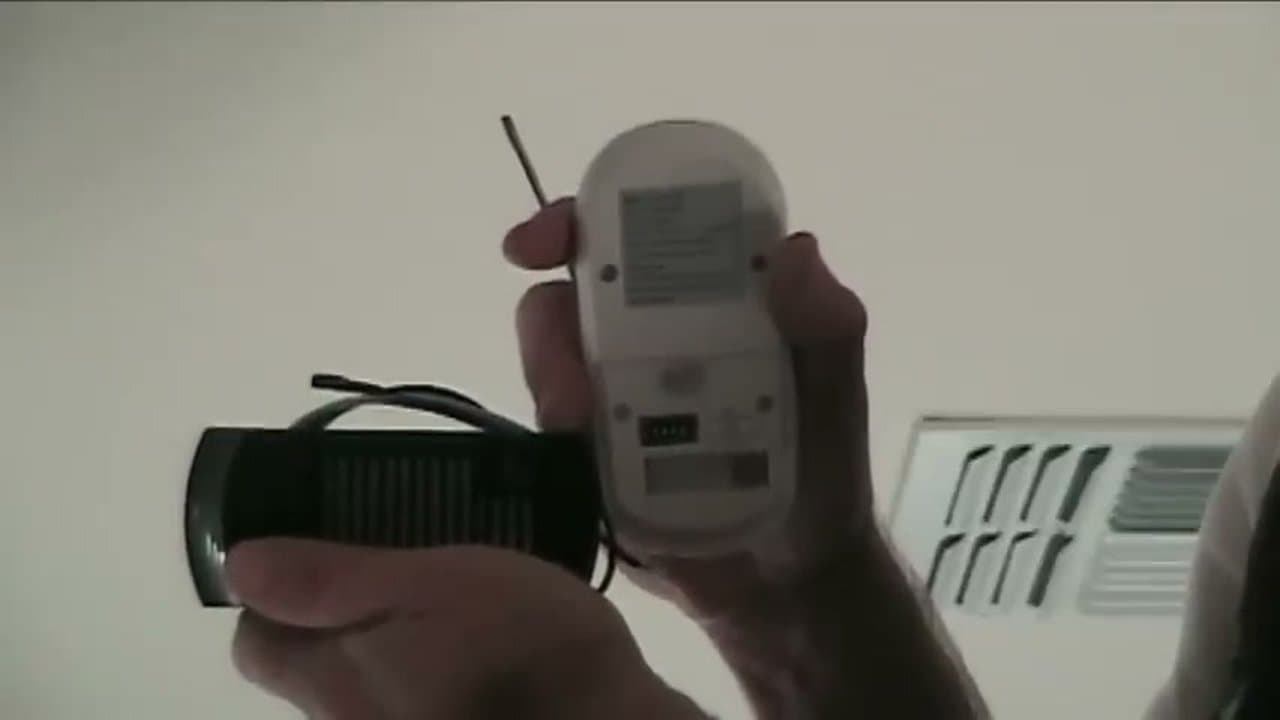
Why does the remote receiver go between the wall power and the fan?
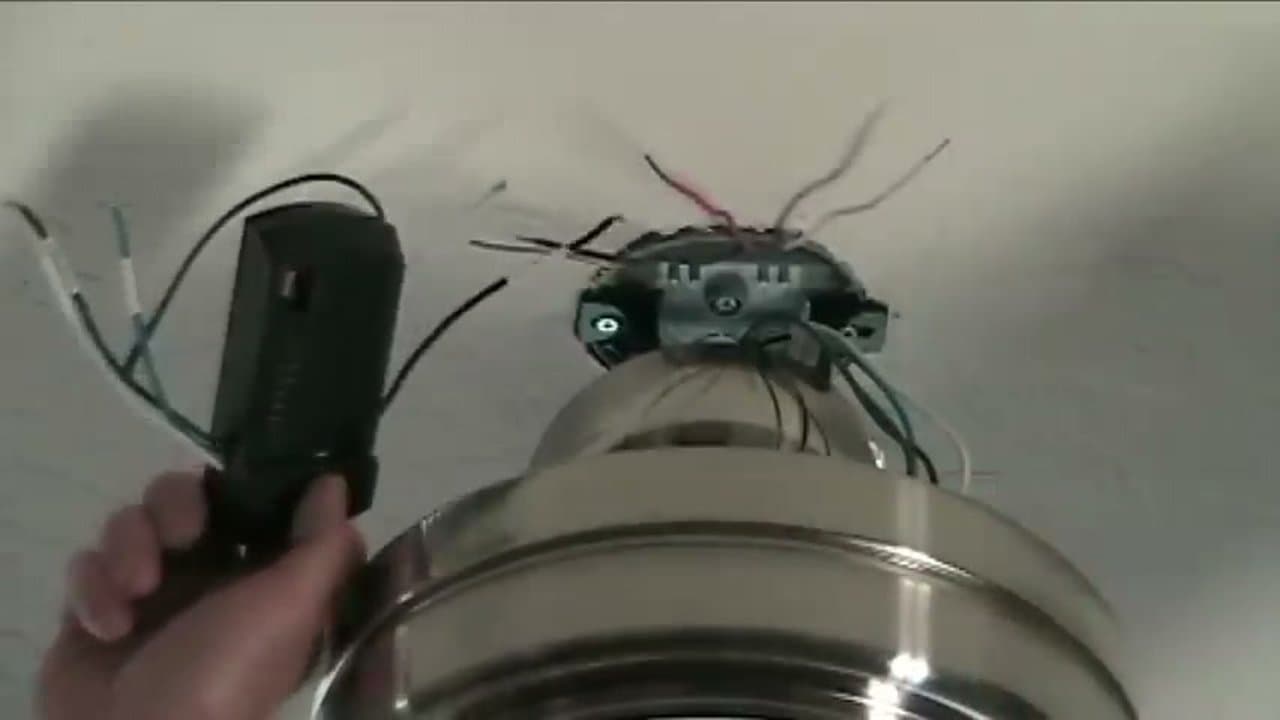
The receiver is the brain. It takes one switched hot from the wall and splits it into the fan motor circuit (black to black) and the light kit circuit (black to blue), each independently controlled by the remote. Without the receiver inline, the wall switch can only turn the fan plus light on or off together. The receiver is what lets you dim the light without slowing the fan, and vice versa.
Which direction should ceiling fan blades spin?
Counter-clockwise in summer (viewed from below) pushes air down and creates a wind-chill effect that makes a room feel about 4 degrees cooler. Clockwise in winter at low speed pulls cool air up and pushes warm air down the walls without creating a draft. The reverse switch is usually on the motor housing just above the blade brackets. Some remote-controlled fans toggle direction from the remote instead.
Can I install a ceiling fan without a neutral wire?
You need a neutral at the box to power the receiver. If you only have two hot wires going to the box (older homes with a switch-loop wiring style), you have to either run a new neutral from the panel or use a battery-powered fan controller. Don't try to bond the neutral to ground at the fan; that's a code violation and a shock hazard.
How high should a ceiling fan hang?
Blades should be at least 7 feet off the floor (this is code) and ideally 8 to 9 feet for the best airflow. There should be at least 18 inches of clearance from the blade tip to the nearest wall. For ceilings under 8 feet, use a flush-mount (hugger) fan with no down rod. For ceilings 10 feet or higher, use a longer down rod to get the blades down into the 8 to 9 foot sweet spot.
How do I reset the DIP switches if the remote stops working?
Open the receiver compartment in the canopy and the back of the remote, set both to the same new pattern (any pattern, just identical), then re-pair by holding the fan power button while flipping the wall switch on. If you have to drop the canopy to reach the receiver, kill the breaker first; the receiver is live whenever the wall switch is on.
The fan wobbles after installation. How do I fix it?
Wobble almost always means the blades aren't seated flat in the brackets or one blade is warped. Use the blade-balancing kit that came with the fan (the small clips and weights). Clip the test clip to each blade in turn and run the fan; the blade that wobbles least is the heaviest. Add a weight to the lightest blade to match. If a blade is visibly bowed, swap it for the spare or contact the manufacturer.
Do I need an electrician to install a ceiling fan?
If a fan-rated box is already in the ceiling and the existing wiring has hot, neutral, and ground at the box, no - this is a confident-DIYer job. You need an electrician if the box is just a light box that needs to be swapped (and you can't reach it through the attic), if the wiring is pre-1960s with no ground, or if your local code requires a permit and inspection for any fixed-fixture electrical work. Most US municipalities allow homeowners to do their own residential electrical work; check your county building department's site before you start.
How much does ceiling fan installation cost?
DIY is the fan price plus about $20 in materials (wire nuts, fan-rated box if needed, maybe a longer downrod). A hired electrician runs $150 to $350 for a straight swap and $400 to $700 if a fan-rated box has to be added through the ceiling. If the fan body itself is $150 to $400, total DIY cost is one third to one half of the electrician quote.
Can I install a ceiling fan on a sloped or vaulted ceiling?
Yes, but you need a sloped-ceiling mounting kit (sometimes sold separately, sometimes included). The kit replaces the standard ball-joint mount with one rated for the angle of your ceiling - most kits handle up to 45 degrees. The downrod has to be long enough to keep the blade tips at least 18 inches from the slope. Measure the angle with a digital level on the ceiling before you order the kit.
What wattage and amperage rating do I need for the circuit?
Most residential ceiling fans draw under 1 amp on the fan motor and 1 to 2 amps on the light kit (LED). A standard 15-amp lighting circuit handles a ceiling fan plus several other fixtures on the same circuit without issue. If you're adding a fan to a circuit that already has six or more recessed lights and is on a 15-amp breaker, do the math: total wattage divided by 120 volts should stay under 12 amps for safety. Switch to a 20-amp circuit if the load is borderline.
Downrod or flush mount - which should I choose?
Flush-mount (hugger) fans sit tight to the ceiling and are required for ceilings under 8 feet. Downrod fans hang the blades 8 to 12 inches below the ceiling for better airflow and are required for ceilings over 9 feet to get the blades into the sweet spot. For an 8 to 9 foot ceiling, either works - downrod moves more air at the same speed, flush-mount looks cleaner. If you have an attic above the fan, downrod is also easier to wire because you have hand access from above.
Common Mistakes and Fixes
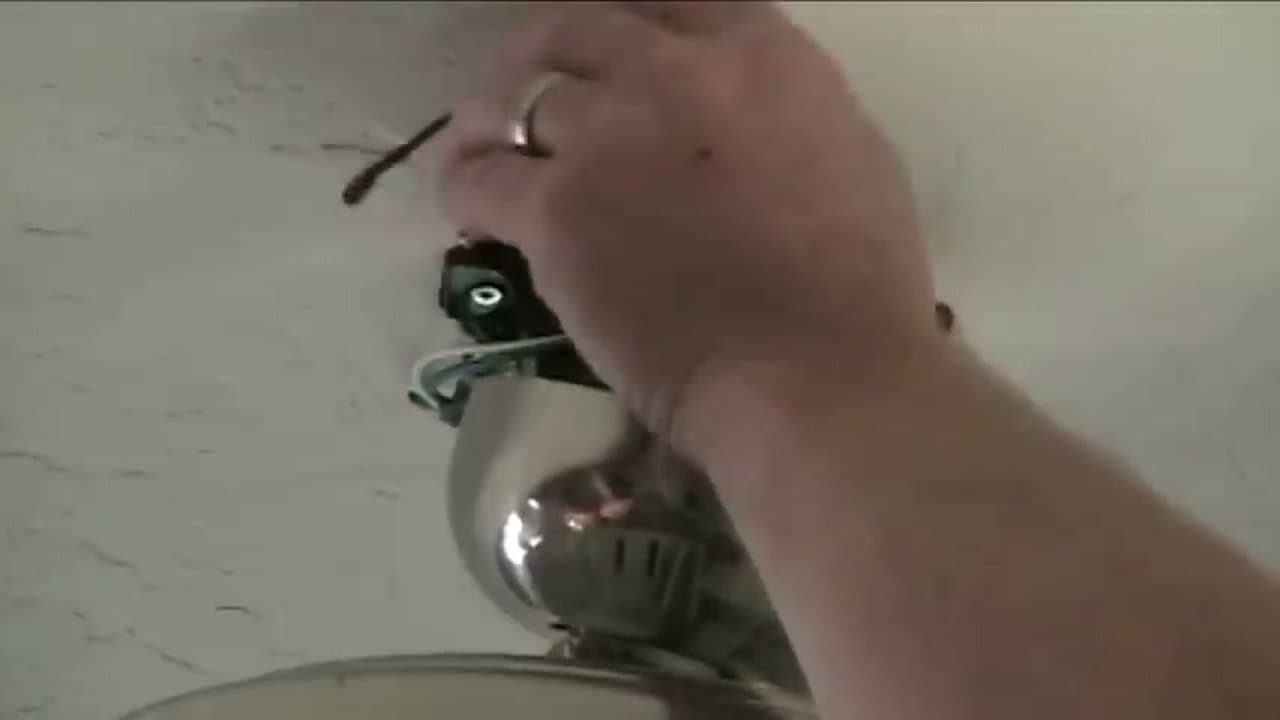
The remote works from across the room but not under the fan. The antenna is coiled. Drop the canopy, straighten the receiver's whip antenna so it hangs loose inside the canopy housing without touching metal, and re-seat the canopy. Coiled antennas kill the radio's effective range.
The fan hums but doesn't spin. The capacitor inside the motor housing is bad, or the receiver is wired to the wrong output. Verify the receiver's black-to-black (fan motor) connection. If wiring is correct, the capacitor is the next part to swap. They cost $10 and snap in with two wires.
The wall switch still controls the light, but the remote doesn't. The wall switch is wired ahead of the receiver instead of feeding it. Re-run the wires so the wall switch supplies one constant hot to the receiver's power-in side, and let the remote handle the on/off itself. Otherwise the receiver is unpowered every time the wall switch is off.
The canopy won't sit flush. Either the wires are bunched between the bracket and the canopy, or a screw isn't fully seated. Drop it back down, push the wires up into the canopy housing one section at a time, then re-seat. A 1/8 inch gap between canopy and ceiling means a wire is in the way.
Ceiling Box Type Reference
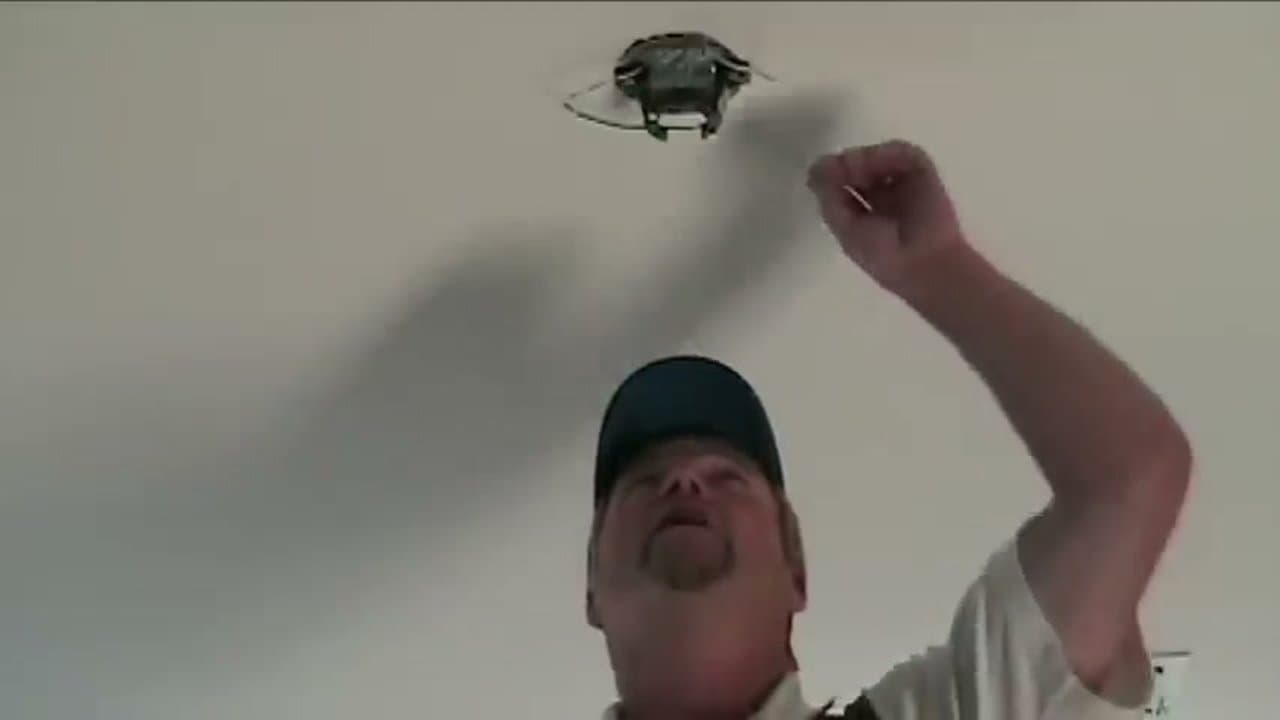
The most common point of confusion in ceiling fan installation is which box is already up there. Three types show up in residential ceilings, and only one is safe for a fan.
Pancake box. A shallow round metal box about 1/2 inch deep, screwed flat to the bottom of a joist. Common above older flush-mount light fixtures. Not fan-rated. Pancake boxes hold static weight only, attach to a single joist edge, and will eventually pull loose under a spinning fan's torque. Always swap before installing a fan.
Standard junction box (light box). A 4-inch round or octagonal plastic or metal box about 1.5 inches deep, nailed to one joist or hung between joists with a thin metal bar. The default for most residential light fixtures. Not fan-rated unless explicitly stamped. If you don't see "FOR USE WITH CEILING FANS" or a UL listing for fan use on the box itself, treat it as a light box and replace it.
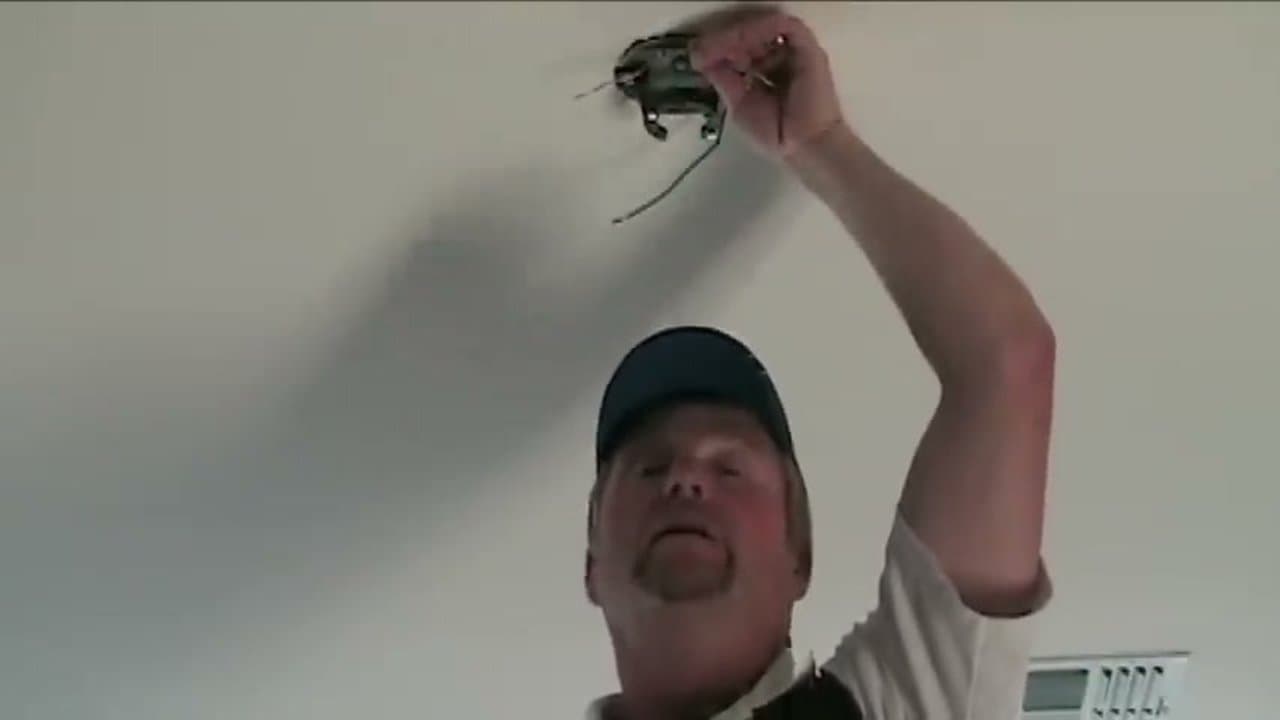
Fan-rated brace box. A 4-inch round box attached to an adjustable steel brace bar that spans two joists. The brace expands by twisting until it wedges between the joists, distributing the fan's dynamic load across both sides. Stamped "FOR USE WITH CEILING FANS" and rated for 50 or 70 pounds. This is the only safe option. Brace boxes install through the existing hole - no drywall cutting required - and run $15 to $25 at any hardware store.
If you're replacing an existing pancake or light box, the brace-bar version is the fastest swap: pull the old box, feed the brace through the hole, twist to wedge it between the joists, then mount the box to the brace. Total swap takes 10 minutes if you can reach the box from the floor with a step ladder.
Tool and Code Notes
A non-contact voltage tester is non-negotiable. The wall switch can be in the off position with hot wires still live (multi-way switch wiring, miswired switches, ungrounded boxes). Confirm at the box itself, not at the switch. Wire nuts should be twisted clockwise onto the stripped wire ends with no copper exposed; give them a gentle tug to verify they hold.
Per NEC 314.27, the box must be marked "FOR USE WITH CEILING FANS" or carry the equivalent listing. Per NEC 422.18, the fan's support must hold the operating weight plus a safety factor. Per UL 507, the fan kit's mounting hardware ships pre-rated, so don't substitute generic screws for the kit-supplied ones; they're sized for the fan's weight and shear load.
For other DIY projects in the same room, see how to paint a room like a pro and how to install floating shelves with hidden anchors.
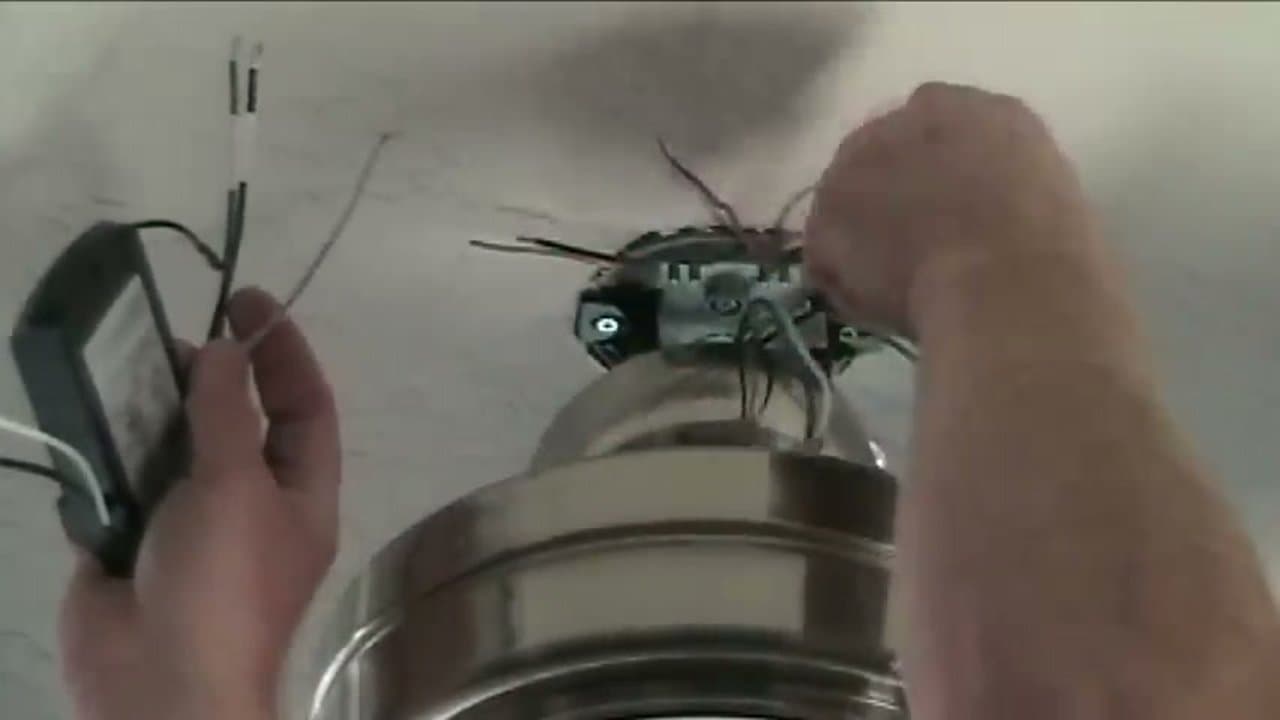
Wire Color Decoder: Black, White, Red, Green, and Blue
Ceiling fan wiring uses the same color code as the rest of the house, but
the blue wire trips up first-timers. Here is what each wire does and which
ceiling wire it joins inside the canopy.
- Black - hot. Carries 120V from the wall switch to the fan
motor. Joins the black ceiling wire (or the always-hot if the switch only
controls the light).
- White - neutral. Return path back to the panel. Joins the
white ceiling wire. Never joins black or red.
- Green (or bare copper) - ground. Joins the green or bare
ceiling ground and the green pigtail on the mounting bracket. If your ceiling
box has no ground, the brace bar can serve as the ground path on a metal box
or you can run a green pigtail to a known ground.
- Blue - light kit hot. Only used if the fan has a light.
If the wall switch controls both fan and light together, cap the blue with the
black under the same wire nut. If you have two switches (one for fan, one for
light), the blue joins the red ceiling wire and the black joins the black
ceiling wire so each switch controls its own load.
- Red - secondary hot. Shows up in homes wired for switched
fan/light separation. If you do not have a red wire, you have single-switch
control and the blue and black both tie to the same ceiling hot.
Before touching any wire, confirm the circuit is dead with a non-contact
voltage tester held against each conductor at the ceiling box - not at the
switch. A wall switch in the off position can still feed power if the box was
miswired upstream. Twist a wire nut clockwise onto stripped, matched ends and
tug gently to verify it holds. No copper should show below the nut.
Downrod vs Flush Mount: Which to Choose
The mount style is dictated by ceiling height. Building code requires at
least 7 feet of clearance from the floor to the lowest fan blade, and ceiling
fans move the most air when the blades sit 8 to 9 feet off the floor.
- Flush mount (hugger) - for ceilings under 8 feet. The
fan motor sits flush against the canopy with no downrod. Airflow drops about
20% versus a downrod install because the blades cannot pull as much air from
above, so pick a flush mount only if you cannot fit the 7-foot clearance any
other way.
- Standard downrod (3 to 6 inches) - for 8 to 9 foot
ceilings. Most fan kits ship with a short downrod in the box.
- 12-inch downrod - for 10-foot ceilings.
- 18-inch downrod - for 12-foot ceilings.
- 24 to 36-inch downrod - for vaulted or cathedral
ceilings 14 feet and up. Pair with a sloped-ceiling mounting adapter if the
ceiling is angled more than 15 degrees - the standard ball-and-socket
bracket binds past that.
Rule of thumb: subtract 9 from your ceiling height in feet and order a
downrod that many feet long, then convert to inches. A 12-foot ceiling wants
a 36-inch drop, but most installers stop at 18 inches to keep the fan high
enough that a tall guest cannot brush a blade.
Mounting Box Safety: Why a Standard Box Will Not Work
The single most-skipped step in a DIY ceiling fan installation is the
electrical box swap. A standard round light-fixture box is rated for static
weight only - a hanging pendant or a flush fixture that does not move. A
ceiling fan spins, wobbles, and applies dynamic load that a light box will
not survive long-term. The fan will gradually loosen the screws and eventually
fall.
You need a fan-rated electrical box, stamped FOR USE WITH CEILING
FANS or carrying the UL 514A listing for ceiling fans up to 70 pounds
(50 pounds minimum per NEC 314.27, 70 pounds if the fan itself weighs more
than 35 pounds). Identify a fan-rated box three ways:
- Stamped marking on the box face: ACCEPTABLE FOR FAN
SUPPORT or the weight rating in pounds.
- Brace bar visible across the joists above the box. A
metal saddle bar that wedges between two joists with adjustable teeth is the
retrofit standard.
- Heavy gauge metal or PVC with two threaded mounting
points sized for the fan kit screws (usually 10-24 thread).
If your existing box is just a light box, the retrofit option is a
braced fan box that installs through the existing hole - no drywall cutting.
Pull the old box, feed the brace through the opening, twist to wedge it
between the joists, then mount the box to the brace. Total swap is 10 to 15
minutes from a step ladder. Brace boxes run $15 to $25 at any hardware
store and are the safest path for any DIY ceiling fan installation.
Adding a Light Kit to Your Ceiling Fan
Most modern ceiling fans ship with the light kit as a separate sub-assembly
that bolts to the bottom of the motor housing. The wiring is simpler than the
main fan: three leads come out of the light kit harness and join three
matching leads on the fan body.
- Blue to blue - light hot. The fan's internal blue wire
carries switched power to the light kit.
- White to white - neutral.
- Green or bare to green - ground.
If your fan uses a remote-control receiver, the receiver handles light
on/off and dimming - skip the wall dimmer. If you want wall-switch dimming
instead, confirm the bulbs are dimmable LED or incandescent (most LED fan
bulbs are not dimmer-compatible out of the box) and install a fan-rated
dimmer. Standard LED dimmers can hum or flicker on fan-light circuits because
the receiver's load characteristics confuse the dimmer. The pull-chain on the
light kit is a third control path - tug it once for on, again for off, regardless
of the wall or remote state. After wiring, lift the light kit into place,
seat it against the motor housing gasket, and snug the three retaining screws
in a star pattern so the trim ring sits flat.