How to Deadhead Petunias (Step by Step)

By ShowMeStepByStepPublished Updated

Based on a video by My Flagstaff Home.

Petunias start the summer looking gorgeous - full, bushy, covered in flowers. Then by mid-July most of them turn into long bare stems with one tired bloom at the tip. That happens for one reason: people are deadheading them wrong.

Here's the key insight. Deadheading a petunia is not just pulling the wilted petal off. Behind every flower is a small green seed pod, and that pod has to come off too. If you leave the pod on the plant, it fills up with seeds, the plant figures its job for the season is done, and it stops making new flowers.

Pull off both pieces - the wilted petal and the green pod underneath - and the plant keeps trying to reproduce. That means more blooms, all summer, all the way around the basket instead of just at the tips. Jennifer from My Flagstaff Home walks through exactly where to pinch and what the spent pod looks like. Ten minutes once a week is enough to keep a hanging basket loaded with blooms through August.

Step-by-Step Guide

1

Spot the Spent Flowers

1:40
Step 1: Spot the Spent Flowers

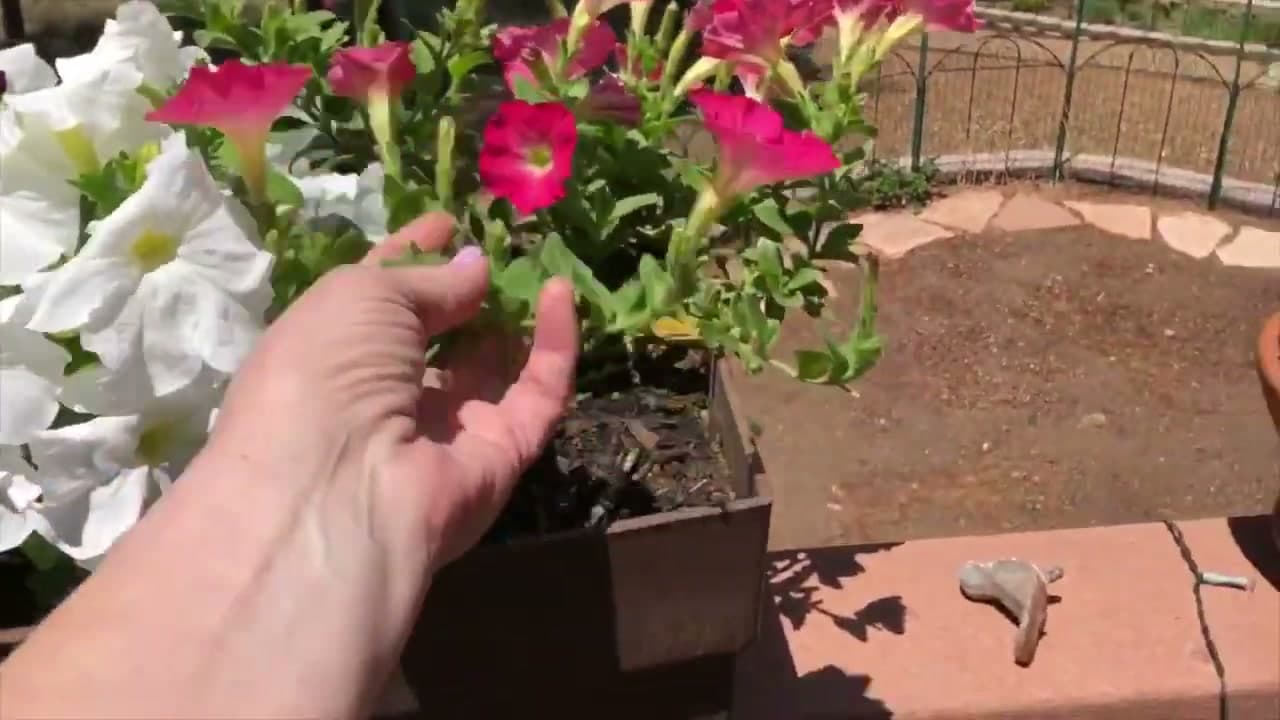
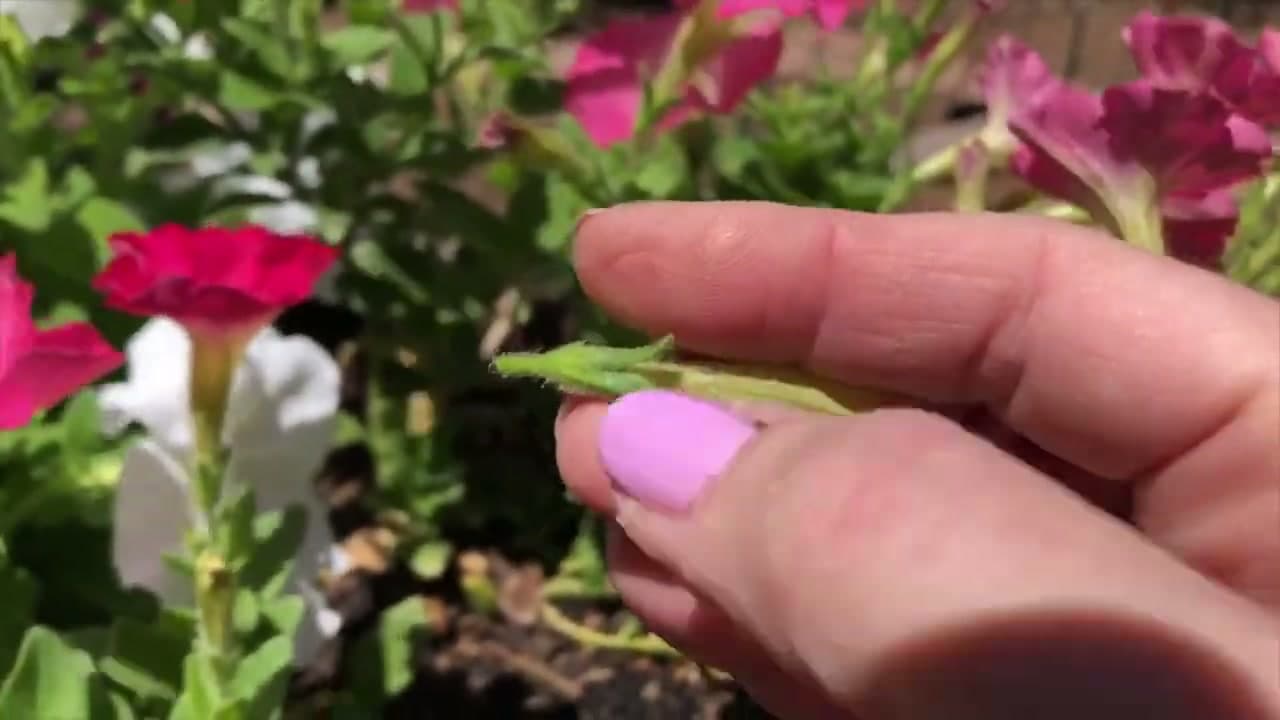
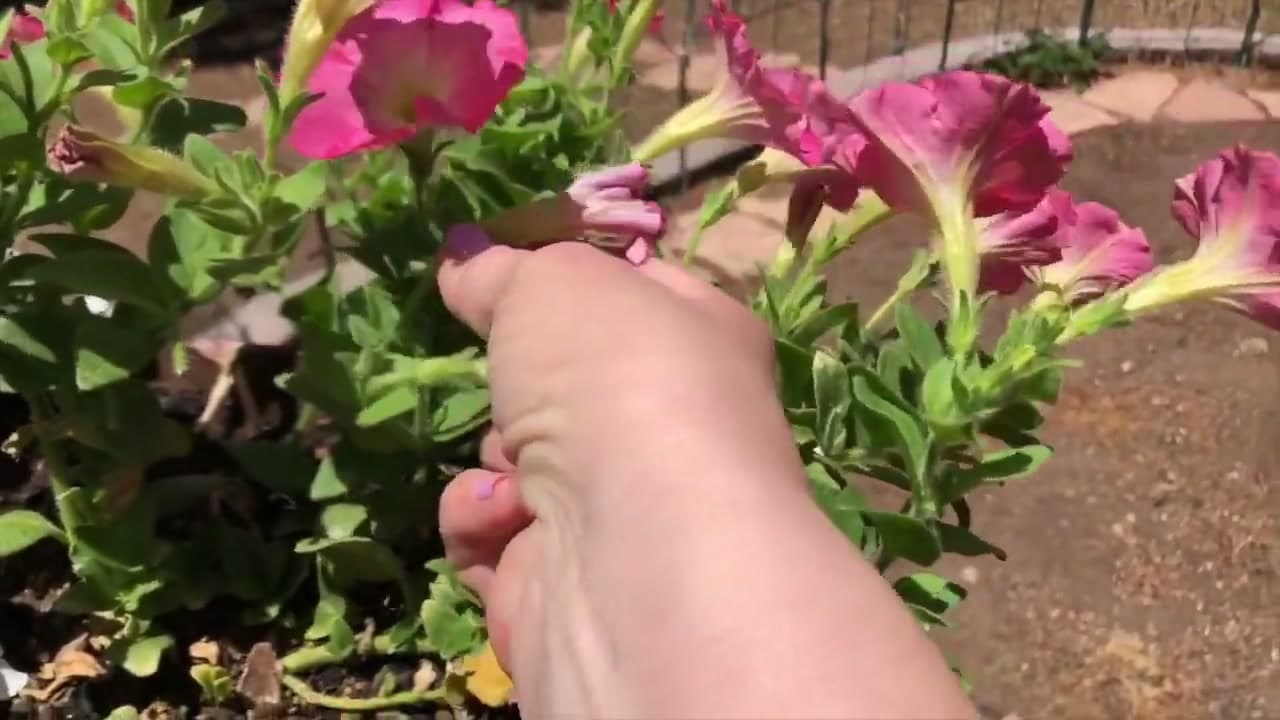
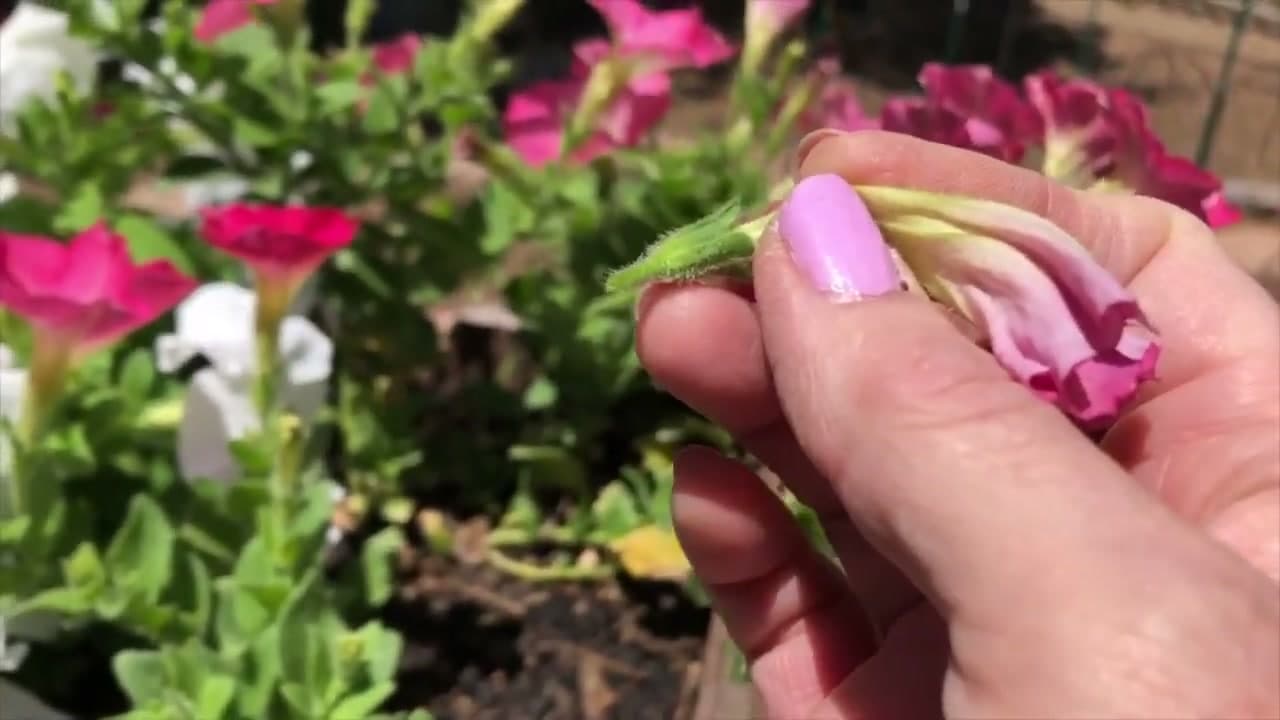
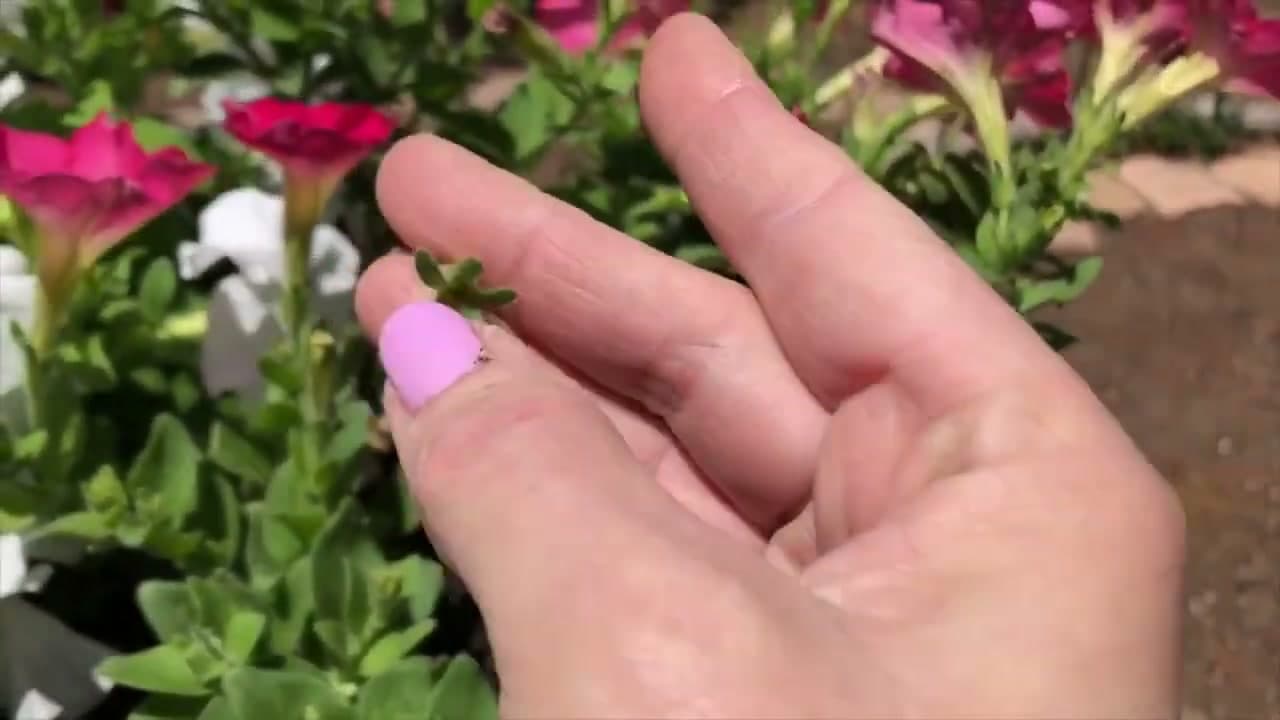
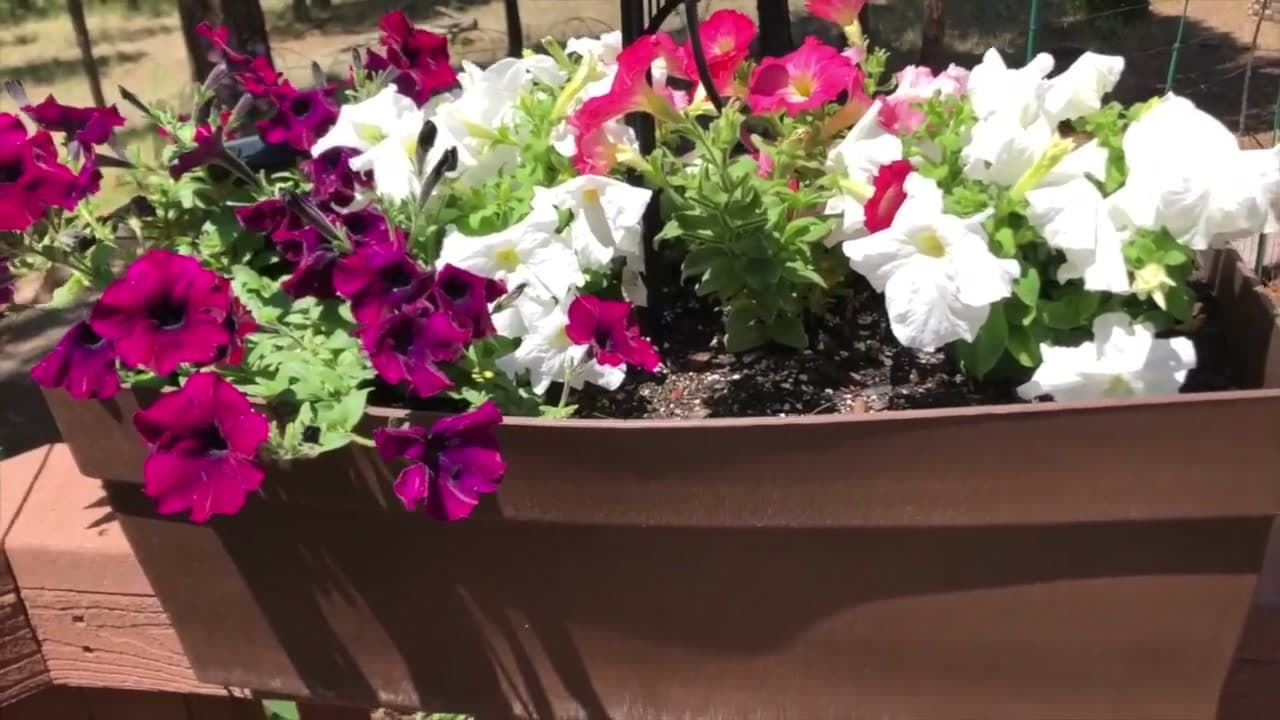
Look at your petunia plant and find the blooms that are past their prime. A spent flower is wilted, the color has faded, and the petals are starting to roll inward or close up. Some will already be brown at the edges.

Leave the bright open flowers and the unopened buds alone. You are only removing the tired blooms - that's what tells the plant to keep producing more.

Tip

Plan to do this once or twice a week through the summer. A quick pass on a hanging basket takes about five minutes once you know what to look for.

Products used in this step

Gardening Gloves
2

Find the Seed Pod Behind the Bloom

2:20
Step 2: Find the Seed Pod Behind the Bloom

This is the part most people skip and it's the whole reason petunias get leggy. Trace the wilted petal down its yellow trumpet shape. At the base, where the flower meets the stem, there's a small green bulb wrapped in tiny green leaves. That's the seed pod.

Touch it with your finger so you know exactly what you are removing. Once you can find it, the rest of the work goes fast.

Tip

The seed pod has a slight five-pointed star shape from the green sepals that hold it. It feels firmer than the wilted petal above it.

3

Pinch Below the Seed Pod

2:00
Step 3: Pinch Below the Seed Pod

Position your thumbnail and index finger on the stem just below the green seed pod. Squeeze and twist gently. A healthy petunia stem snaps cleanly with a soft pop. You want to break the stem below the pod so the whole thing comes off in your fingers.

If you are working on woody older stems near the base of the plant, switch to garden shears. Forcing a tough stem with your fingers can rip bark down the side of the stem and damage the plant.

Tip

Painted fingernails work great as a built-in pinching tool - the nail gives you a sharper edge than fingertip skin alone.

Products used in this step

Garden Snips Pruners
4

Pull the Whole Piece Off Together

2:25
Step 4: Pull the Whole Piece Off Together

The wilted petal and the green seed pod should come away as one piece in your hand. If you look at what you removed and only see the dried trumpet without the firmer green bulb, you missed the pod. Go back to the plant and look at that spot - the bulb is still there.

Drop the spent flowers in a bucket or compost pile. Don't toss them back into the basket soil. The seeds will eventually sprout and crowd the parent plant.

Tip

Carry a small bowl with you while you deadhead so you have somewhere to put the pieces. It speeds things up and keeps your patio clean.

5

Check What's Left on the Stem

2:35
Step 5: Check What's Left on the Stem

Look at the spot where you just deadheaded. The stem should end at a clean leaf node with no green bulb attached. If you still see a small fuzzy green pod sitting there, the petal pulled off but the seed stayed behind.

That is the most common mistake. Pinch the leftover pod off and you're done. Over the summer the difference between leaving pods on and removing them all is huge - the plant either keeps making flowers or quietly shuts down.

Tip

A leaf node is the little spot where two leaves come out of the stem. Cutting just above one of those tells the plant to branch out from that point and produce two new shoots.

6

Trim Back Any Leggy Stems

1:55
Step 6: Trim Back Any Leggy Stems

If your plant already has long bare stems with a single bloom at the very end, those need a harder cut. Use garden shears and trim the stem back by about a third. Cut just above a leaf node so the plant has a place to branch from.

It feels brutal the first time but the plant recovers fast. Within a week or two new growth comes out below the cut and the plant fills back in fuller than before.

Tip

Don't cut more than a third of the plant at once. A heavy hard prune in the middle of summer can stress a hanging basket that's already fighting heat.

Products used in this step

Garden Snips Pruners
7

Water Deeply and Feed

3:05
Step 7: Water Deeply and Feed

Right after deadheading is a good time to water the basket through. Pour water across the soil slowly until you see it running out the bottom. Hanging baskets dry out fast in summer and stressed plants don't bloom well no matter how cleanly you deadhead.

Mix a liquid bloom-booster fertilizer into the water every one to two weeks. Look for one with a higher middle number on the label - that's phosphorus, the nutrient that drives flower production. Petunias are heavy feeders and a basket with steady nutrition rewards you with blooms right through September.

Tip

Water in the morning, not the middle of a hot afternoon. Mid-day watering can scorch leaves and most of the water evaporates before the roots get any.

Products used in this step

Miracle-Gro Bloom Booster Fertilizer
Watering Can
Plant Labels

Products Used

Gardening GlovesGarden Snips PrunersMiracle-Gro Bloom Booster FertilizerWatering CanPlant Labels
☐ The Checklist

How to Deadhead Petunias (Step by Step)

Tools
2
Materials
1
Steps
7
Video
4 min

Your Guide

My Flagstaff Home

As an Amazon Associate we earn from qualifying purchases. Links on this page may be affiliate links - clicking them and buying doesn't change your price, but helps support ShowMeStepByStep.

Tags

What's next

Weekly Digest

Liked this gardening tutorial?

Pick the categories you want to hear about. Weekly digest of new step-by-step tutorials. No spam, easy unsubscribe.

Send me tutorials about

We only email about new tutorials. Easy unsubscribe anytime.