How to Dry Basil at Home

By ShowMeStepByStepPublished Updated

Based on a video by DirtFarmerJay.

Step-by-Step Guide

1

Step 1: Harvest Fresh Basil From the Garden

1:05
Step 1: Step 1: Harvest Fresh Basil From the Garden

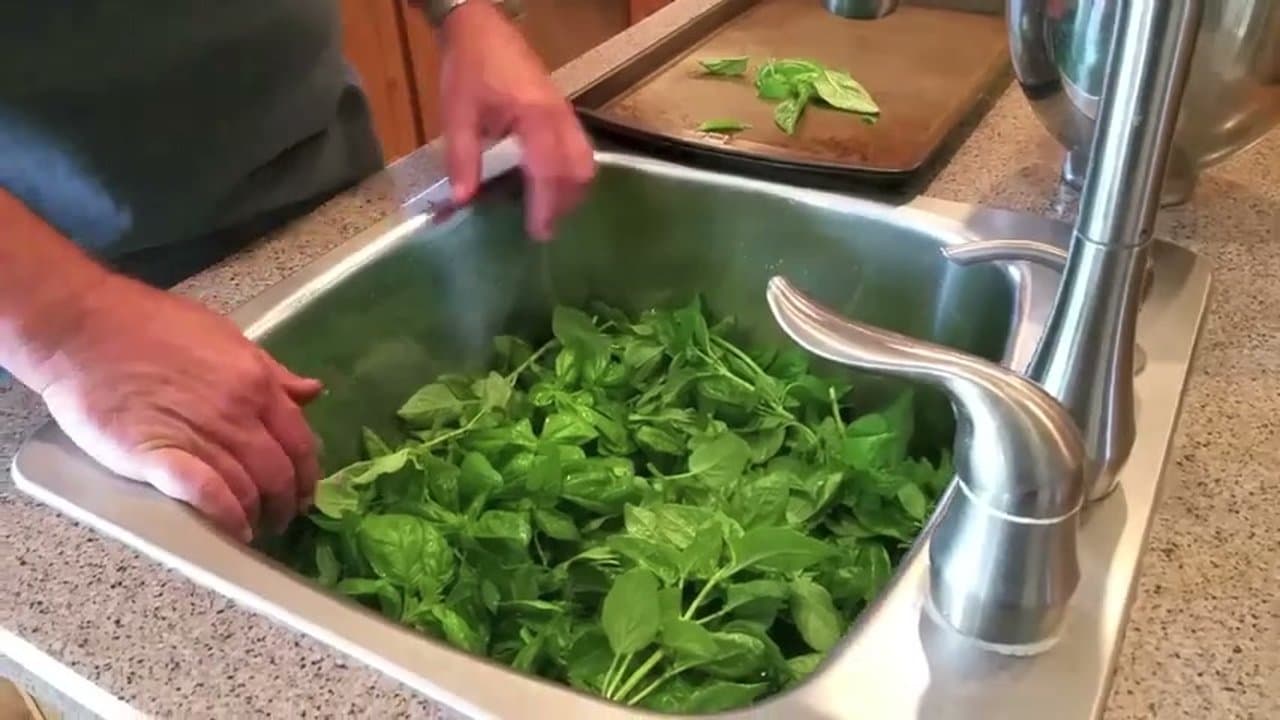
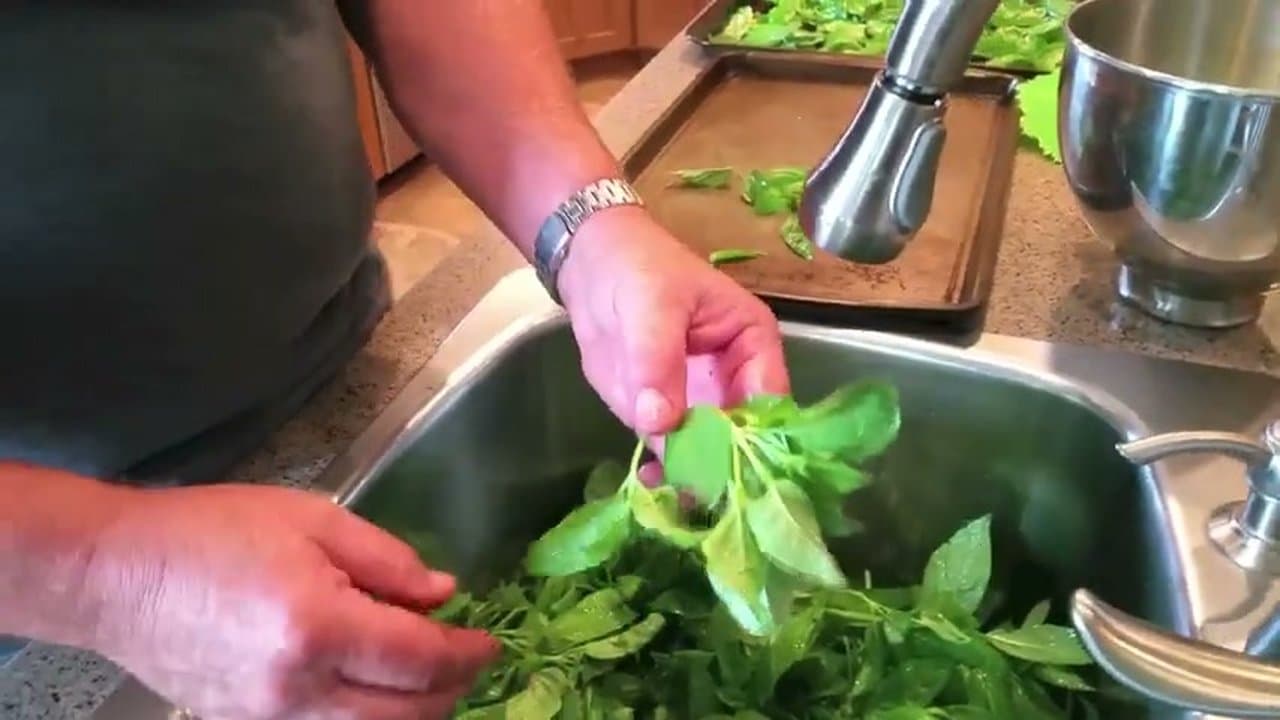
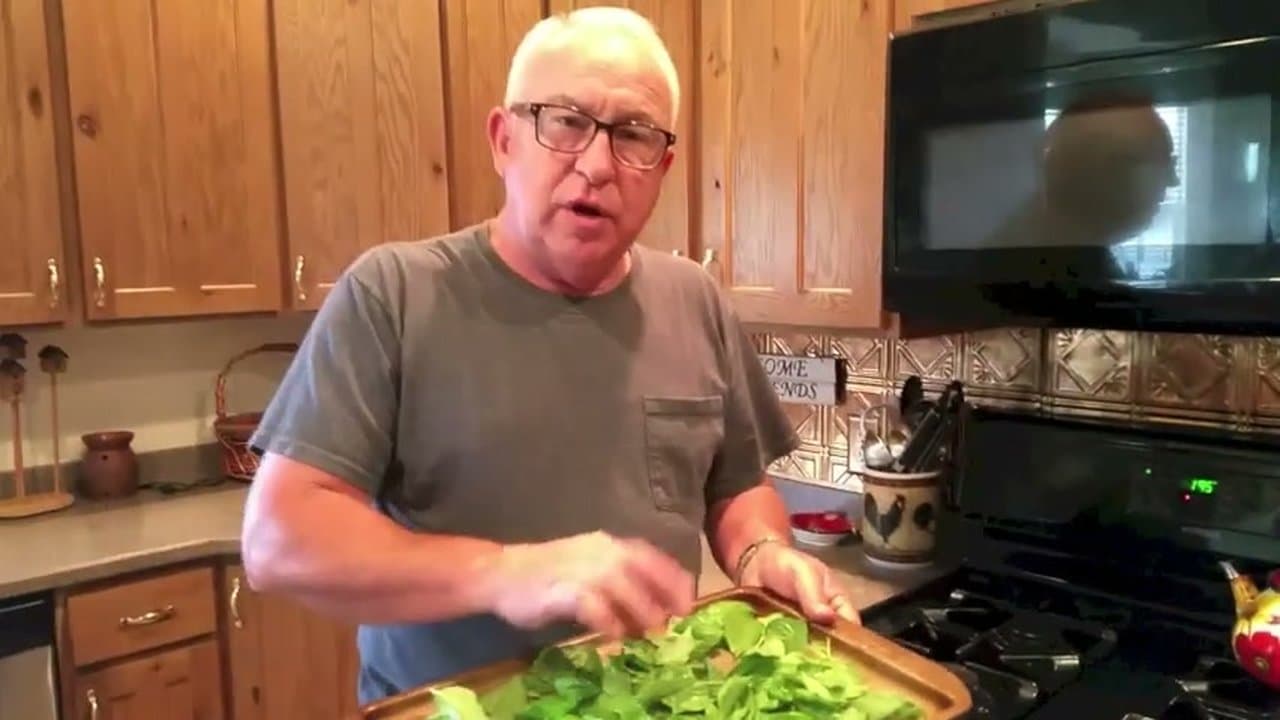
Cut whole sprigs of basil from the plant - you'll strip the leaves off the stems in the next step. Pick in the morning after the dew has dried but before the heat of the day, when the essential oils in the leaves are most concentrated.

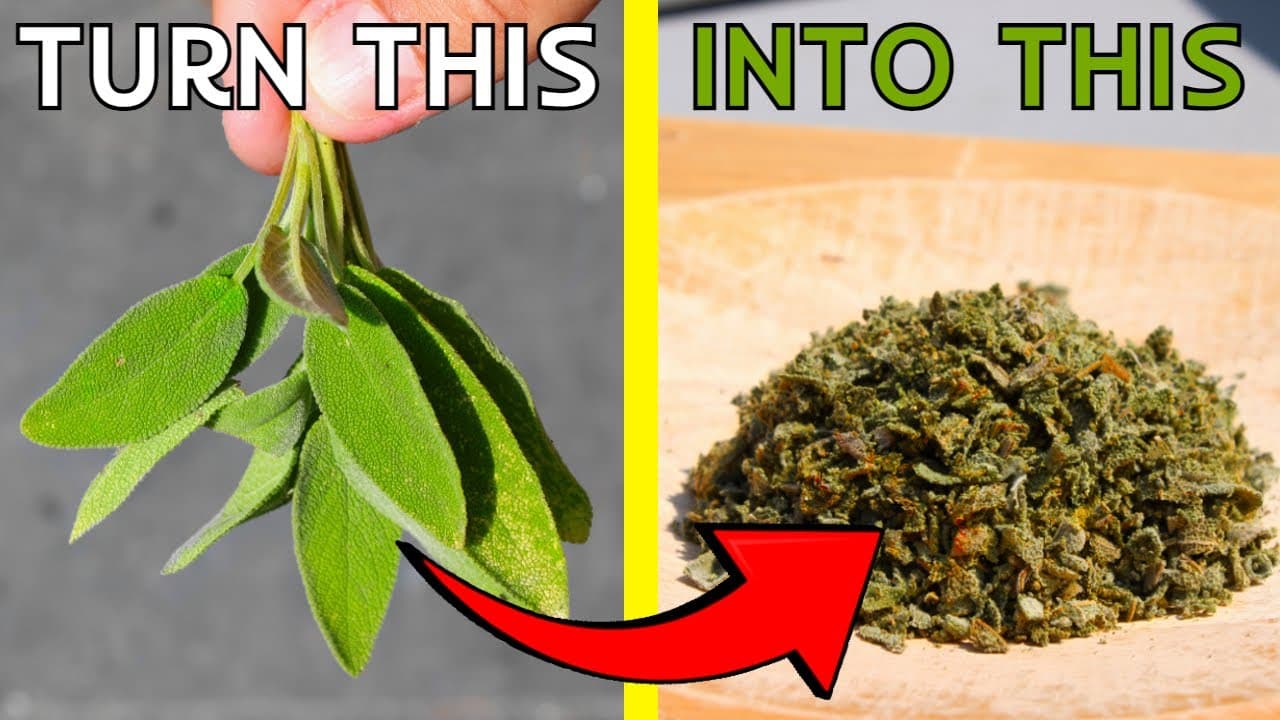
Take more than you think you need. The leaves shrink down to about a quarter of their fresh volume once dried.

Tip

Skip any leaves with brown spots or holes - those don't dry well and can introduce off flavors.

2

Step 2: Pinch the Leaves Off the Stems

1:20
Step 2: Step 2: Pinch the Leaves Off the Stems

Use your thumbnail and forefinger right at the base of each leaf to pop it off the stem. Drop the leaves into a clean bowl as you go.

The reason to do this now (and not after drying): dried stems are bitter and woody, and once everything is shriveled up they're a pain to pick out. Spending five minutes pinching now saves twenty minutes of sorting later.

4

Step 4: Dry at 170-195°F for About 1 Hour 45 Minutes

2:15
Step 4: Step 4: Dry at 170-195°F for About 1 Hour 45 Minutes

Set the oven to between 170 and 195°F. The lower end of that range preserves more flavor; the higher end is fine if your basil came in wet from a quick rinse.

Crack the oven door open about an inch with a wooden spoon to let moisture escape. If the door stays sealed, the leaves end up cooking instead of drying.

Check at the 90-minute mark. Some ovens run faster, some slower. The leaves shrink and darken visibly as they go.

Tip

If your oven has a convection setting, turn it on - it cuts the drying time roughly in half.

5

Step 5: Test for Dryness

2:38
Step 5: Step 5: Test for Dryness

Pull a tray out and press a finger into a leaf. Properly dried basil crumbles between your fingers. The leaves have darkened from bright green to a deeper, almost army green and have lost their gloss.

If any leaves still feel pliable or look shiny, give the tray another 15-20 minutes. Chewy basil is still wet inside and will mold within a week of being jarred.

6

Step 6: Crush and Store in Airtight Jars

3:15
Step 6: Step 6: Crush and Store in Airtight Jars

Two ways to crush. Tip the trays into a stainless steel bowl and crush the leaves between clean hands - quick, but messy if there's any breeze in the kitchen.

Or tip everything into a zip-top bag and crush from the outside. The bag method keeps the counter clean and gives you better control over how fine you grind. Stop when the pieces are about half the size of a pencil eraser - any finer and you lose flavor faster in storage.

Funnel the crushed basil into airtight glass jars. Label with the date and store away from heat and light. The spice rack above the stove is the worst place to keep dried herbs - the heat cooks the volatile oils right out of them. A pantry shelf or a cool drawer is ideal.

Tip

Dried herbs are about three times more potent than fresh. A recipe calling for a tablespoon of fresh basil only needs a teaspoon of dried.

Products Used

☐ The Checklist

How to Dry Basil at Home

Tools
6
Materials
1
Steps
6
Video
5 min

Your Guide

DirtFarmerJay

As an Amazon Associate we earn from qualifying purchases. Links on this page may be affiliate links - clicking them and buying doesn't change your price, but helps support ShowMeStepByStep.

Tags

Test your knowledge

Did the lesson stick? Find out in 2 minutes.

5 quick questions covering what you just read. No signup, no score saved — just a gut check.

Quick reference

Key takeaways from How to Dry Basil at Home

5 questions, answers, and one-line explanations. Tap to expand.

  1. 1.Best time to harvest basil leaves for drying?

    Answer: MORNING after dew dries but before the heat - essential oils are most concentrated

    Heat evaporates the volatile oils that give basil its flavor. Morning harvest = noticeably more flavorful dried product.

  2. 2.Why pinch leaves OFF the stems BEFORE drying (not after)?

    Answer: Dried stems are bitter, woody, and a pain to pick out of crumbled leaves later

    Five minutes pinching fresh leaves now saves twenty minutes sorting crumbly dried mess later.

  3. 3.Oven temperature for drying basil?

    Answer: 170 to 195 deg F with the oven door propped open about an inch

    Lower preserves more flavor. Propping the door lets moisture escape - sealed oven = cooks the leaves instead of drying.

  4. 4.Why prop the oven door open about an inch with a wooden spoon?

    Answer: Lets moisture escape - sealed oven steams the leaves instead of drying them

    Drying = water out. Sealed oven traps the moisture and you end up with cooked, mushy leaves.

  5. 5.How do you confirm basil is fully dried (and won't mold in the jar)?

    Answer: Press a leaf - properly dried CRUMBLES between fingers; if it bends or feels pliable, it's still wet

    Crunch test is the only reliable check. Chewy basil = still moist = mold within a week of being jarred.

What's next

Related collections

Curated theme pages that include this tutorial.

Weekly Digest

Liked this gardening tutorial?

Pick the categories you want to hear about. Weekly digest of new step-by-step tutorials. No spam, easy unsubscribe.

Send me tutorials about

We only email about new tutorials. Easy unsubscribe anytime.