How to Install a Doorknob in 7 Steps

Home ImprovementEasy7:117 steps
Also in:Adulting

By ShowMeStepByStepPublished Updated

Based on a video by The Funny Carpenter.

Replacing an interior doorknob is one of the easiest fix-it jobs in the house. The hardware is built around standard dimensions - a 2-1/8 inch bore hole through the face of the door, a 1-inch latch hole through the edge, and a backset of either 2-3/8 or 2-3/4 inches from the edge to the center of the bore. New knob sets are designed to drop into any of those, so the job is mostly lining things up, not cutting wood.

You'll need a screwdriver and maybe a drill. A chisel and a utility knife come in handy if the new strike plate has different proportions than your old one and you have to deepen the mortise on the jam. That's the only part of the job where you're shaping wood - everything else is screws into pre-drilled holes.

The pro tip that nobody tells beginners: don't over-tighten the screws on the back plate until you've confirmed the knob spins freely. Crank them down too early and the assembly binds at exactly one rotation point - the knob feels stiff every time you turn it. Snug part-way, test, then finish. The other fix-it jobs in this cluster: how to fix a leaky faucet, how to fix holes in drywall, and how to remove a stripped screw cover the next most common interior repairs.

One call to make up front: lever-style handles are heavier than round knobs and slip out of the bore more easily during install. Keep one hand on the exterior knob the whole time once it's threaded through the latch, especially if you have hard floors below. A dropped lever leaves a divot you can't sand out.

Step-by-Step Guide

1

Step 1: Mark and Mortise the Strike Plate

0:24
Step 1: Step 1: Mark and Mortise the Strike Plate

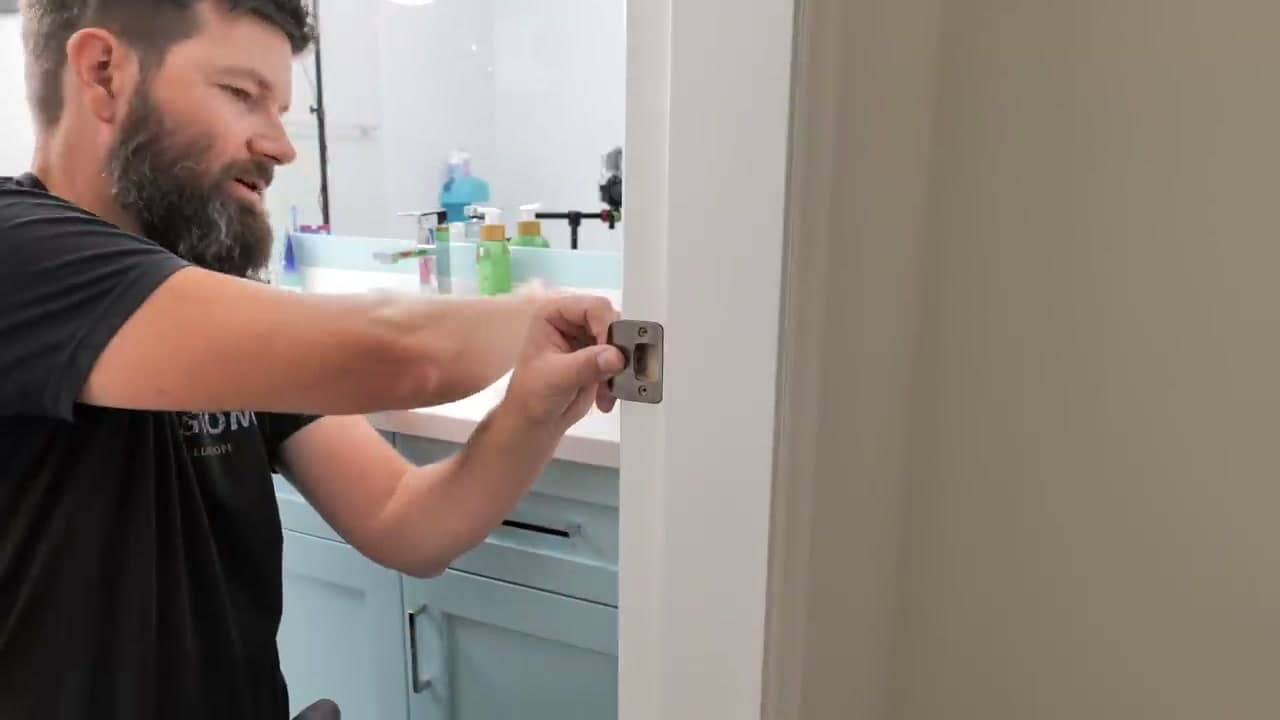
Hold the new strike plate against the door jam where the latch will meet it and trace its outline with a utility knife. If the new plate has square corners and the old recess was rounded, the plate won't sit flush yet. Watch at 0:24. Deepen the score lines, then chisel out the wood inside the lines a little at a time until the plate drops in level with the surface of the jam. If you're reusing the old recess and the new plate fits, skip the chisel work.

Tip

Score the outline twice - once shallow to mark, once deep to cut. The clean knife line keeps the chisel from blowing past the edge.

2

Step 2: Pre-Drill and Drive the Strike Plate Screws

1:00
Step 2: Step 2: Pre-Drill and Drive the Strike Plate Screws

Door jams are usually softwood and they split easily. Pick a drill bit roughly the same width as the screw shank or slightly smaller, then drill a shallow pilot hole at each screw location through the strike plate. Watch at 1:00. If you don't have a drill, snip the tip off each screw with side cutters - chopping the wedge tip off does the same job as a pilot hole. Drive the screws with a hand screwdriver or a drill on low torque. Never an impact driver - 1,200 pounds of force snaps the plate and chews up the jam.

Tip

Once the plate is on, take a flat screwdriver to the little tab on the strike opening and bend it slightly outward. The tab pushes against the latch and stops the door from rattling.

3

Step 3: Check the Backset and Seat the Latch

2:25
Step 3: Step 3: Check the Backset and Seat the Latch

Pick up the latch and find the adjustable slide on the body. It locks into either 2-3/4 inch (long) or 2-3/8 inch (short) - that's the distance from the door's edge to the center of the bore hole. Hold the latch against the door to confirm the round end centers on the bore opening, then slide the latch into the hole on the edge of the door. Watch at 2:25. Keep it square as you press it in. If the door is new and the fit is tight, lay a block of scrap wood across the face plate and tap the block with a hammer until the latch sits flush. Don't strike the latch directly - the mechanism inside isn't built for impact.

Tip

Look at the curved side of the latch tongue - it has to face the direction the door closes. If you install it backwards, the door won't latch shut.

4

Step 4: Insert the Exterior Knob Through the Latch

4:10
Step 4: Step 4: Insert the Exterior Knob Through the Latch

Pick up the exterior knob and confirm the privacy lock is set to the unlocked position so the post spins freely. Look at the square post on the back of the knob - it can only enter the latch one way. Watch at 4:10. Slide the post through the latch from the outside of the door so the post sticks out the interior side. If it won't seat, rotate the knob 180 degrees and try again. Keep one hand on the exterior knob the whole time - heavy lever-style knobs are notorious for slipping out and chipping the floor.

Tip

The two long screw posts on the knob also have to line up with the holes in the latch frame. If everything seats except those two posts, give the knob a quarter turn.

Products used in this step

5

Step 5: Hand-Start the Interior Back Plate Screws

5:20
Step 5: Step 5: Hand-Start the Interior Back Plate Screws

On the interior side of the door, hold the mounting plate over the protruding post and line it up with the two screw posts coming through from the exterior knob. Some sets let you pre-load the screws onto the plate and spin everything together - skip that, it never lines up. Just hold the plate in place, start one of the long machine screws by hand, and turn it three or four times until you feel solid threading. Watch at 5:20. Pull the plate back slightly if you can't see where the screw tip is landing. Start the second screw the same way.

Tip

If a screw feels gritty as you turn it, back it out and try again. You can cross-thread the brass threads inside the knob in three turns and ruin the assembly.

Products used in this step

6

Step 6: Check Alignment, Then Tighten the Screws

5:40
Step 6: Step 6: Check Alignment, Then Tighten the Screws

With both screws started by hand, the back plate should still have a bit of wiggle. Grab the exterior knob and turn it - it should spin freely with no binding. If it does, switch to a screwdriver (not a drill at this stage) and snug both screws partway down, alternating between them. Watch at 5:40. Turn the knob again. Still spinning? Finish hand-tightening until the plates are firm against the door. If the knob binds even slightly, back the screws out, re-center the back plate, and try again.

Tip

Hand-tight is enough - you're not building a deck. Over-tightening pulls the back plate cockeyed and locks the knob in a slight bind that wears the latch out fast.

Products used in this step

7

Step 7: Snap on the Cover Plate and Test the Lock

6:45
Step 7: Step 7: Snap on the Cover Plate and Test the Lock

The cosmetic cover plate hides the two screws. It has no alignment marks and snaps on at any rotation - just align the tabs around the back plate and press firmly until it clicks. Watch at 6:45. Run the final test: turn the knob from both sides to confirm smooth rotation, push the privacy pin to engage the lock, push the small hole on the exterior side with a paperclip to release it, then close the door and check that the latch catches the strike plate without any rattle. If it does rattle, bend the strike plate tab from step 2 a hair more.

Tip

If the latch catches the strike plate but the door still rattles, the issue is usually that the strike tab needs more bend, not that the plate needs to move.

Products used in this step

Products Used

☐ The Checklist

How to Install a Doorknob in 7 Steps

Tools
10
Materials
6
Steps
7
Video
7 min

Your Guide

The Funny Carpenter

As an Amazon Associate we earn from qualifying purchases. Links on this page may be affiliate links - clicking them and buying doesn't change your price, but helps support ShowMeStepByStep.

Tags

Related Tutorials