How to Unclog a Sink the Right Way

Home ImprovementEasy10:097 steps

Chemical drain cleaners are a temporary fix that can damage your pipes over time. The right way to unclog a bathroom sink is to take the P-trap apart, pull out whatever is blocking things, and put it back together. It takes about 20 minutes.

Jeff from Home Repair Tutor walks through the whole process, including how the plumbing under your sink works, where clogs actually form, and a couple of cheap tools that make the job easy.

Step-by-Step Guide

1

Understand the P-Trap

0:20
Step 1: Understand the P-Trap

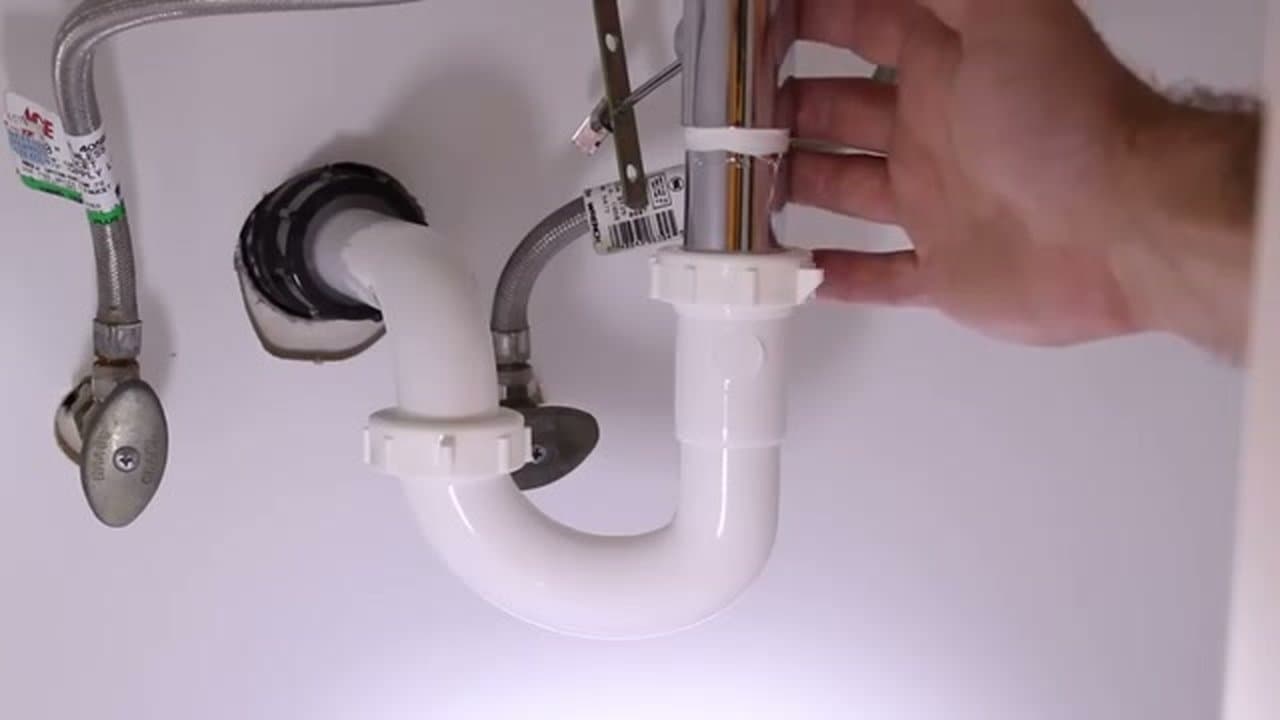
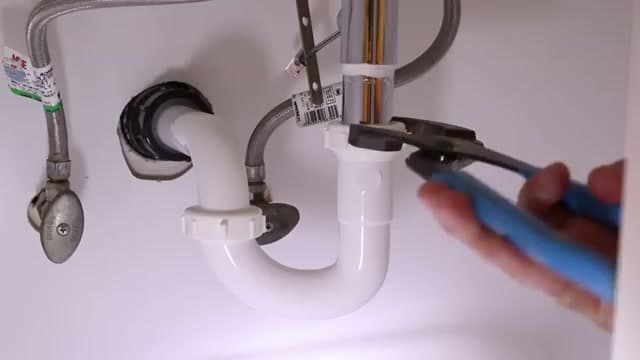
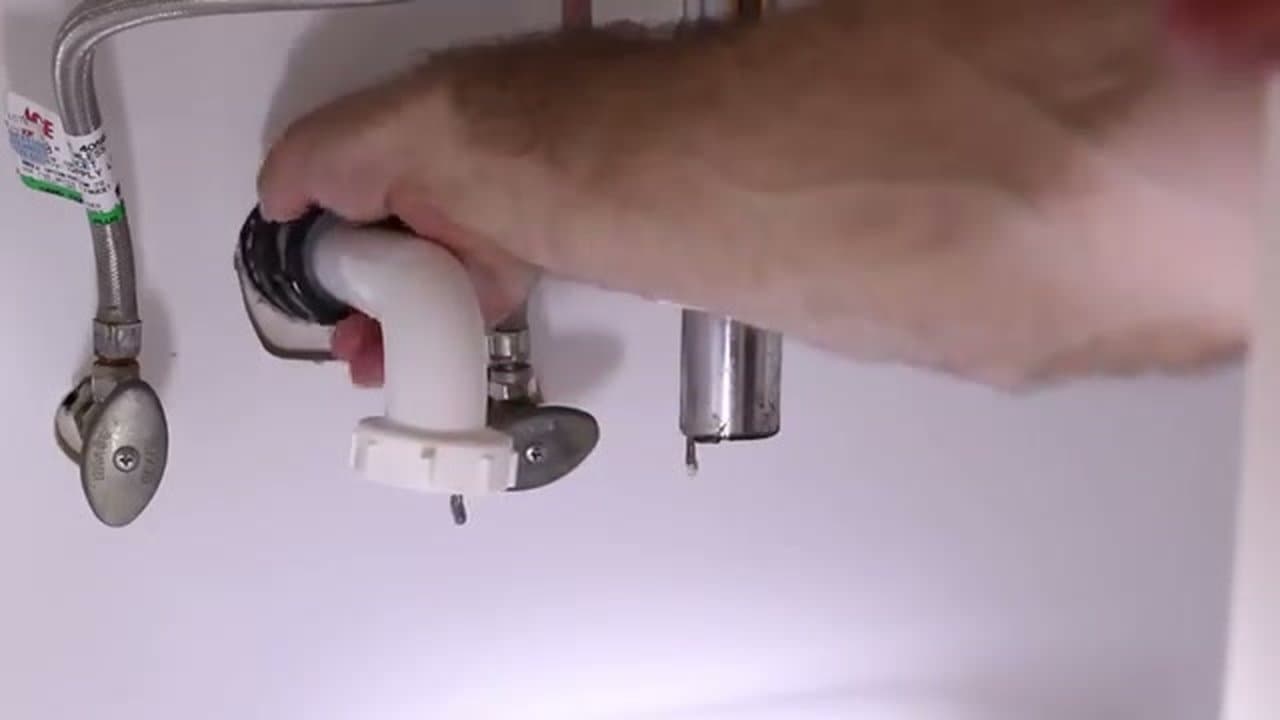
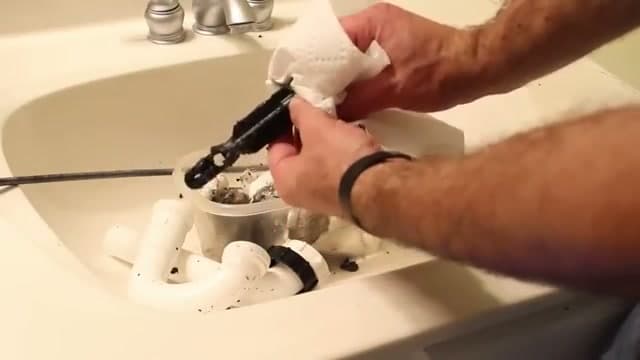
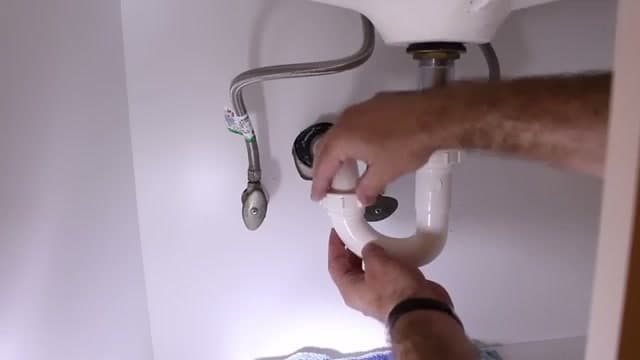
The curved pipe under your sink is called the P-trap. It holds a small amount of standing water that blocks sewer gas from coming back into your bathroom. Most sink clogs build up in three places: inside the P-trap itself, around the pop-up stopper rod, and in the pipe that goes into the wall.

Understanding the layout makes the rest of the job straightforward.

2

Remove the P-Trap

1:00
Step 2: Remove the P-Trap

Put a bucket or container directly under the P-trap before you touch anything. Loosen the slip nut at the top of the curved section by hand. If it will not budge, use channel lock pliers. Then loosen the bottom nut. Water will pour out as you remove it.

Pull the whole P-trap off once it drains. Tap it out into your bucket. It will be full of buildup.

Products used in this step

Channel Lock Pliers
Bucket (5 Gallon)
3

Remove the Pop-Up Stopper

2:44
Step 3: Remove the Pop-Up Stopper

On the back of the drain pipe, there is a nut holding a small pivot arm in place. Loosen that nut with pliers and pull the arm out. It will be coated in goop. With the arm removed, pull the pop-up stopper straight up and out of the drain.

Hair and buildup collect on the pivot arm and stopper constantly. This is often the main cause of a slow drain.

4

Clear the Drain with a Zip-It or Snake

3:36
Step 4: Clear the Drain with a Zip-It or Snake

Push a zip-it tool (a cheap barbed plastic strip) down into the drain opening from the top of the sink. Pull it back out slowly. The barbs grab hair and gunk on the way up. For deeper clogs, use a drain auger. Feed the cable in until you hit resistance, lock it, and spin to break through.

You can also push a paper towel through the drain and use the snake to push it out the bottom. It cleans the pipe walls on the way through.

Products used in this step

Drain Snake (25 ft)
5

Snake the Wall Pipe

5:30
Step 5: Snake the Wall Pipe

With the P-trap off, you have direct access to the pipe going into the wall. Push your zip-it or auger into that pipe as far as it will go. Spin the auger when you hit something solid. Pull it back out and check what came with it.

This is where deeper clogs hide, especially in older homes. While you have it apart, you might as well clear this pipe too.

Products used in this step

Drain Snake (25 ft)
6

Clean All the Parts

6:42
Step 6: Clean All the Parts

Before reassembly, clean every piece. Push a folded paper towel through the gooseneck pipe like floss to wipe the inside walls. Clean the pop-up stopper and pivot arm with paper towels. Rinse the P-trap out completely.

Everything should be clear of buildup before it goes back on. Otherwise you are just reinstalling a partial clog.

7

Reassemble and Check for Leaks

7:21
Step 7: Reassemble and Check for Leaks

Put the gooseneck back into the wall pipe. Position the P-trap and hand-tighten both slip nuts, then snug them one quarter turn with channel locks. Reinstall the pivot arm into the drain and tighten its nut.

Turn the water on and let it run for a full minute. Check every connection for drips. If anything leaks, tighten that nut another quarter turn.

Tip

Put a drain hair catcher over the drain opening going forward. A two-dollar screen catches most of the hair before it goes down the drain and prevents clogs from forming.

Products used in this step

Channel Lock Pliers
Drain Hair Catcher

Products Used

Channel Lock PliersBucket (5 Gallon)Drain Snake (25 ft)Drain Hair Catcher

Your Guide

Home Repair Tutor

Tags

Related Tutorials

Learn More