How to Braid Hair: 3 Easy Styles (Classic, Rope Twist, Fishtail)

By ShowMeStepByStepPublished Updated

Based on a video by Learn Do Teach Hairstyles “LDT Hairstyles”.

Three braids cover almost every situation. The classic three-strand plait is the one most of us tried as kids and never really moved past. The rope twist is the fastest braid you can do when you're running out the door. The fishtail looks fancier than it is, and you only need two strands to make it.

This tutorial teaches all three on a low ponytail so you can practice the technique without fighting hair on top of your head. Once these are muscle memory, the next steps are the French braid (which adds hair as you go from the crown) and the Dutch braid (the same idea, but the strands cross under so the braid sits on top of the head). Want a no-braid option for messy days? Our messy bun walkthrough takes about a minute.

The video comes from Carrie and Gracie at Learn Do Teach Hairstyles. They demo everything on a slick, sectioned ponytail so you can clearly see every cross. Skip ahead in the video using the timestamps if you want to jump straight to one braid.

Step-by-Step Guide

1

Step 1: Gather Hair Into a Low Ponytail

0:37
Step 1: Step 1: Gather Hair Into a Low Ponytail

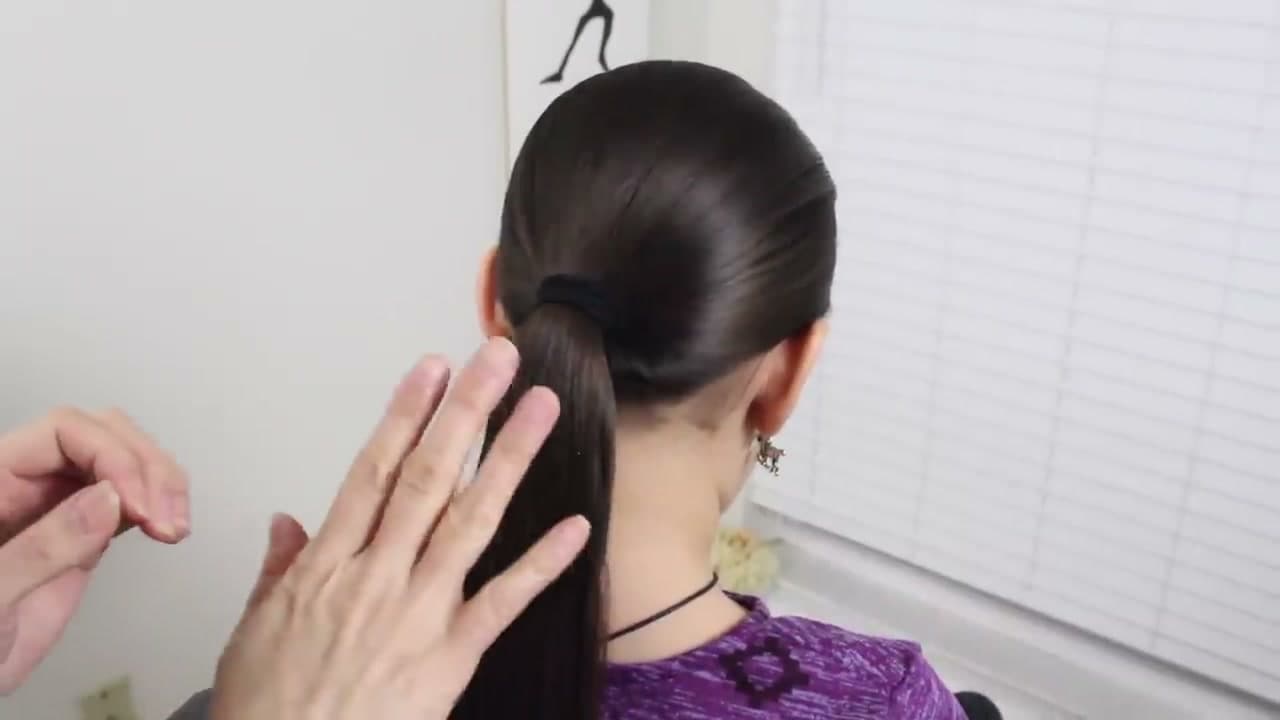
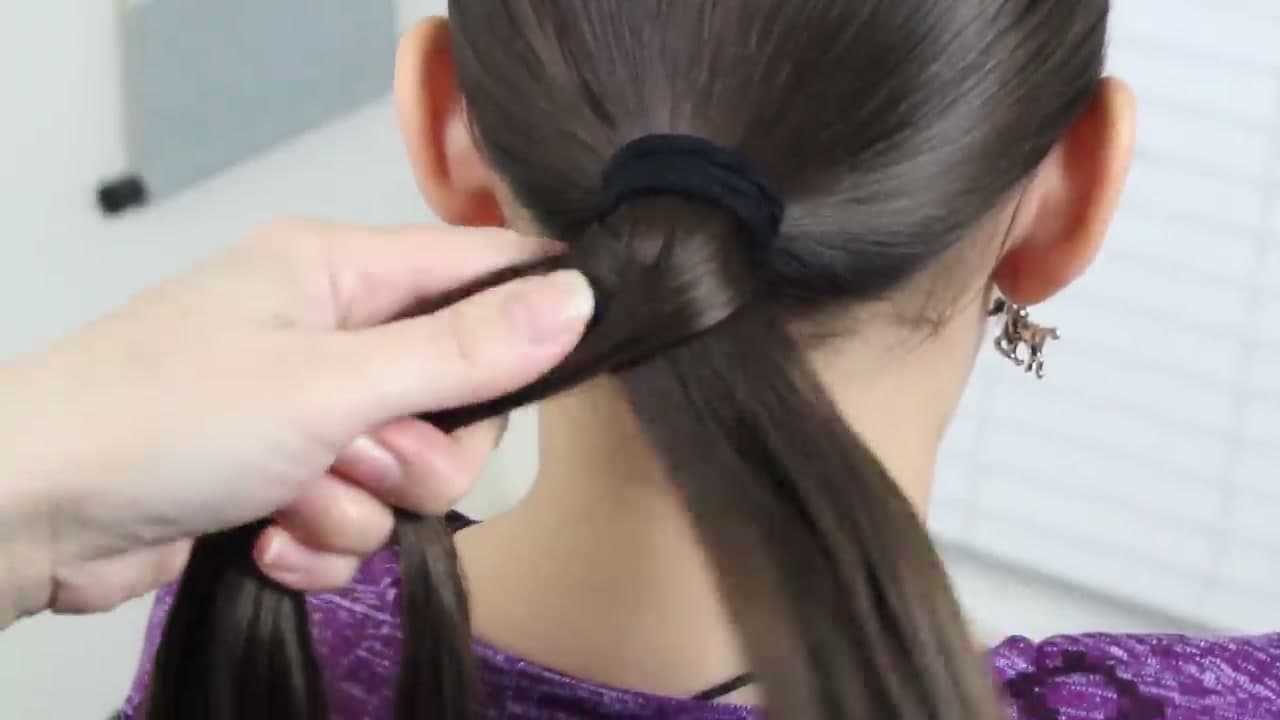
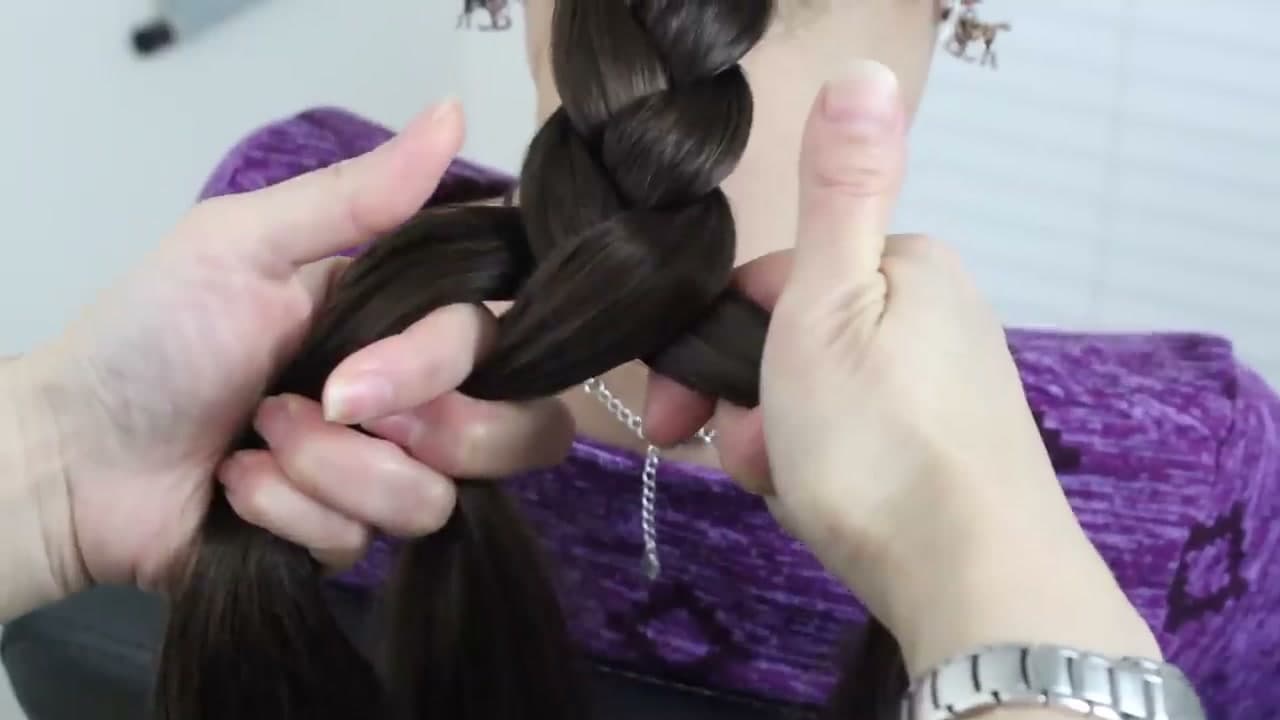
Brush hair smooth and pull it into a low ponytail at the nape of the neck. Secure with a hair tie. Working from a ponytail makes every braid easier to learn because the strands stay separate and you can see what your hands are doing.

Skip the ponytail later once you're comfortable, or use it as a base for any of the three styles below. Watch the prep at 0:30.

Tip

A small spritz of water or a leave-in detangler helps the strands behave, especially if your hair is freshly washed and slippery.

2

Step 2: Split for a Rope Twist and Twist the Right Strand

0:50
Step 2: Step 2: Split for a Rope Twist and Twist the Right Strand

For the rope twist, split the ponytail into two equal sections. Take the right strand and twist it clockwise (to the right) until it forms a tight cord. Keep tension on it so the twist holds. This is the fastest braid in the bunch and works well when you're short on time.

Jump to the rope twist demo at 0:31 in the video.

Products used in this step

3

Step 3: Cross the Twisted Strand Over to Finish the Rope

1:35
Step 3: Step 3: Cross the Twisted Strand Over to Finish the Rope

While the right strand is still twisted clockwise, cross it over the left strand to the left side. Pick up the new right strand (which was the original left), twist it clockwise, and cross it over again. Keep repeating all the way down. The trick is that both moves go in opposite directions: twist right, cross left.

The two-tone corkscrew look comes from that opposing tension. Secure the bottom with a small elastic.

Tip

If the rope keeps unraveling, you're probably twisting and crossing in the same direction. The twist and the cross have to go opposite ways for the braid to lock.

4

Step 4: Start a Fishtail by Crossing Thin Outside Pieces

3:15
Step 4: Step 4: Start a Fishtail by Crossing Thin Outside Pieces

For the fishtail, split the ponytail into two equal halves again. Take a small section from the outside edge of the left strand and pull it across to the right side, combining it with the right strand. Now grab a thin section from the outside edge of the right strand and pull it across to join the left.

That's the whole braid. Two strands, thin outside pieces crossing over and over. Skip ahead in the source video to 2:36 to follow along.

5

Step 5: Keep Crossing Outside Sections Down the Length

4:30
Step 5: Step 5: Keep Crossing Outside Sections Down the Length

Repeat the cross-over pattern all the way down. Smaller pieces give you a tight, micro-woven look that takes longer. Bigger chunks finish faster but look chunkier. You can mix the two in one braid - thin pieces near the top transitioning to fatter chunks toward the bottom for a nice graduated effect.

Hold the braid taut as you go or it'll loosen up. Tie off the end with a clear or thin elastic.

Tip

Working over your shoulder, in front of you, is much easier than reaching behind your head. Pull the ponytail forward to the side you're most coordinated on.

Products used in this step

6

Step 6: Split Into Three Strands and Cross Right Over Middle

5:55
Step 6: Step 6: Split Into Three Strands and Cross Right Over Middle

For the classic three-strand braid, divide the ponytail into three equal sections. Take the right strand and cross it over the middle strand. The right strand is now the new middle. Then take the left strand and cross it over the new middle. Left is now the middle.

That alternating pattern - right over middle, left over middle - is the whole braid. The full demo starts at 5:23 in the video.

Tip

If you keep dropping a strand, dedicate one finger to each section. Pinky on the outside strand, index on the inside, palm cradling the middle.

7

Step 7: Repeat Right-Over-Middle, Left-Over-Middle Down the Length

7:10
Step 7: Step 7: Repeat Right-Over-Middle, Left-Over-Middle Down the Length

Keep alternating crosses all the way to the ends of the hair. Right over middle, left over middle, right over middle, left over middle. The pattern looks complicated when someone else is doing it fast, but it's literally those two moves repeating.

Once you hit the bottom, wrap a small hair tie around the ends. For a more polished look, gently tug each loop outward to soften the braid (a technique called pancaking).

Tip

A light mist of hairspray on dry hair before braiding adds grip and keeps flyaways down. Spray after braiding to lock it in place all day.

Products Used

Your Guide

Learn Do Teach Hairstyles “LDT Hairstyles”

As an Amazon Associate we earn from qualifying purchases. Links on this page may be affiliate links - clicking them and buying doesn't change your price, but helps support ShowMeStepByStep.

Tags

Test your knowledge

Did the lesson stick? Find out in 2 minutes.

5 quick questions covering what you just read. No signup, no score saved — just a gut check.

Quick reference

Key takeaways from How to Braid Hair: 3 Easy Styles (Classic, Rope Twist, Fishtail)

5 questions, answers, and one-line explanations. Tap to expand.

  1. 1.Best base for learning all three braids?

    Answer: Low ponytail

    Ponytail keeps strands separate so you can see what your hands are doing. Skip the ponytail once you're comfortable.

  2. 2.Rope twist needs how many strands?

    Answer: Two strands

    Two strands only. Twist right strand clockwise into a tight cord, then cross over the left strand - repeat.

  3. 3.Rope twist key trick - twist and cross go...

    Answer: Opposite directions

    Twist clockwise, cross to the left. Both moves go in opposite directions - that opposing tension creates the corkscrew look.

  4. 4.Fishtail uses how many strands?

    Answer: Two strands

    Two strands. Take a thin section from outside edge of one, cross to join the other. Repeat alternating sides.

  5. 5.Classic three-strand braid pattern is...

    Answer: Right and left over middle

    Right over middle, then left over middle - alternating crosses all the way down. That's the whole braid.

What's next

Related collections

Curated theme pages that include this tutorial.

Weekly Digest

Liked this lifestyle tutorial?

Pick the categories you want to hear about. Weekly digest of new step-by-step tutorials. No spam, easy unsubscribe.

Send me tutorials about

We only email about new tutorials. Easy unsubscribe anytime.