1
Drape the Tie and Set the Length
0:46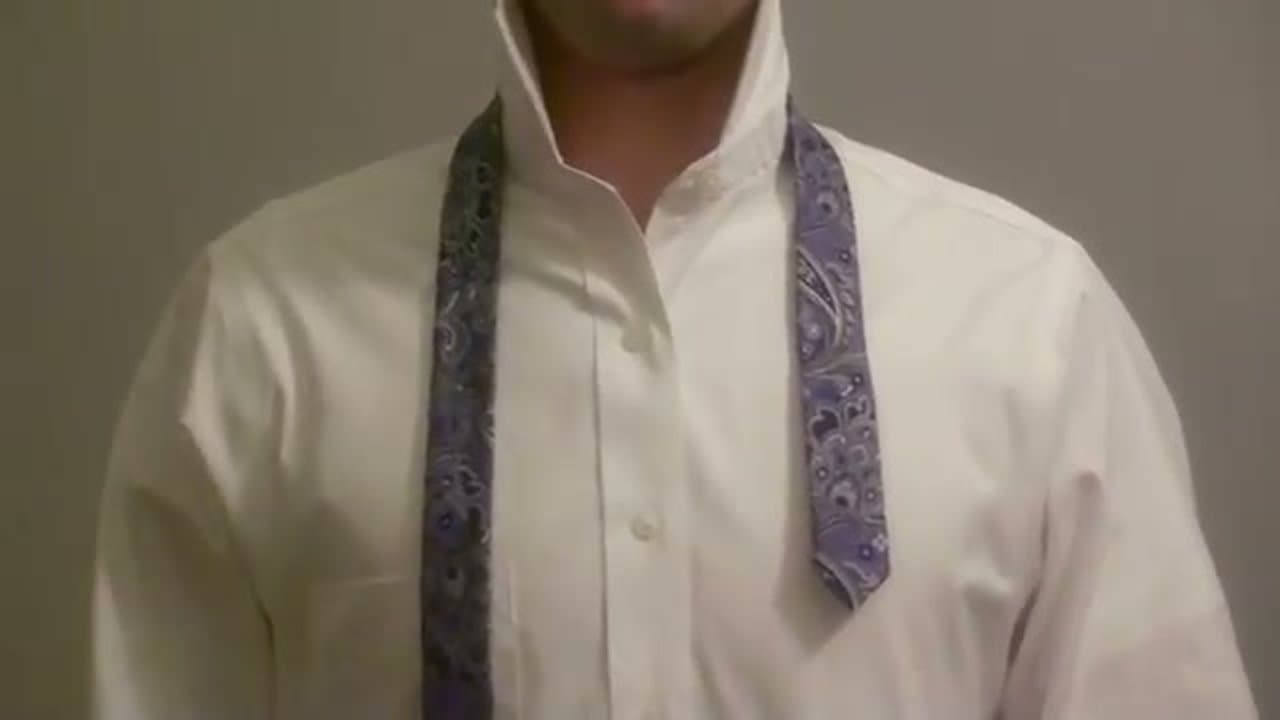
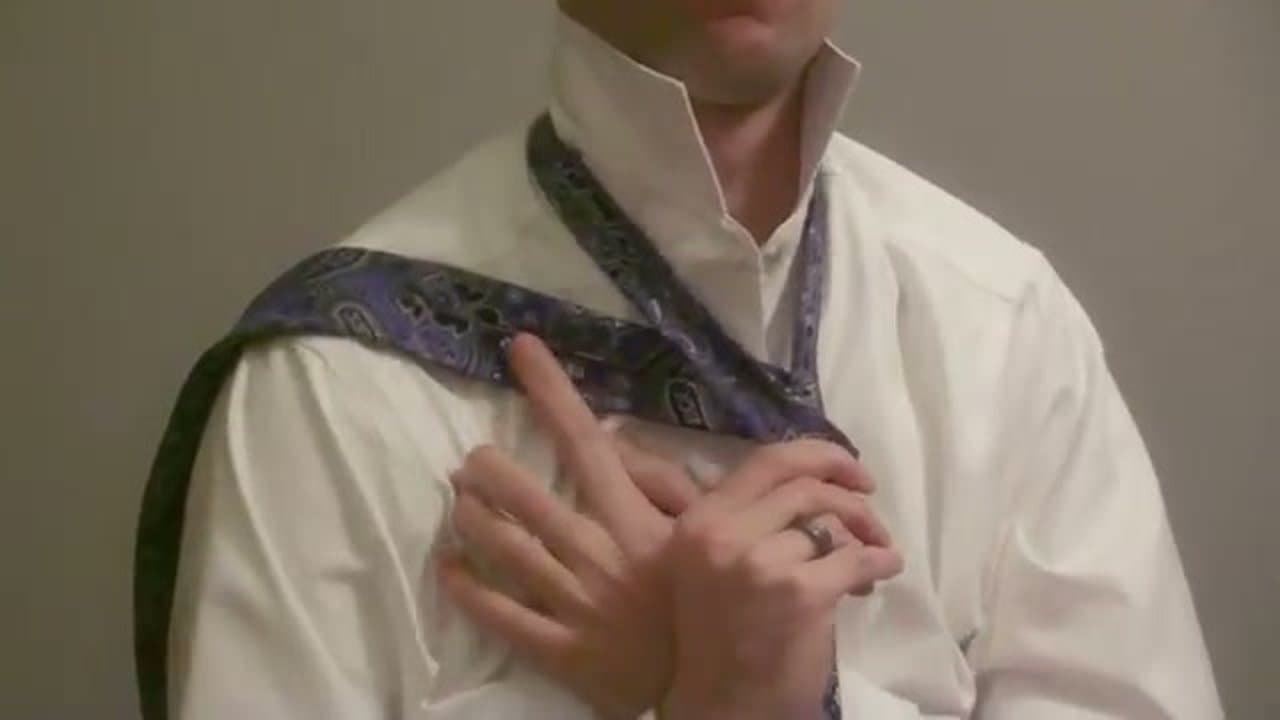
Start with the seam side down, tie flat around your neck. Pull the fat end down so the skinny end sits around your rib cage. The exact length takes practice, but for now just focus on learning the knot.
By ShowMeStepByStepPublished Updated
Based on a video by How to tie a tie.
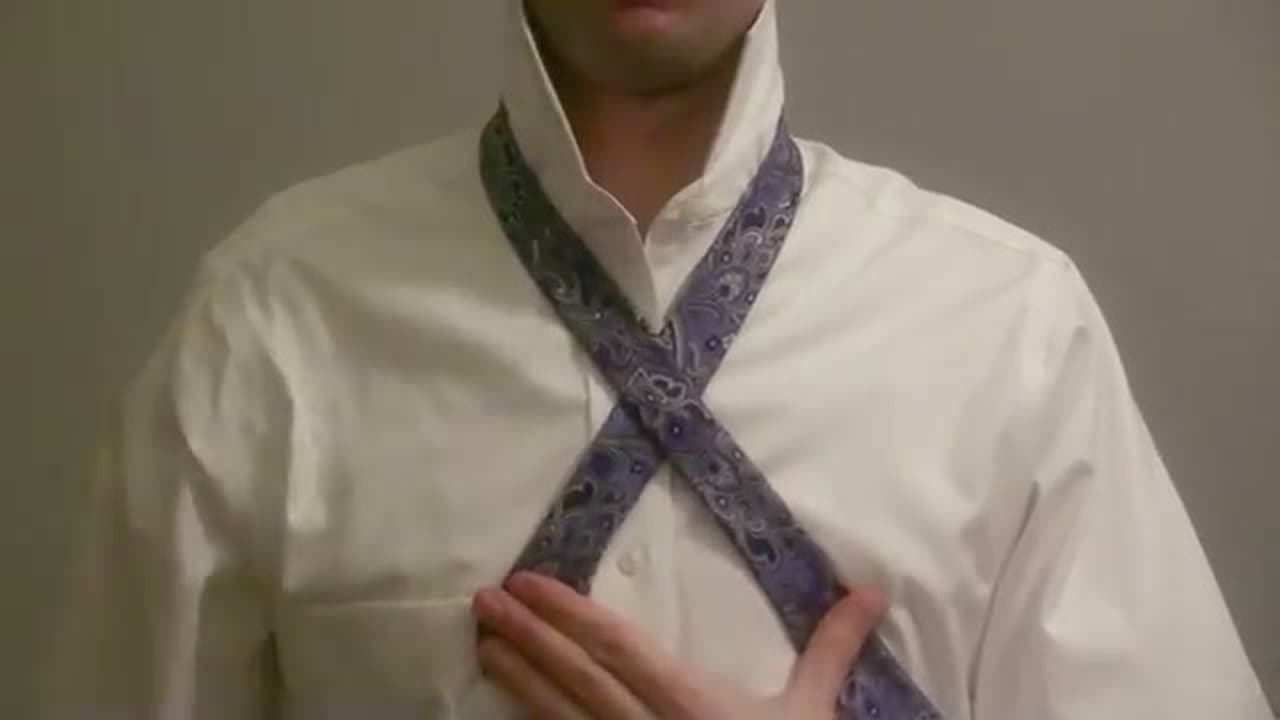
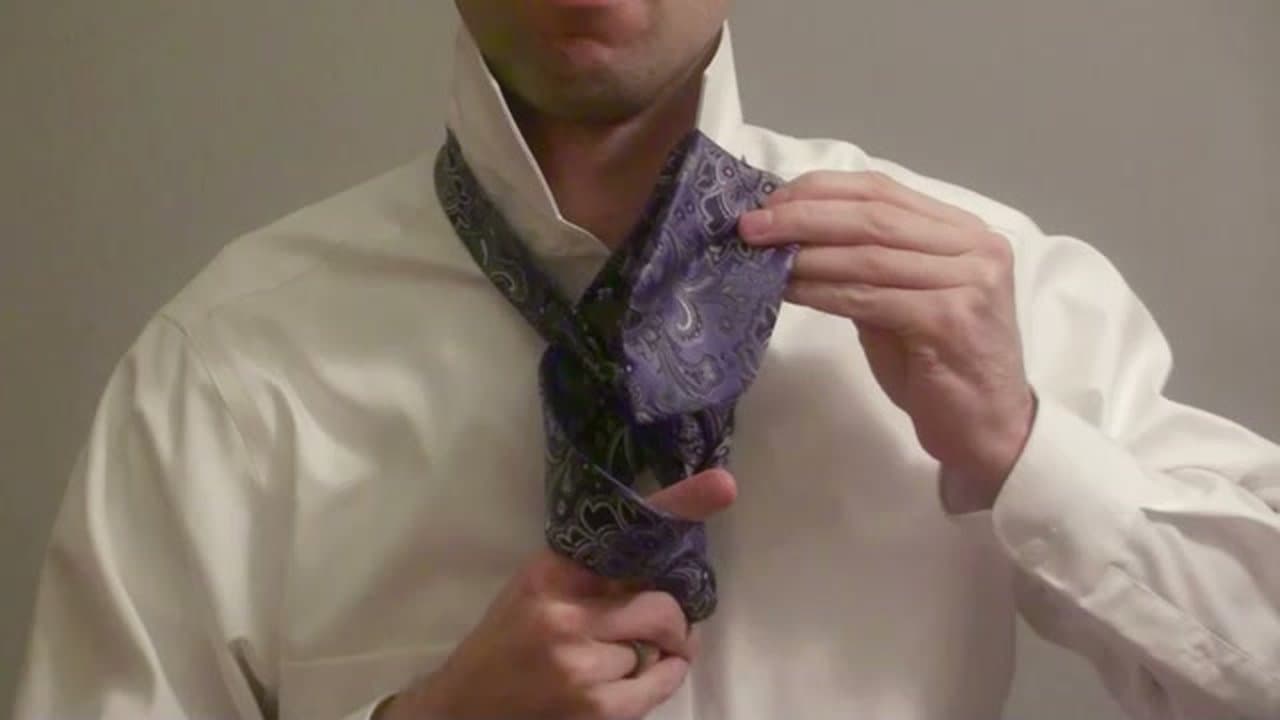
To tie a full Windsor knot: drape the tie with the fat end 12 inches longer than the thin end. Cross the fat end over, loop it up through the neck, wrap it behind and across, loop it up a second time, then feed it down through the final loop and tighten by sliding the knot to your collar.
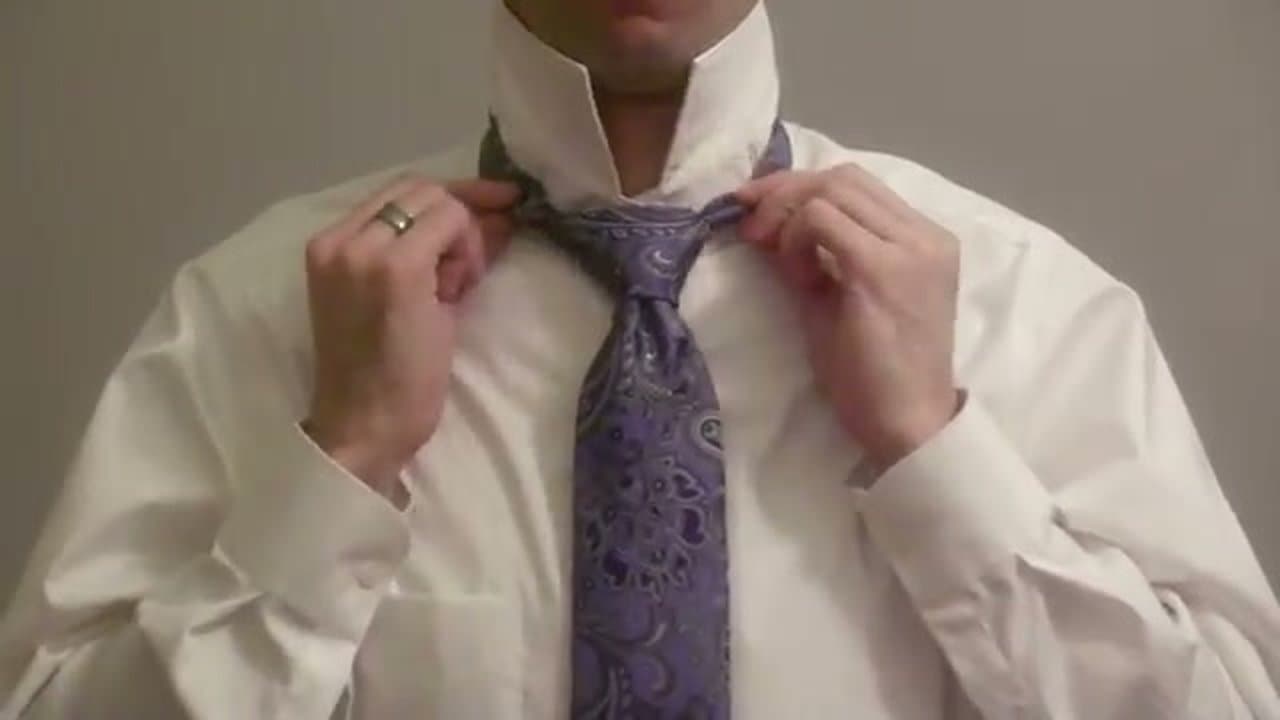
The full Windsor produces a wide, symmetrical triangle that fills a spread collar — the right knot for a formal suit, a job interview, or a black-tie event. Pair it with a sharp ironed dress shirt for the full effect, and our bow tie guide covers the black-tie alternative.
Answers to the questions we see most often about the full Windsor — when to use it instead of the half, how long the tie should hang afterwards, and the dimple trick that separates a polished knot from a flat one.
The full Windsor wraps the fat end through the neck loop twice (once on each side), the half Windsor only once. That second wrap is what gives the full Windsor its wider, more symmetrical triangle. The half is faster and lower-profile — better for narrower collars and everyday wear. Use the full when the occasion calls for a wider, more formal knot.
The full Windsor is built for a spread or cutaway collar — collars whose points sit at a wide angle from the throat and need a fatter knot to fill the space underneath. On a narrow point collar, a full Windsor will look bulky and poke out past the collar points. Stick to a four-in-hand or half Windsor on point collars.
The tip of the tie should land right at the middle of your belt buckle when you're standing straight. Too long and it looks sloppy; too short and it makes your torso look stubby. If your fat-end-to-thin-end starting offset of 12 inches gets you the wrong length, adjust by an inch or two before retying — taller men usually need 13-14 inches of fat-end overhang.
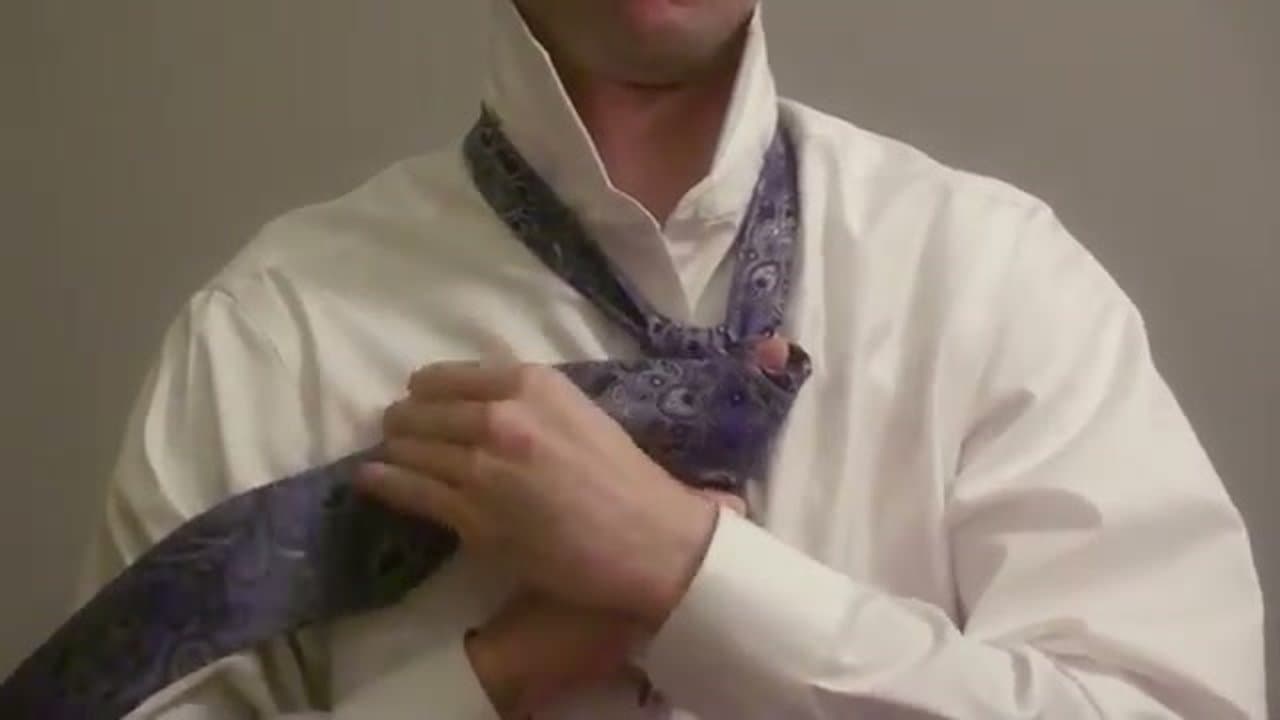
Right as you're tightening the knot for the last time, pinch the front of the tie about an inch below where the knot will sit and hold that pinch as the knot seats. The pinched fold becomes the dimple. It takes a little practice to time correctly, but a centered dimple is the visual cue that separates a knot tied with care from one yanked into place.
"Double Windsor" is informal slang for the full Windsor. Both refer to the same knot — the version that wraps through the neck twice, producing the wider triangle. There's no separate "double" knot beyond it. If a colleague says "tie it as a double Windsor," they mean exactly the same eight-step sequence above.
For most modern offices, yes. The full Windsor reads as overdressed in business-casual settings and pairs awkwardly with narrower modern collars. Reserve it for interviews, weddings, formal events, and outfits with spread collars. For daily ties, the four-in-hand or half Windsor are easier and look more proportional with everyday shirts.
Tip
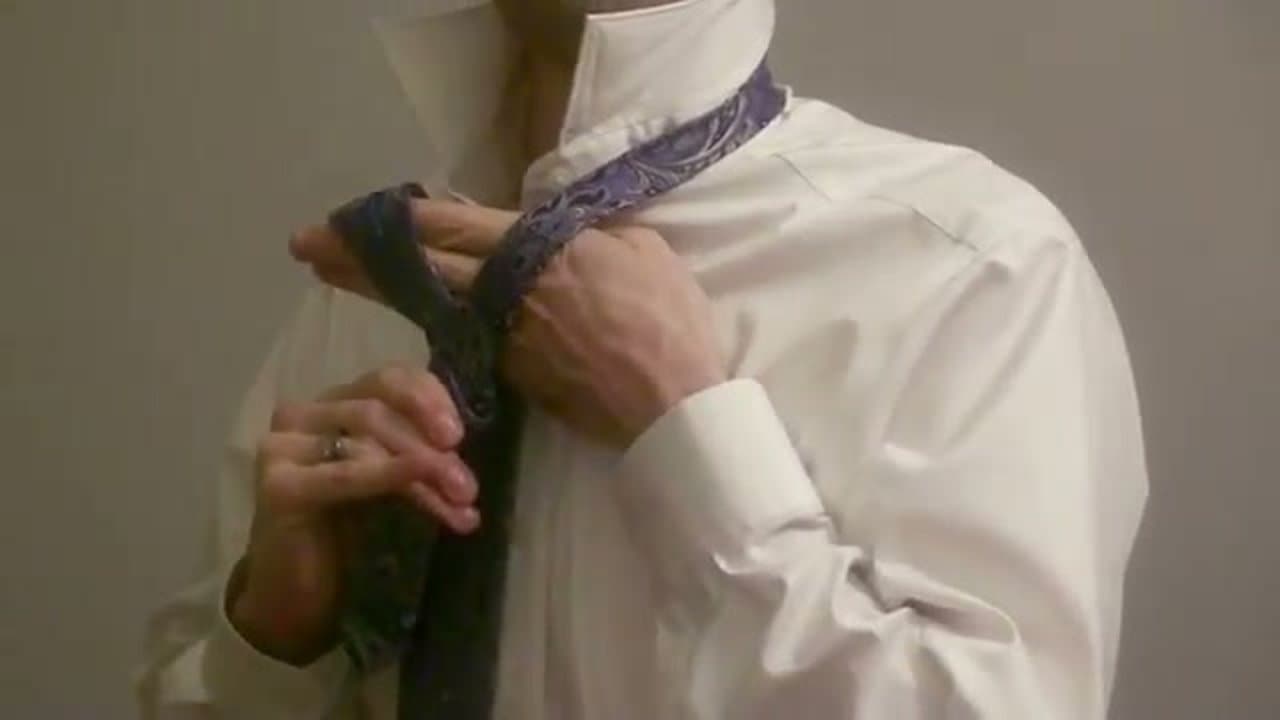
The space between the X and your neck is what he calls the "tie hole." Every step from here goes through, around, or across it.
Tip
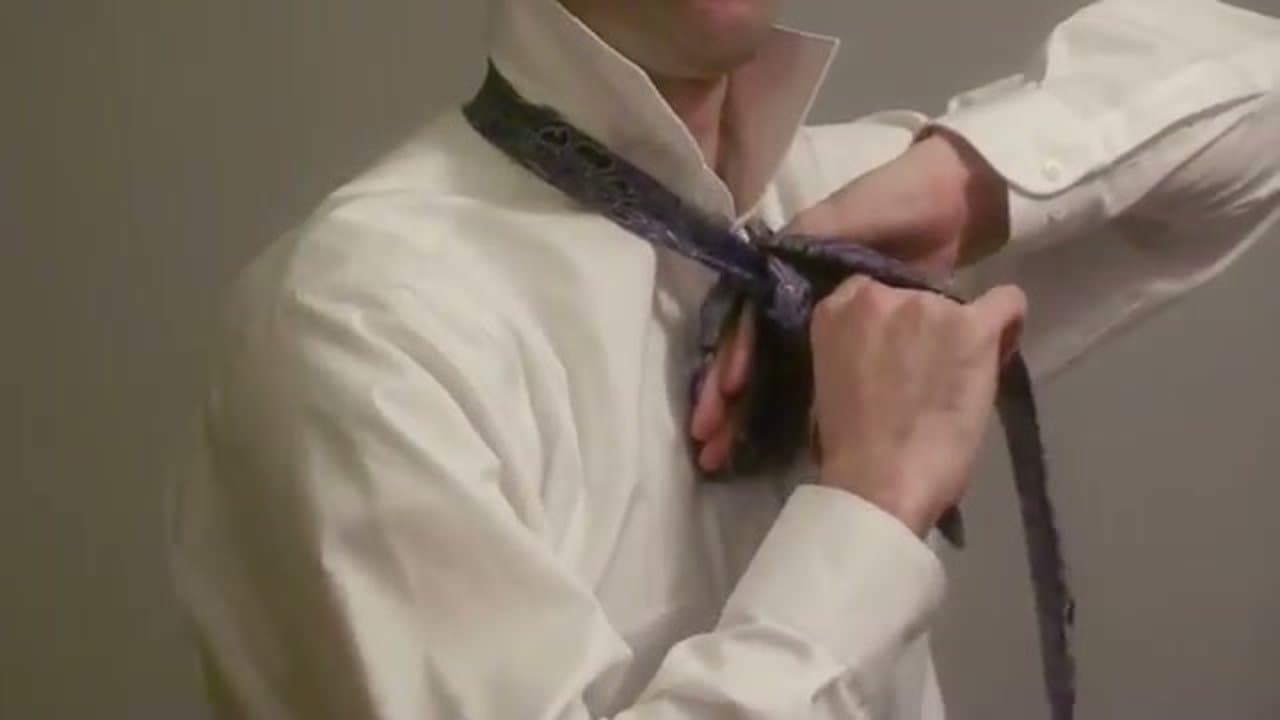
That finger is the key to the last step. Don't skip it or you'll be hunting for the right loop to thread through.
Tip
If the length is off, untie and start over with the fat end a little higher or lower. It takes a few tries to get the hang of it.
As an Amazon Associate we earn from qualifying purchases. Links on this page may be affiliate links - clicking them and buying doesn't change your price, but helps support ShowMeStepByStep.
Test your knowledge
5 quick questions covering what you just read. No signup, no score saved — just a gut check.
Quick reference
5 questions, answers, and one-line explanations. Tap to expand.
1.Fat end overhang to start?
Answer: About 12 inches
About 12 inches of overhang on the fat end gives you enough slack to wrap the full Windsor without coming up short.
2.What does your knot hand do?
Answer: Pins the center X
Knot hand pins the X in place. The working hand does the wrapping.
3.Final shape at bottom of the knot?
Answer: A symmetric triangle
Squeeze the bottom into a triangle and pull the top edges out to widen. That is the signature Windsor silhouette.
4.How do you tighten up to the collar?
Answer: Slide knot up
Anchor the skinny end and walk the knot up. Pulling on the fat end just elongates the front.
5.Which collar is the Full Windsor for?
Answer: Spread collar
The wide triangular Windsor knot fills the open spread of a spread (cutaway) collar without leaving gaps on either side.
Did this work for you?
Curated theme pages that include this tutorial.
Hand-picked next reads based on the one you just finished.
Pick the categories you want to hear about. Weekly digest of new step-by-step tutorials. No spam, easy unsubscribe.
Send me tutorials about