How to Regrow Celery from a Celery Base

GardeningEasy5:137 stepsBrowse more →
Also in:Adulting

By ShowMeStepByStepPublished

Based on a video by The Ripe Tomato Farms.

Most kitchen-scrap regrowing is more party trick than payoff. Celery breaks that rule. It roots so easily and gives back so much that Ripe Tomato Farms calls it easier to grow from a cut stalk than from seed. You take the base you would normally toss, set it in a little water, and a brand-new plant pushes up from the middle.

Here is the whole arc. You cut the bunched base a couple inches from the bottom, peel off the tired outer stalks, and stand it in a shallow dish of water. Within a week a tiny celery plant appears dead center. Roots follow, and once they show, the plant is ready for a pot of soil where it keeps growing until you want to harvest.

It is a safe, slow-motion project that kids love to check on each morning, and seasoned gardeners get a kick out of it too. Celery is a cold-weather crop, so spring, fall, or a sunny windowsill all work. If you catch the growing bug, try starting something from scratch next with growing tomatoes from seed.

Step-by-Step Guide

7 steps · about 5 minutes.Check off each step as you go and your progress saves automatically.

1

Step 1: Cut the Celery Base

0:58
Step 1: Step 1: Cut the Celery Base

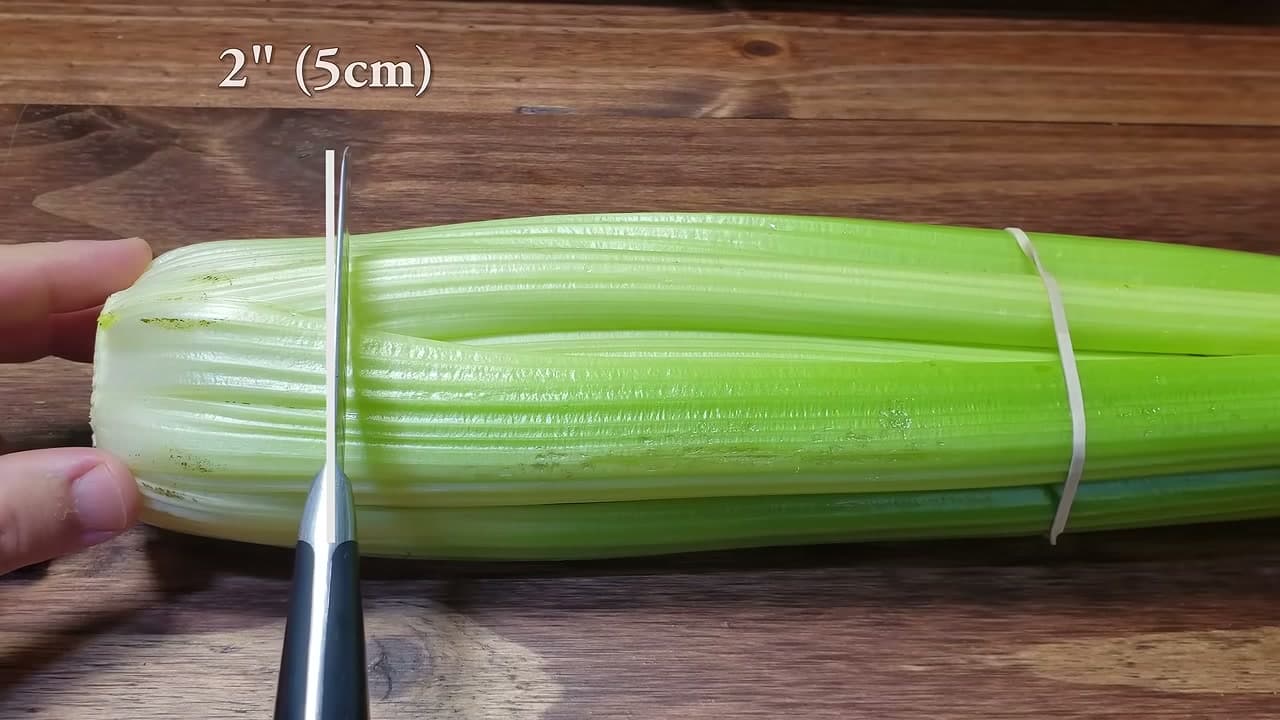
Start with a full bunched head of celery, either from the store or pulled from your garden. Loose individual stalks won't work here. You need the bunched base because that is where the root collar lives, and the root collar is what regrows.

Make your cut about 2 to 3 inches up from the very bottom. Anywhere in that range is fine. Use a real knife with some heft to it, not the tiniest blade in the drawer, so you get one clean cut straight through. Set the tall stalks aside for snacking and keep the base.

Tip

Watch this step Keep the cut level and square across the base. A slanted cut leaves part of the collar higher and dry, which can slow the new growth on that side.
2

Step 2: Peel Off the Old Outer Stalks

1:30
Step 2: Step 2: Peel Off the Old Outer Stalks

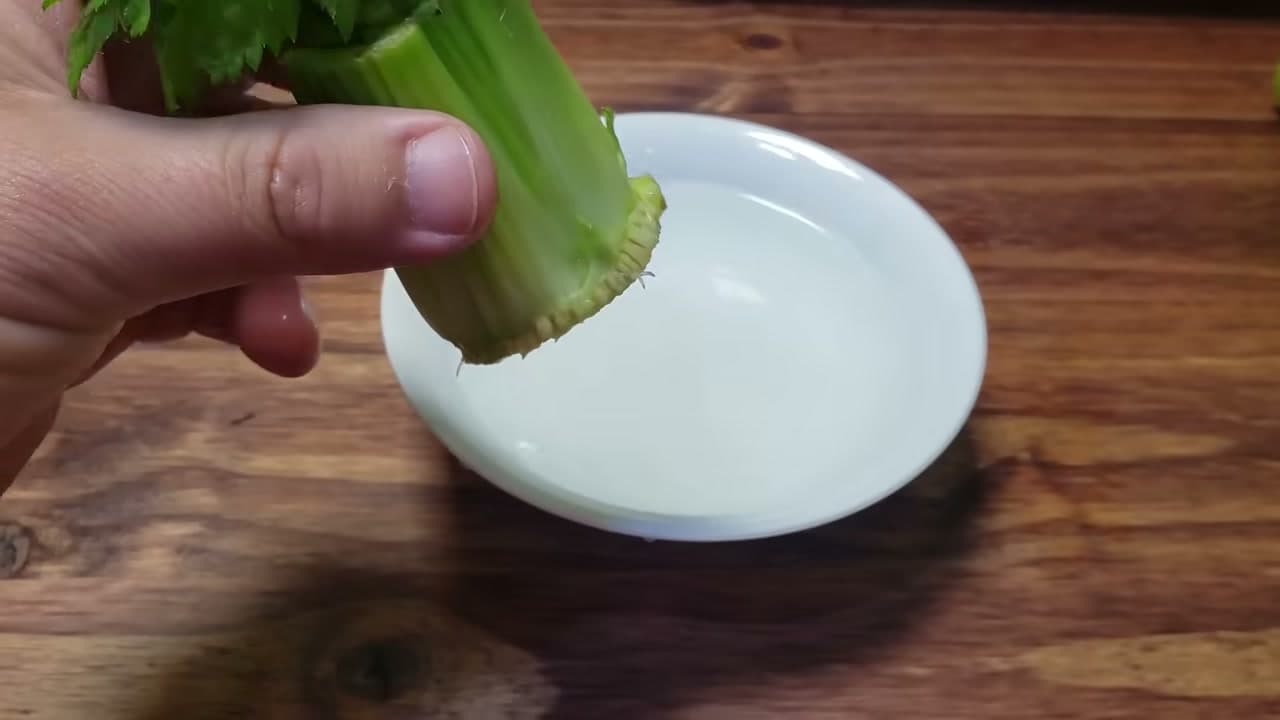
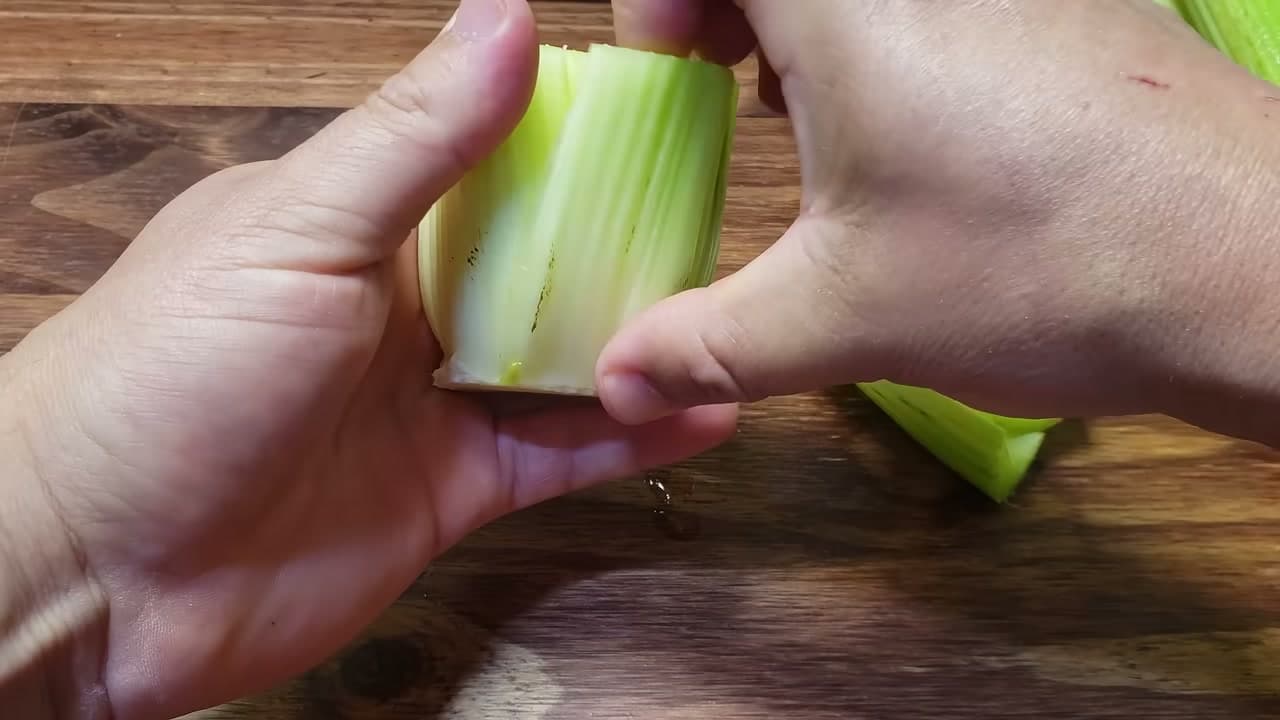
This part is optional, but worth doing. The outermost stalks are the oldest, and they are going to rot in the water anyway, so pull them off before they cause trouble.

Work your way around the base and remove the outer three or four. They peel away naturally with a gentle tug, so you don't need a knife. Don't strip it down too far. You just want to clear off the tired outside layers and leave a firm, clean base standing.

Tip

Watch this step If a stalk resists and won't peel cleanly, leave it. Forcing it can tear into the collar. Only take the ones that come away easily.

Products used in this step

3

Step 3: Stand the Base in a Dish of Water

1:43
Step 3: Step 3: Stand the Base in a Dish of Water

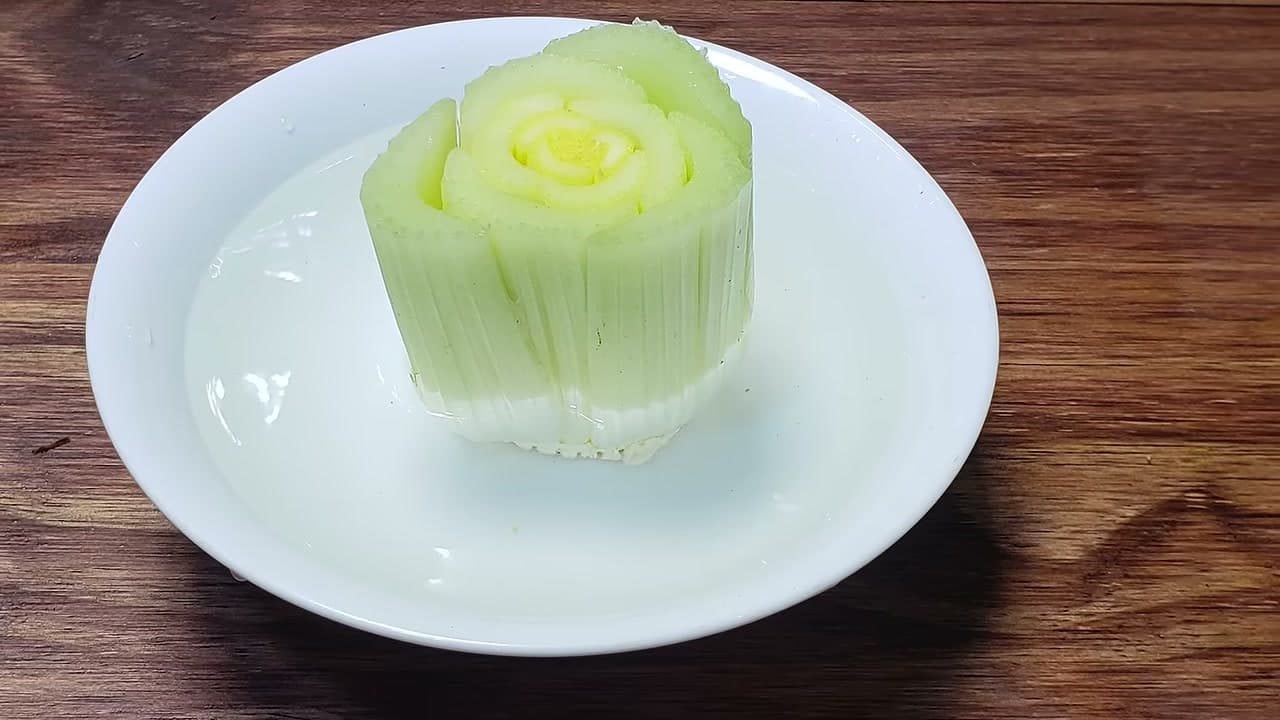
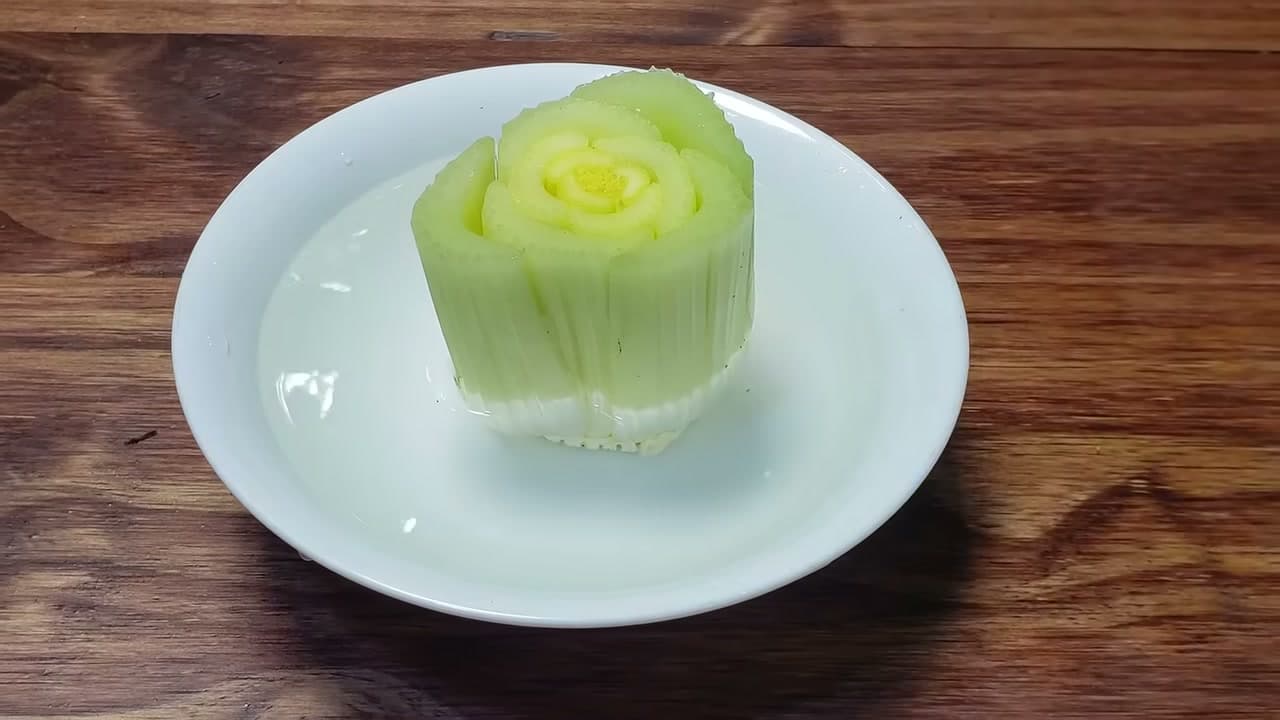
Set the trimmed celery base cut-side up in a shallow dish. Add enough water to cover at least the bottom inch of the base. A wide, low dish works better than a tall glass because it keeps the base upright and the growing tip in the air.

That's the whole setup. Put it somewhere with a bit of light and go do other things for a couple of days. The base handles the rest on its own.

Tip

Watch this step After two days you may see brown oxidized scarring around the cut edge. That is normal and it will not spread up into the growing tip, so don't panic and toss it.

4

Step 4: Change the Water Every Few Days

2:02
Step 4: Step 4: Change the Water Every Few Days

Clean water is the one thing that makes or breaks this. Every three days, pour out the old water and refill the dish with fresh. It takes ten seconds and it keeps the base from getting slimy or funky-smelling.

Give the dish a quick rinse when you refill it. Keeping the water clean this way is the difference between a base that rots and one that pushes out healthy new growth.

Tip

Watch this step If the water looks cloudy before the three days are up, change it early. There is no downside to fresher water, and cloudiness is the first sign of rot.

Products used in this step

5

Step 5: Watch a New Plant Sprout from the Center

2:28
Step 5: Step 5: Watch a New Plant Sprout from the Center

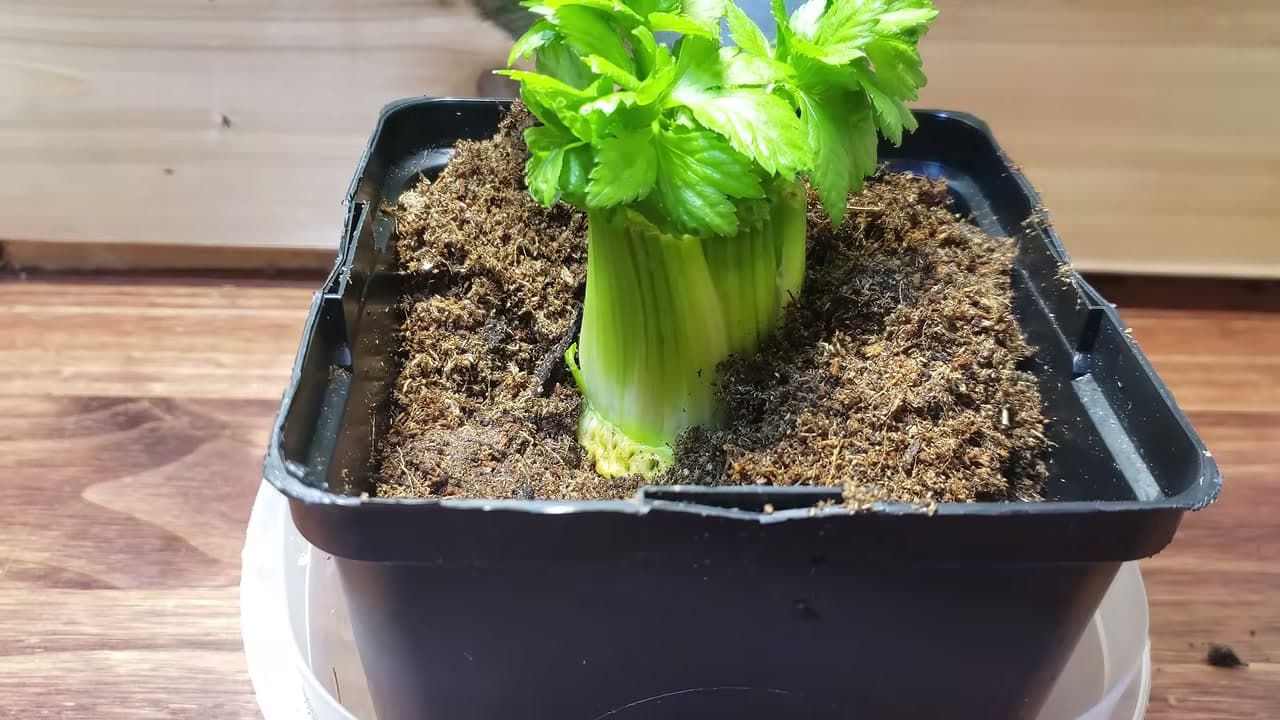
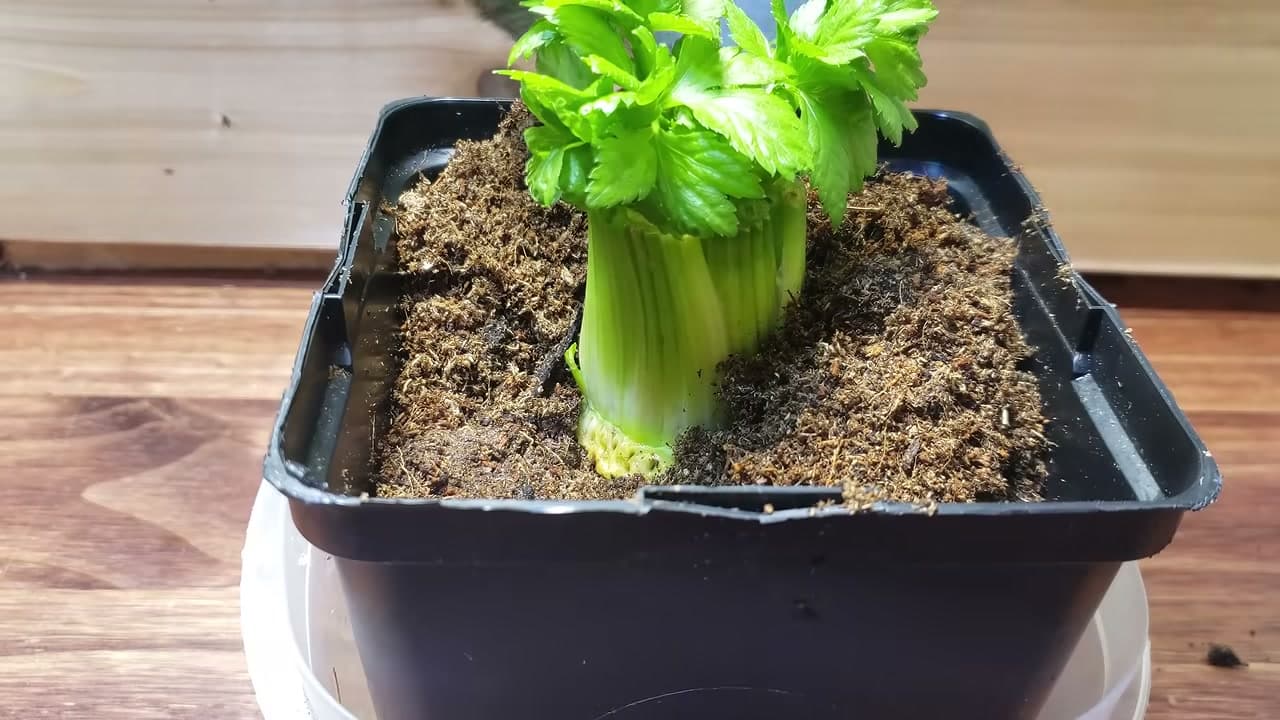
Around the one-week mark, look at the center of the base. A tiny, fully formed celery plant grows right out of the middle of the old one. It is pale green and small at first, and it is genuinely fun to watch it appear.

Over the next several days that center foliage takes off. By roughly two weeks from your first cut the top is exploding with new leaves. This is the payoff moment that makes the whole project worth it.

Tip

Watch this step Roots often lag behind the top growth. Celery is not a heavy rooter, so a couple of small root stubs at the sides is plenty of signal that it is thriving.

Products used in this step

6

Step 6: Fill a Pot with Potting Mix

3:15
Step 6: Step 6: Fill a Pot with Potting Mix

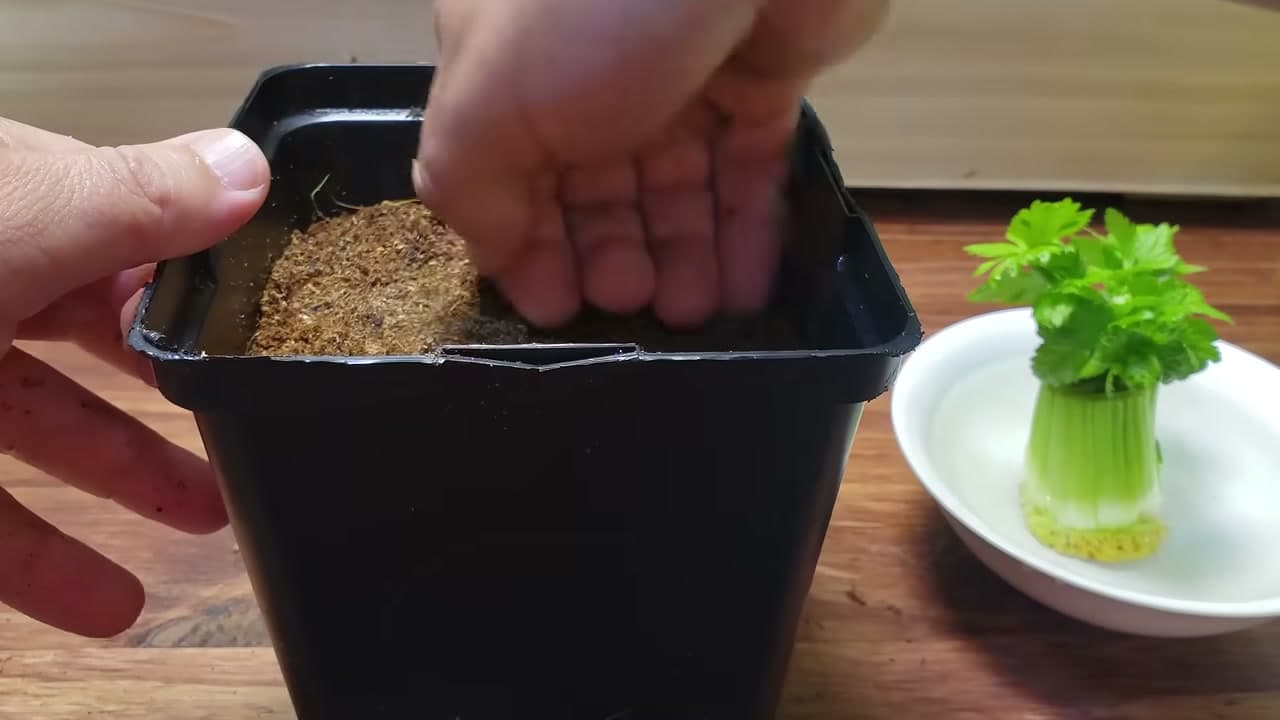
Once a few roots have formed at the sides, it is time to plant. A one-gallon pot is plenty. Celery is shallow rooted, so you don't need to go any bigger than that.

Fill the pot right to the top with a light, airy organic potting mix that is rich in compost. Then press the soil down about 20 percent so it settles and holds together. Before you plant, soak the whole pot for about an hour. Those roots have only known water, so wet soil eases the move and helps them avoid transplant shock.

Tip

Watch this step Skip heavy garden dirt in a pot. It compacts and stays soggy. A bagged organic potting mix stays loose and drains well, which shallow celery roots need.

7

Step 7: Plant and Firm the Celery In

3:52
Step 7: Step 7: Plant and Firm the Celery In

Set the rooted celery on top of the soaked soil and hold it in place. Add more of the same potting mix around the base until the plant sits about an inch deep. Then press the soil down firmly all around so the little guy is snug.

You can push down harder than you think. Without a big root system to anchor it yet, that firm packing is what keeps the plant standing upright. If the pot is going outside, keep an eye on it until the roots grab hold. From here it grows on, ready to harvest at whatever length you like.

Tip

Watch this step Celery likes cool weather. If you set the pot outside in summer heat, give it afternoon shade so the new transplant doesn't wilt while it settles in.

Products Used

☐ The Checklist

How to Regrow Celery from a Celery Base

Tools
4
Materials
4
Steps
7
Video
5 min

Tools we recommend

Your Guide

The Ripe Tomato Farms

As an Amazon Associate we earn from qualifying purchases. Links on this page may be affiliate links - clicking them and buying doesn't change your price, but helps support ShowMeStepByStep.

Tags

Sunday How-To

New gardening tutorials, every Sunday

One short email with the week's best step-by-step guides. Free, no spam, unsubscribe anytime.

Did this work for you?

What's next

Related collections

Curated theme pages that include this tutorial.

Weekly Digest

Liked this gardening tutorial?

Pick the categories you want to hear about. Weekly digest of new step-by-step tutorials. No spam, easy unsubscribe.

Send me tutorials about

We only email about new tutorials. Easy unsubscribe anytime.