How to Mulch a Garden Bed (5 Mulch Types Compared)

By ShowMeStepByStepPublished Updated

Based on a video by Growing In The Garden.

Mulch is the closest thing a gardener has to a magic trick. A 2-3 inch layer across your bed regulates soil temperature, cuts down how often you water, smothers weed seeds before they sprout, and breaks down into the soil as organic matter. It's cheap, it works, and the only way to mess it up is to pile it against your plant stems.

Angela from Growing In The Garden walks through every common mulch type - wood chips, straw, shredded leaves, compost, and grass clippings - with the strengths and trade-offs of each. You'll learn when to put mulch down (after the soil warms, not on cold wet ground), how deep (2-3 inches, never more), and the one rule that protects young trees: keep mulch pulled back from the trunk to avoid the mulch volcano that traps moisture and kills bark.

For more spring garden chores, see our guides on deadheading roses, growing tomatoes from seed, and pruning tomato plants.

Step-by-Step Guide

1

Step 1: Know the Four Benefits of Mulching

1:00
Step 1: Step 1: Know the Four Benefits of Mulching

Mulch does four things at once and that's why every experienced gardener swears by it. First, it regulates soil temperature - the layer shades the ground from direct sun in summer and insulates it from cold snaps in spring and fall. Plant roots are happiest at a steady temperature, and mulch evens out the highs and lows.

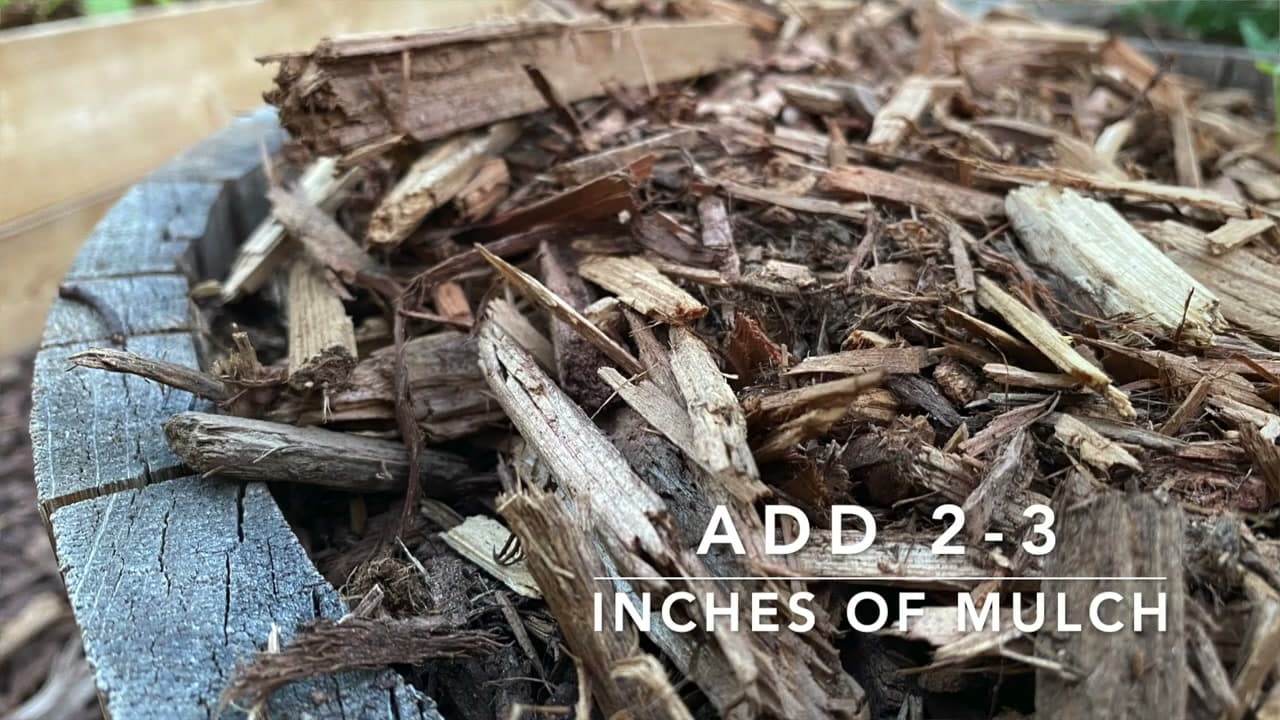
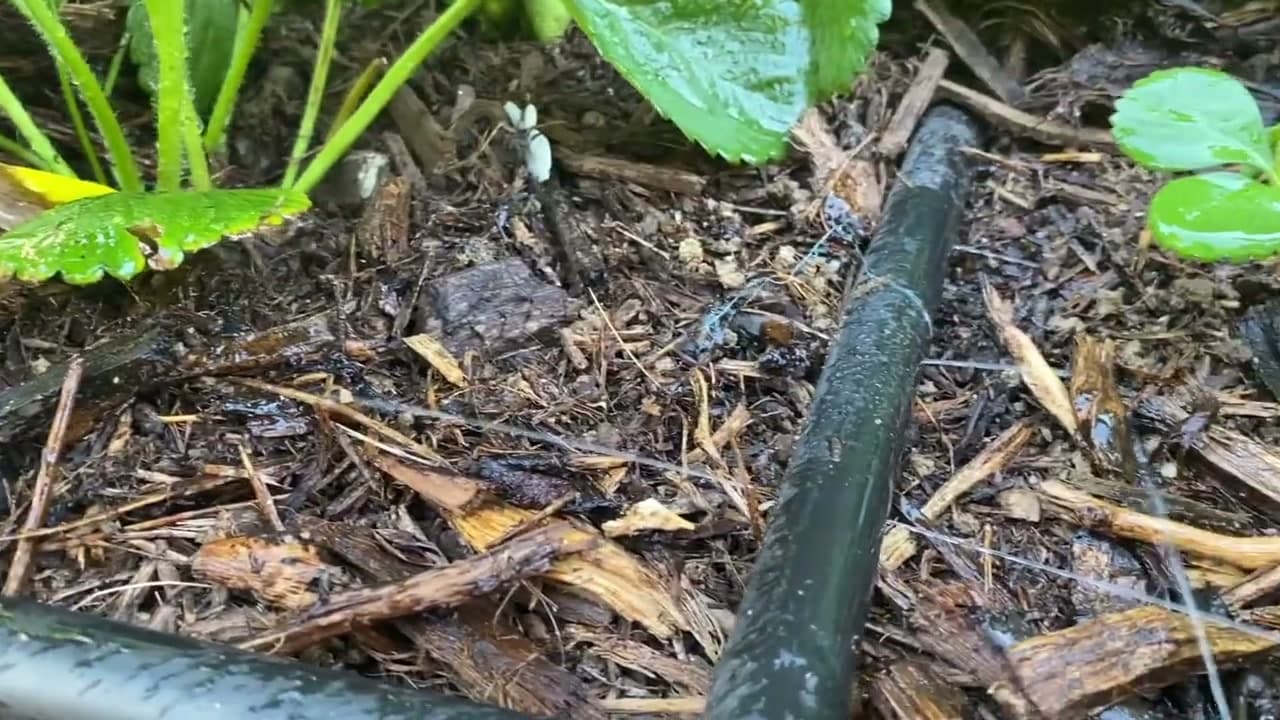
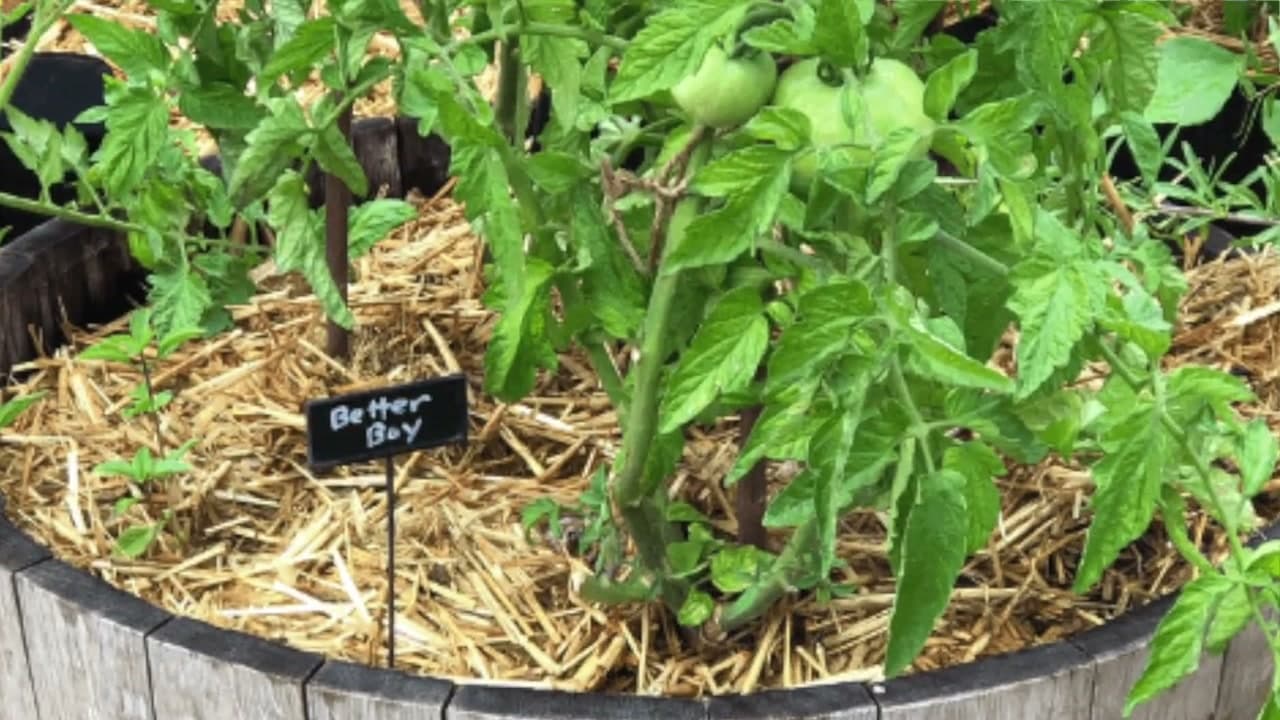
Second, it slows evaporation. A 2-3 inch layer cuts how often you water by roughly half in hot weather. Third, it blocks the sunlight weed seeds need to germinate, so the weeds that do sprout are easier to pull. Fourth, natural mulches like wood chips, straw, and shredded leaves break down into the soil as organic matter, which feeds the worms and microbes that build healthy dirt over time.

All four benefits work together. Better soil temperature plus more moisture plus less weed pressure equals plants that grow faster with less effort from you.

Tip

If you only do one new thing in your garden this year, mulch your beds. The benefits compound over a season and you'll spend less time weeding and watering than you ever have.

2

Step 2: Mulch After the Soil Warms - Not Before

8:30
Step 2: Step 2: Mulch After the Soil Warms - Not Before

The biggest timing mistake new gardeners make is mulching too early in the spring. Mulch on cold wet soil acts like a blanket - it keeps the ground cold and damp for weeks longer than bare soil would. Cold roots grow slowly, so an early mulch can actually delay your tomatoes and peppers from getting going.

Wait until daytime temperatures are consistently in the 70s and your soil has warmed up. Plant your seeds or transplants first. Let the seedlings push up several inches above the soil line. Once they're established and the ground is warm, lay the mulch around them.

If you mulch over fresh seed, the seedlings either can't push through or come up so weak they fail. The order matters: plant, sprout, then mulch.

Tip

In cold-climate gardens, hold off on mulching until late May or early June. In hot climates like the low desert, mulch right after your spring planting goes in - the soil is already warm and the bigger risk is heat and evaporation.

3

Step 3: Pick a Mulch Type That Matches Your Bed

2:42
Step 3: Step 3: Pick a Mulch Type That Matches Your Bed

There are five common mulch types and each has a place. Wood chips and bark last the longest - one application can hold up two or three years. Good for pathways, around trees, and on perennial beds. Often free from arborists or chip-drop services.

Composted mulch (sometimes called city mulch) has a chunkier texture than finished compost and is perfect on top of raised beds - it breaks down slowly and adds nutrients. Straw is cheap, fast to spread, and breaks down in one season. Just check that it's pesticide-free. Shredded leaves are free if you have a lawn - run the mower over fallen leaves and the chopped pieces stop matting. Compost is the most nutrient-dense option but the finest-textured; great for raised beds.

Grass clippings work too if your lawn hasn't been treated with weed killer or chemical fertilizer. Spread them in thin layers and let them dry first or they'll mat into a slimy crust.

Tip

For raised beds, compost or composted mulch wins. For pathways and tree rings, wood chips win. For vegetable rows, straw is hard to beat for price and ease.

4

Step 4: Prep the Bed - Weed and Water First

3:20
Step 4: Step 4: Prep the Bed - Weed and Water First

Mulch smothers small weeds but established weeds with deep roots will push right through it. Pull what you can see before you mulch - tug from the base so you get the root, not just the top. A weeding fork or a hori hori knife makes quick work of dandelions and grass clumps.

Then water the bed thoroughly. Mulch is a moisture trap, so you want water in the soil before you cap it with the layer. Soak the bed until the top 4-6 inches are damp. Once the mulch is down, that moisture stays put for days longer than it would on bare soil.

If your bed has serious weed pressure, lay a sheet of cardboard or biodegradable landscape fabric on the soil before the mulch goes down. The cardboard smothers existing weeds, breaks down within a season, and the mulch sits on top looking tidy.

Tip

Skip the plastic landscape fabric. It traps water on top, breaks apart into shreds after a few years, and prevents mulch from feeding the soil. Cardboard or paper-based fabric does the job without the long-term mess.

5

Step 5: Spread 2-3 Inches Deep, Not More

9:55
Step 5: Step 5: Spread 2-3 Inches Deep, Not More

Two to three inches is the sweet spot. Less than 2 inches doesn't suppress weeds well and dries out fast. More than 3 inches starts to suffocate roots - the layer gets so thick that water has a hard time reaching the soil, and oxygen has a hard time reaching the roots.

Shovel mulch into a wheelbarrow, dump small piles around the bed, then spread it out with the back of a garden rake or a mulch fork. Aim for a consistent depth across the whole bed - sloppy spreading leaves bare patches where weeds will pop up and thick mounds where roots will struggle.

A quick check: if you push a finger through the mulch and feel soil at the first knuckle, you're at 2-3 inches. If your finger doesn't reach the soil, the layer is too deep.

Tip

One cubic yard of mulch covers roughly 100 square feet at 3 inches deep. For a 4 x 8 raised bed (32 sqft), that's about a third of a yard, or 6-8 bags of the 2 cu ft size sold at garden centers.

6

Step 6: Keep Mulch 2-3 Inches Away From Stems and Trunks

7:40
Step 6: Step 6: Keep Mulch 2-3 Inches Away From Stems and Trunks

This is the rule that protects your plants from the work you just did. Pull the mulch back from the base of every plant stem and tree trunk, leaving a 2-3 inch ring of bare soil around each. Mulch piled against bark traps moisture and invites rot, fungus, voles, and termites.

The classic mistake is the mulch volcano - a cone of mulch piled high against the trunk of a young tree. It looks tidy but it suffocates the trunk's bark and rots the cambium underneath. Most young trees killed by landscapers die from mulch volcanoes, not bugs or weather.

The right shape is a doughnut. A flat ring of mulch around the tree, with bare soil visible right at the base. Same principle for tomatoes, peppers, perennials, anything with a stem - leave the stem dry and breathable.

Tip

If you inherited a mulch volcano around a tree on your property, pull the mulch back this season. The tree should recover if the bark hasn't already rotted. Don't replace what you remove - bare soil at the trunk is healthy.

7

Step 7: Top Up Once or Twice a Year

9:15
Step 7: Step 7: Top Up Once or Twice a Year

Organic mulches break down into the soil - that's the whole point - which means the layer thins out over a growing season. Most gardens benefit from a refresh twice a year: a layer in spring after the soil warms, and a top-up in fall after summer crops come out.

Each refresh only needs to bring the layer back to 2-3 inches. If you put down 3 inches in spring and most of it has broken down by October, add another inch or two in fall. Don't pile new mulch on top of a layer that hasn't decomposed - you'll end up with 5 inches of compacted material that water can't penetrate.

In cold climates, a slightly thicker fall mulch insulates perennials over winter. In hot climates, the spring mulch is the critical one - it gets you through the brutal months when evaporation is highest and the soil temperature spikes.

Tip

Wood chips on pathways last 2-3 years between top-ups. Straw on vegetable beds needs replacing every season. Plan your purchases accordingly so you're not buying mulch you don't need.

8

Step 8: Skip Dyed Mulch in Vegetable Gardens

10:00
Step 8: Step 8: Skip Dyed Mulch in Vegetable Gardens

The bagged red, black, or brown mulch sold cheap at big-box stores is usually dyed reclaimed wood, sometimes including ground-up pallets and construction debris. The dyes are typically iron-oxide based and the wood itself may carry contaminants. Fine for ornamental beds along your driveway. Not fine for beds where you grow food.

Stick with natural-color wood chips, straw, shredded leaves, or composted mulch in your vegetable garden, herb garden, or anywhere fruit is grown. Natural mulches break down into the soil and feed it. Dyed mulches break down into the soil too, but with whatever's in them.

If you can't tell whether a bagged mulch is dyed, check the label. Anything that says color treated, color enhanced, or has a price way below natural cedar or pine is almost certainly dyed reclaimed wood.

Tip

For ornamental beds where dyed mulch is OK, look for the Mulch and Soil Council certification logo on the bag. The MSC tested-product list confirms the dye and wood source are non-toxic.

Products Used

☐ The Checklist

How to Mulch a Garden Bed (5 Mulch Types Compared)

Tools
4
Materials
2
Steps
8
Video
10 min

Your Guide

Growing In The Garden

As an Amazon Associate we earn from qualifying purchases. Links on this page may be affiliate links - clicking them and buying doesn't change your price, but helps support ShowMeStepByStep.

Tags

Test your knowledge

Did the lesson stick? Find out in 2 minutes.

5 quick questions covering what you just read. No signup, no score saved — just a gut check.

Quick reference

Key takeaways from How to Mulch a Garden Bed (5 Mulch Types Compared)

5 questions, answers, and one-line explanations. Tap to expand.

  1. 1.Right mulch depth across the bed?

    Answer: 2 to 3 inches

    Less than 2 = doesn't suppress weeds. More than 3 = suffocates roots; water/oxygen can't reach the soil.

  2. 2.When should you mulch in spring?

    Answer: After soil warms

    Mulch on cold wet soil acts like a blanket - keeps ground cold for weeks. Wait until daytimes are in the 70s.

  3. 3.Mulch type that lasts the LONGEST per application?

    Answer: Wood chips/bark

    One application holds 2-3 years. Good for pathways, around trees, perennial beds. Often free from arborists.

  4. 4.What's the 'mulch volcano' mistake?

    Answer: Cone piled at trunk

    Cone piled high against young tree trunks - suffocates bark and rots cambium. Most young trees killed by bad landscapers.

  5. 5.Which mulch to AVOID in vegetable gardens?

    Answer: Dyed red/black bagged

    Dyed reclaimed wood (often ground pallets/construction debris). Fine for ornamental beds, not food. Stick to natural.

What's next

Related collections

Curated theme pages that include this tutorial.

Weekly Digest

Liked this gardening tutorial?

Pick the categories you want to hear about. Weekly digest of new step-by-step tutorials. No spam, easy unsubscribe.

Send me tutorials about

We only email about new tutorials. Easy unsubscribe anytime.