How to Make Stepping Stones with a Pebble Mosaic

By ShowMeStepByStepPublished Updated

Based on a video by Wood Glueru.

Stepping stones are one of those projects that look so much better when you make them yourself. A store-bought paver does the job, but a pebble mosaic stone you cast in your driveway becomes the thing visitors stop to look at on the way down the path.

This build follows Wood Glueru, who knocks together a simple plywood form, pours a square slab of concrete, and presses river pebbles into the wet mix to lay out a flowing color-banded pattern. The finished stone gets dropped into a side-yard walkway alongside others to build out a full mosaic path.

The technique is forgiving. You don't need a perfect form or expensive stones - a $30 stack of cement and a bucket of pebbles from a landscape supply yard gets you a handful of one-of-a-kind stepping stones for the cost of a single store-bought paver. Work outside, give yourself a long afternoon, and have a beer waiting for the cure.

Step-by-Step Guide

1

Step 1: Build a Simple Plywood Form

0:08
Step 1: Step 1: Build a Simple Plywood Form

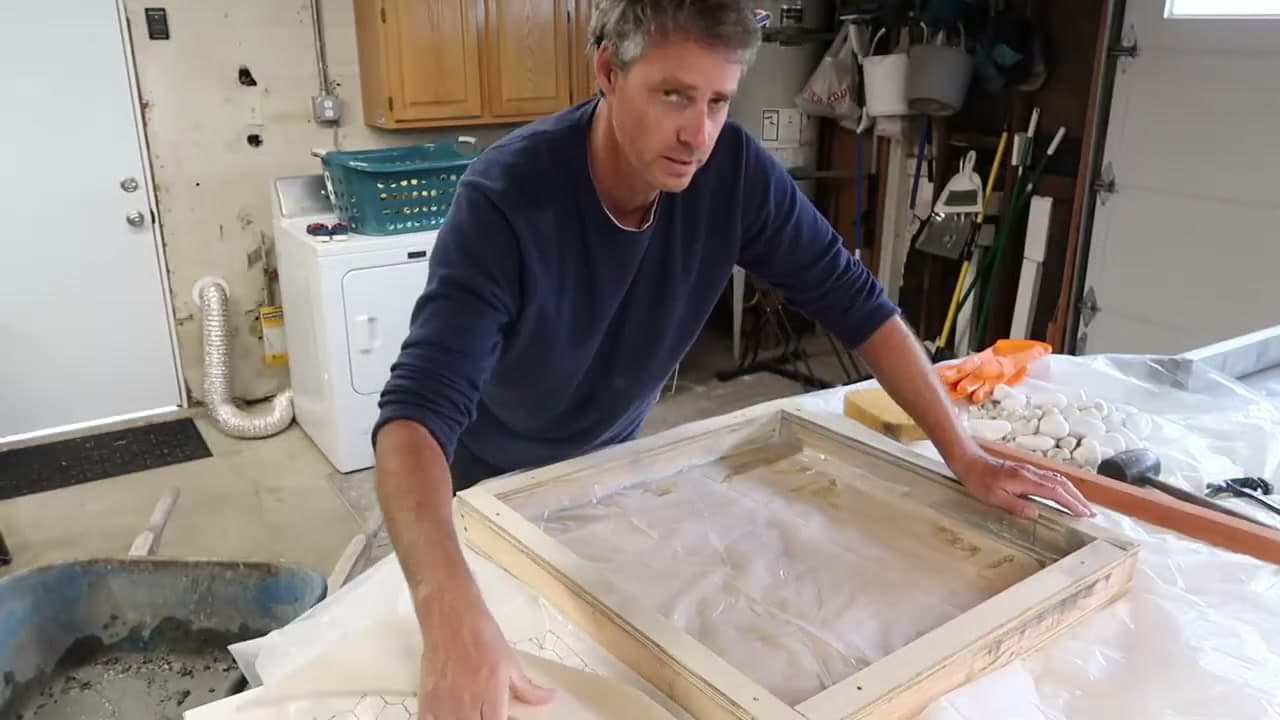
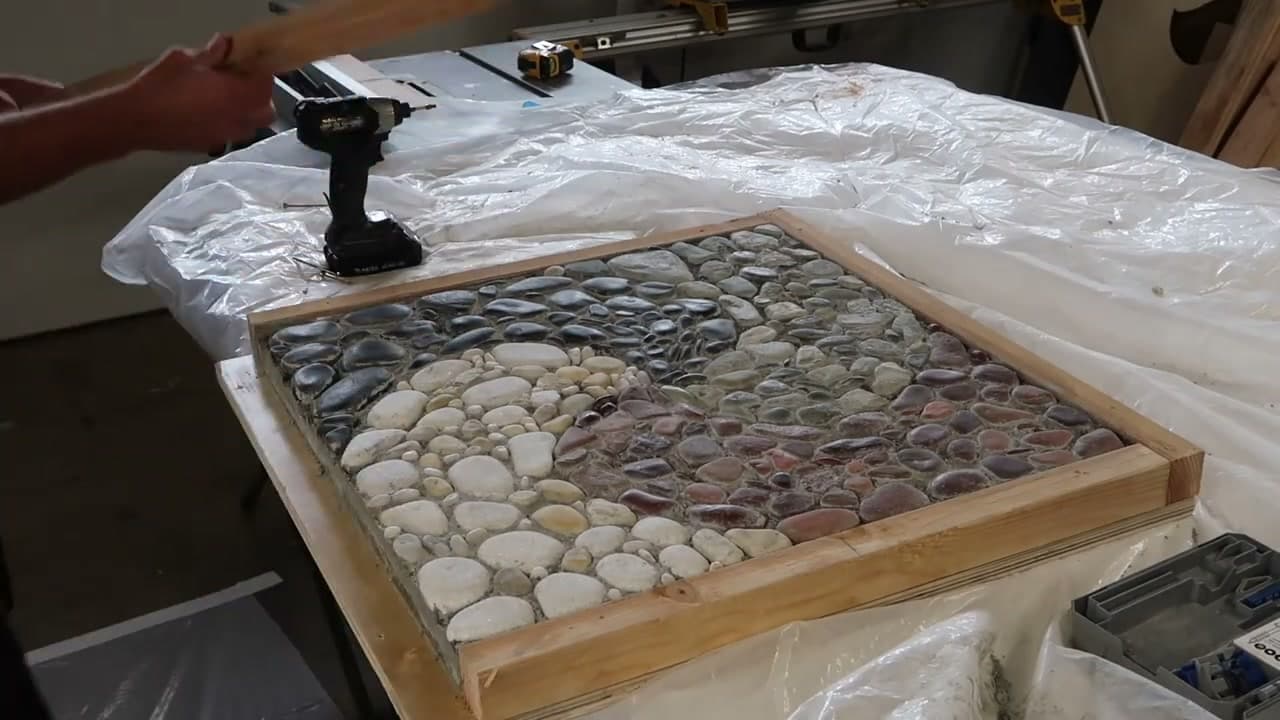
Knock together a square form from scrap plywood and 2x4 strips. The bottom is a flat plywood panel; the sides are four short pieces screwed in from underneath. Aim for a stone roughly 16 to 18 inches square and about an inch and a half deep.

The trick is keeping your screws accessible. When the slab cures you'll back the screws out to release the form, so don't bury the screw heads under the concrete. Drive them from the outside in.

Tip

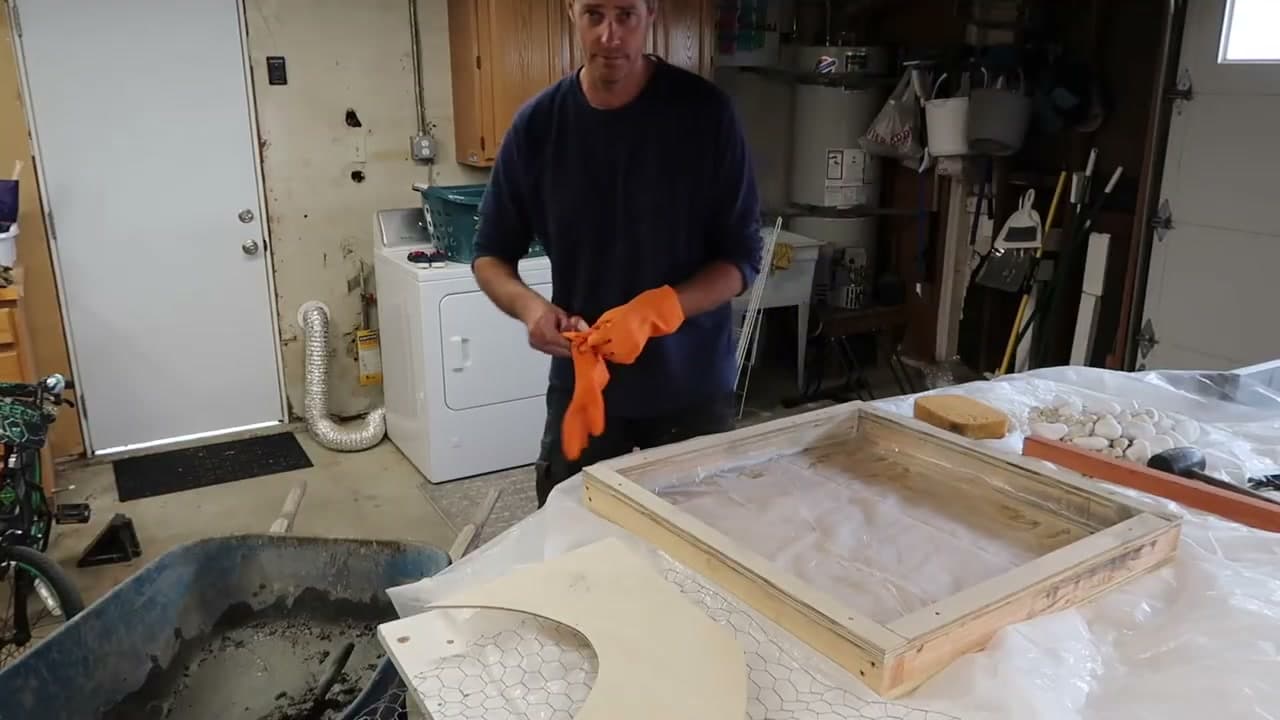
Scrap wood is fine. The form is single-use - the concrete will stain it - so don't waste your nice plywood.

2

Step 2: Line the Form With Plastic Sheeting

1:00
Step 2: Step 2: Line the Form With Plastic Sheeting

Lay a sheet of plastic across the inside of the form and press it down into the corners. This is your mold release - the concrete will not bond to plastic, so the slab pops free when you take the form apart.

A cheap painter's drop cloth or a contractor garbage bag both work. Don't worry about wrinkles. They'll show as faint texture on the bottom of the finished stone, which nobody sees once it's in the ground.

Tip

Let the plastic drape a few inches up over the side rails. That way when you pour, the cement can't sneak between the plastic and the wood.

3

Step 3: Mix Your Concrete and Glove Up

1:18
Step 3: Step 3: Mix Your Concrete and Glove Up

Dump a bag of quick-set concrete mix into a wheelbarrow and add water a little at a time. Stir with a trowel or a scrap of 2x4 until you get a thick scoopable consistency - somewhere between oatmeal and brownie batter. Too wet and the stones will sink right through; too dry and they won't seat properly.

Pull on a pair of long rubber gloves before you touch the wet mix. Cement is alkaline and will burn skin after a few minutes of contact. The orange dishwashing gloves are perfect because they reach past your wrist.

Tip

Quick-set concrete sets in about 30 to 45 minutes. Have your stones laid out and ready before you start the pour.

4

Step 4: Pour the Concrete and Press in Chicken Wire

1:40
Step 4: Step 4: Pour the Concrete and Press in Chicken Wire

Scoop the concrete into the lined form and spread it out to roughly an inch thick. Lay a square of chicken wire mesh across the top and press it down into the wet mix. The wire is reinforcement - it keeps the slab from cracking the first time someone steps on a corner.

Once the wire is buried, scoop another half-inch layer of concrete on top so the wire ends up sandwiched in the middle of the slab. Smooth the surface flat with a gloved palm or a trowel before you start placing stones.

Tip

Tin snips cut chicken wire fast. Trim the mesh about an inch smaller than the form so no sharp ends poke out the sides.

5

Step 5: Start Placing Pebbles From the Edge

2:35
Step 5: Step 5: Start Placing Pebbles From the Edge

Start at one corner and press your first pebbles into the wet concrete. Push each stone down so about half of it sinks into the mix and the top half stays exposed. Work from an edge inward so you always have a clean line to butt the next stone against.

Sort your pebbles by color and size before you start - this is the most relaxing part of the build but it goes fast once the cement starts setting up. White and cream stones, brown and rust stones, slate-gray stones - keep them in separate piles within arm's reach.

Tip

Use a chopstick or a butter knife to nudge small stones into tight gaps without disturbing the ones you already placed.

6

Step 6: Arrange the Pattern and Tap Stones Level

4:00
Step 6: Step 6: Arrange the Pattern and Tap Stones Level

Keep filling the slab in your chosen pattern. A flowing spiral, color-banded sections, or a sun-and-moon split all read well from above. Group by color so each section feels intentional rather than random.

Lay a flat scrap of 2x4 across the form and tap the board gently with a rubber mallet. The board distributes the pressure so the tops of all the stones settle to the same height. Slide the board across the whole slab and tap a few times in each spot until everything is level.

Tip

If a stone sinks too far, pull it out with your gloved fingers, scrape a little cement into the hole, and reseat it higher.

7

Step 7: Sponge the Pebble Tops Clean

5:20
Step 7: Step 7: Sponge the Pebble Tops Clean

Wet a large sponge, wring it out, and wipe across the tops of the stones. Cement haze comes off easily while it's still fresh - wait an hour and you'll need acid to get it back. Rinse the sponge in a bucket of water between passes so you're not just smearing the haze around.

Use a gloved fingertip to smooth the cement in the joints between stones. Aim for a slight dip below the stone tops so each pebble reads as a clean shape, not a stone half-drowned in concrete.

Tip

Don't soak the slab. Excess water on top of curing cement weakens the surface and leaves a chalky finish.

8

Step 8: Cure 24 to 48 Hours and Remove the Form

6:50
Step 8: Step 8: Cure 24 to 48 Hours and Remove the Form

Drape a sheet of plastic loosely over the slab and walk away. Concrete cures slowly. Give it a full 24 hours before you touch it, 48 hours before you put weight on it. Curing in the shade with a little surface moisture trapped under the plastic actually makes a stronger stone than curing in direct sun.

When it's hard, back out your screws, lift the form sides away, and peel the plastic off the bottom. Drop the finished stone into the garden path. Optional final move: brush a coat of clear concrete sealer over the top to deepen the pebble colors and protect against frost.

Tip

Two or three stones in a row look like a project. Five or more start to look like a path. Mix and pour the next one while the first is curing.

Products Used

☐ The Checklist

How to Make Stepping Stones with a Pebble Mosaic

Tools
7
Materials
7
Steps
8
Video
7 min

Your Guide

Wood Glueru

As an Amazon Associate we earn from qualifying purchases. Links on this page may be affiliate links - clicking them and buying doesn't change your price, but helps support ShowMeStepByStep.

Tags

Test your knowledge

Did the lesson stick? Find out in 2 minutes.

5 quick questions covering what you just read. No signup, no score saved — just a gut check.

Quick reference

Key takeaways from How to Make Stepping Stones with a Pebble Mosaic

5 questions, answers, and one-line explanations. Tap to expand.

  1. 1.Why drive the form's screws from the outside in, not from inside the form?

    Answer: So you can back them out to release the slab after curing

    When the slab cures, the screws have to come out. Heads buried in concrete make the form impossible to break apart.

  2. 2.What's the purpose of the plastic sheeting laid inside the form?

    Answer: To act as a mold release so the slab pops free

    Concrete won't bond to plastic, so the slab releases cleanly when you break the form apart.

  3. 3.How wet should the concrete mix be when you pour it?

    Answer: Between oatmeal and brownie batter

    Too wet, stones sink through. Too dry, they won't seat. Thick-scoopable is the sweet spot.

  4. 4.Where does the chicken wire reinforcement go in the slab?

    Answer: Sandwiched in the middle of the concrete

    Wire in the middle keeps the slab from cracking the first time someone steps on a corner.

  5. 5.How long should you cure the stone before walking on it?

    Answer: 24 hours before touching, 48 before walking on it

    Slow cures are stronger. Wait 24 hours before touching, 48 before it carries weight.

What's next

Related collections

Curated theme pages that include this tutorial.

Weekly Digest

Liked this gardening tutorial?

Pick the categories you want to hear about. Weekly digest of new step-by-step tutorials. No spam, easy unsubscribe.

Send me tutorials about

We only email about new tutorials. Easy unsubscribe anytime.