How to Do a Low Bun - Two Easy Methods for Long or Short Hair

LifestyleEasy4:097 steps

By ShowMeStepByStepPublished Updated

Based on a video by Lainey Ostrom.

A low bun reads polished in about 90 seconds, no hot tools required. The trick is knowing two different methods - one for long hair, one for shorter or medium hair - because the same wrap-and-pin move that works on long hair falls apart when you don't have enough length to pull through a knot.

This tutorial walks through both. Method one is the chic knot bun: twist your hair into a rope, loop it, push your fingers through, and pull the ends through to form a hidden knot at the nape. Method two is the twist-and-pin: low ponytail, split into two, twist tightly into a single rope, then wrap-pin-wrap-pin around the base. Either way you end up with a clean, smooth bun sitting flat against your head.

If you've already worked through our messy bun walkthrough, this is the polished sister style - same nape position, very different finish. The braiding companions are our three-braid starter guide and the fishtail braid tutorial if you want more weekday hair options.

The video comes from Lainey Ostrom, who demos on her own long hair so you can see exactly how each move looks from the back. Skip ahead using the timestamps if you want to jump straight to method two.

Step-by-Step Guide

1

Smooth Hair With a Few Drops of Oil

0:17
Step 1: Smooth Hair With a Few Drops of Oil

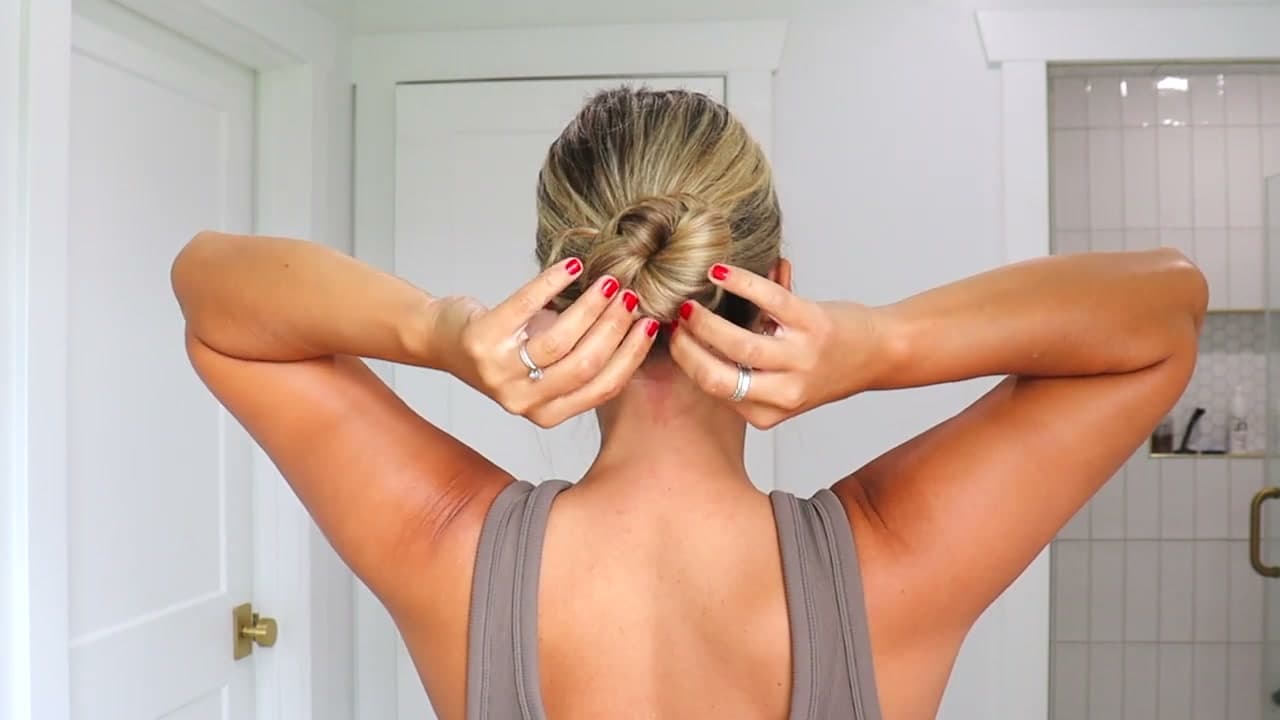
Brush your hair fully smooth and dispense two or three pumps of a lightweight hair oil into your palm. Rub your hands together and work the oil through the mid-lengths and ends - skip the roots so the crown stays full instead of flat. The oil is what gives the finished bun its glossy, sleek look. Skip this step and you get a bun that reads casual instead of chic.

Watch the oil pass at 0:17.

Tip

If your hair is on the finer side, use just one pump. Too much oil weighs the bun down and looks greasy. You're after a soft sheen, not wet-look.

2

Twist Your Hair Into a Hidden Knot

0:43
Step 2: Twist Your Hair Into a Hidden Knot

This is the move that makes Method One. Gather all your hair at the nape and twist it around your index finger like you're making a tight rope. Bring the rope up and around toward the top of where the bun will sit, then push your fingers down through the middle of the loop you just made and grab the ends. Pull the ends all the way through the knot so the bun forms a hidden twist at the base.

The bun shape comes from the loop, not from wrapping the hair around itself. If your hair is medium length and the ends won't pull through cleanly, jump to Step 5 for the twist-and-pin method instead. See the twist demo at 0:43.

Tip

Twist the rope tight before looping it. A loose twist makes a sloppy bun that won't hold its shape against your head.

3

Press Flat and Bobby Pin to Secure

1:35
Step 3: Press Flat and Bobby Pin to Secure

Once the knot is formed, press it flat against the back of your head so the bun sits low at the nape with no gap. Take the loose tail of hair, wrap it up and tuck it underneath the bun, then slide bobby pins in around the base to hold everything in place. Cross two pins in an X for the most secure hold - one pin alone tends to slip.

Keep the bun pressed flush against your head while you pin. Any air gap between the bun and your head will sag through the day. Watch the pinning at 1:35.

Products used in this step

4

Tuck Stragglers and Add a Touch of Volume

1:50
Step 4: Tuck Stragglers and Add a Touch of Volume

Look in a mirror for any short pieces poking out around the back of your head or near your ears. Twist each loose piece into a small rope and tuck it up underneath the bun, then slide a bobby pin through to lock it. Once everything is tucked, gently tug on the crown section of your hair to add a tiny bit of softness and volume on top. Just a little - you don't want it puffy.

That small tug at the crown is what separates a chic low bun from a tight school-uniform bun. See the tuck-and-tug at 1:50.

Tip

If pieces keep slipping out, mist a little hairspray onto an old toothbrush and smooth it over the flyaways. Cleaner finish than spraying the whole head.

5

Switch to Method Two - Ponytail and Twist

3:00
Step 5: Switch to Method Two - Ponytail and Twist

If your hair is too short to pull through the knot cleanly, switch to this method. Gather all your hair into a low ponytail at the nape and secure with a hair elastic. Split the ponytail into two equal sections, then twist both sections tightly around each other all the way down to the ends. You'll end up with one twisted rope hanging from the elastic.

Keep the twist tight as you work down. A loose twist falls apart when you try to wrap it. Watch the section-and-twist at 3:00.

Products used in this step

6

Wrap the Twist Around the Base, Pinning as You Go

3:20
Step 6: Wrap the Twist Around the Base, Pinning as You Go

Now wrap the twisted rope around the base of the elastic to form the bun. The key here is wrap-a-little, pin-it, wrap-a-little-more, pin-it again. If you try to coil the whole rope first and pin it after, the wraps slip and the bun loosens. Keep each wrap stacked close to the last one so the finished bun sits flat against your head instead of bulging out.

Watch the wrap-and-pin rhythm at 3:20.

Tip

Use about four to six bobby pins for this bun. More than that and the pins start working against each other.

Products used in this step

7

Tuck the Ends and Set With Hairspray

3:40
Step 7: Tuck the Ends and Set With Hairspray

When you reach the end of the twist, tuck the loose tail underneath the bun and slide in one or two final bobby pins to lock it down. Mist a light flexible-hold hairspray over the whole bun to set the shape and smooth any remaining flyaways. Run a fingertip around the edge of the bun to clean up the line where the bun meets your head.

The finished low bun should sit at the nape, feel secure when you gently tug it, and look smooth from every angle. See the finish at 3:40.

Products Used

Your Guide

Lainey Ostrom

As an Amazon Associate we earn from qualifying purchases. Links on this page may be affiliate links - clicking them and buying doesn't change your price, but helps support ShowMeStepByStep.

Tags

Related Tutorials