How to Take a Screenshot on Mac

By ShowMeStepByStepPublished Updated

Based on a video by macmostvideo.

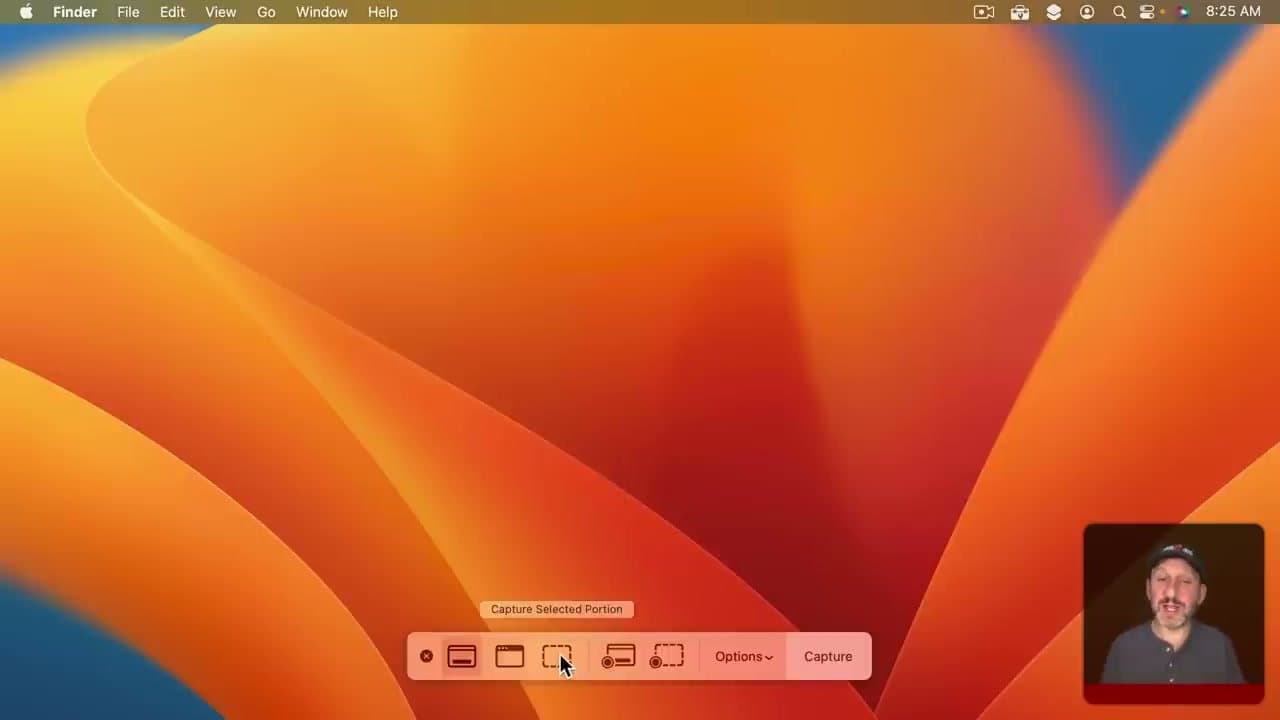
How to screenshot on Mac comes down to three keyboard shortcuts. Cmd+Shift+3 grabs the full screen. Cmd+Shift+4 lets you drag a rectangle around just the part you want. Cmd+Shift+5 opens the screenshot toolbar with extra controls - delayed captures, screen recording, and a custom save location. Pick the one that matches what you need to capture.

Once you know how to take a screenshot on Mac, the question is what to do with it. By default macOS drops every screenshot on your desktop. You can change that to a folder, route it to the clipboard, or send it straight into a Markup window for annotations. For the iPhone equivalent and related macOS tasks, see how to take a screenshot on iPhone, how to take a long screenshot on iPhone, how to mirror iPhone to TV, transfer photos from iPhone to Mac, and how to factory reset a Mac.

How do you screenshot on Mac without the shortcut?

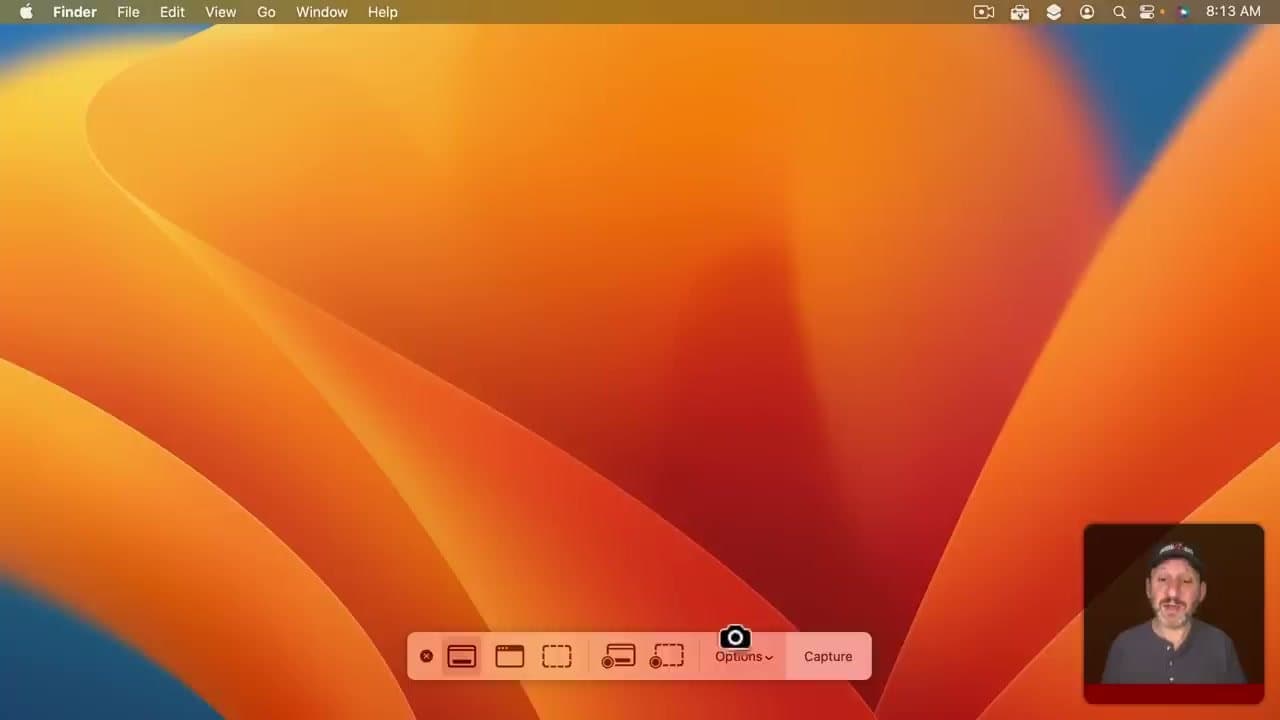
Open the Screenshot app from Launchpad (or Spotlight: Cmd+Space, type 'screenshot'). The same toolbar that Cmd+Shift+5 launches appears, no shortcut needed.

Where do Mac screenshots get saved?

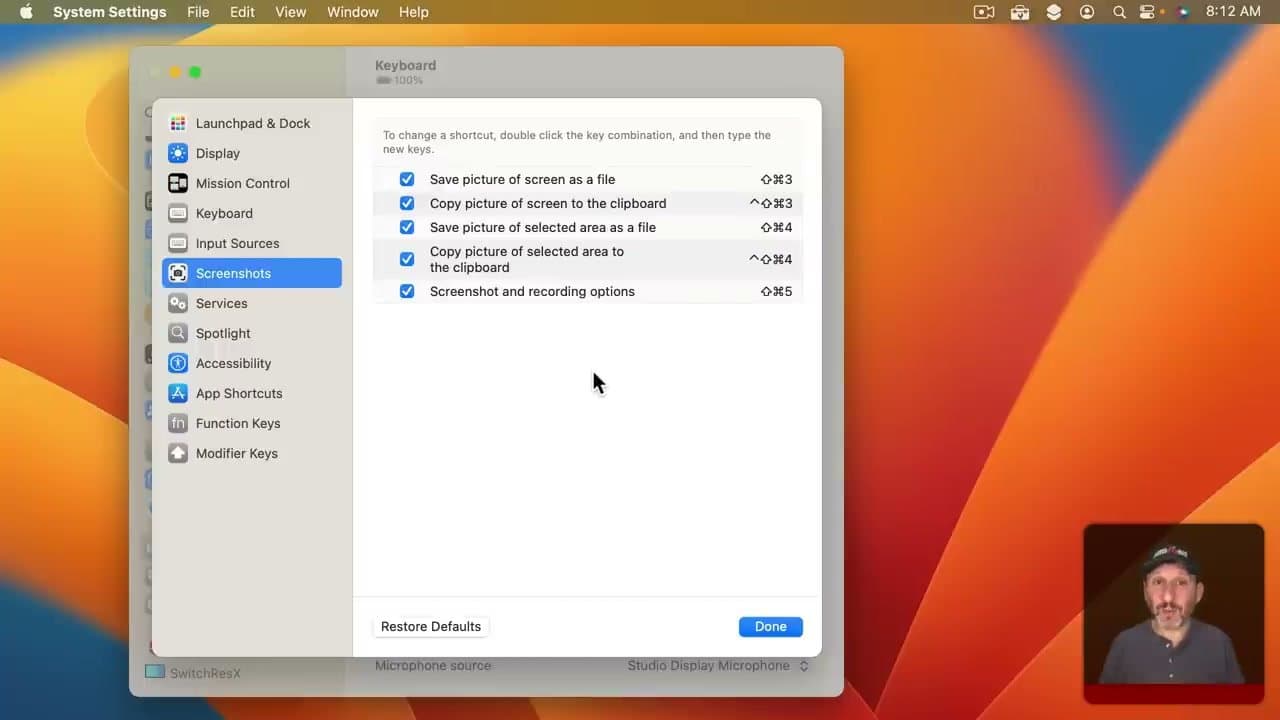
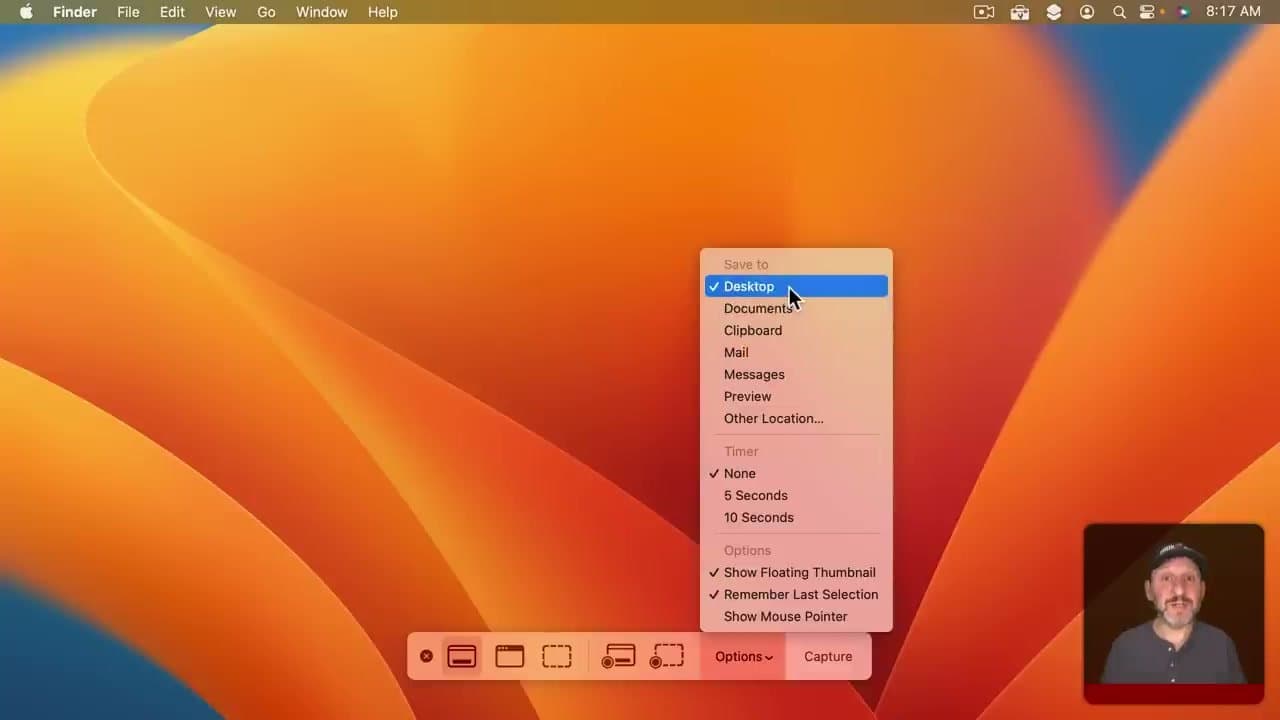
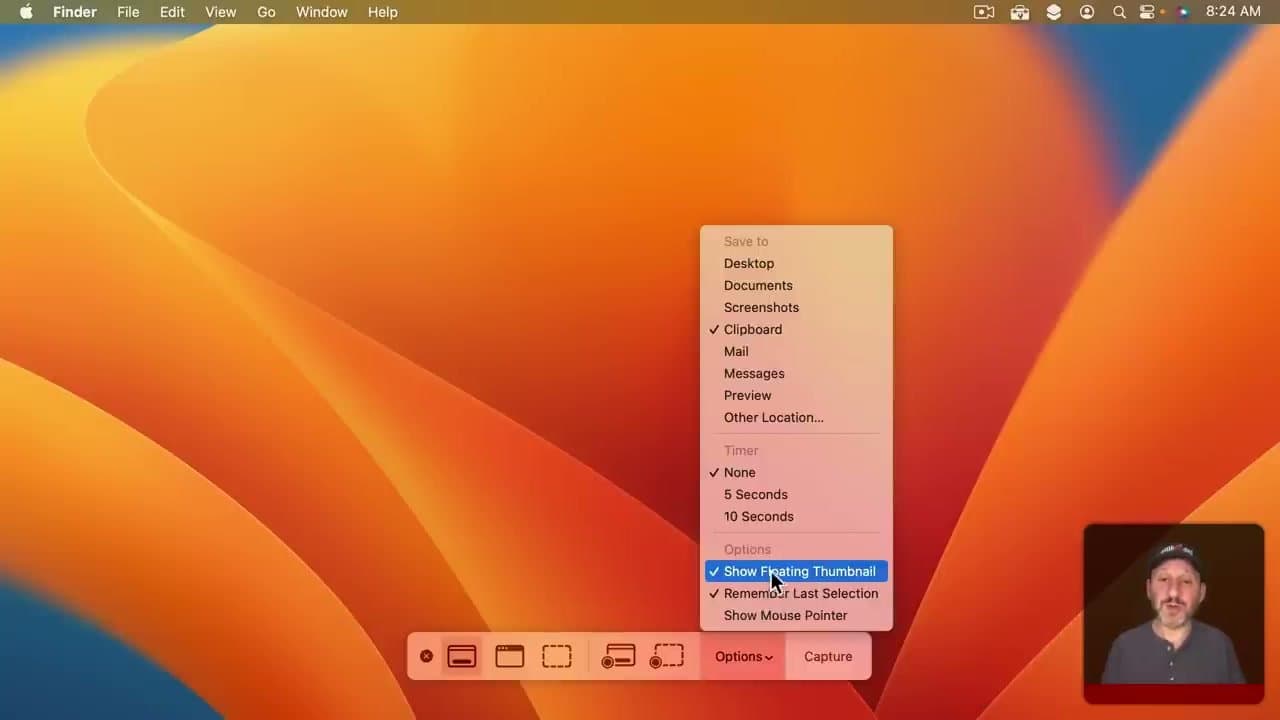
The desktop by default. Cmd+Shift+5 lets you change the save location to any folder. Pick Options in the screenshot toolbar, then under Save To choose a custom location.

How do I screenshot on Mac and copy to clipboard instead of saving a file?

Add Control to the shortcut. Cmd+Ctrl+Shift+3 copies the full screen to the clipboard. Cmd+Ctrl+Shift+4 copies a dragged area. Paste with Cmd+V into any app.

Can I screenshot just one window on a Mac?

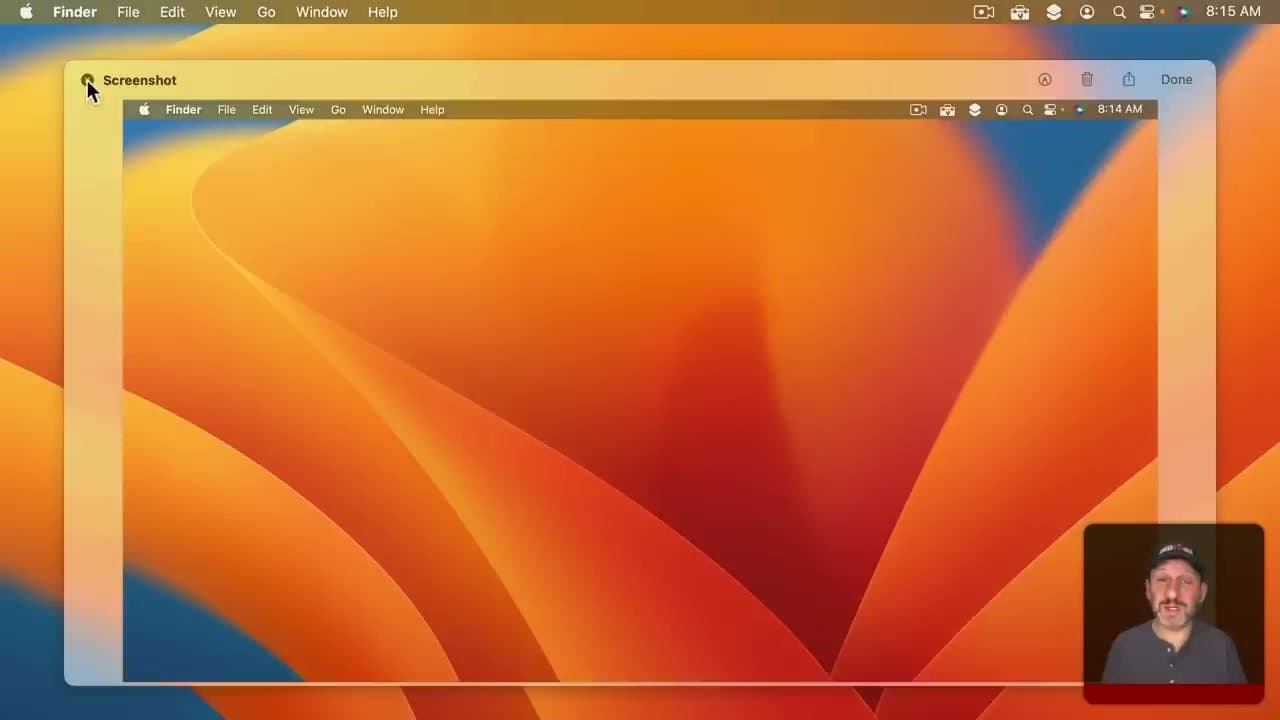
Yes. Press Cmd+Shift+4, then tap the spacebar. The cursor becomes a camera. Hover over the window you want and click - the screenshot is just that window with a soft drop shadow.

How do I delay a screenshot on Mac?

Cmd+Shift+5, then in the toolbar pick Options > Timer > 5 or 10 seconds. Useful for capturing menus or hover states that close when you click away.

Step-by-Step Guide

1

Capture the Whole Screen with Shift+Command+3

0:27
Step 1: Capture the Whole Screen with Shift+Command+3

Press Shift, Command, and 3 at the same time to grab everything that's currently on your display. A small floating thumbnail appears in the bottom-right corner. If you ignore it, the screenshot saves to your Desktop as a PNG file a few seconds later.

This is the workhorse shortcut and the one you'll use most. Memorize it first.

Tip

If you have multiple monitors, Shift+Command+3 captures every screen at once. You'll get one PNG per display.

2

Open the Screenshot Toolbar with Shift+Command+5

1:25
Step 2: Open the Screenshot Toolbar with Shift+Command+5

Shift+Command+5 brings up a small toolbar at the bottom of the screen. From here you can capture the full screen, just one window, a selected area, or even record video. It's the single keyboard shortcut to remember if you don't take screenshots often - it gives you every option in one place.

3

Open Options to Customize Your Workflow

1:45
Step 3: Open Options to Customize Your Workflow

With the Shift+Command+5 toolbar visible, click Options. This menu controls every screenshot setting on your Mac - where files save, whether the floating thumbnail appears, the delay timer, and whether the mouse pointer shows up in the capture.

4

Use the Floating Thumbnail to Mark Up or Trash

2:36
Step 4: Use the Floating Thumbnail to Mark Up or Trash

Right after a capture, click the floating thumbnail in the bottom-right corner before it disappears. A preview window opens with markup tools, a share button, and a trash can.

The trash can is the underrated one. If the screenshot didn't come out right, hit it - the file never saves to disk and you can take another one. Way faster than tracking down a bad file on the Desktop later.

Tip

The markup tools include arrows, text, shapes, and a signature option. For most quick annotations, you don't need a separate app like Skitch.

5

Change Where Screenshots Save

4:00
Step 5: Change Where Screenshots Save

In the Options menu, look for Save to. The default is Desktop. Switch it to Documents, or pick Other Location and choose any folder you want - a Pictures > Screenshots folder is a good setup.

Doing this once stops the Desktop clutter problem permanently. Every screenshot from now on lands in the folder you picked.

6

Send Screenshots Straight to the Clipboard

5:46
Step 6: Send Screenshots Straight to the Clipboard

If you mostly take screenshots to paste them into chats, emails, or docs, set Save to > Clipboard in the Options menu. Now Shift+Command+3 copies the capture instead of saving a file. Press Command+V wherever you want it.

You can also press Control+Shift+Command+3 from any setting to do this on a one-off basis without changing the default.

7

Capture an Exact Selection

6:10
Step 7: Capture an Exact Selection

Open Shift+Command+5 and click the icon for Capture Selected Portion. A resizable rectangle appears. Drag the corners to frame exactly what you want, then click Capture or press Return.

If Remember Last Selection is on in Options, the rectangle stays the same size and position next time, so grabbing the same chart or window over and over is a one-key job.

Tip

Press Command+C while the selection is active to send it to the clipboard instead of saving as a file - useful for one-off pastes.

8

Add a Delay for Menus and Tooltips

7:12
Step 8: Add a Delay for Menus and Tooltips

Some things vanish when you press a key. Drop-down menus, hover states, tooltips - all of them disappear the second your mouse leaves the spot. Set Options > Timer to 5 or 10 seconds, then click Capture, then have those 5 to 10 seconds to open the menu or hover over the element you want to grab. The delay catches what a regular screenshot can't.

Tip

10 seconds feels long but is the right setting if you need to navigate two or three clicks deep before the capture fires.

Your Guide

macmostvideo

As an Amazon Associate we earn from qualifying purchases. Links on this page may be affiliate links - clicking them and buying doesn't change your price, but helps support ShowMeStepByStep.

Tags

Test your knowledge

Did the lesson stick? Find out in 2 minutes.

5 quick questions covering what you just read. No signup, no score saved — just a gut check.

Quick reference

Key takeaways from How to Take a Screenshot on Mac

5 questions, answers, and one-line explanations. Tap to expand.

  1. 1.Which shortcut captures the whole screen at once?

    Answer: Shift+Command+3

    Shift+Command+3 instantly saves a full-screen image to your Desktop.

  2. 2.Where do Mac screenshots save by default?

    Answer: Desktop

    Screenshots land on the Desktop until you change the location in the Options menu.

  3. 3.What does the floating thumbnail let you do?

    Answer: Mark up, crop, or trash before it saves

    Click the thumbnail to open Markup — or just ignore it and it saves on its own.

  4. 4.How do you copy a screenshot to the clipboard instead of saving a file?

    Answer: Add Control to the shortcut (Control+Shift+Command+3)

    Control added to any screenshot shortcut sends the result directly to clipboard.

  5. 5.You need to capture a menu that closes when you click. Best solution?

    Answer: Set a timer delay in Shift+Command+5 Options

    A 5- or 10-second delay gives you time to open the menu before the capture fires.

What's next

Related collections

Curated theme pages that include this tutorial.

Weekly Digest

Liked this tech tutorial?

Pick the categories you want to hear about. Weekly digest of new step-by-step tutorials. No spam, easy unsubscribe.

Send me tutorials about

We only email about new tutorials. Easy unsubscribe anytime.