1
Step 1: Check Your iCloud Backup Size
2:10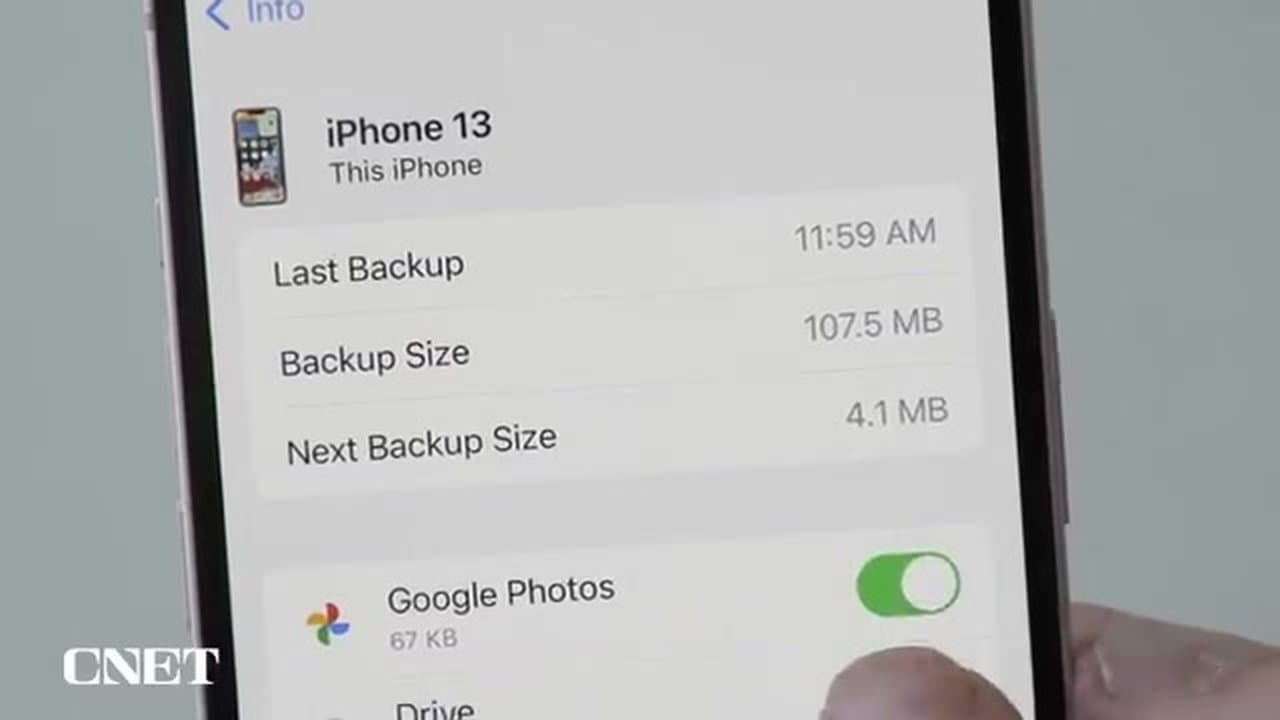
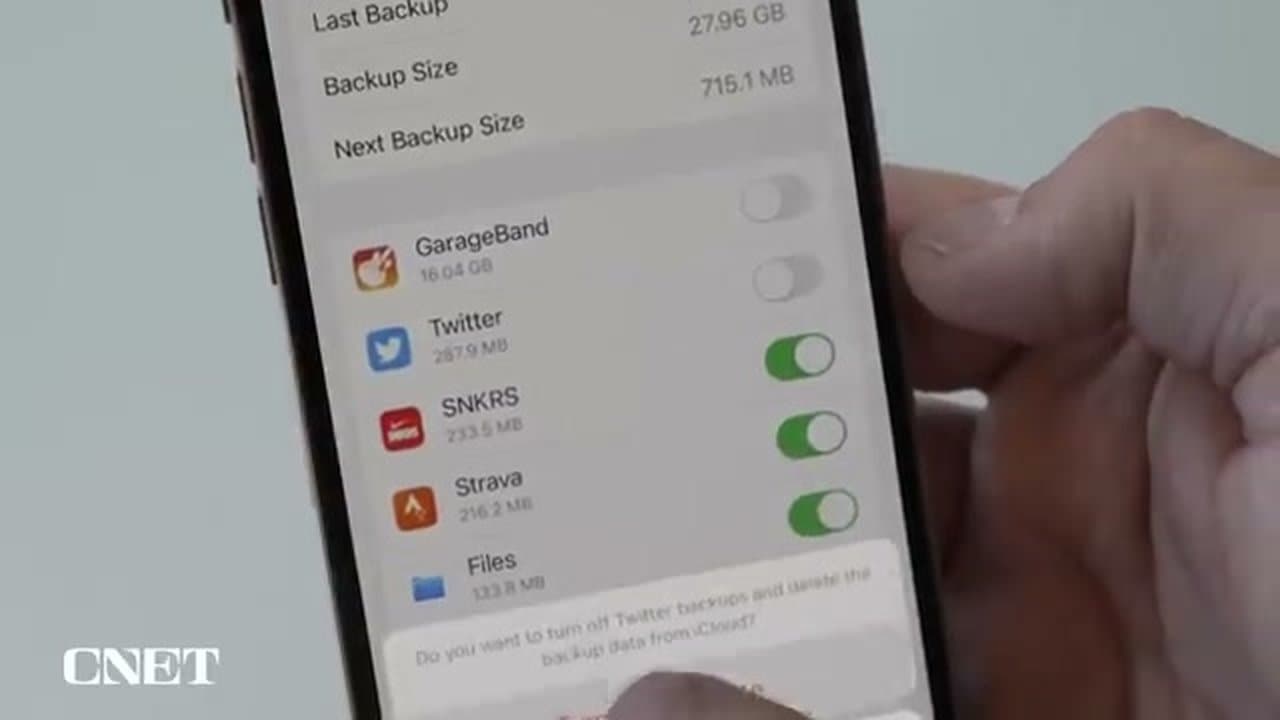
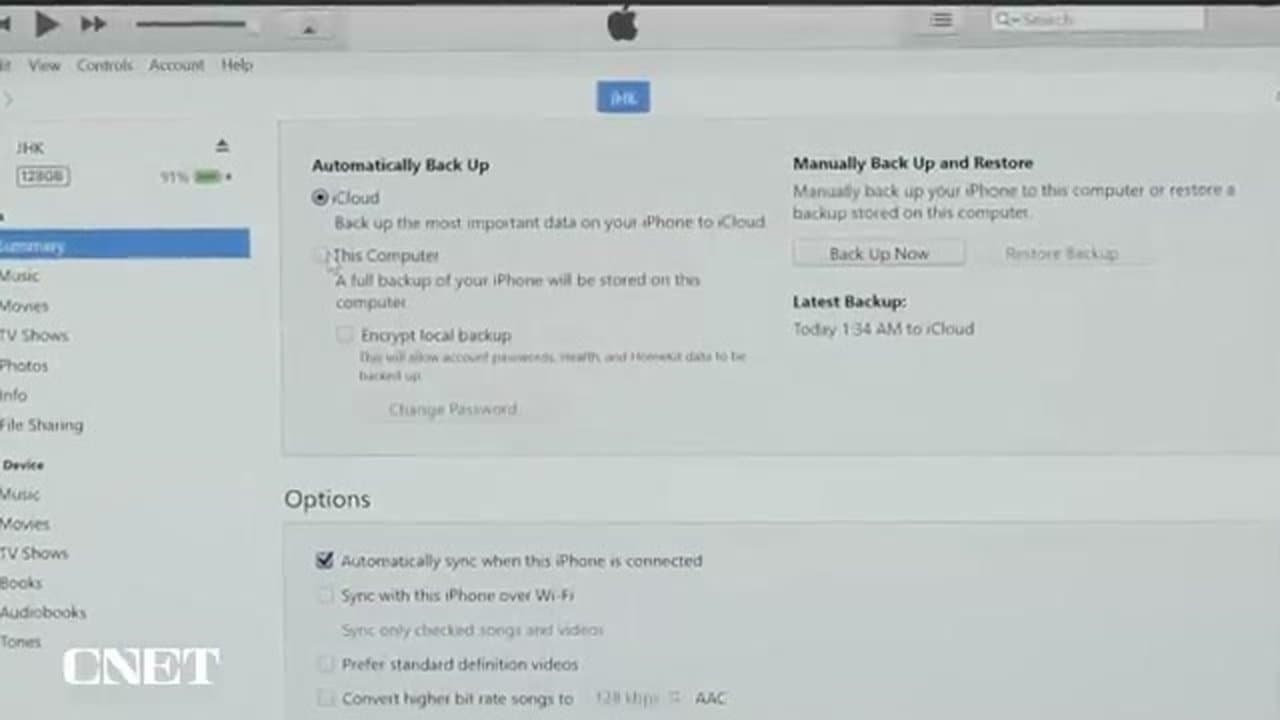
Open Settings, tap your name at the top, then iCloud. Tap Manage Storage, then Backups, and pick your iPhone from the list.
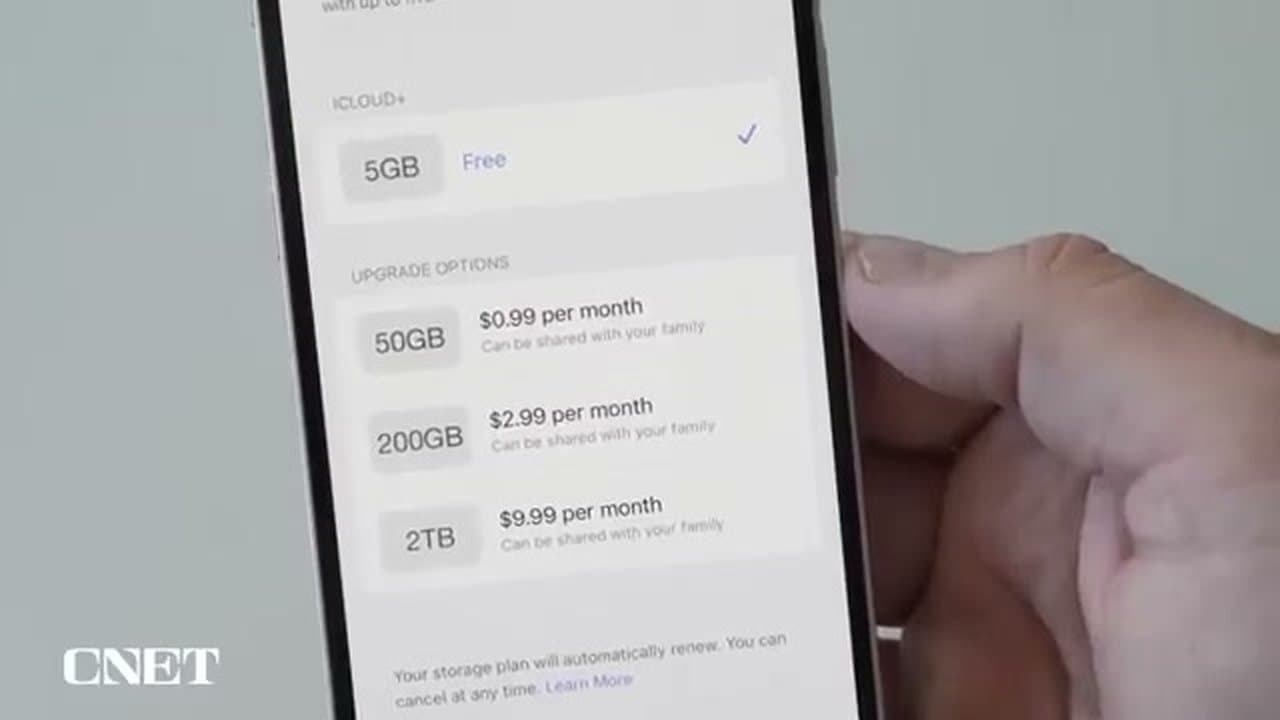
Look at the top three lines: Last Backup, Backup Size, and Next Backup Size. Focus on Next Backup Size. If it's under 5 GB, the free iCloud tier covers you. If it's over, you've got a couple of choices to make in the next two steps.
Tip
Backup Size is what iCloud already stores. Next Backup Size is what the upcoming run will use. They can differ by a lot if you've added photos or apps since the last backup.