How to Pair AirPods and Set Them Up Like a Pro

TechEasy13:529 steps

Based on a video by AppFind.

Got new AirPods and not sure what they can really do? This walkthrough from AppFind covers everything from pairing on day one to a couple of features you probably never knew about.

By the end you'll have your AirPods set up the way you want them, with custom controls, a battery widget on your home screen, and the ability to find them when they go missing.

Step-by-Step Guide

1

Step 1: Pair AirPods to Your iPhone

1:00
Step 1: Step 1: Pair AirPods to Your iPhone

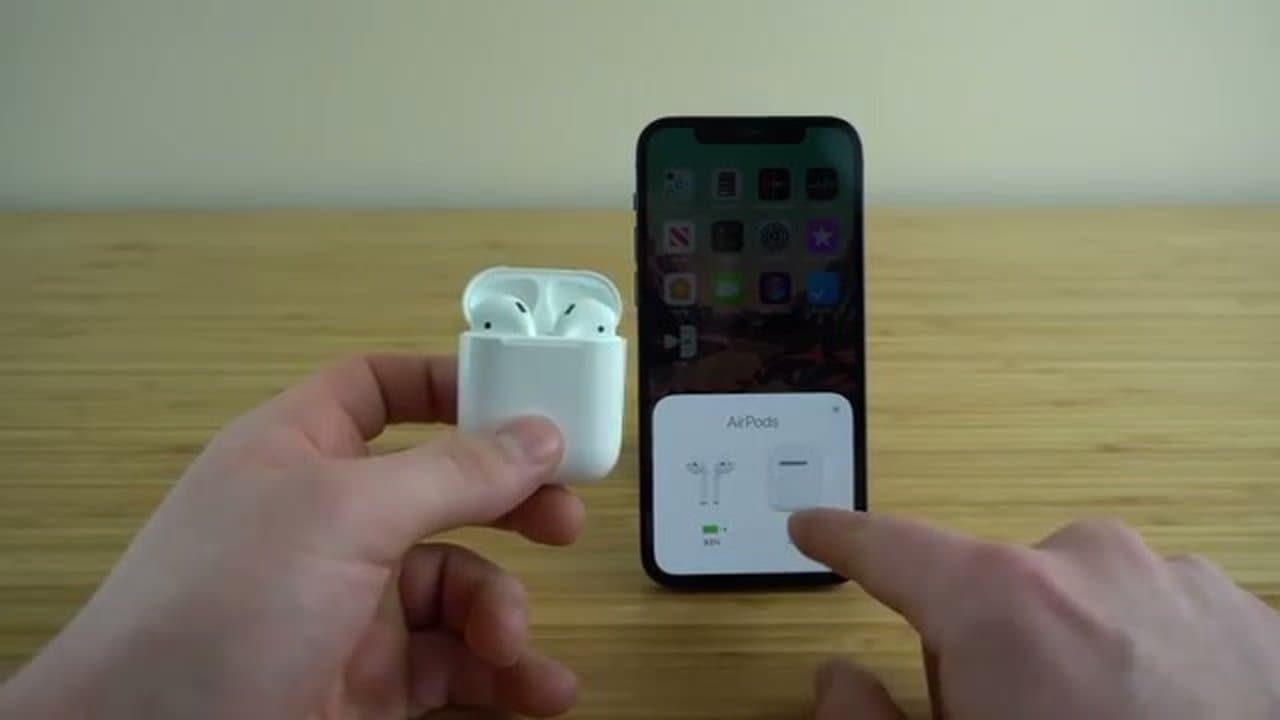
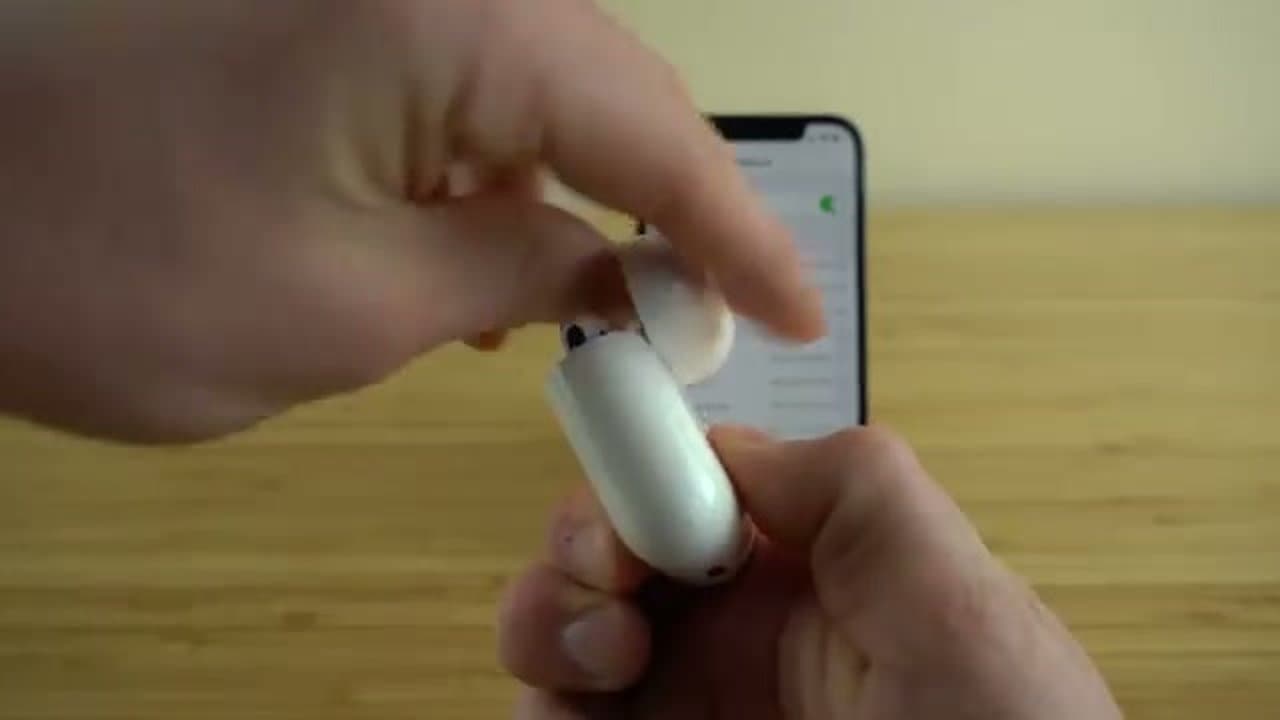
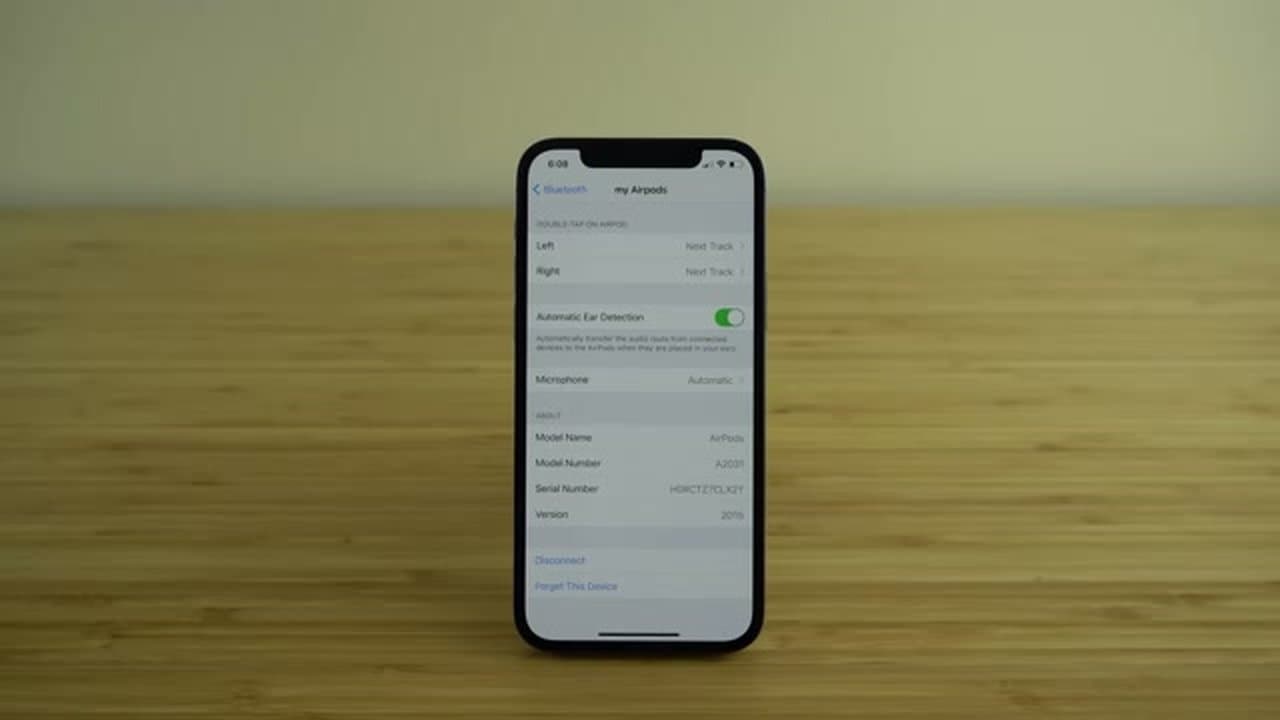
Open the AirPods case next to your iPhone. As long as Bluetooth is on, a popup slides up showing your AirPods and a Connect button. Tap it and you're done.

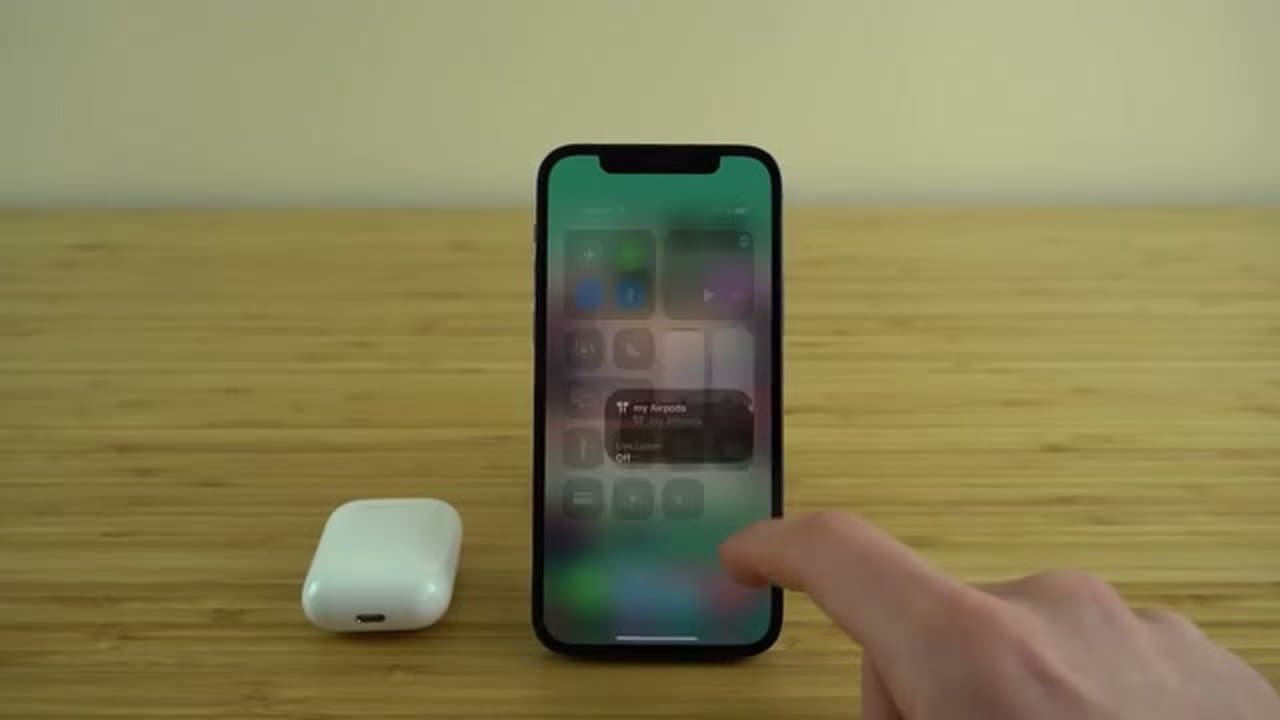
If nothing pops up, swipe down from the top-right corner to open Control Center and tap the Bluetooth icon to turn it on. The same popup appears the moment the case opens.

Tip

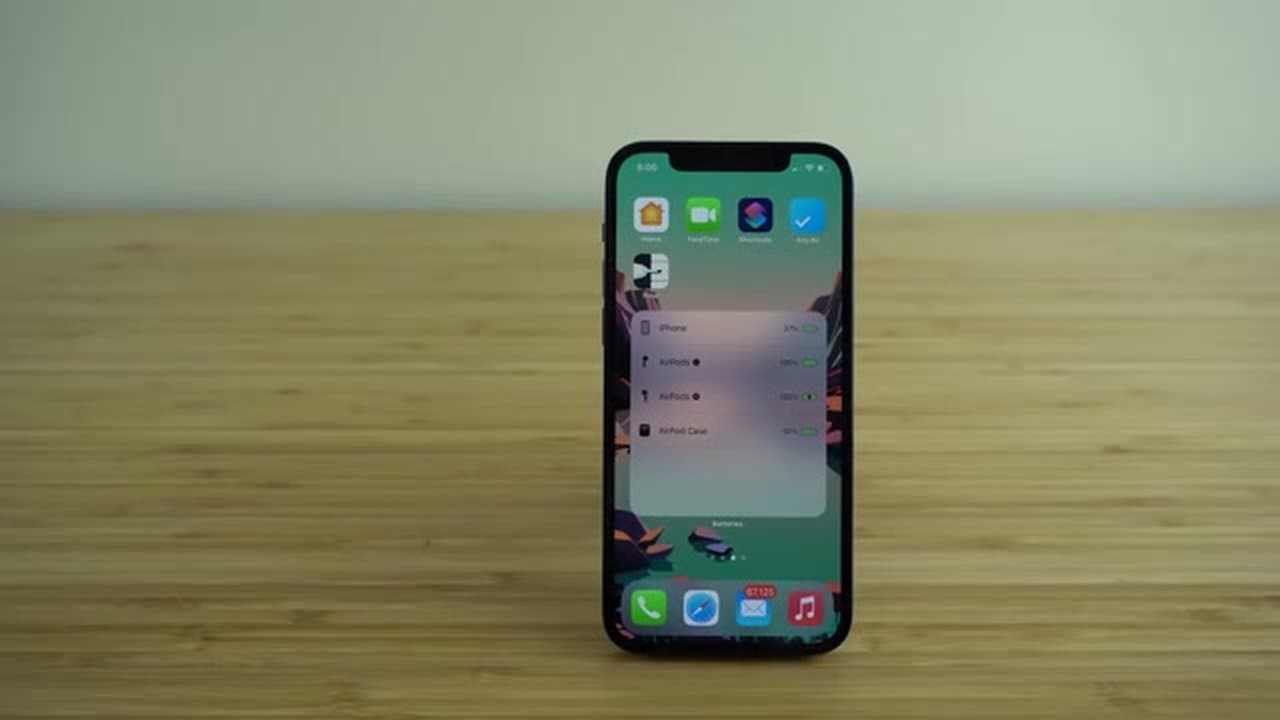
If your iPhone is signed into iCloud, your AirPods automatically pair to every other Apple device on the same Apple ID, including your iPad and Mac.

2

Step 2: Pair to a Non-Apple Bluetooth Device

1:32
Step 2: Step 2: Pair to a Non-Apple Bluetooth Device

AirPods work with Android phones, Windows PCs, and any Bluetooth device, not just Apple. Open the lid, then press and hold the small round button on the back of the case for a few seconds.

The white light inside starts blinking, which means the case is broadcasting. Go into the other device's Bluetooth settings, find AirPods in the list, and tap to connect. You may need to confirm pairing on that device.

Tip

You lose Apple-only features like automatic ear detection and the iCloud handoff when paired to non-Apple devices, but audio and the microphone still work fine.

3

Step 3: Charge the Case and Read the LED

2:25
Step 3: Step 3: Charge the Case and Read the LED

The case charges over Lightning - the same cable that ships with most iPhones. Plug it into the bottom of the case and the LED holds steady amber while it charges. The case also works with most Qi wireless chargers; lay it flat on the pad and it picks up automatically.

The LED tells you the state at a glance. Solid green is full. Solid amber is low. Flashing white means the case is in pairing mode. Flashing amber means you need to reset the connection.

4

Step 4: Check Battery and Add a Widget

4:30
Step 4: Step 4: Check Battery and Add a Widget

Open the case near your iPhone and a card pops up showing the case battery and each AirPod's charge level individually.

For at-a-glance access, add a Batteries widget to your home screen. Long-press any empty area, tap Edit Home Screen, hit the plus icon in the top corner, and search for Batteries. Pick a size, tap Add Widget, drag it where you want it, and tap Done. Once your AirPods are paired the widget shows iPhone, both AirPods, and the case.

5

Step 5: Rename and Customize Double-Tap

5:45
Step 5: Step 5: Rename and Customize Double-Tap

Open Settings, go to Bluetooth, and tap the info icon next to your AirPods. The first field lets you rename them anything - useful if you have multiple sets in the household.

The Double-Tap on AirPod section is the gem here. You can set what each earbud does when you tap it twice on the side: Siri, play/pause, next track, previous track, or off. Map the left to play/pause and the right to Siri, or whatever combination matches how you listen day to day.

Tip

The double-tap setting is per ear, so you can mix and match. If you only ever wear one AirPod at a time, set both sides to the same action so it works either way.

6

Step 6: Turn On Ear Detection and Set the Microphone

7:20
Step 6: Step 6: Turn On Ear Detection and Set the Microphone

On that same settings page, leave Automatic Ear Detection on. It pauses your audio the moment you take an AirPod out and resumes when you put it back in. Small thing, big quality-of-life upgrade.

Below that, tap Microphone and pick Automatically Switch AirPods. Your phone then uses whichever side is picking up the cleanest audio at any moment, which matters most on calls in noisy spaces. Lock it to a specific side only if you usually wear just one earbud.

7

Step 7: Have Your AirPods Announce Calls

8:45
Step 7: Step 7: Have Your AirPods Announce Calls

Open Settings, go to Phone, then Announce Calls. Pick Headphones Only.

Now your AirPods read the caller's name out loud when a call comes in, or the phone number if it's an unknown caller. You can answer or decline without digging the phone out of a pocket. There's also a Headphones & Car option if you want it active over your car's Bluetooth too.

8

Step 8: Find Lost AirPods with Find My

10:05
Step 8: Step 8: Find Lost AirPods with Find My

If you misplace your AirPods, open the Find My app on your iPhone. Tap Devices and your AirPods show up under the name you set earlier.

The map shows where they last connected, usually accurate enough to get you to the right room or store. From there you can tap Play Sound, which is loud enough to find them under a couch cushion or inside a bag. Find My works as long as the AirPods have any charge left.

Tip

Find My only sees the last location your AirPods were connected to a paired device, so if they got tossed in a stranger's bag at the airport, the map might lag behind reality.

9

Step 9: Use Live Listen as a Remote Microphone

12:40
Step 9: Step 9: Use Live Listen as a Remote Microphone

Live Listen turns your iPhone into a remote microphone that streams to your AirPods in real time.

Add it to Control Center first: Settings > Control Center > add Hearing. Drop your phone wherever you want to listen, open Control Center, tap the ear icon, then switch Live Listen on. You can hear whatever the phone's microphone picks up, straight in your ears. It was designed as a hearing assist for noisy rooms and lectures - use it for that.

Products Used

Your Guide

AppFind

As an Amazon Associate we earn from qualifying purchases. Links on this page may be affiliate links - clicking them and buying doesn't change your price, but helps support ShowMeStepByStep.

Tags

Related Tutorials