When to Harvest Garlic (5 Signs Your Crop Is Ready)

Also in:Adulting

By ShowMeStepByStepPublished Updated

Based on a video by Beginner's Garden - Journey with Jill.

Garlic is one of the few crops that doesn't announce itself. Unlike onions, the bulb stays hidden underground until you decide it's ready, and the calendar is a liar - your zone, your variety, and last week's weather all shift the date by two or three weeks. Pull too early and the cloves haven't separated; pull too late and the wrappers split and the bulb won't store.

Jill from Beginner's Garden has grown garlic in Tennessee for years and walks her bed showing exactly what to watch for. She lifts a bulb, brushes off the dirt, and shows you the difference between a plump, well-wrapped head ready to cure and one that's been left in the ground a week too long. Six minutes, no jargon, no guesswork.

If you planted last fall and are wondering when to dig, this guide is the missing piece. Pair it with our fall garlic planting guide when you're ready to set next year's crop, or look at when to harvest potatoes and when to harvest onions to finish out the rest of your summer beds. For other vegetable timing, the garden harvest theme collects every harvest-timing tutorial in one place.

Step-by-Step Guide

1

Know the General Harvest Window

0:47
Step 1: Know the General Harvest Window

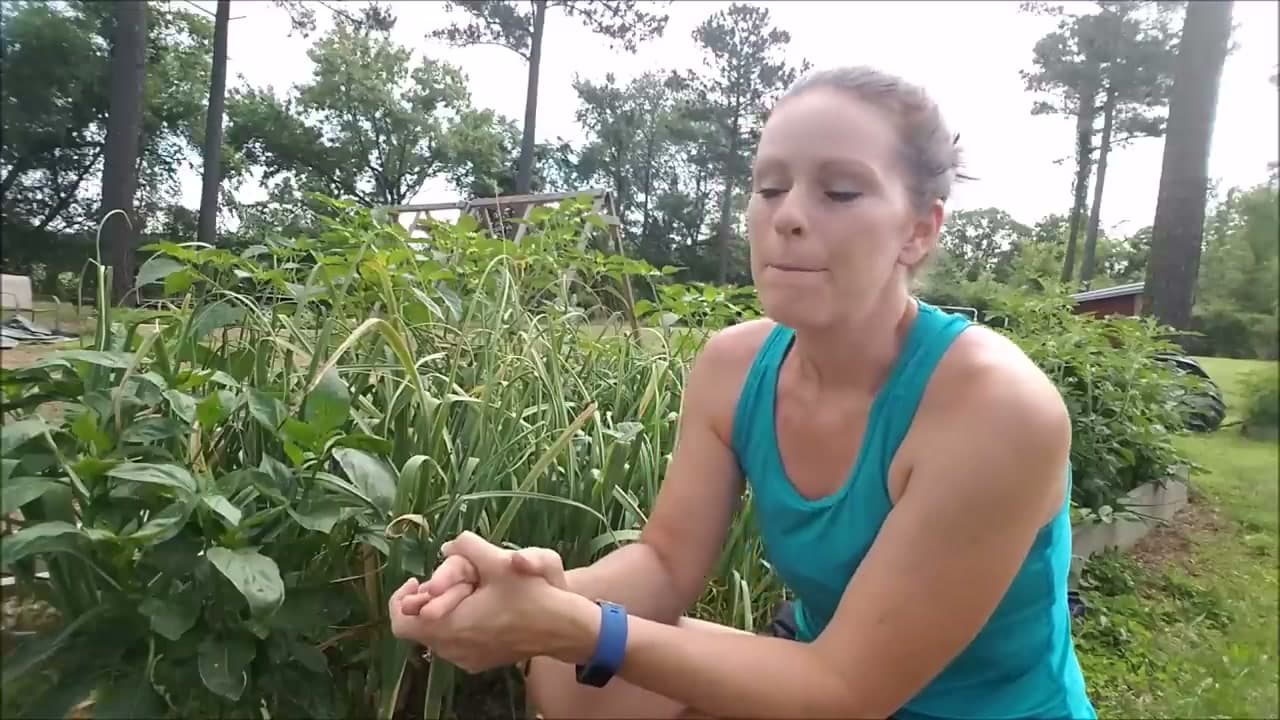
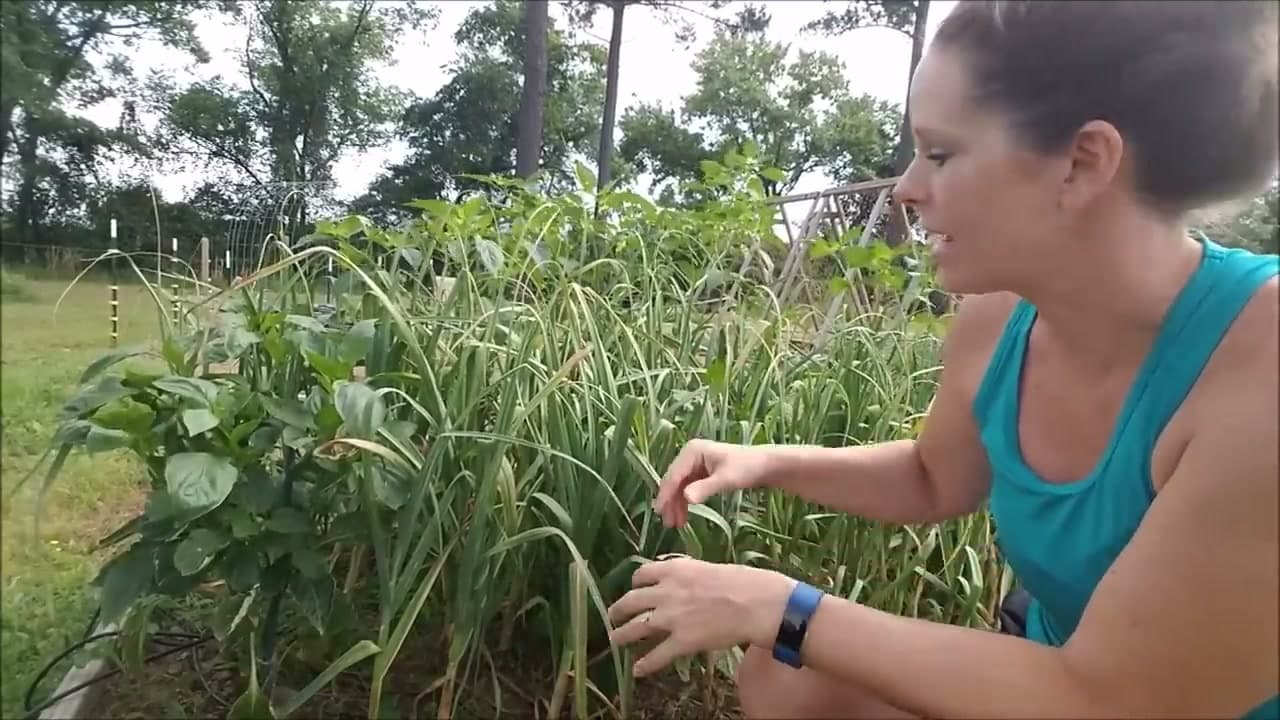
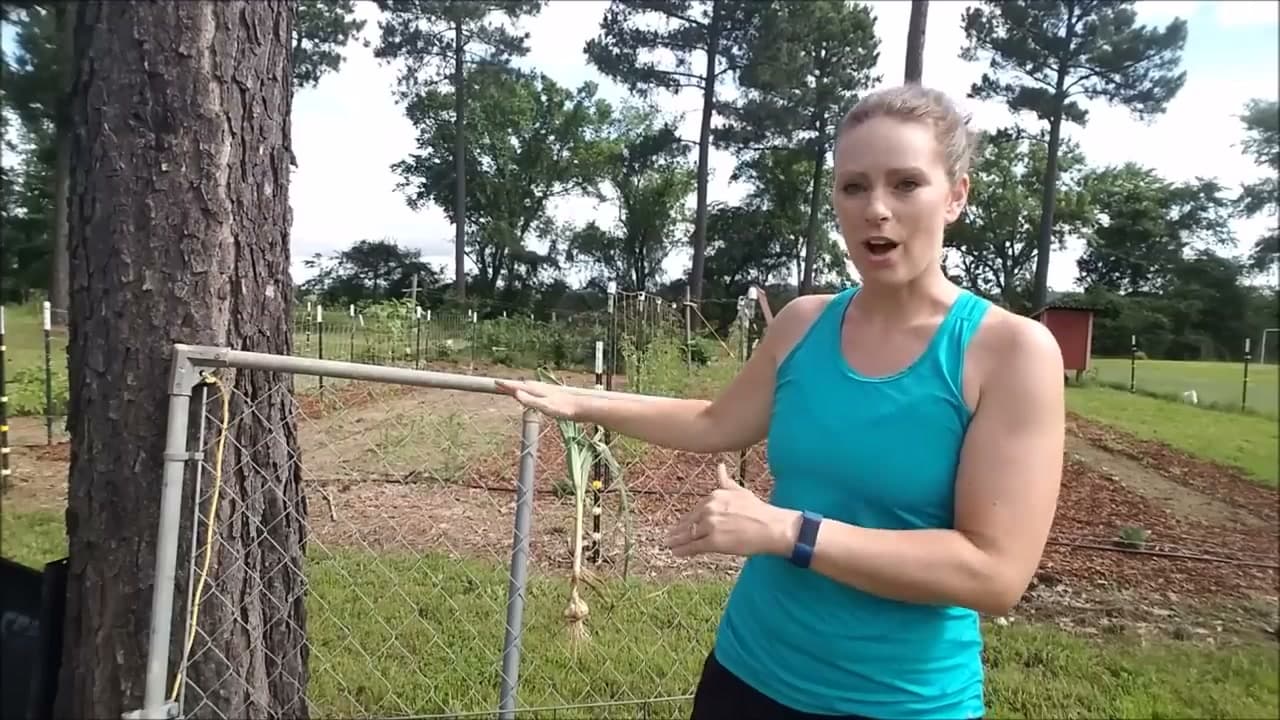
Hardneck garlic planted in October or November is usually ready in late June through early July. Softneck varieties run a couple of weeks later, often into July and August depending on zone. If you're south of Zone 6, the window starts earlier; up in Zone 4 or 5 you may not pull until early August.

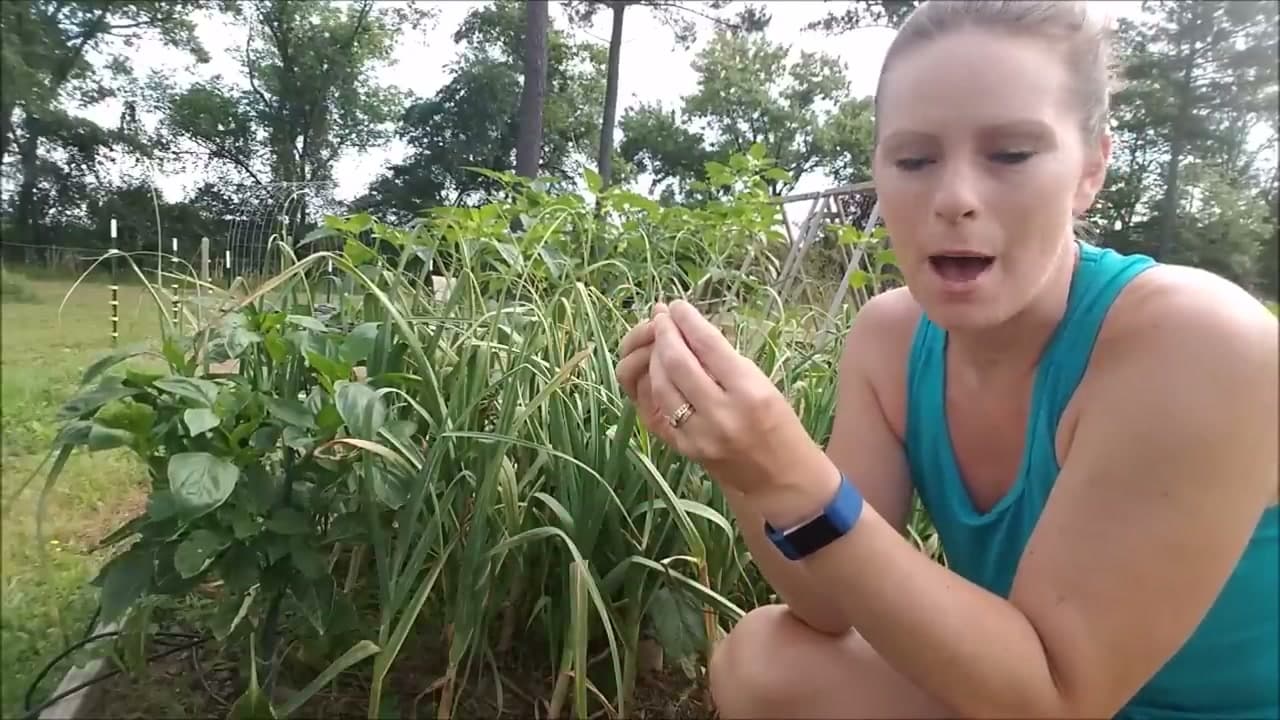
The calendar gets you in the right month, but the plant itself is the actual signal. Once you see the first lower leaves yellowing, start checking every couple of days.

Tip

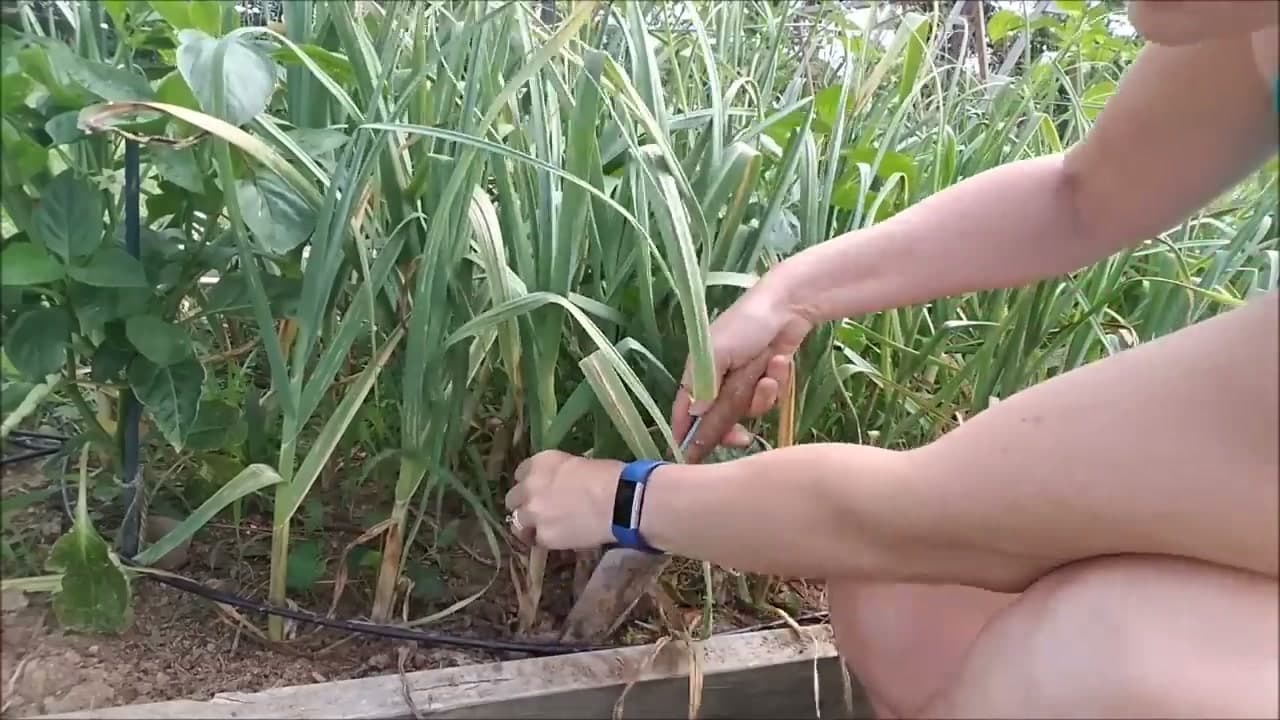
Hardneck garlic sends up a curly flower stalk called a scape in early June. Cutting the scape redirects energy back into the bulb and usually means harvest is three to four weeks away - a useful early heads-up.

Products used in this step

2

Watch the Bottom Leaves Brown and Die Back

1:08
Step 2: Watch the Bottom Leaves Brown and Die Back

The signal you're watching for: the bottom three or four leaves on each plant turning yellow and brown, while the top three or four leaves stay green. Each leaf on the plant corresponds to a wrapper layer on the bulb underground, so half-green and half-brown means roughly half the wrappers are still intact and protective.

Those intact wrappers are what let your garlic store for months instead of weeks. Pull when about five lower leaves have browned and five upper leaves are still green - that's the sweet spot for both maturity and storage life.

Tip

Count leaves from the bottom up. If you can't tell which is which because the bed is dense, gently bend the lowest stem aside and count from the soil line - the order is always clear once you get close.

Products used in this step

3

Don't Wait Until Every Leaf Is Brown

1:42
Step 3: Don't Wait Until Every Leaf Is Brown

If you let the plant go until all the leaves are dead, the protective papery wrappers around the bulb split open. The cloves separate inside the head, and a separated head will rot in storage within a few weeks instead of keeping for months. You can still eat the garlic - it just won't store.

This is the most common mistake new growers make. Garlic dying back looks like a plant that needs more time, when really it's a plant that's already past its prime. If you're not sure, dig one bulb to check.

Tip

Garlic that's been left too long isn't a loss - it's a meal plan. Use the separated heads first in roasting, soups, and confit. Save the tight, well-wrapped heads for storage.

Products used in this step

4

Test-Dig One Bulb Before Harvesting the Rest

2:02
Step 4: Test-Dig One Bulb Before Harvesting the Rest

If you're on the fence about timing, dig one plant and look at the bulb. A ready garlic head is plump, the wrapper is intact and tight, and the cloves are clearly defined under the papery layer. If the bulb is still slim or the cloves haven't fully separated under the wrapper, give the bed another week and check again.

One test plant tells you about the whole bed - garlic in the same bed almost always finishes within a few days of each other. If the test bulb is good, lift the rest; if it isn't, water normally and wait.

Tip

Don't waste the test bulb. If it's even close to ready, eat it fresh - young garlic has a milder, almost sweet flavor that's perfect in pasta, dressings, or roasted whole.

5

Loosen the Soil with a Fork - Never Yank by the Stem

2:40
Step 5: Loosen the Soil with a Fork - Never Yank by the Stem

Slide a garden fork or spade into the soil four to six inches away from the stem and rock it gently to break up the root ball. You're not trying to pry the bulb out with the tool - you're loosening the soil around it so the bulb lifts free without pressure on the stem.

Once you feel and hear the roots release, set the tool aside and lift the bulb by the base of the stem with your other hand. Yanking by the stem alone snaps the neck off perfectly mature bulbs and leaves you with garlic that won't store. A fork is worth the extra thirty seconds.

Tip

A digging fork beats a flat shovel here. The tines slide between cloves if you're a little off; a shovel blade will slice straight through the bulb if you guess wrong.

6

Brush Off Loose Dirt - Do Not Wash

3:17
Step 6: Brush Off Loose Dirt - Do Not Wash

Once a bulb is out of the ground, gently brush the loose dirt off with your hand. Don't pull at the wrappers and don't wash. Water at this stage is the fastest way to ruin a bulb - moisture trapped under the wrappers during curing causes rot, and washed garlic will not store for more than a few weeks.

The remaining dirt will fall off naturally during the curing process and you'll clean up the bulbs properly after they've cured for three weeks.

Tip

If a bulb comes up with a chunk of soil stuck inside the root mass, leave it. Resist the urge to pick at it - you'll damage roots that are still drawing moisture down out of the stem during the first couple of curing days.

7

Cure in a Shaded, Ventilated Spot for 3 to 4 Weeks

3:50
Step 7: Cure in a Shaded, Ventilated Spot for 3 to 4 Weeks

Move the harvested bulbs - stems, leaves, and roots all still attached - to a shaded, dry spot with good airflow. Hang bunches from twine, drape them across a section of chain-link or wire fencing, or lay them in a single layer on a screen. Whatever you use, keep individual bulbs separated by an inch or two so air moves around each one.

A garage, basement, covered porch, or shaded shed works perfectly. In humid weather, set a fan on low to keep air moving. After three to four weeks the stems will be papery, the necks dry, and the bulbs will rattle slightly when you handle them - that's how you know they're cured.

Tip

Skip direct sunlight even outdoors. Sun-cured garlic loses flavor compounds and the wrappers can crack from heat. Shade and airflow are the whole recipe.

8

Harvest on a Dry Day, Then Trim and Store

4:50
Step 8: Harvest on a Dry Day, Then Trim and Store

Wait three to four days after the last rain before you dig. Wet soil cakes onto the bulbs and traps moisture under the wrappers, both of which shorten storage life dramatically. A cloudy dry day is ideal - the bulbs go straight from cool soil into shade rather than baking in direct sun while you finish the row.

After three to four weeks of curing, trim the stems to an inch above the bulb and clip the roots flush with kitchen scissors. Brush off any remaining dirt and peel away the outermost loose wrapper layer. Store the trimmed bulbs in a mesh bag, paper sack, or open basket in a cool, dark, dry spot around 50 to 60 degrees. Properly cured hardneck stores for four to six months; softneck holds for six to eight.

Tip

Save the biggest, best-wrapped heads from your harvest and replant the individual cloves this fall - that's how you build a permanent garlic bed without buying seed garlic year after year.

Products Used

☐ The Checklist

When to Harvest Garlic (5 Signs Your Crop Is Ready)

Tools
6
Steps
8
Video
6 min

Your Guide

Beginner's Garden - Journey with Jill

As an Amazon Associate we earn from qualifying purchases. Links on this page may be affiliate links - clicking them and buying doesn't change your price, but helps support ShowMeStepByStep.

Tags

What's next

Related collections

Curated theme pages that include this tutorial.

Weekly Digest

Liked this gardening tutorial?

Pick the categories you want to hear about. Weekly digest of new step-by-step tutorials. No spam, easy unsubscribe.

Send me tutorials about

We only email about new tutorials. Easy unsubscribe anytime.