How to Do a Lazy Daisy Stitch

The finished result: How to Do a Lazy Daisy Stitch
Also in:Fiber Arts

By ShowMeStepByStepPublished Updated

Based on a video by Clever Poppy.

The lazy daisy is the stitch that turns a beginner's embroidery into something that looks like a finished design. It is a single looped chain, worked on its own and tacked down at the tip, and it makes a neat little petal or leaf. Arrange a ring of them around one point and you have a daisy. In this tutorial, Clever Poppy shows the stitch slowly enough to actually follow, with the small hand tricks that make it sit right.

You will start the loop at the petal's point, leave it generous, catch it from the inside, then shape and secure it so it stays plump instead of pulling flat. The one rule that ties it all together: tension the loop away from the tip and keep a finger on it as you close, so it holds its round shape.

What a lazy daisy stitch is

Its other name is detached chain stitch. It is one loop of chain stitch worked on its own, with a tiny tacking stitch over the top to hold it down. Chain stitch links loop after loop into a line. Lazy daisy stops after one. That is why it reads as a petal, a leaf or a seed rather than a line.

Building a 5- or 6-petal flower

Wandering petals are the giveaway of a first daisy. Before you stitch, mark a small center dot and draw a light circle around it, as wide as your petals are long. Then mark the petal tips on the circle. For six petals, think of a clock: 12, 2, 4, 6, 8 and 10. For five, start at 12 and space four more by eye.

Work opposite petals before the ones between them. Splitting a gap in half is easy. Spacing petals one after another usually leaves the last one squeezed.

Leaves, seeds and other uses

One lazy daisy angled off a stem stitch vine makes a quick leaf. Put a pair at each bend and you have a trailing vine in minutes. Small loops scattered in different directions read as seeds. Long and narrow, they turn into grass or lavender buds. Short and round, they make a bee's wing, which the video shows.

Strand count and loop size

Two or three strands of six-strand floss is the usual range. Two gives a fine, delicate petal. Three or four fill the loop out and look bolder from across the room. Bigger loops need more strands or they look skeletal. Petals around 5-8mm long suit two or three strands. Anything over 1cm looks better with four, or with a single straight stitch worked up the middle to fill it.

Finish with a french knot center

A daisy without a center looks unfinished. Once the petals are in, fill the middle with one to three french knots in yellow or a contrast color. Use a strand or two more for the knots than you used for the petals, so the center sits up a little.

Common mistakes

  • Loop pulled flat. The petal shrinks to a skinny line. Pull away from the tip and keep a thumb on the loop as you tack it. If it is already tight, use the slide-and-loosen fix from step 7.
  • Anchor stitch too long. A long tack leaves a tail poking past the petal. Keep it tiny, right over the curve of the loop.
  • Uneven petals. Mark the circle and tips before you stitch, and pull every loop with the same tension.
  • Center hole on thin fabric. Six petals through one hole can stretch loose weaves open. Come up a thread apart around the dot instead.

For a solid outline around a bigger flower, split stitch pairs well with these petals.
What you'll need

Step-by-Step Guide

7 steps · about 5 minutes.Check off each step as you go and your progress saves automatically.

1

Come Up at the Petal's Point

0:08
Step 1: Come Up at the Petal's Point - How to Do a Lazy Daisy Stitch

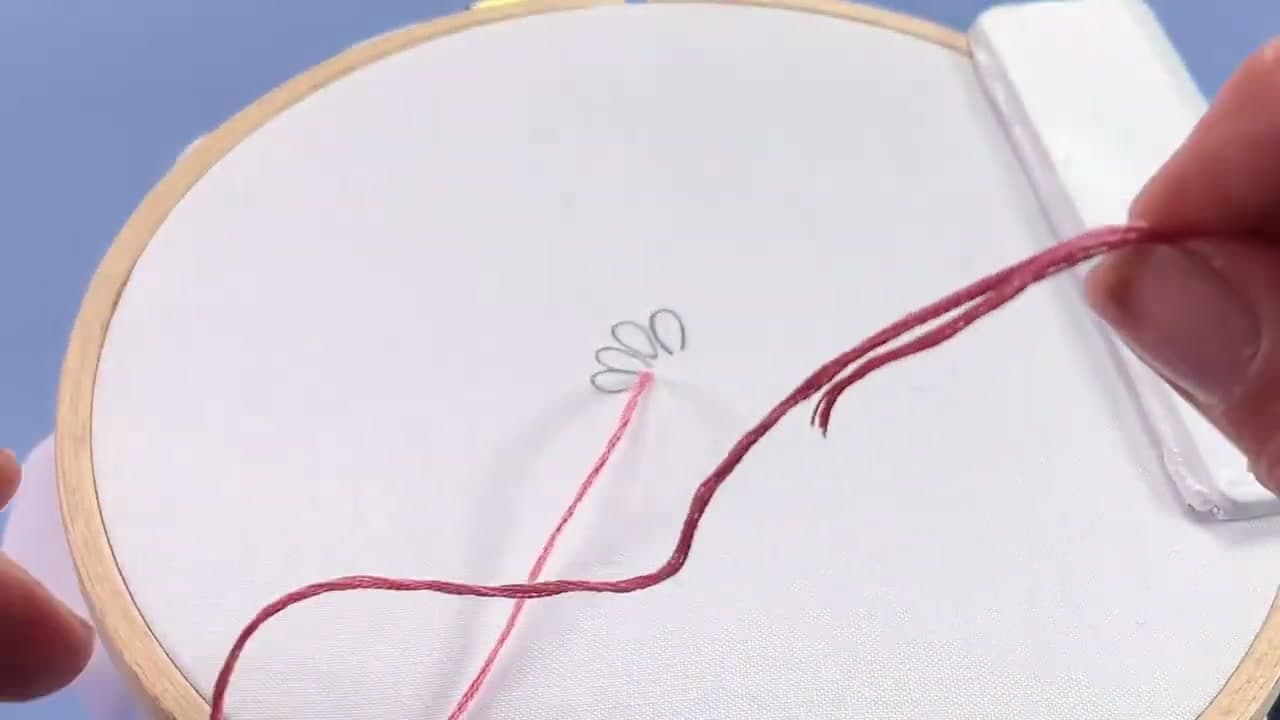
Bring your needle up through the fabric right at the pointed tip of where you want the petal to sit, and pull all of the working thread through so the knot seats against the back. This point is the bottom of the petal, the spot it narrows to, so you start every lazy daisy here.

If you are stitching a whole flower, this point is the center of the daisy. Every petal will begin from this same spot and fan outward.

Tip

Watch this step The pointed tip is your anchor. Starting in the same hole each time is what makes a row of petals share one neat center.

2

Lay the Thread in the Petal's Direction

0:33
Step 2: Lay the Thread in the Petal's Direction - How to Do a Lazy Daisy Stitch

This stitch is a two-hand job. Use your free hand to lay the working thread out flat in the direction you want the petal to point, then press it lightly against the fabric to hold it there.

Aiming the thread before you anchor it is what controls where the petal lands. Point it where you want the petal and the loop will follow.

Tip

Watch this step Hold the thread down with a finger or thumb the whole time. That free hand is doing half the work of shaping the loop.

3

Go Back Down and Leave a Big Loop

1:00
Step 3: Go Back Down and Leave a Big Loop - How to Do a Lazy Daisy Stitch

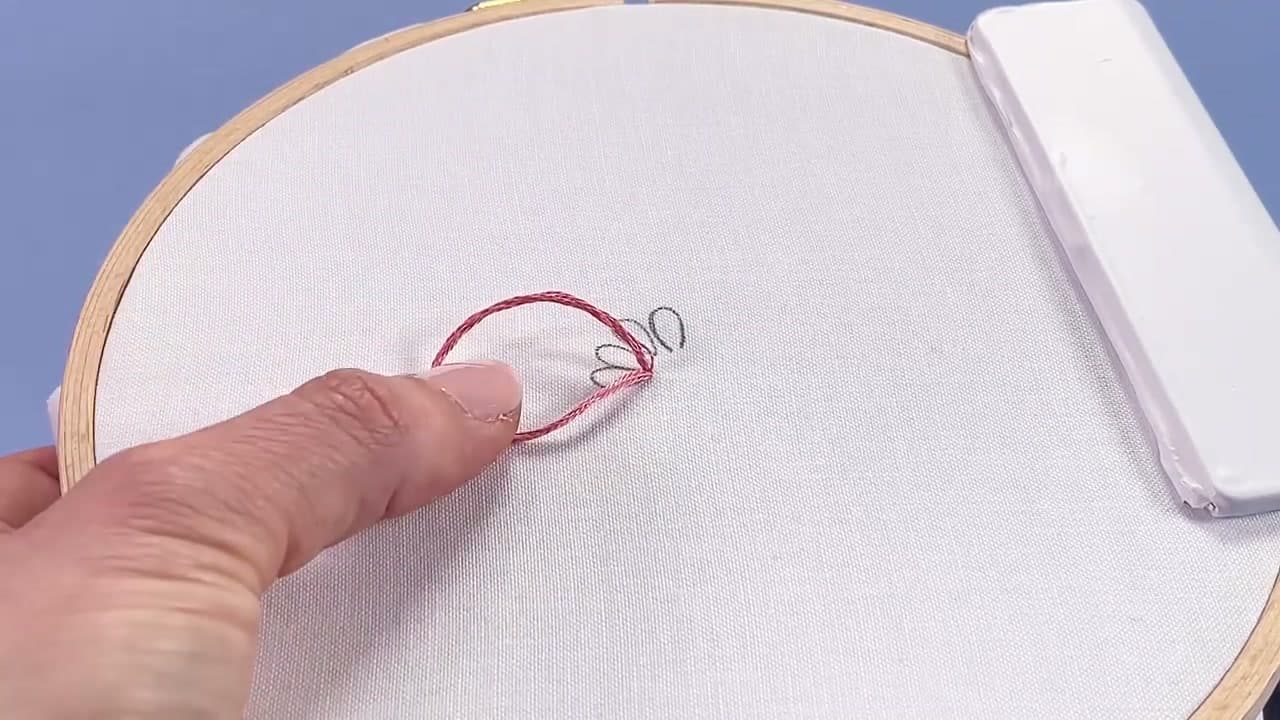
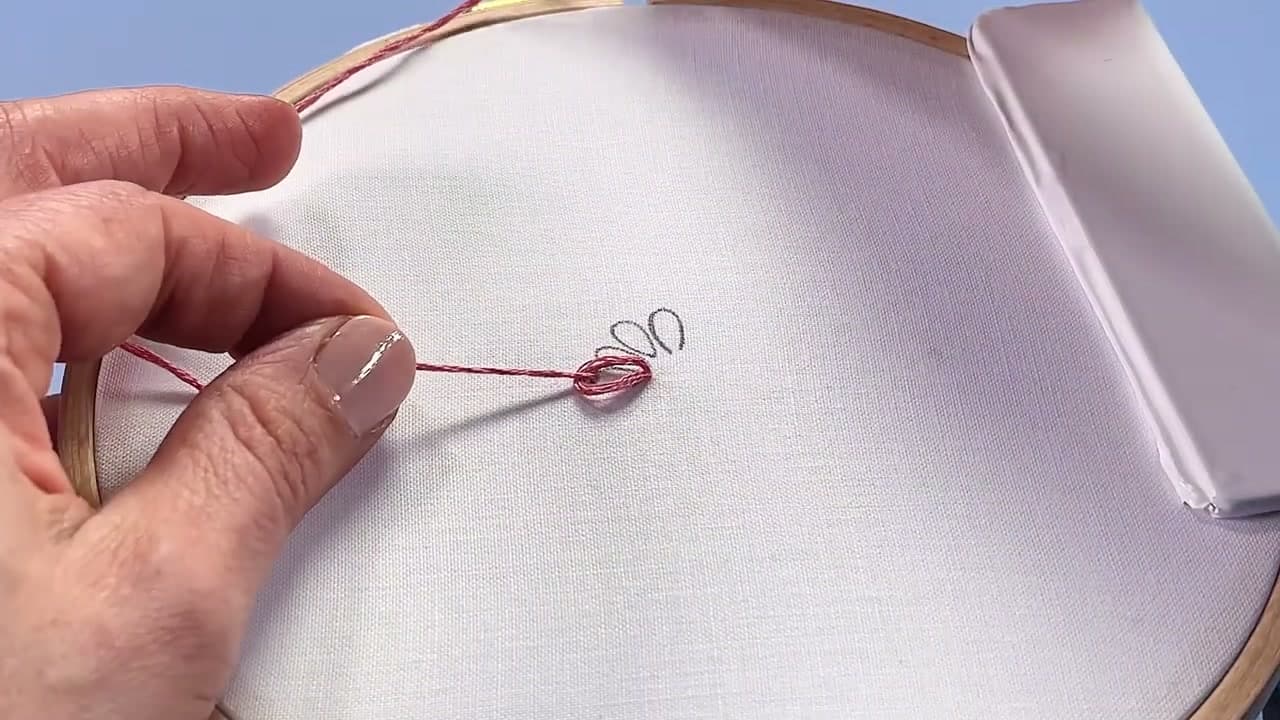
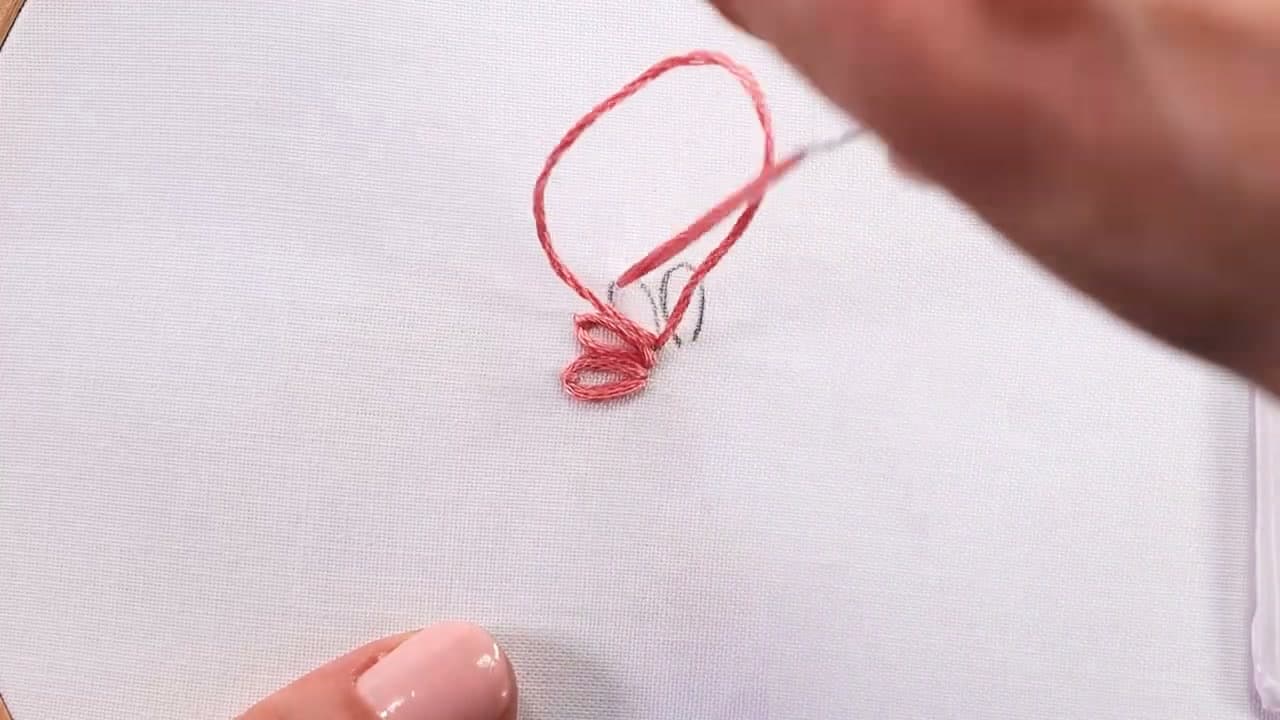
Take the needle back down into the same hole you came up through, or just beside it, which is perfectly fine. Draw the thread to the back slowly and stop while a generous loop is still sitting on top of the fabric.

Leave the loop bigger than the petal you actually want. The extra slack gives you room to shape it cleanly in the next steps, and you can always draw it down later.

Tip

Watch this step Go slow on this pull. If you whip the thread through, the loop vanishes before you can catch it and you have to start the petal over.

4

Bring the Needle Up Inside the Loop

1:12
Step 4: Bring the Needle Up Inside the Loop - How to Do a Lazy Daisy Stitch

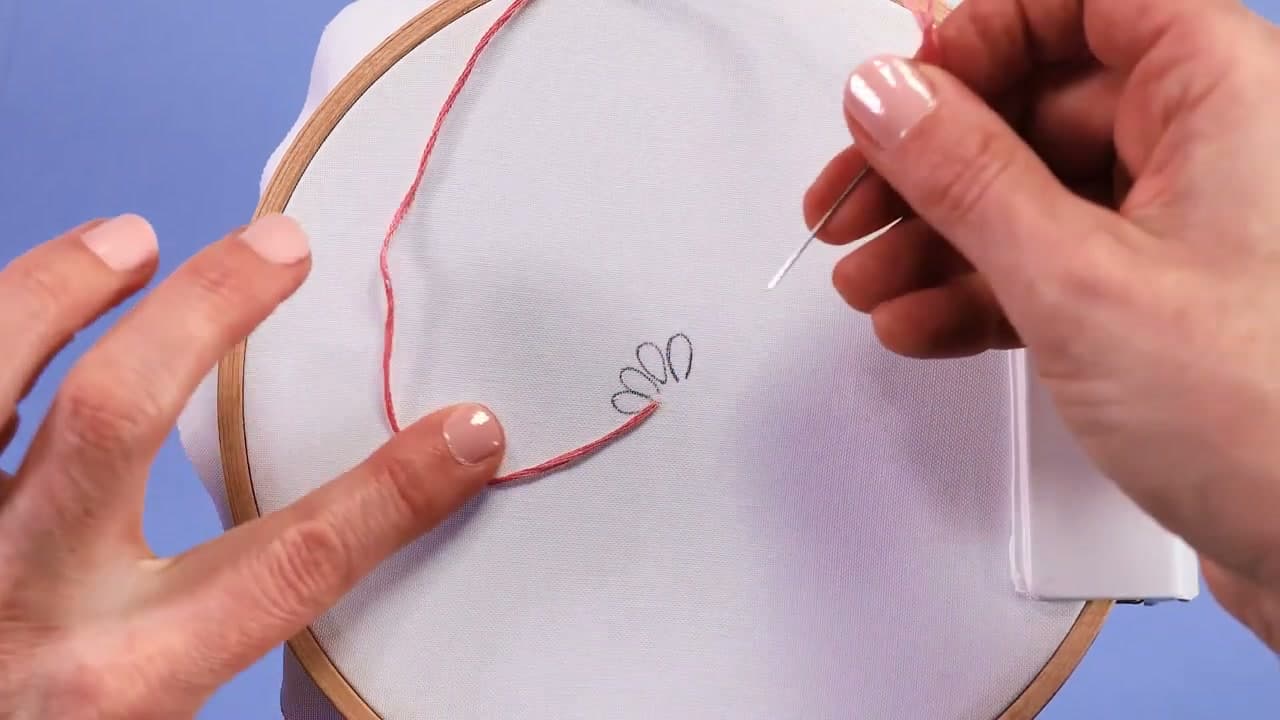
Bring the needle back up through the fabric on the inside of the loop, aiming for the spot just inside that curved top edge. The needle must come up within the loop, not outside it.

Coming up inside is the whole trick of the stitch. It is what hooks the loop in place so it reads as a rounded petal instead of pulling flat into a straight line.

Tip

Watch this step Eye the inside of that curved top before you push the needle up. Catching the loop from inside is the difference between a petal and a flat stitch.

5

Pull Through and Shape the Petal

1:30
Step 5: Pull Through and Shape the Petal - How to Do a Lazy Daisy Stitch

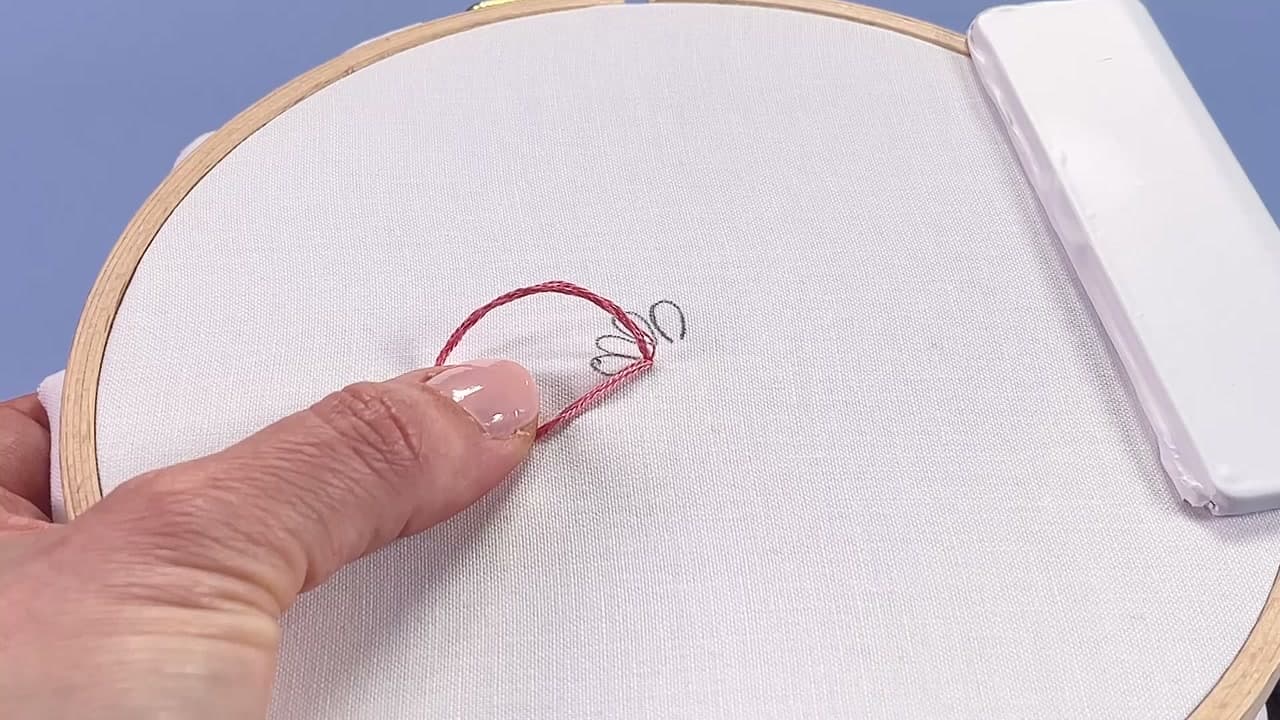
Gently draw the working thread through, pulling it out away from the end of the loop. Go slowly and watch the lazy daisy shape form as the loop settles. Stop once the petal is as full and round as you want it.

A touch looser keeps the petal plump and rounded. A touch tighter gives a slimmer, more pointed petal. Either can be right depending on the flower you are making.

Tip

Watch this step Tension is everything in this stitch. Draw it away from the tip, not back toward it, or the round shape collapses.

6

Secure the Petal With a Tiny Stitch

1:55
Step 6: Secure the Petal With a Tiny Stitch - How to Do a Lazy Daisy Stitch

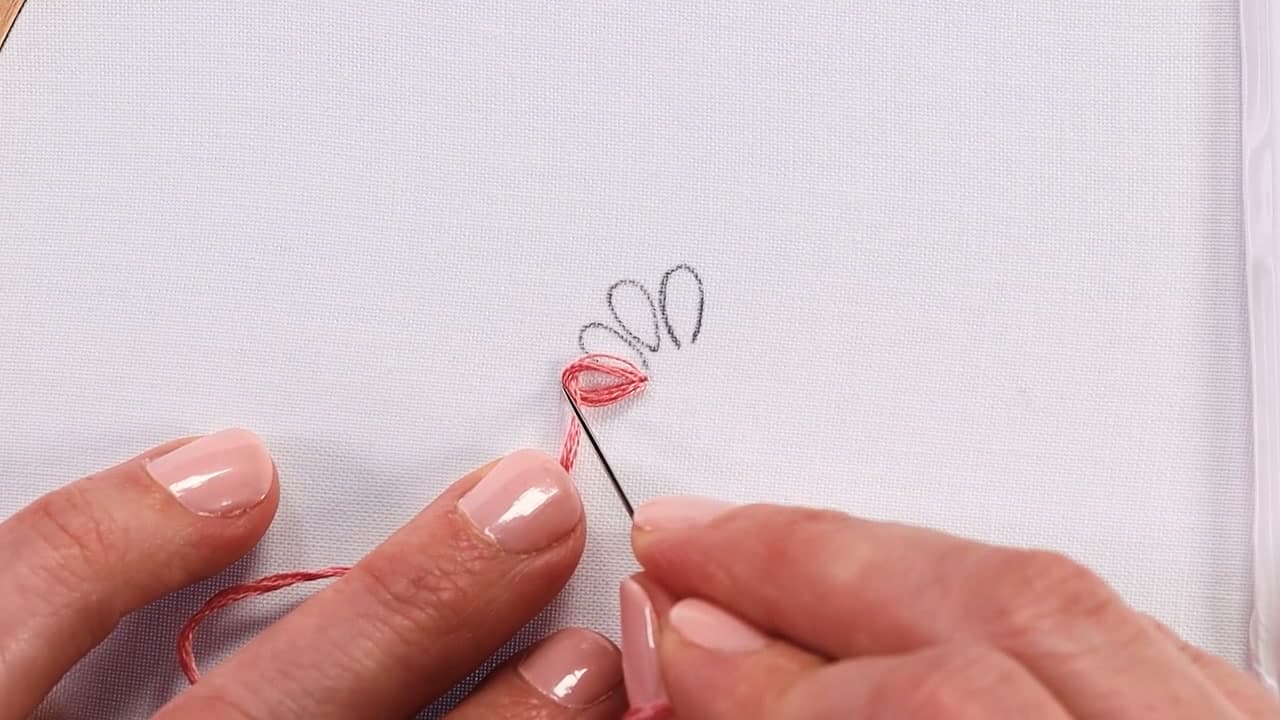
Take the needle down with a very small stitch right over the outside edge of the loop's curved top. As you tighten that stitch, rest your thumb on the petal so it keeps its rounded shape instead of being pulled flat.

That tiny tacking stitch is what locks the petal to the fabric. Once it is snug, you have made one complete detached chain, which is one finished lazy daisy petal.

Tip

Watch this step Keep your thumb on the loop as you cinch the securing stitch. It stops the petal from snapping into a tight sliver right at the finish.

7

Fix the Tension and Build Your Flower

4:05
Step 7: Fix the Tension and Build Your Flower - How to Do a Lazy Daisy Stitch

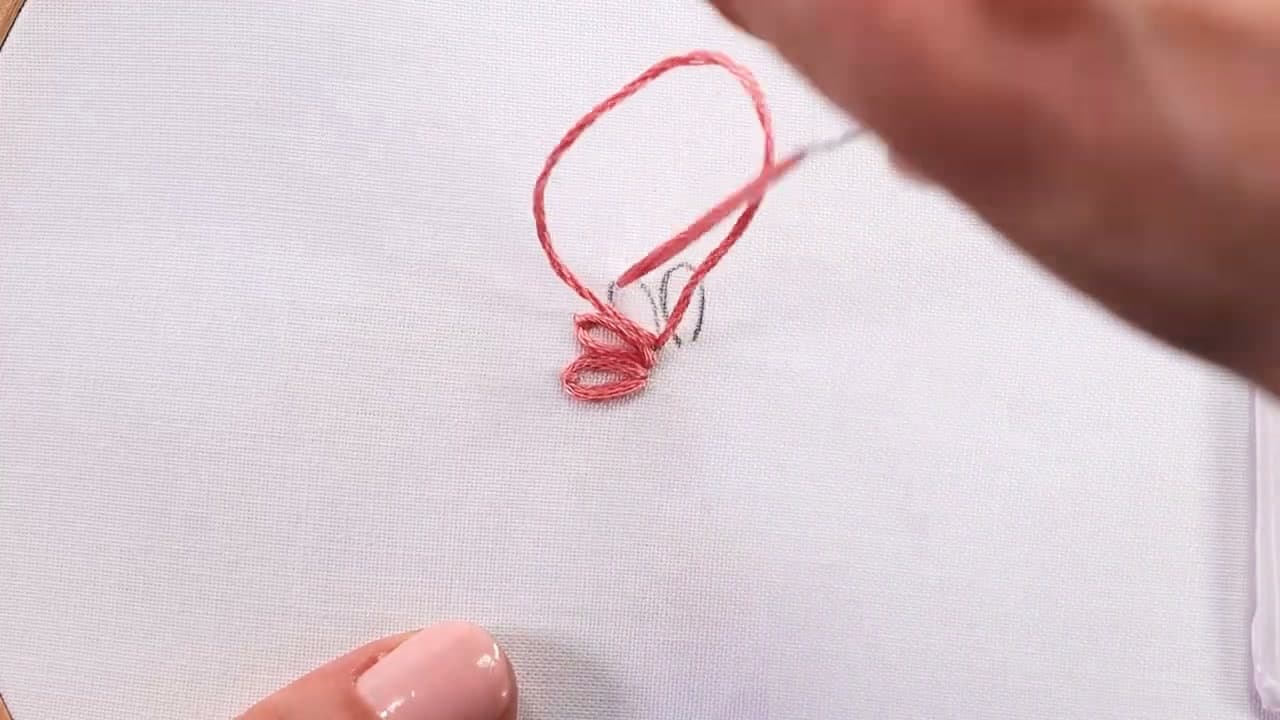
Tension takes practice, so do not worry if early petals pull narrow. To round one back out, slide the needle through the middle of the loop and gently draw a little slack back to the top, then secure it.

Work a ring of these around one center point and you have a daisy. They do not always need a sharp point either. A softer horseshoe shape is perfect for leaves or a bee's wing.

Tip

Watch this step Petals pulling skinny is the most common beginner snag, and it happens to pros too. The slide-and-loosen fix saves a tight petal without unpicking it.

Keep going

How to Embroider a Rose (Easy Woven Wheel Stitch)

Products Used

The Checklist

How to Do a Lazy Daisy Stitch

Tools
3
Materials
2
Steps
7
Video
5 min

Tools we recommend

Your Guide

Clever Poppy

As an Amazon Associate we earn from qualifying purchases. Links on this page may be affiliate links - clicking them and buying doesn't change your price, but helps support ShowMeStepByStep.

Tags

Sunday How-To

New embroidery tutorials, every Sunday

One short email with the week's best step-by-step guides. Free, no spam, unsubscribe anytime.

Test your knowledge

Did the lesson stick? Start with this one.

5 questions covering what you just read. No signup, no score saved, and you can stop after this one.

Question 1 of 5

The lazy daisy stitch is basically a single what, tacked down to the fabric?

Quick reference

Key takeaways from How to Do a Lazy Daisy Stitch

5 questions, answers, and one-line explanations. Tap to expand.

  1. 1.The lazy daisy stitch is basically a single what, tacked down to the fabric?

    Answer: Detached chain

    A lazy daisy is one detached chain loop secured with a small stitch, forming a petal.

  2. 2.When you bring the needle back up to catch the loop, where must it come up?

    Answer: Inside the loop

    The needle has to come up inside the loop so it hooks the thread into the petal shape.

  3. 3.How big should you leave the loop before catching it with the needle?

    Answer: Bigger than the finished petal

    Extra slack gives you room to shape the petal, which you tighten down afterward.

  4. 4.What keeps the petal from being pulled flat when you secure it?

    Answer: Hold the petal down with your thumb as you stitch

    Holding the petal with your thumb as you tack it down keeps its rounded shape.

  5. 5.For a plumper, more rounded petal instead of a slim one, how should you pull the thread?

    Answer: Pull it a touch looser

    A looser pull leaves the petal full and round; tightening it makes a slimmer petal.

Did this work for you?

What's next

Weekly Digest

Liked this embroidery tutorial?

Pick the categories you want to hear about. Weekly digest of new step-by-step tutorials. No spam, easy unsubscribe.

Send me tutorials about

We only email about new tutorials. Easy unsubscribe anytime.