How to Dispute a Charge: Get Your Money Back from Unauthorized Transactions

Also in:Adulting

By ShowMeStepByStepPublished Updated

Based on a video by Adam Answers.

Knowing how to dispute a charge is one of the most useful banking skills you can pick up. Whether the charge is unauthorized, a duplicate, the wrong amount, or for a product that never showed up, every major credit card issuer gives you a way to challenge it. The catch is that the steps and screens look slightly different at each bank, so the first time you try it, the process can feel hidden.

The walkthrough below uses Chase as the example because the dispute form is easy to follow and the screens look similar to what most issuers show. The same basic flow works at Bank of America, Capital One, Citi, Discover, Wells Fargo, and just about every other major card issuer. Log into your account, find the charge, click Dispute Transaction, pick a reason, submit details, and save the case ID. Then check the status until the dispute is resolved.

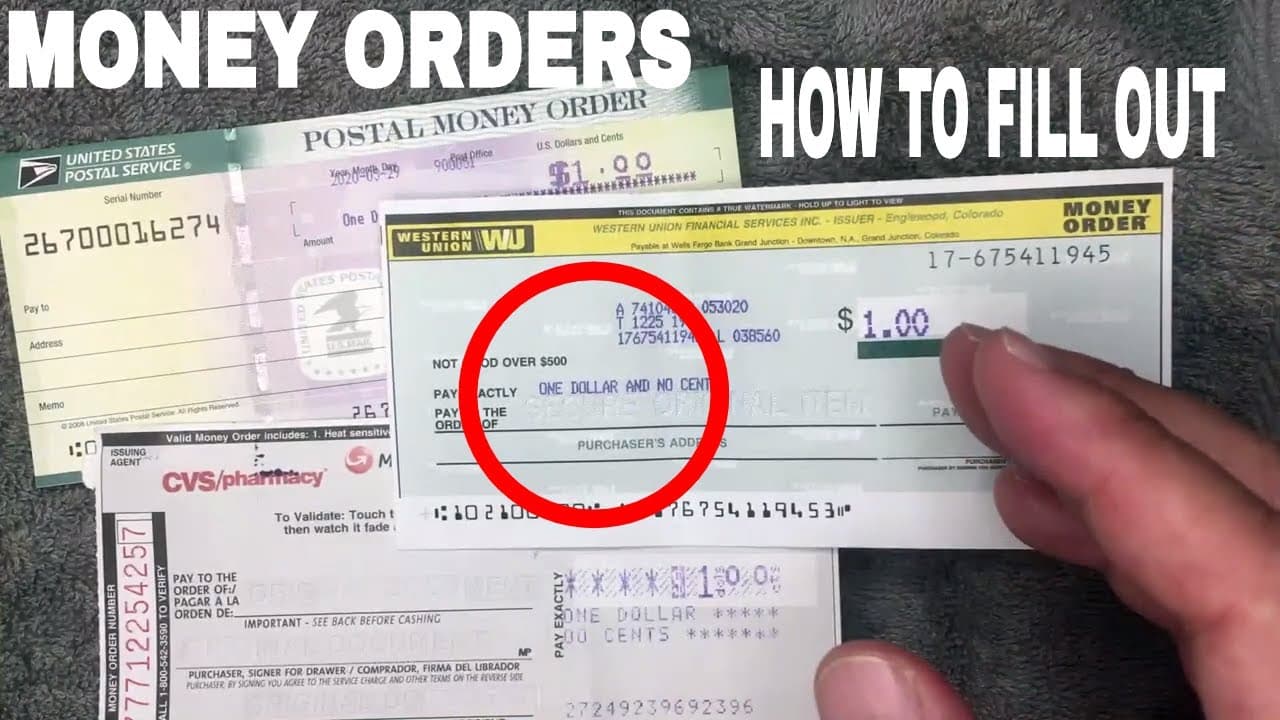
This guide pairs well with the other banking basics: how to deposit a check, how to deposit a check on mobile, how to balance a checkbook, and how to write a money order. Before you dispute, try to work it out with the merchant first. Disputes are slower than refunds, and racking up too many of them in a short window can put your account under extra scrutiny.

Step-by-Step Guide

1

Step 1: Log Into Your Bank Account and Find the Card

0:26
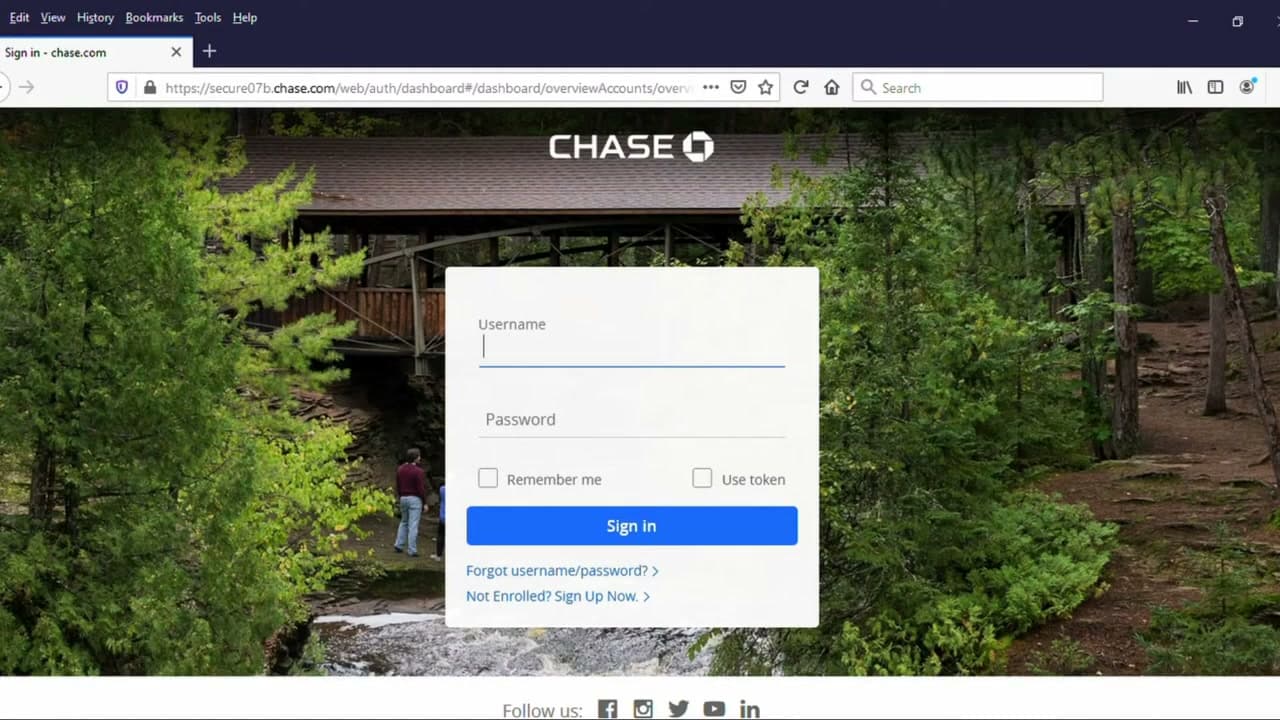
Step 1: Step 1: Log Into Your Bank Account and Find the Card

Sign into your bank or card issuer's website or mobile app with your usual login. Once you're in, you'll see a list of your cards and accounts. If you have more than one card, find the specific card the disputed charge was made on. Click or tap that card to open the account details. The walkthrough here shows Chase, but the layout is similar across most major card issuers like Capital One, Citi, and Bank of America.

Tip

Always log in through the official app or by typing the bank URL directly. Phishing emails that look like dispute notices are a common scam right around the time real disputes are happening.
2

Step 2: Open Recent Transactions or Activity Since Last Statement

0:55
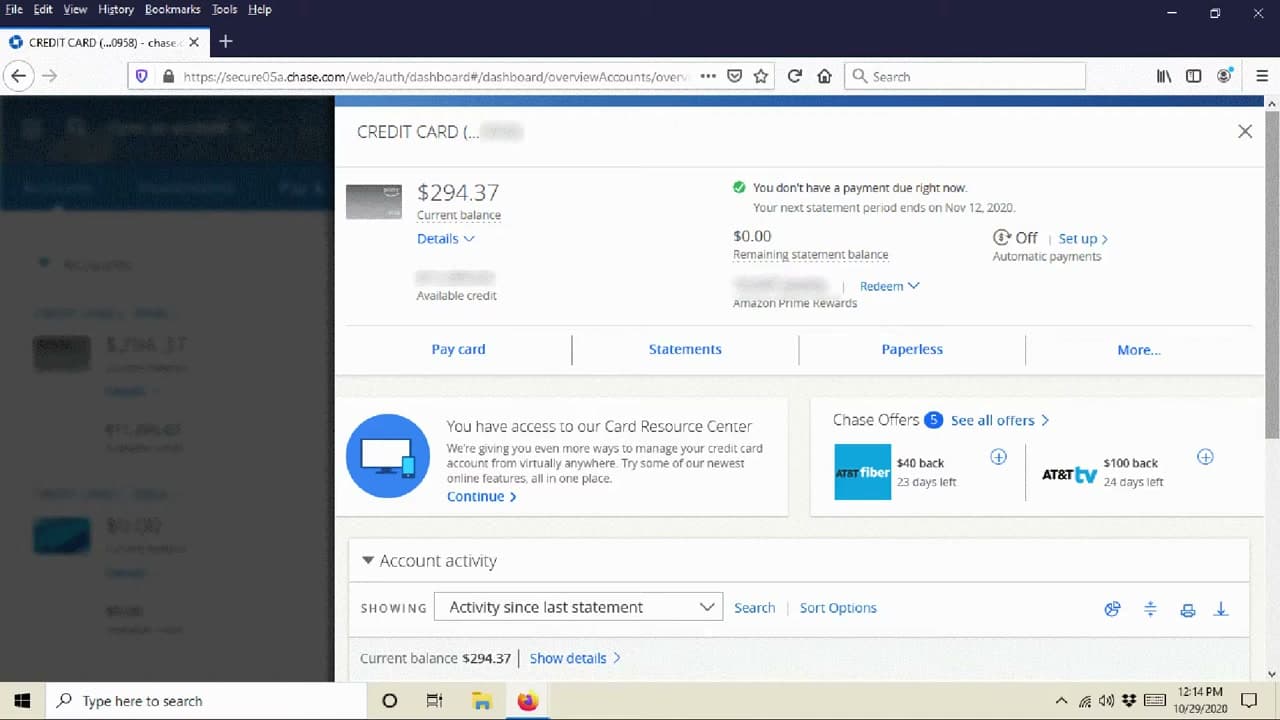
Step 2: Step 2: Open Recent Transactions or Activity Since Last Statement

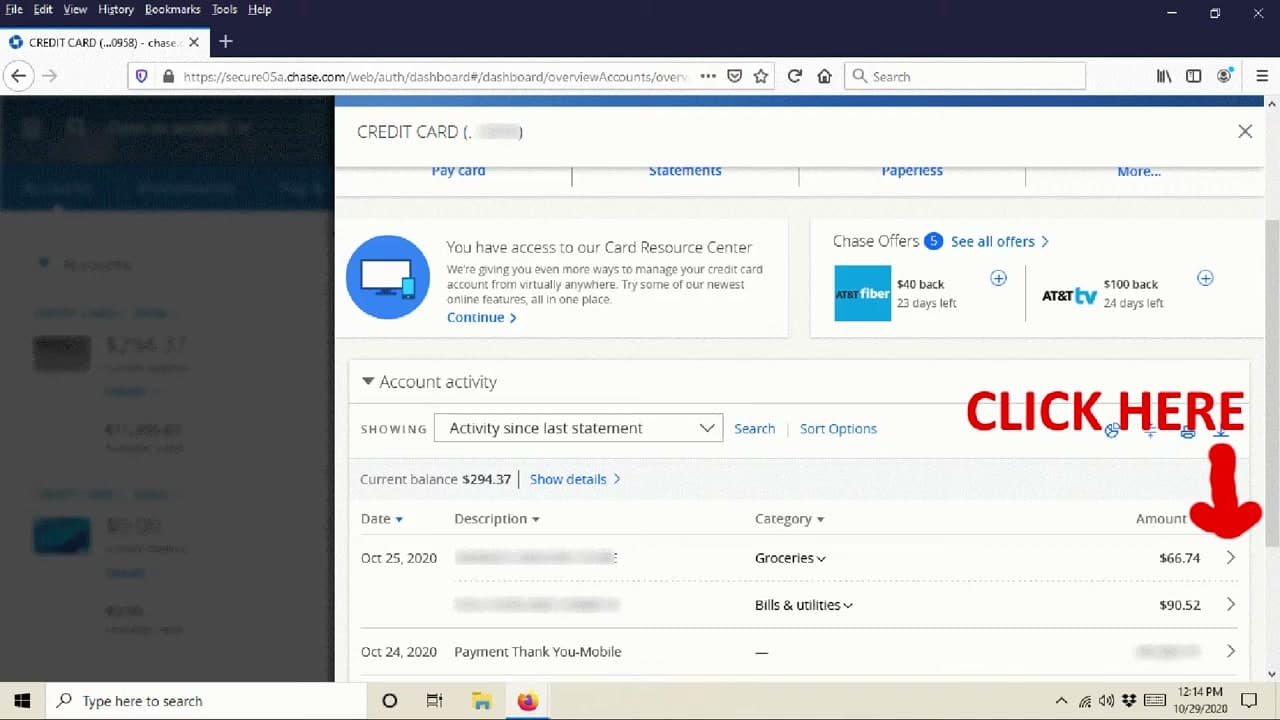
Once you're inside the card's account view, scroll down to recent transactions or activity since last statement. This is where every charge posted to the card is listed. Look through the list carefully and find the charge you want to dispute. Check the date, merchant name, and amount so you grab the right one. If you're not sure which charge is wrong, compare the list against your receipts before going further.

Tip

Set up transaction alerts in the app so you get a text or email every time a charge posts. You'll spot a wrong charge in minutes instead of waiting for the statement.

3

Step 3: Click the Transaction to See Full Details

1:20
Step 3: Step 3: Click the Transaction to See Full Details

Click the arrow at the end of the transaction row, or tap the transaction itself on mobile. A panel opens up showing the merchant, the sale amount, the date, and the category. Underneath those details you'll see a Dispute Transaction button. If you don't see that button right away, scroll down or look for a More Options menu. Some issuers tuck the dispute link behind a three-dot menu on the right side.

Tip

Screenshot the transaction details before you start the dispute. If the bank's system glitches mid-form, you'll have the merchant name and date saved on your phone.

4

Step 4: Click Dispute Transaction to Start the Form

1:42
Step 4: Step 4: Click Dispute Transaction to Start the Form

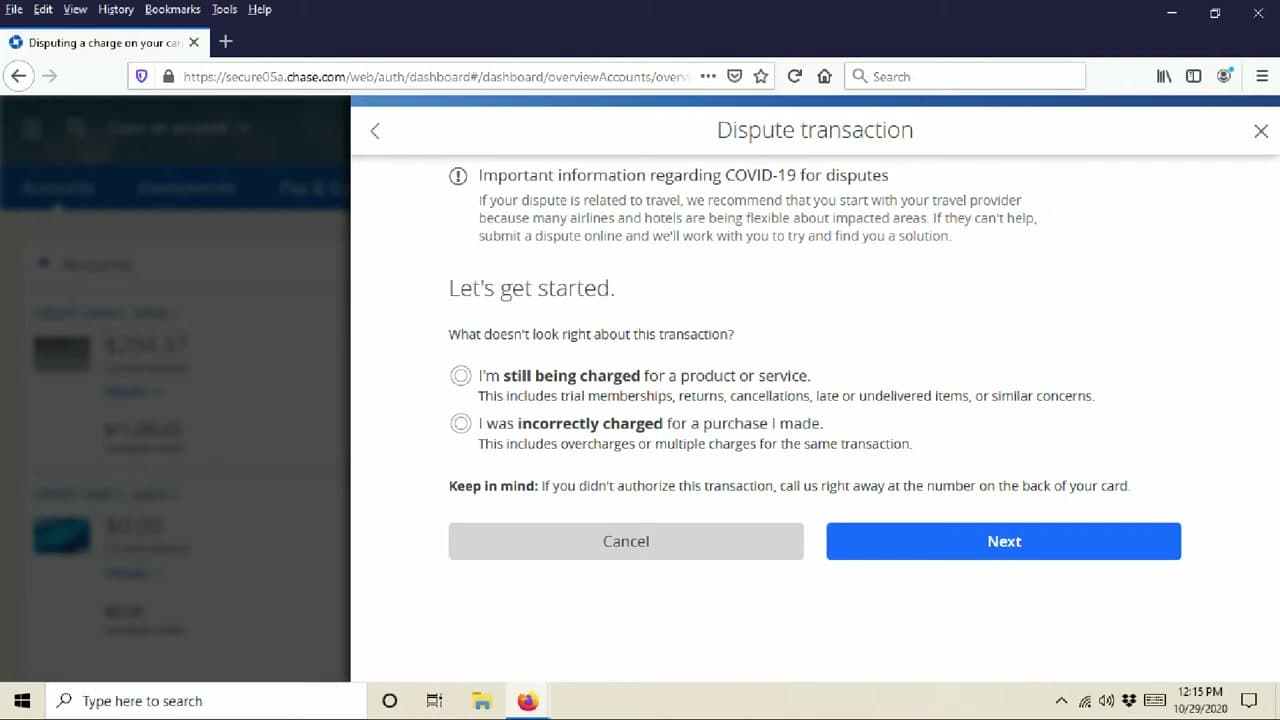
Tap or click the Dispute Transaction button. A new window opens asking what doesn't look right about this charge. This is where the dispute form starts. Take a breath before you click through. Have your evidence ready: receipts, emails confirming a refund, screenshots of the merchant's website, or the order number. The more specific you are in this form, the faster the bank can investigate and credit you back.

Tip

If you suspect outright fraud (someone else used your card), don't go through the online dispute form. Call the number on the back of the card. Fraud claims get a different, faster track.

5

Step 5: Pick the Reason That Matches Your Situation

2:18
Step 5: Step 5: Pick the Reason That Matches Your Situation

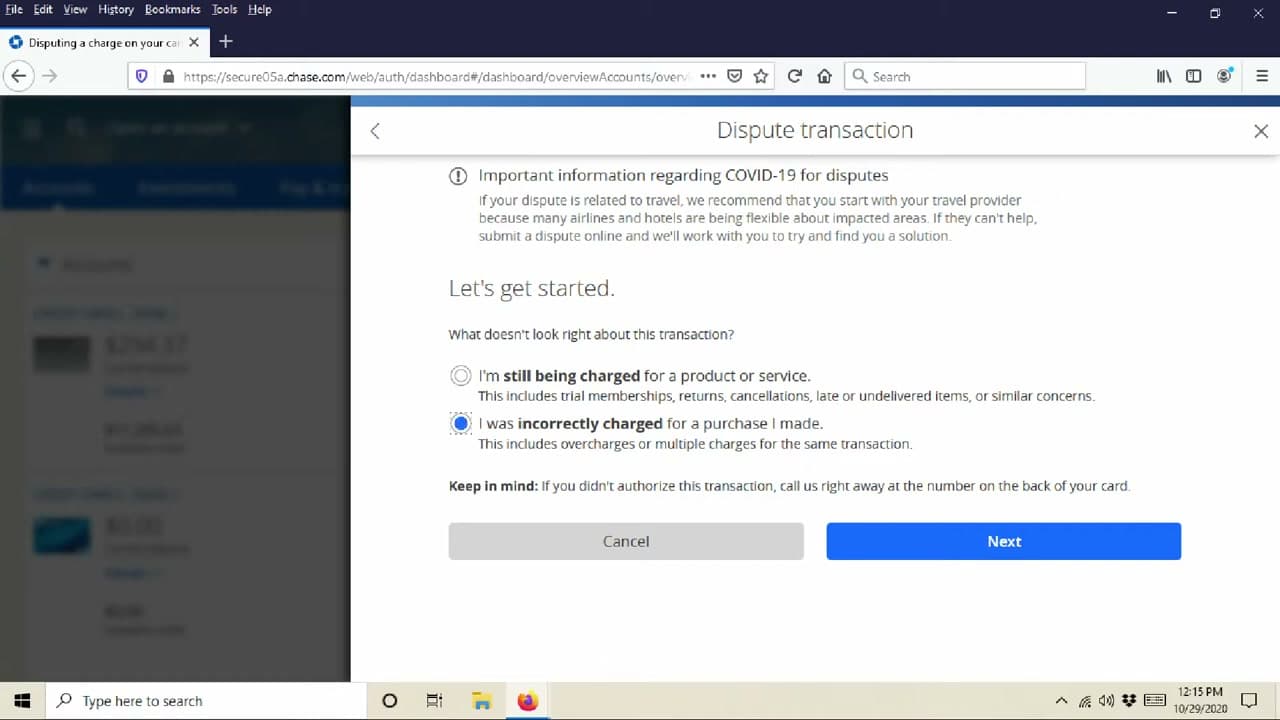
Select the reason that best fits your dispute. Common options include: you were charged the wrong amount, charged twice for one purchase, charged for a subscription you canceled, charged for something you never received, or charged on a card that wasn't even used. Pick the closest match. If your situation doesn't fit any option exactly, choose the nearest one and add a note. Wrong reason codes can slow the dispute down or get it denied.

Tip

If your reason is a canceled subscription, gather the cancellation confirmation email before you start. Banks ask for proof of cancellation date on those disputes.

6

Step 6: Enter the Expected Amount or Other Required Details

2:39
Step 6: Step 6: Enter the Expected Amount or Other Required Details

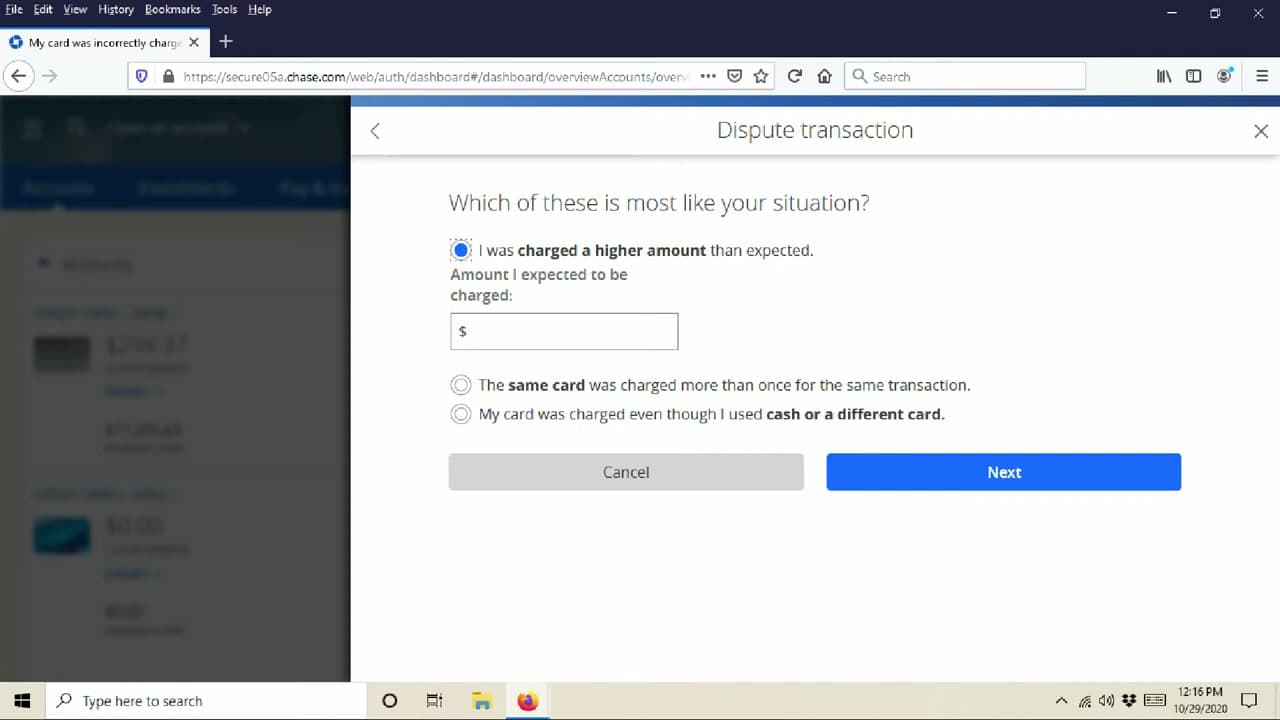
Depending on the reason you picked, the form asks follow-up questions. If you were overcharged, type the amount you actually expected to be charged. If a subscription wouldn't cancel, enter the date you tried to cancel. Be honest and specific. The bank cross-checks what you enter against the merchant's records, so guessing or rounding hurts your case. Click Next when each screen is filled in.

Tip

Have the original receipt or order confirmation open in another tab while you fill the form out. Typing dollar amounts from memory leads to disputes getting denied for inconsistency.

7

Step 7: Review the Dispute and Submit

2:55
Step 7: Step 7: Review the Dispute and Submit

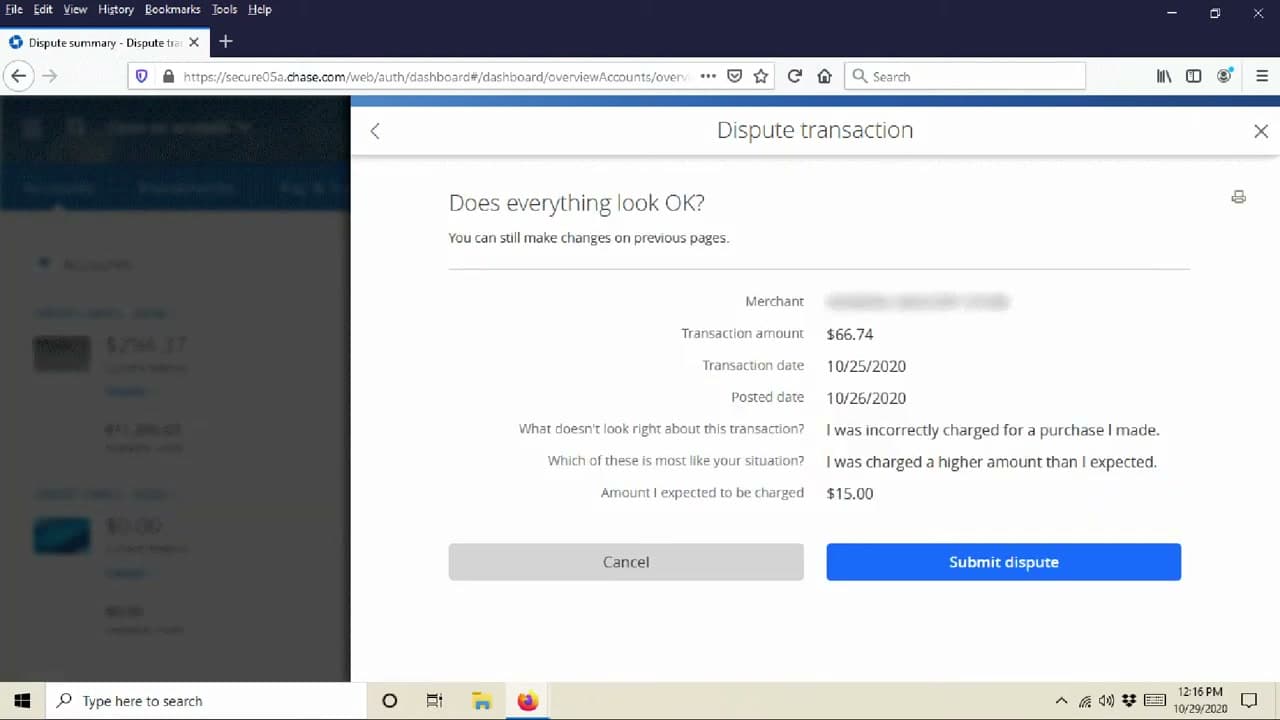
The final screen lets you review everything before submitting. Go back and edit any page where the details look off. When everything's correct, click Submit Dispute. You'll get a confirmation screen and usually an email with a case ID. Save that case ID. You'll need it to check the status later. The bank will contact the merchant, investigate, and usually issue a temporary credit while they work through it.

Tip

Forward the confirmation email to a folder named 'Disputes' so you can find it later. Banks resolve some cases in days and others in two months, so don't lose the paper trail.

8

Step 8: Track the Dispute Status From Account Services

4:05
Step 8: Step 8: Track the Dispute Status From Account Services

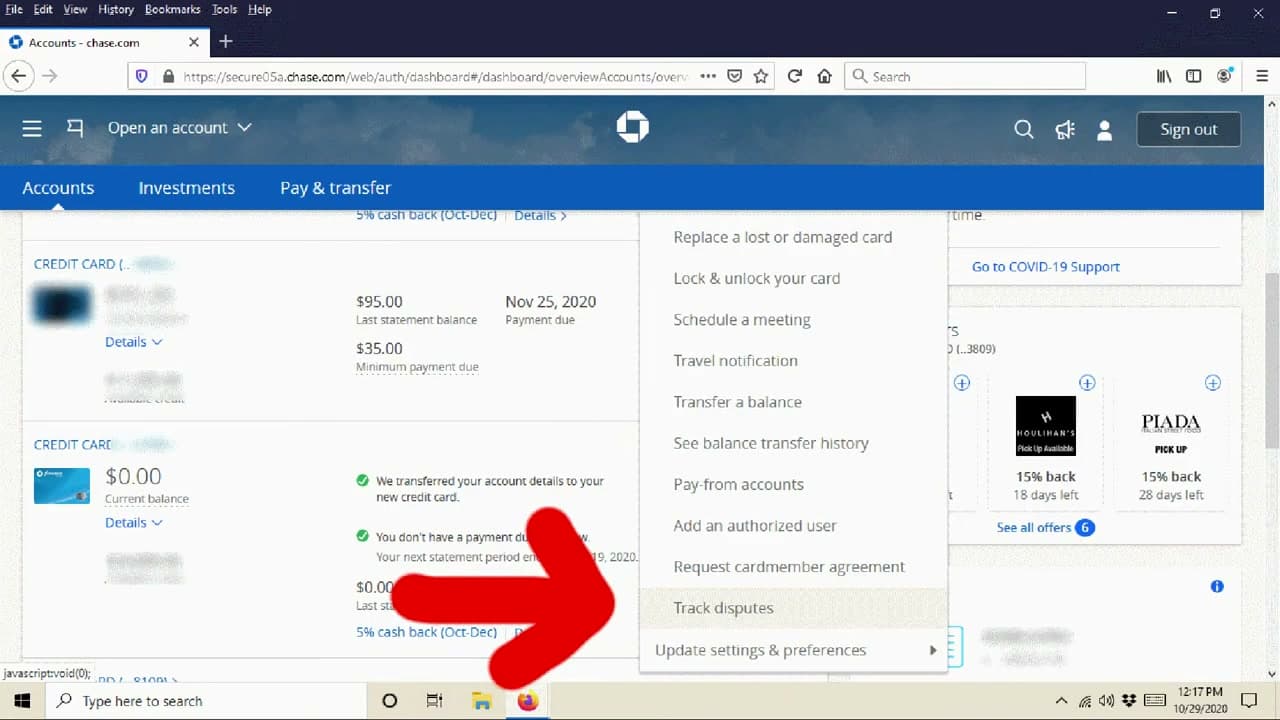
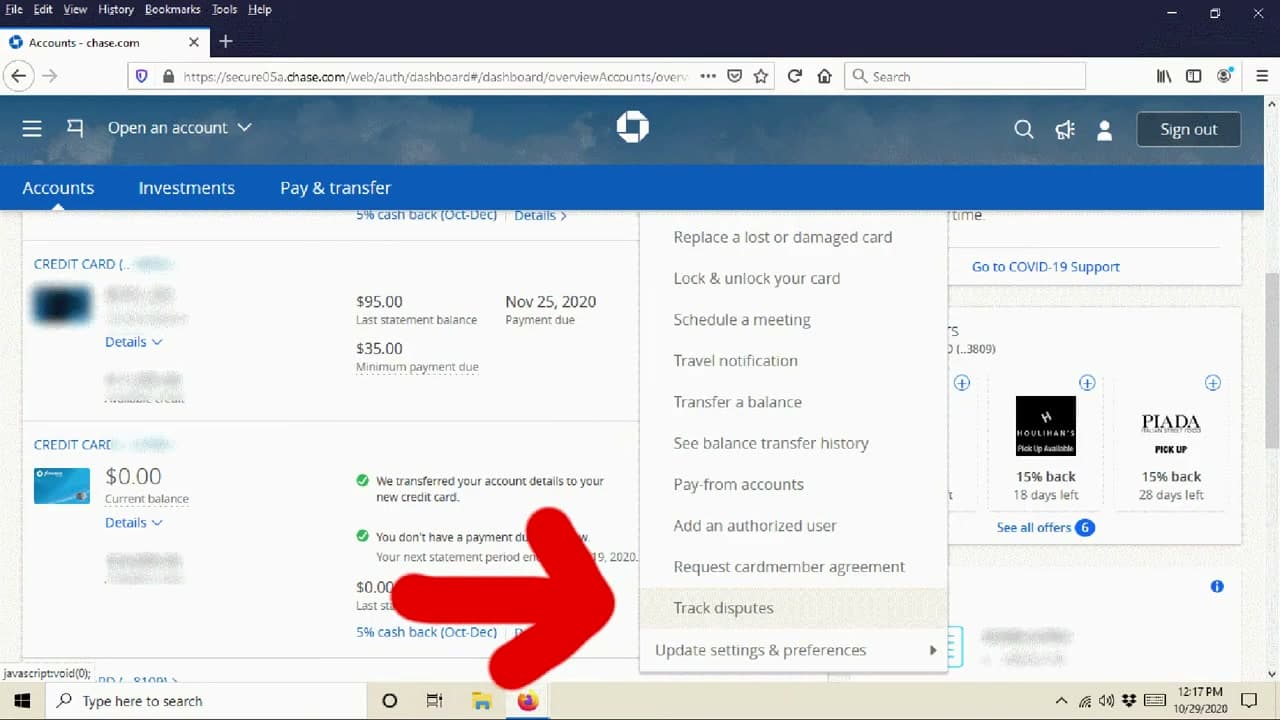
To check on your dispute later, log back into your account and pick the same card. On desktop, click the three-dot menu and choose Account Services, then scroll down to Track Disputes. On mobile, scroll down on the main card screen to Account Services and tap Show More if Track Disputes isn't visible right away. Tap Track Disputes and you'll see every open and closed dispute with its current status.

Disputing at other banks. The universal pattern is the same wherever you bank: call the card-issuer phone number on the back of the card for fraud or urgent disputes, file the online dispute through the app or website for everything else, and follow up in writing (certified mail) if the online process stalls past 60 days. Capital One, Citi, Bank of America, Wells Fargo, Discover, and most credit unions all use a near-identical online form. The screens have different colors and the buttons have different labels, but the seven steps above map almost one-to-one.

Tip

If the dispute closes against you and you still think you're right, the federal Fair Credit Billing Act gives you 60 days to ask for a rereview. Send a letter to the bank's billing-error address with your case ID and the new evidence.

Products Used

Your Guide

Adam Answers

As an Amazon Associate we earn from qualifying purchases. Links on this page may be affiliate links - clicking them and buying doesn't change your price, but helps support ShowMeStepByStep.

Tags

Test your knowledge

Did the lesson stick? Find out in 2 minutes.

5 quick questions covering what you just read. No signup, no score saved — just a gut check.

Quick reference

Key takeaways from How to Dispute a Charge: Get Your Money Back from Unauthorized Transactions

5 questions, answers, and one-line explanations. Tap to expand.

  1. 1.After signing in, what's the first thing you select?

    Answer: The card the disputed charge was made on

    Disputes are filed per-card, not per-account.

  2. 2.Where's the 'Dispute Transaction' button usually located?

    Answer: Inside the transaction's detail panel (sometimes behind a 'More' menu)

    Tap into the transaction itself; some banks tuck it behind a 3-dot menu.

  3. 3.Why does picking the right reason code matter?

    Answer: Wrong codes can slow the dispute or get it denied

    Reason codes route the dispute. Mismatched ones cause back-and-forth that wastes days.

  4. 4.What does the bank typically do AFTER you submit?

    Answer: Issue a temporary credit while investigating

    Temporary credit lands while they contact the merchant. Final outcome can adjust it.

  5. 5.What should you save the moment you submit?

    Answer: The case ID (and the confirmation email)

    The case ID is how you track status later in Account Services.

What's next

Related collections

Curated theme pages that include this tutorial.

Weekly Digest

Liked this banking tutorial?

Pick the categories you want to hear about. Weekly digest of new step-by-step tutorials. No spam, easy unsubscribe.

Send me tutorials about

We only email about new tutorials. Easy unsubscribe anytime.