How to Check Transmission Fluid (Dipstick or No Dipstick)

By ShowMeStepByStepPublished Updated

Based on a video by Budget Mechanic.

Bad transmission fluid kills transmissions. The fluid lubricates, cools, and hydraulically actuates the shifts - when it gets low or burnt, the gears slip, the clutches glaze, and a $4,000 rebuild is suddenly on your shoulders. Checking the level takes ten minutes and the dealer charges $80 to do it.

The catch on newer cars. Around 2010, automakers started shipping vehicles with no transmission dipstick. The factory calls them "sealed" or "lifetime" or "non-user serviceable" transmissions, and the official answer is to bring the car to the dealer with a scan tool. That is marketing, not engineering. The transmission still needs the same checks it always did - you just need a workaround to read the level.

The workaround. Josh from Budget Mechanic uses your engine oil dipstick (it has a blank side), marks it with the cold and hot fluid level lines for your specific transmission, and reads the level the same way a factory dipstick would. Free, repeatable, and accurate enough for a level check.

Two situations this walkthrough covers. If your car has a real transmission dipstick (most pre-2010 vehicles, plus many trucks), skip the marking step and go straight to step 6. If your car has the blank plug instead of a dipstick (a 2014 Chrysler Town and Country in this video, but the same on Dodge, Chrysler, GM, Mercedes, and most modern cars), follow the marking method from step 2 onward.

While the hood is up, this is also a good time to check your car battery, swap the cabin air filter, or tackle brake pads. Knock the whole monthly check out in one afternoon.

Step-by-Step Guide

1

Step 1: Find the Transmission Fill Plug (or Confirm You Have a Dipstick)

0:50
Step 1: Step 1: Find the Transmission Fill Plug (or Confirm You Have a Dipstick)

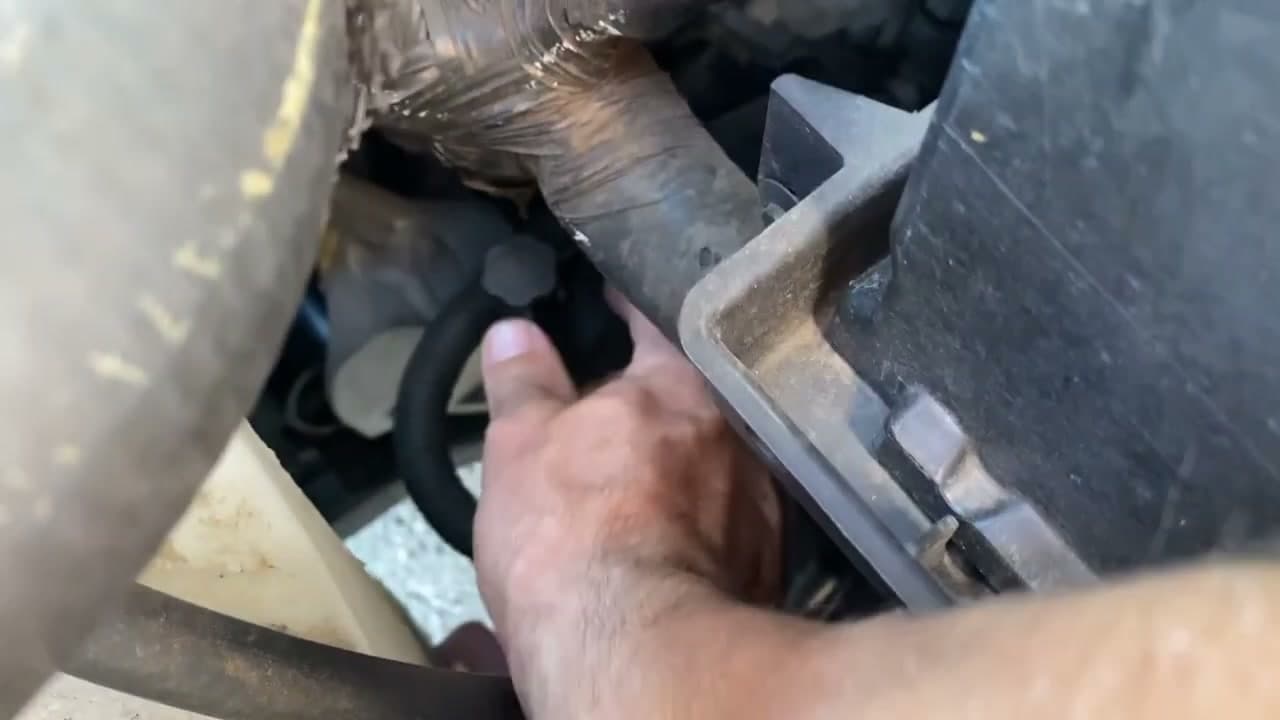
Pop the hood and look near the back of the engine bay, usually on the driver side, for the transmission. If you see a yellow-handled dipstick clearly marked "TRANS" or "ATF", you have a traditional setup and your job is easy - skip to step 6 and just pull that dipstick.

If instead you see a small black or silver plug where the dipstick tube should be, with no handle to pull, that is a sealed transmission. The plug is a fill port, not a dipstick - the factory expects you to bring the car in. You will use the oil-dipstick workaround starting in step 2.

Tip

Take a phone photo of the plug or dipstick location BEFORE you start. Some transmissions hide the fill port under the air intake or behind a heat shield, and the photo helps when you are trying to thread a funnel back in with greasy fingers.

2

Step 2: Pull the Engine Oil Dipstick (Yes, the Oil One)

1:35
Step 2: Step 2: Pull the Engine Oil Dipstick (Yes, the Oil One)

Here is the trick: your engine oil dipstick has TWO sides. One side is marked with the engine oil min and max - that is the side you normally read. Flip it over and the back is usually blank metal. That blank side is what you will mark for transmission fluid, so the same dipstick now does double duty.

Pull the dipstick, wipe it down with a clean rag, and lay it on a flat surface with the blank side facing up. A workbench or even a piece of cardboard on the driveway works. Do not let the oily side sit on a clean surface or you will spend the next ten minutes wiping black streaks off your garage floor.

Tip

If the back of your oil dipstick already has factory markings (some European cars do), grab a clean wooden ruler or a metal kebab skewer the same length as the dipstick to use as your transmission stick instead. Mark it the same way.

3

Step 3: Look Up Your Fluid Level Temperature Chart

2:45
Step 3: Step 3: Look Up Your Fluid Level Temperature Chart

Every automatic transmission has a fluid-level-vs-temperature chart that tells you, in millimeters, how far from the tip of the dipstick the fluid should sit at any given temperature. The fluid expands when hot and contracts when cold, so the chart has two ranges: a cold range (around 70F) and a hot range (around 200F operating temp).

To find yours, look up your year/make/model and identify the transmission code (this 2014 Chrysler Town and Country uses the 62TE, for example). Then search "[transmission code] fluid level temperature chart" - the PDF usually pops right up from a service manual or a forum thread. You want the low and high marks for both 70F and 200F.

Tip

If your search comes up empty, try the FCA TechAuthority, AllData, or Mitchell1 service databases - your local library often has free remote access. The official service manual chart is the one to trust. Random forum numbers can be wrong.

4

Step 4: Mark Cold and Hot Lines on the Dipstick

3:55
Step 4: Step 4: Mark Cold and Hot Lines on the Dipstick

You will end up with four marks on the blank side of the dipstick: a low and high for cold, and a low and high for hot. On this Chrysler, the chart calls for 4mm and 15mm from the tip at 70F, and 40mm and 54mm at 200F. Use a millimeter tape measure for accuracy. If you only have a standard tape, convert: 4mm is roughly 1/8 inch, 15mm is about 5/8 inch, 40mm is about 1-5/8 inch, and 54mm is about 2-1/8 inch.

Lay the dipstick on a flat board with the tip flush against the edge so your tape has a clean zero. Mark each of the four distances with a Sharpie. Label the cold pair "C" and the hot pair "H" so you do not confuse them at 7am in the driveway.

Tip

A millimeter tape measure is one of the cheapest auto tools you will buy and the most useful. Most decent ones cost under $10 and have both metric and SAE - you will use it for spark plug gaps, bolt sizes, fluid levels, and a hundred other small jobs.

5

Step 5: Score the Marks Permanently With a Box Cutter

4:55
Step 5: Step 5: Score the Marks Permanently With a Box Cutter

Sharpie wears off the first time the dipstick goes back into the tube. To make the marks permanent, score right through the center of each Sharpie line with a box cutter or utility knife. Run the blade along a straight edge so the cut is clean and even.

To tell the cold and hot pairs apart at a glance, scratch a little X pattern in between the two cold marks, and leave the area between the two hot marks plain (or vice versa - pick a system and stick with it). The pattern is what your eye will read in low light, not the position alone. From this point on, the dipstick is your forever transmission tool.

Tip

If your dipstick is the flexible flat-ribbon type instead of the round rod type, score gently - too much pressure and the ribbon will deform. A light pass with a sharp blade is enough. You can also use a metal stamp or a Dremel with a cutoff wheel for deeper marks.

6

Step 6: Warm the Engine, Shift Through All Gears, Park

5:35
Step 6: Step 6: Warm the Engine, Shift Through All Gears, Park

The fluid level depends entirely on temperature, so the engine has to be at a known temp before the dipstick reading means anything. For the most accurate hot reading, drive the car for 10 to 15 minutes until the temperature gauge sits at operating temp. For a cold reading, the car needs to have been off for at least a few hours.

Park on level ground - any slope skews the reading. With your foot on the brake, shift slowly through every gear (Park, Reverse, Neutral, Drive, low gears, back to Park) so the fluid fills every passage in the transmission. Leave the engine RUNNING and the lever in Park. This is critical: most automatics are read with the engine running, unlike engine oil which is read with the engine off.

Tip

Always double-check the procedure in your owner's manual. A few transmissions (a handful of Hondas and some commercial trucks) get checked with the engine OFF after shutting down - rare, but worth verifying for your specific vehicle. If you check a running-spec transmission with the engine off, you will read a falsely high level and underfill it.

7

Step 7: Push the Dipstick to the Bottom and Read the Level

6:25
Step 7: Step 7: Push the Dipstick to the Bottom and Read the Level

With the engine running and the car in park, push your marked dipstick all the way down the tube until it bottoms out. Hold it there for two seconds so the fluid wets the stick, then pull it straight up without rotating. Read the wet line against your scored marks.

The fluid should sit between your low and high marks for the temperature range you are at - hot pair if the car is warmed up, cold pair if it has been sitting overnight. The fluid itself should be bright translucent red (or pink) and should NOT smell burnt. If it is brown or black, or smells like burnt toast, schedule a full fluid and filter service - the fluid is cooked and continuing to drive on it will damage the clutches.

If the level is low, add the EXACT fluid type your owner's manual specifies (ATF+4 for most Chrysler, Mercon LV for Ford, Dexron VI for GM, and so on) through the fill plug or dipstick tube, a quarter-quart at a time, rechecking between adds. Overfilling is just as bad as underfilling - the fluid foams and the transmission slips.

Tip

The wrong transmission fluid will damage the transmission. ATF+4, Dexron VI, Mercon LV, Toyota WS, Honda DW-1 are all different formulations and are NOT interchangeable. Look up your exact spec before you buy. If you have to add fluid and the bottle does not match your manual, drive to the parts store and get the right one before you pour anything in.

Products Used

☐ The Checklist

How to Check Transmission Fluid (Dipstick or No Dipstick)

Tools
7
Materials
1
Steps
7
Video
7 min

Your Guide

Budget Mechanic

As an Amazon Associate we earn from qualifying purchases. Links on this page may be affiliate links - clicking them and buying doesn't change your price, but helps support ShowMeStepByStep.

Tags

Test your knowledge

Did the lesson stick? Find out in 2 minutes.

5 quick questions covering what you just read. No signup, no score saved — just a gut check.

Quick reference

Key takeaways from How to Check Transmission Fluid (Dipstick or No Dipstick)

5 questions, answers, and one-line explanations. Tap to expand.

  1. 1.Some modern cars ship with no transmission dipstick. What's the trick to check those?

    Answer: Use the back (blank) side of your ENGINE OIL dipstick - score your own marks at the correct distances from the tip

    Engine oil dipstick + custom-scored marks = a free workaround for sealed transmissions.

  2. 2.Where do you find the fluid-level-vs-temperature chart for your transmission?

    Answer: Search '[transmission code] fluid level temperature chart' - PDFs from service manuals usually pop right up

    Find your transmission code (e.g. 62TE), search for the chart - it gives you the correct mm-from-tip for cold and hot ranges.

  3. 3.Before reading the dipstick, what gear should the car be in?

    Answer: Park, engine RUNNING - after shifting slowly through every gear so fluid fills every passage

    Park + engine running + foot on brake after shifting through all gears = accurate reading.

  4. 4.Why score marks with a box cutter instead of just marking with Sharpie?

    Answer: Sharpie wears off the first time the dipstick goes back in the tube - cuts are permanent

    Sharpie wipes off; scoring keeps your custom marks permanent forever.

  5. 5.What does healthy automatic transmission fluid look (and smell) like?

    Answer: Bright translucent red or pink - should NOT smell burnt

    Brown/burnt = schedule a full fluid and filter service. Bright red = healthy.

What's next

Related collections

Curated theme pages that include this tutorial.

Weekly Digest

Liked this adulting tutorial?

Pick the categories you want to hear about. Weekly digest of new step-by-step tutorials. No spam, easy unsubscribe.

Send me tutorials about

We only email about new tutorials. Easy unsubscribe anytime.