How to Screen Record on iPhone or iPad

Also in:TechAdulting

By ShowMeStepByStepPublished Updated

Based on a video by Apple Support.

Apple Support walks through how to use the built-in Screen Recording feature on iPhone and iPad. No extra apps needed - everything is already on your device.

The setup takes about a minute the first time. Once Screen Recording is in your Control Center, starting and stopping a recording is two taps. Recordings save automatically to Photos, where you can trim and share them.

Common questions

Why isn't there a screen record button on my iPhone?

It isn't in Control Center by default. Open Settings or Control Center, tap Add a Control, find Screen Recording (a circle with a dot inside), and add it once. After that it's always a tap away.

How do I record my voice while screen recording?

Press and hold the Screen Recording button to open its options, then tap the microphone icon so it turns red. That captures your voice alongside the screen audio.

Where do iPhone screen recordings save?

Straight to the Photos app, the same place as your videos. A thumbnail pops up in the corner the moment you stop, and you can tap it to jump right to the clip.

Step-by-Step Guide

1

Open Control Center to Add Screen Recording

0:07
Step 1: Open Control Center to Add Screen Recording

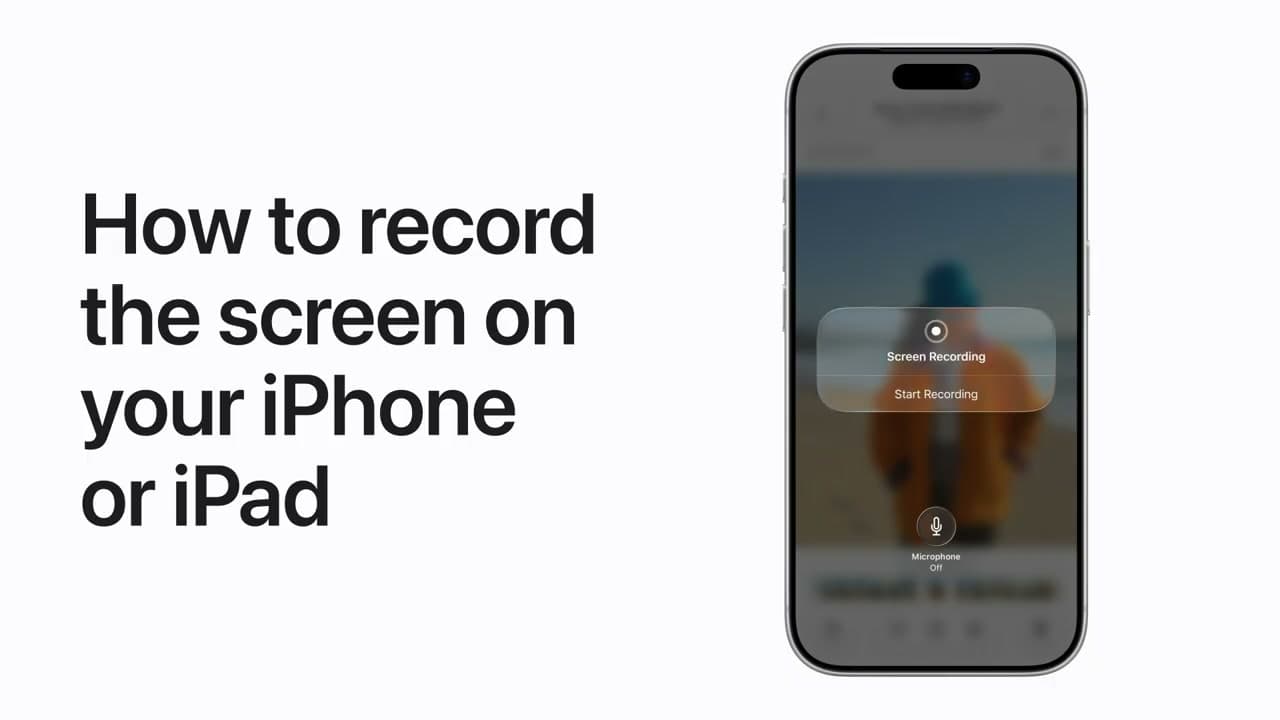
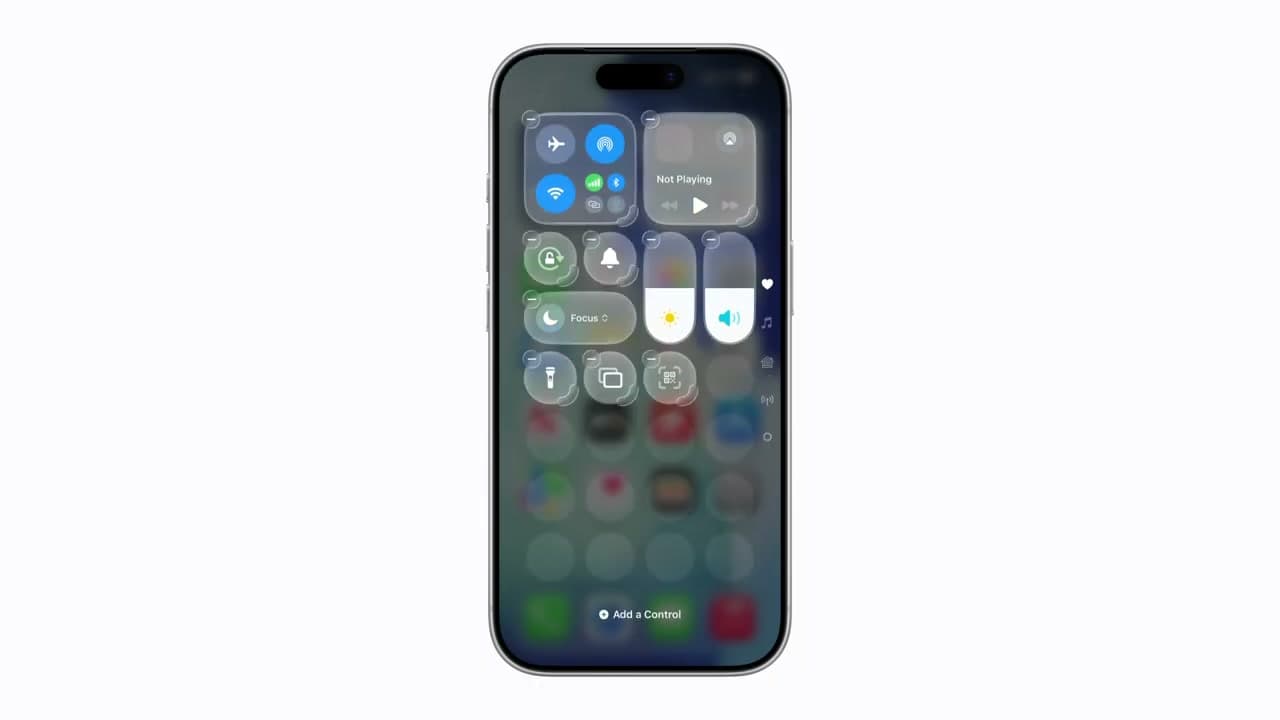
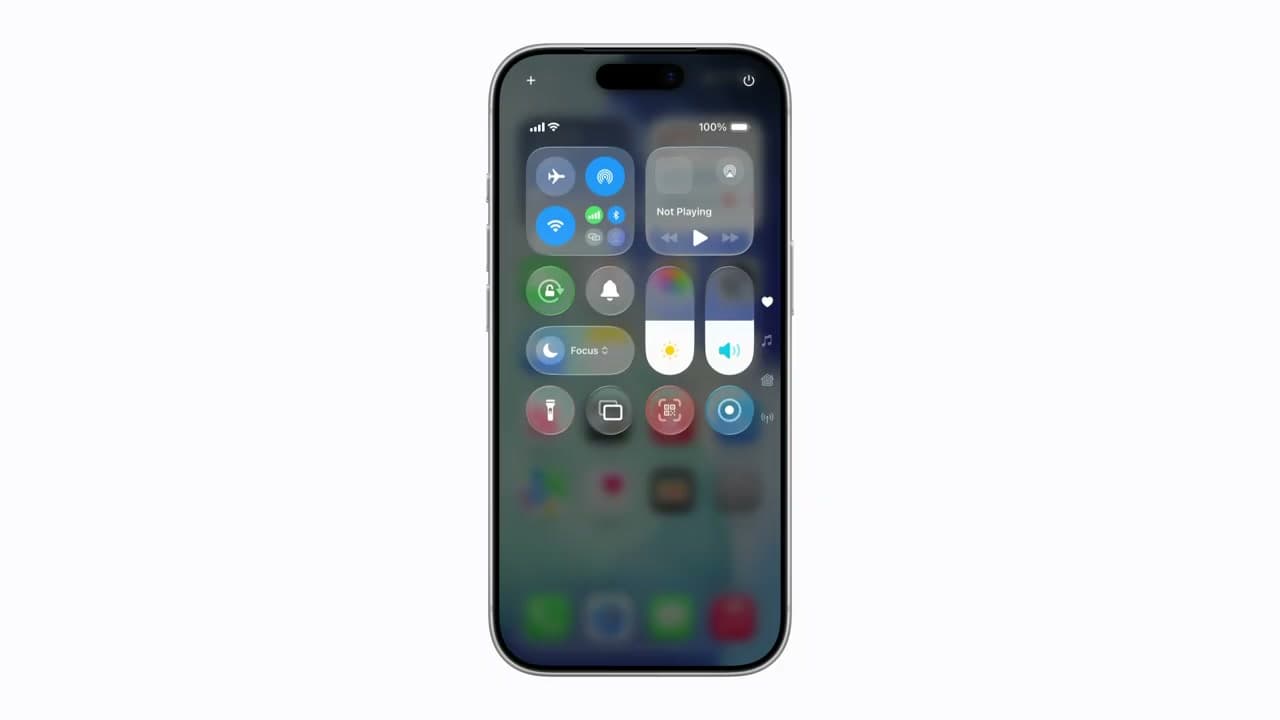
Screen Recording isn't in Control Center by default, so you need to add it once. Swipe down from the top right corner of your screen to open Control Center, then tap the plus button in the top left corner.

Tip

On iPhone X and later, swipe from the top right corner. On older iPhones with a home button, swipe up from the bottom of the screen.

2

Add the Screen Recording Button

0:22
Step 2: Add the Screen Recording Button

Tap "Add a Control" at the bottom of the screen. Scroll through the list until you find Screen Recording - it looks like a circle with a dot inside. Tap it to add it to your Control Center.

Tap anywhere outside the controls to exit editing mode, then swipe up from the bottom to close Control Center. This only needs to be done once.

Products used in this step

3

Tap Screen Recording to Start Capturing

0:46
Step 3: Tap Screen Recording to Start Capturing

Whenever you want to record, open Control Center and tap the Screen Recording button - the circle icon. A 3-second countdown starts, then the recording begins. Navigate away from Control Center and do whatever you want to capture.

If you want extra options first, touch and hold the button instead of just tapping. That opens a menu where you can turn on your microphone or start a broadcast.

4

Turn On Microphone Audio (Optional)

1:02
Step 4: Turn On Microphone Audio (Optional)

In the options panel, tap the microphone icon to toggle it on. It turns red when active - that means your voice will be recorded alongside the screen. Then tap "Start Recording."

If you don't need voice-over, skip this step and just tap the Screen Recording button directly.

Tip

Some apps block audio recording. If you notice no sound in your video, that app may have restrictions on screen capture audio.

5

Stop the Recording

1:43
Step 5: Stop the Recording

When you're done, tap the red dot in the status bar at the top of your screen and tap "Stop." You can also open Control Center and tap the red version of the Screen Recording button.

Note that some apps - like streaming services - won't allow you to record their content. And you can't use Screen Recording and screen mirroring at the same time.

6

View Your Recording in Photos

1:59
Step 6: View Your Recording in Photos

Your recording saves automatically to the Photos app. A thumbnail pops up in the top corner of your screen right after you stop - tap it to jump straight to the video. Or open Photos and find it in Recents.

Use the editing tools to trim the beginning or end. Hit the share button to send it by text, email, AirDrop, or wherever it needs to go.

Products Used

Your Guide

Apple Support

As an Amazon Associate we earn from qualifying purchases. Links on this page may be affiliate links - clicking them and buying doesn't change your price, but helps support ShowMeStepByStep.

Tags

Test your knowledge

Did the lesson stick? Find out in 2 minutes.

5 quick questions covering what you just read. No signup, no score saved — just a gut check.

Quick reference

Key takeaways from How to Screen Record on iPhone or iPad

5 questions, answers, and one-line explanations. Tap to expand.

  1. 1.Where do you go first to enable screen recording on an iPhone?

    Answer: Settings > Control Center > Customize Controls

    Screen Recording is a Control Center shortcut you have to manually add.

  2. 2.How do you start a screen recording once the button is in Control Center?

    Answer: Open Control Center and tap the Screen Recording button

    A single tap in Control Center triggers a 3-second countdown before recording starts.

  3. 3.What does enabling the microphone during a screen recording capture?

    Answer: Your voice through the iPhone mic alongside the screen capture

    Turning on the mic lets you narrate or record commentary while capturing the screen.

  4. 4.What is the quickest way to stop a screen recording in progress?

    Answer: Tap the red status bar at the top of the screen

    Tapping the red bar at the top gives an instant stop prompt without reopening Control Center.

  5. 5.Where does a finished screen recording save on iPhone?

    Answer: The Photos app

    Screen recordings save as video files in Photos, the same as any video you record.

What's next

Related collections

Curated theme pages that include this tutorial.

Weekly Digest

Liked this tech setup tutorial?

Pick the categories you want to hear about. Weekly digest of new step-by-step tutorials. No spam, easy unsubscribe.

Send me tutorials about

We only email about new tutorials. Easy unsubscribe anytime.