How to Knit Short Rows (German Short Rows)

KnittingMedium11:0210 stepsPart of Crafting for BeginnersBrowse more →
The finished result: How to Knit Short Rows (German Short Rows)

By Show Me Step by StepPublished

Based on a video by Brooklyn Tweed.

Short rows are partial rows. You knit part way across, turn around and work back, so one area of the fabric gets extra rows and grows taller than the rest. That is how knitters shape sock heels, raise the back neck of a sweater, add bust darts and make curved hems. This tutorial follows Brooklyn Tweed, who teach the German short row method on a yellow swatch with the short rows in blue so you can see exactly where they land.

How to knit short rows: the short version

  • Work across the row until the pattern says to turn, and turn.
  • Slip the first stitch purlwise with the yarn in front.
  • Pull the yarn up and over the needle so the stitch shows two legs.
  • Work back, and repeat at each turning point.
  • When you reach a double stitch later, work its two legs together.

Why German short rows

Most older patterns call for wrap and turn. It works, but many knitters get small holes or visible wraps at each turn. The German method uses one move, the slip and pull, and there is nothing to pick up later. The turn closes neatly on the right side. On the wrong side you will see a tiny bump at each turning point. That is normal and nobody sees it.

Using them in a wrap and turn pattern

You can swap German short rows into any pattern that says w&t. Work the pattern as written. When it tells you to wrap and turn, work one more stitch, then turn and do the slip and pull instead. Do the same on the way back. When the pattern says to pick up wraps, knit or purl the double stitch together as shown in steps 8 and 9.

Where short rows show up in patterns

Look for the words short row, w&t, GSR or turn. In a top down sock, short rows build the heel cup. In a sweater, a few pairs across the back of the neck stop the front from riding up. In a shawl they make crescents and wedges, and in a hat they can shape a slouch. Once the move is familiar, every one of those reads the same way: work to the turn, slip and pull, go back.

Yarn and needles for practice

Practice on a swatch first, about 20 stitches of stockinette in a smooth light colored worsted. Use a contrast color for the short rows the way Brooklyn Tweed do. It makes the turning points easy to find and shows the wedge shape when you are done. A circular needle is handy because you can push the stitches to either end as you turn.

Common problems

  • Holes at the turns. The slip and pull was loose. Keep the yarn tight over the needle while you work the next stitch.
  • Counted the double stitch as two. It is one stitch. Count it once when you measure to the next turn.
  • Lost track of the turns. Put a locking marker in each double stitch as you make it.
  • Turns all line up in a seam. Stagger them a few stitches apart, as the pattern shows, for a smooth slope.

More knitting to learn

The slip and pull wraps the needle much like a yarn over. Short rows turn a heel in socks and lift the back neck of a sweater. For other shaping, see how to increase in knitting.

What you'll need

Step-by-Step Guide

10 steps · about 11 minutes.Check off each step as you go and your progress saves automatically.

1

Knit a Partial Row for the First Short Row

0:58
Step 1: Knit a Partial Row for the First Short Row - How to Knit Short Rows (German Short Rows)

Start from the right side of a stockinette swatch. Join a contrast color if you are practicing, so the short rows stand out. Knit across, but stop before the end of the row. Brooklyn Tweed stop five stitches short. In a real pattern, this is the point where it tells you to stop and turn. Those last stitches stay unworked on the left needle.

Tip

Mark the stopping point with a locking marker the first time so you can count back.

2

Turn the Knitting Mid Row

1:12
Step 2: Turn the Knitting Mid Row - How to Knit Short Rows (German Short Rows)

Turn the work around, as if you had reached the end of the row. The unworked stitches are now on the right needle and the stitches you knit are on the left. The working yarn hangs at the back after the turn. This is the moment the German short row starts, before you work a single stitch in the new direction.

Tip

Push the stitches to the needle tips first. A tidy needle makes the next move easier.

3

Slip the First Stitch Purlwise With Yarn in Front

1:28
Step 3: Slip the First Stitch Purlwise With Yarn in Front - How to Knit Short Rows (German Short Rows)

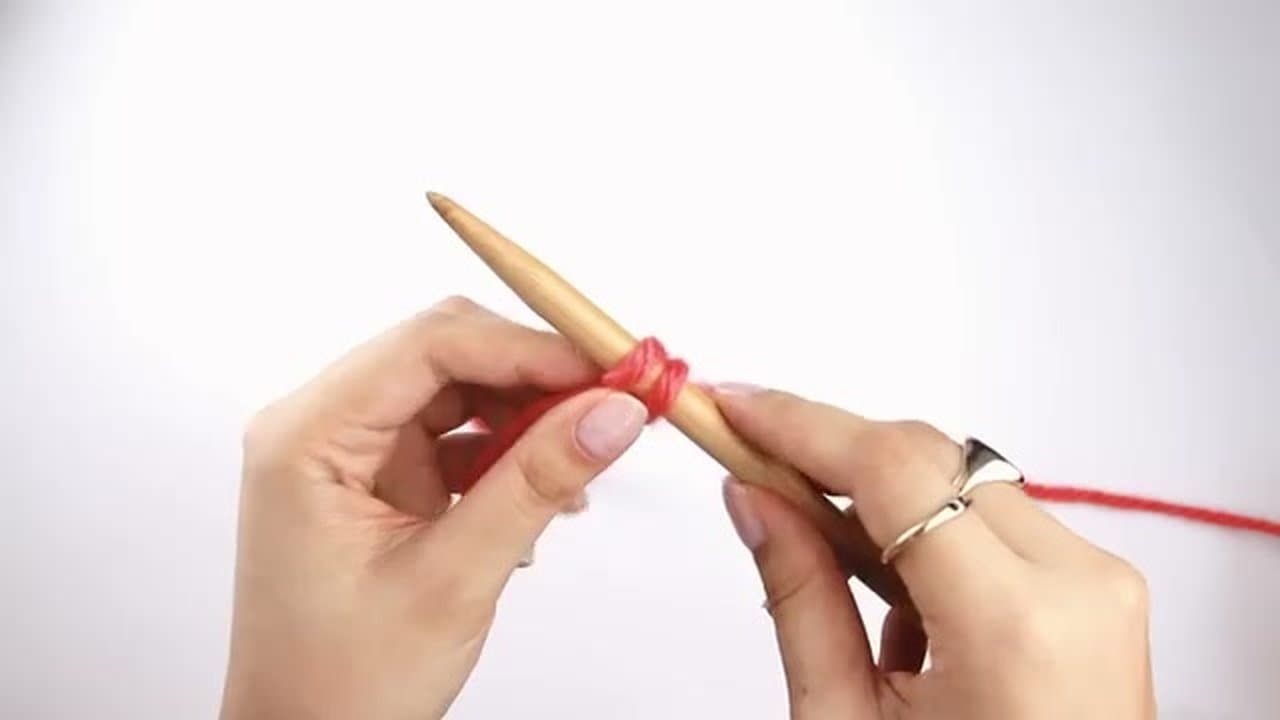
Bring the yarn to the front if it is not there already. Slip the first stitch on the left needle to the right needle purlwise, without working it. That slipped stitch is the turning point. Do not let it slide off. Hold it with your finger so it stays put while you set up the pull.

Tip

Purlwise means you insert the needle from right to left, as if to purl.

4

Pull the Yarn Over to Make the Short Row Double Stitch

1:36
Step 4: Pull the Yarn Over to Make the Short Row Double Stitch - How to Knit Short Rows (German Short Rows)

Pull the yarn firmly up and over the top of the right needle. The slipped stitch flips, and its two legs from the row below sit on the needle. It looks like two stitches. Keep tension on the yarn while you work the next stitch, then bring the yarn around to the front again like a yarn over. Purl back across.

Tip

Snug the double stitch up before you work on. Tension here is what stops holes.

5

Slip and Pull From the Knit Side of the Short Row

2:55
Step 5: Slip and Pull From the Knit Side of the Short Row - How to Knit Short Rows (German Short Rows)

Purl back until you are five stitches from the other end, then turn again. Now the knit side faces you and the yarn is at the back. Bring the yarn to the front, slip the first stitch purlwise and pull the yarn up and over the needle until the two legs show. Then knit the next stitch, keeping that first one tight.

Tip

The move is the same on both sides. Only where the yarn starts is different.

6

Stagger the Next Short Rows Four Stitches In

4:00
Step 6: Stagger the Next Short Rows Four Stitches In - How to Knit Short Rows (German Short Rows)

Work the next short row to four stitches before the last turning point. Turn, slip and pull, and work back. Do the same on the other side. Each pair of turns sits a few stitches in from the last, which is how most patterns write it. The staggering makes a smooth slope instead of a step.

Tip

Count the double stitch as one stitch when you count to the next turn.

7

Lay the Knitting Flat to Check the Short Row Turns

5:00
Step 7: Lay the Knitting Flat to Check the Short Row Turns - How to Knit Short Rows (German Short Rows)

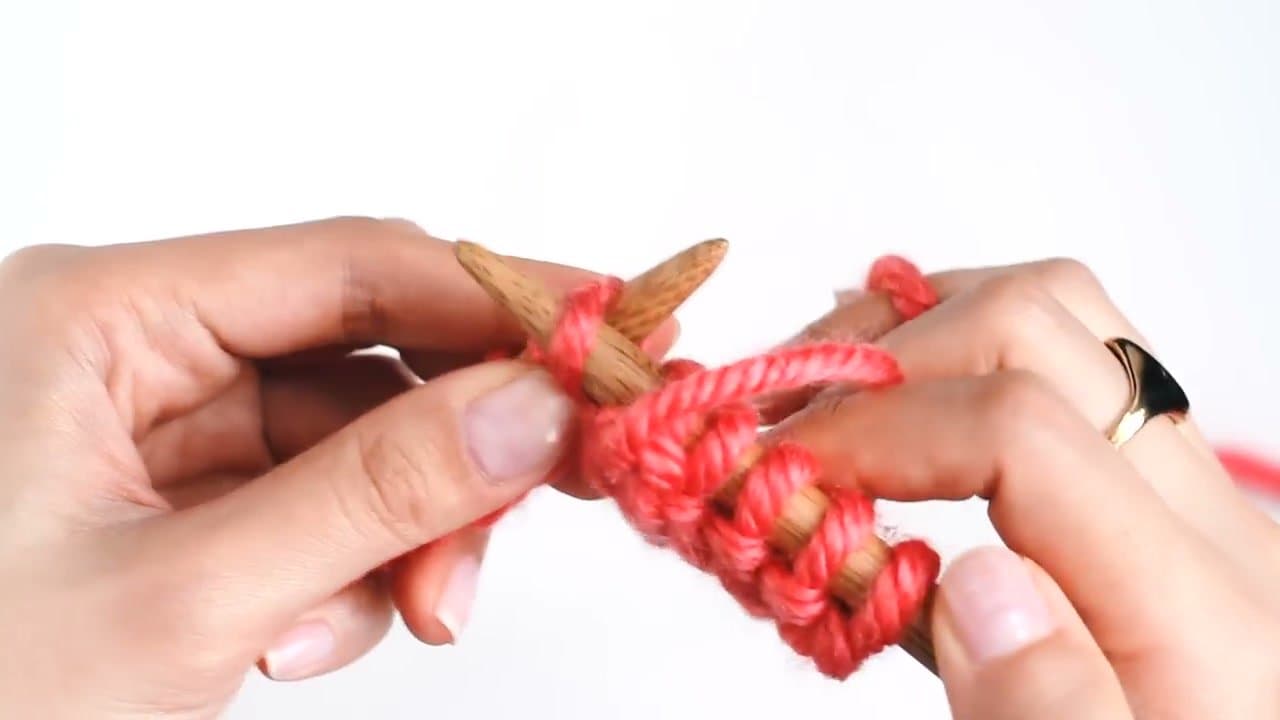
Lay the swatch flat and look along the needle. You will see a double stitch at each turn, staggered across the row. Brooklyn Tweed have two on each side. This is a good moment to check that each one is snug. Now work a full row all the way across, which takes you through every double stitch.

Tip

A loose double stitch is easy to snug now. It is hard to fix once it is worked.

8

Knit the Double Stitch Together on the Right Side

6:05
Step 8: Knit the Double Stitch Together on the Right Side - How to Knit Short Rows (German Short Rows)

Knitting across, you will reach the double stitch. It is not two stitches; it is the slipped stitch and its pulled yarn. Insert the needle through both legs as if to knit two together. Knit them together and slide them off. Tug the yarn a little to keep it tight. Repeat at the next double stitch.

Tip

Go into the center of both legs at once. Catching only one leaves a loop.

9

Purl the Double Stitch Together on the Wrong Side

7:36
Step 9: Purl the Double Stitch Together on the Wrong Side - How to Knit Short Rows (German Short Rows)

Turn and purl back across the full row. When you reach a double stitch from the wrong side, go through both legs as if to purl two together. Purl them together and slide them off. Do the same at the next one, then purl to the end of the row. That completes the section of short rows.

Tip

Look for the two legs riding on the needle. They are easy to spot after one or two.

10

Check the Shape the Short Rows Made in the Knitting

8:35
Step 10: Check the Shape the Short Rows Made in the Knitting - How to Knit Short Rows (German Short Rows)

Knit a few full rows and lay the work flat. The center is taller than the sides, because it got six extra rows while the edges got only two. The turning points are closed and clean on the right side. On the wrong side there is a small bump at each turn. That is how short rows shape fabric.

Tip

Compare the sides with a ruler to see how much height the short rows added.

How to Knit a Yarn Over Between Knit and Purl Stitches

Keep going

How to Knit a Yarn Over Between Knit and Purl Stitches

Products Used

The Checklist

How to Knit Short Rows (German Short Rows)

Tools
4
Materials
2
Steps
10
Video
11 min

Tools we recommend

Your Guide

Brooklyn Tweed

As an Amazon Associate we earn from qualifying purchases. Links on this page may be affiliate links - clicking them and buying doesn't change your price, but helps support Show Me Step by Step.

Tags

Sunday How-To

New knitting tutorials, every Sunday

One short email with the week's best step-by-step guides. Free, no spam, unsubscribe anytime.

Did this work for you?

What's next

Weekly Digest

Liked this knitting tutorial?

Pick the categories you want to hear about. Weekly digest of new step-by-step tutorials. No spam, easy unsubscribe.

Send me tutorials about

We only email about new tutorials. Easy unsubscribe anytime.