How to Knit Mittens - Easy Flat Mittens With Thumbs

KnittingMedium19:4010 stepsPart of Crafting for BeginnersBrowse more →
The finished result: How to Knit Mittens - Easy Flat Mittens With Thumbs

By Show Me Step by StepPublished

Based on a video by So Woolly.

These are classic thumb mittens for a toddler, sized for about 2 to 3 years, and you knit them flat on two straight needles. No double points, no circulars. The tutorial is from So Woolly, and the full written pattern with measurements is free on the So Woolly website. One mitten takes around 30 grams of worsted yarn. If you can knit and purl, you can make these.

How to knit mittens: the short version

  • Cast on 30 stitches on 4 mm needles.
  • Work 13 rows of knit 1, purl 1 rib.
  • Switch to 5 mm needles and work stockinette.
  • Increase on both sides of the thumb stitches every other row.
  • Knit the thumb on its own 9 stitches, then close it.
  • Pick up at the thumb base and knit 9 rows for the hand.
  • Decrease to round the top, bind off and sew the seam.

Why knit mittens flat?

Most mitten patterns are knitted in the round, which means juggling four or five double-pointed needles. Flat mittens skip all that. You knit one piece back and forth, fold it and sew one seam up the side and around the top. For a beginner, or anyone whose hands do not love tiny needles, that is a big relief. The seam sits on the outer edge where a little hand will not feel it.

Yarn and needles

Use a worsted weight wool or wool blend. Wool stays warm when it gets damp, which kids' mittens always do. Superwash wool goes in the washing machine. Acrylic works and is cheaper, though it is less warm. The smaller 4 mm (US 6) needles make the cuff snug so it hugs the wrist. The 5 mm (US 8) needles give the hand some room. Pick a light or mid color for your first pair so you can see each stitch clearly.

Sizing up or down

This size fits roughly 2 to 3 years. Measure around the child's hand at the knuckles. For a bigger child, cast on a few more stitches and knit a few more rows before the thumb and before the top shaping. Hold the mitten up to the child's hand as you go. The hand should reach the tip of the little finger before you start the decreases.

Make them a pair

So Woolly notes the right mitten is almost the same as the left. Follow the written pattern for the small change. Knit both mittens before you sew either one, so you can match row counts. For little ones who lose things, crochet or braid a long cord and sew one end to each cuff, the old-fashioned mitten string.

Common problems

  • Holes beside the thumb. Pull the picked-up stitches snug, and close any gap with the yarn tail when you sew up.
  • Thumb too short. Add a pair of rows before you close it. Toddler thumbs are short, so do not overdo it.
  • Cuff too loose. Check you used the smaller needles for the rib.
  • Bumpy seam. Use mattress stitch on the right side and keep the tension even.

Skills used here

New to any step? Brush up on casting on, ribbing, make one increases, decreases and binding off.

What you'll need

Step-by-Step Guide

10 steps · about 20 minutes.Check off each step as you go and your progress saves automatically.

1

Cast On 30 Stitches for the Mitten Cuff

0:52
Step 1: Cast On 30 Stitches for the Mitten Cuff - How to Knit Mittens - Easy Flat Mittens With Thumbs

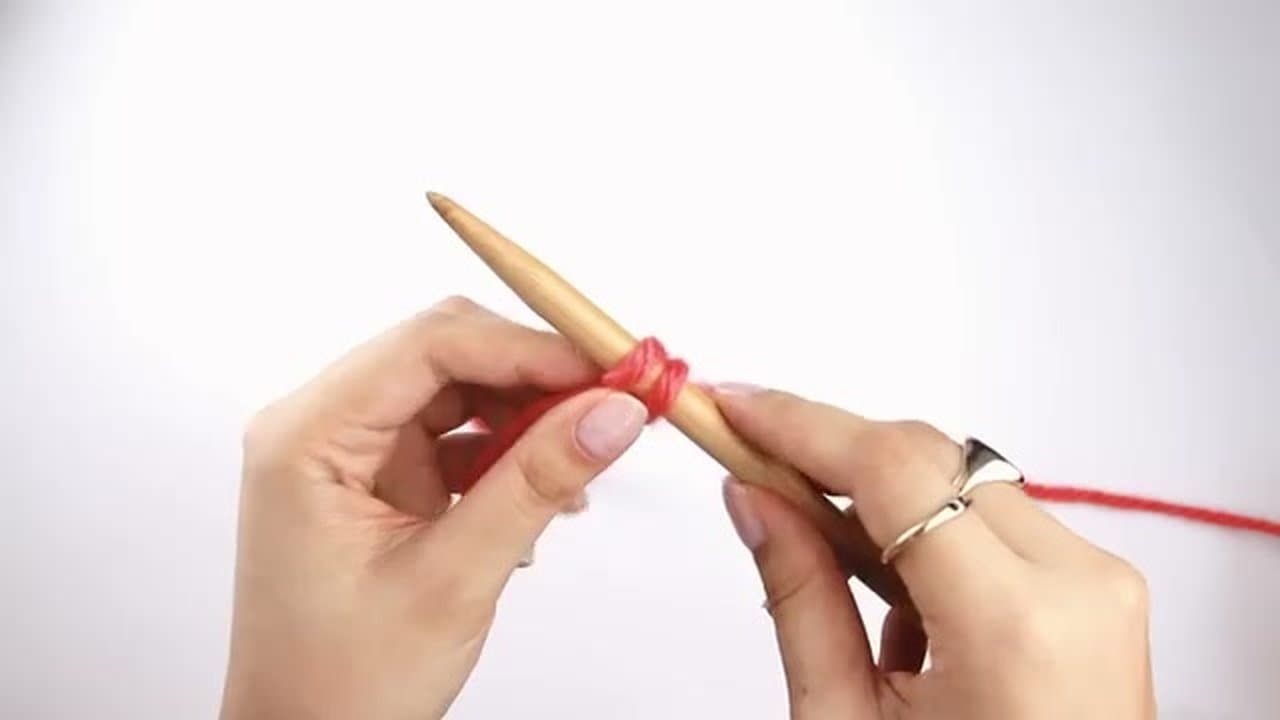
Using the smaller 4 mm needles, cast on 30 stitches. Any stretchy cast on works. The long tail cast on is a good choice because it gives a firm but elastic edge for the cuff. Leave a long tail of about 30 cm (12 inches). You can use it later to sew the side seam of the cuff, which saves weaving in an extra end.

Tip

Count your stitches twice before you start. An odd number throws off the rib.

2

Knit the 1x1 Ribbed Mitten Cuff

1:25
Step 2: Knit the 1x1 Ribbed Mitten Cuff - How to Knit Mittens - Easy Flat Mittens With Thumbs

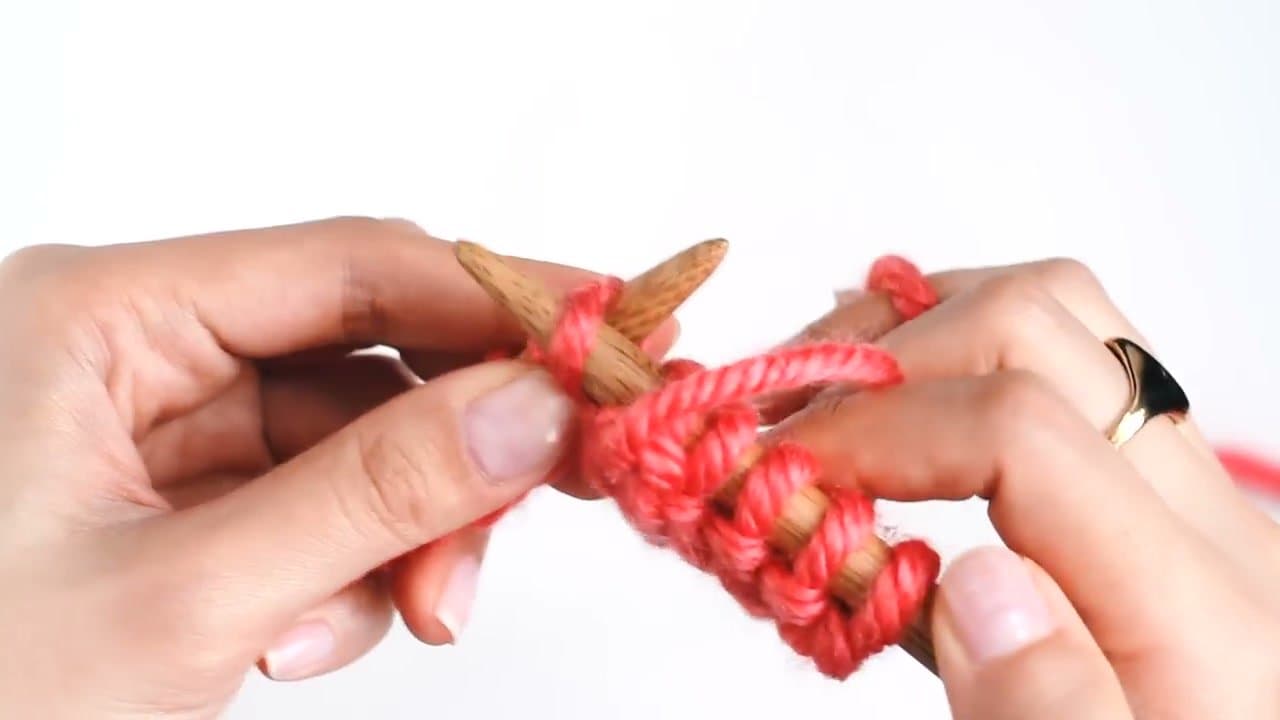
The first row and every odd row is the wrong side. Start with purl 1, knit 1 and repeat to the end. So Woolly knits the last stitch of this first row through the back loop to avoid a big loose loop at the edge. On the next row, knit the knits and purl the purls as they face you. A V is a knit stitch. A bump is a purl. Work 13 rows of rib.

Tip

If you lose your place, look at the stitch below. Match it and the rib stays straight.

3

Switch to Larger Needles for the Mitten Hand

2:45
Step 3: Switch to Larger Needles for the Mitten Hand - How to Knit Mittens - Easy Flat Mittens With Thumbs

Change to the larger 5 mm needles and knit across the whole row. On the next row, swap in the second 5 mm needle and purl every stitch. From here the hand is worked in stockinette, knit on the right side and purl on the wrong side. The bigger needles give the hand more room while the cuff stays snug around the wrist.

Tip

Put a removable stitch marker in the first big-needle row. It makes counting rows easy.

4

Start the Mitten Thumb Gusset With Make One Increases

3:30
Step 4: Start the Mitten Thumb Gusset With Make One Increases - How to Knit Mittens - Easy Flat Mittens With Thumbs

To shape the thumb, knit 13 stitches. Make one right: pick up the strand between the two stitches with your left needle from back to front and knit it. Knit 1. Make one left: pick up the strand from front to back and knit it through the back loop. Knit to the end of the row. You now have two more stitches. Purl the next row.

Tip

The two increases lean toward each other and frame the thumb. Keep them mirrored.

5

Widen the Mitten Thumb Gusset Every Other Row

6:40
Step 5: Widen the Mitten Thumb Gusset Every Other Row - How to Knit Mittens - Easy Flat Mittens With Thumbs

Repeat the increase row three more times, purling every row in between. Each time, knit 13, make one right, knit the thumb stitches, make one left, then knit to the end. The thumb section grows from 1 stitch to 3, then 5, then 7, then 9. That little triangle of extra fabric is the gusset, and it gives the thumb room to move.

Tip

Count the stitches between the increases on every increase row. It should always be odd.

6

Knit the Mitten Thumb on 9 Stitches

8:02
Step 6: Knit the Mitten Thumb on 9 Stitches - How to Knit Mittens - Easy Flat Mittens With Thumbs

Knit 22 stitches, which takes you to the end of the 9 thumb stitches. Turn the work and purl 9. Turn and knit 9. Keep turning and working only those 9 thumb stitches, back and forth, while the rest of the stitches wait on the needles. Work the thumb rows as the pattern says, ending with a purl row.

Tip

Ignore the stitches on either side. They hang there until the thumb is done.

7

Close the Top of the Mitten Thumb

9:20
Step 7: Close the Top of the Mitten Thumb - How to Knit Mittens - Easy Flat Mittens With Thumbs

To close the thumb, knit 2 together four times and knit the last stitch. Five stitches are left. Cut the yarn, leaving a 10 cm (4 inch) tail. Thread it on a tapestry needle and pass it through the remaining thumb stitches, slipping them off the knitting needle. Pull the tail tight to gather the top of the thumb closed.

Tip

Leave this tail hanging. You will use it to sew up the thumb seam.

8

Pick Up at the Thumb Base and Knit the Mitten Hand

10:05
Step 8: Pick Up at the Thumb Base and Knit the Mitten Hand - How to Knit Mittens - Easy Flat Mittens With Thumbs

With the right side facing, join the yarn at the base of the thumb. Pick up and knit one stitch on each side of the thumb base so there is no gap. Then knit to the end of the row. Work 9 rows of stockinette for the hand, starting with a purl row. The fabric now covers the palm and the back of the hand.

Tip

Leave a long tail when you join the yarn. You can close any small hole with it later.

9

Decrease to Shape the Mitten Top

11:20
Step 9: Decrease to Shape the Mitten Top - How to Knit Mittens - Easy Flat Mittens With Thumbs

Round off the top with paired decreases. Knit 1, SSK (slip, slip, knit the two slipped stitches together), knit 10, knit 2 together, and repeat once more, then knit the last stitch. Purl the next row. Repeat the shaping with 8 stitches between the decreases, then with 6, purling every row in between. Bind off knitwise.

Tip

The SSK leans left and the knit 2 together leans right. That pair gives the curved top.

10

Sew the Mitten Seam

19:10
Step 10: Sew the Mitten Seam - How to Knit Mittens - Easy Flat Mittens With Thumbs

Fold the mitten in half with the right side out. Using a tapestry needle and the yarn tails, sew the top of the mitten closed. Then sew up the thumb. Last, sew the side seam down to the cuff. Mattress stitch gives a nearly invisible join. Weave in all the ends, then knit the second mitten the same way.

Tip

Sew the cuff from the wrong side if you plan to fold it back. The seam then hides.

How to Knit an Ear Warmer With a Twist Front

Keep going

How to Knit an Ear Warmer With a Twist Front

10 steps · about 10 minutes

Products Used

The Checklist

How to Knit Mittens - Easy Flat Mittens With Thumbs

Tools
4
Materials
1
Steps
10
Video
20 min

Tools we recommend

Your Guide

So Woolly

As an Amazon Associate we earn from qualifying purchases. Links on this page may be affiliate links - clicking them and buying doesn't change your price, but helps support Show Me Step by Step.

Tags

Sunday How-To

New knitting tutorials, every Sunday

One short email with the week's best step-by-step guides. Free, no spam, unsubscribe anytime.

Did this work for you?

What's next

Weekly Digest

Liked this knitting tutorial?

Pick the categories you want to hear about. Weekly digest of new step-by-step tutorials. No spam, easy unsubscribe.

Send me tutorials about

We only email about new tutorials. Easy unsubscribe anytime.