How to Knit a Pillow Cover

KnittingEasy8:3810 stepsPart of Crafting for BeginnersBrowse more →
The finished result: How to Knit a Pillow Cover

By Show Me Step by StepPublished

Based on a video by Kristabel.

This knitted pillow cover is a weekend project for a new knitter. You knit one flat square in a chunky checkerboard stitch, then sew it onto the front of a plain store-bought cover. Kristabel shows the whole make on her YouTube channel, Kristabel. She skips knitting the back on purpose, because an all-knit cushion tends to sag. The fabric back keeps it firm.

How to knit a pillow cover: what you are making

The front is 32 stitches and about 40 rows of double moss stitch. That is two knits and two purls, swapped every two rows, so you get little raised squares. It only uses the knit and purl stitches, a cast on and a bind off. If you know seed stitch, this is its bigger cousin.

Yarn weight and needle size

Kristabel used one 100 g ball of chunky yarn on 12 mm needles, which is US size 17. In US shops, look for yarn labeled 6 super bulky, or a thick 5 bulky. Lion Brand Wool-Ease Thick and Quick is an easy match. Buy two balls. Running short with ten rows to go is no fun.

Have a yarn in your stash? Check the label. If it asks for needles around 9 to 12 mm, it will work. A thinner yarn needs more stitches to cover the same width.

Pillow form size

Her cover is 40 x 40 cm, close to 16 x 16 inches, the most common US pillow form. A form an inch bigger than the cover, a 17 or 18 inch one, makes the cushion look plump. Hold your panel against the cover as you go. Stop when it reaches the top edge, even if that is 38 rows or 44.

Does gauge matter?

A little. Gauge means how many stitches fit in an inch. Here you want about 2 stitches per inch, so 32 stitches give you 16 inches. Knit a few rows and measure. Too wide? Drop 4 stitches. Too narrow? Add 4. Keep the count a multiple of 4 so the checks line up.

How long it takes

Kristabel finished hers in a couple of hours. A beginner should plan on two or three evenings. Chunky yarn grows fast, so you see progress every row.

Closing and caring for your cushion cover

The knitted panel does not close anything. It is sewn on all four sides to the front, and the store cover keeps its own zip or envelope back, so the form still slides in and out. Use a cover with a zip at the bottom or on the back, never one with a zip on the front edges you plan to stitch.

Wool and wool blends want a hand wash in cool water and a flat dry. Acrylic can go in a mesh bag on a gentle cycle. Either way, unpick the panel or wash the whole cover by hand. Lay it flat to dry and pat it square.

Variations

  • Stripes. Change colour every eight rows.
  • A bigger cushion. Cast on 40 stitches for a 20 inch form.
  • A gift set. Make two in different colours for a sofa.

Prefer a hook? Try the crochet granny stripe pillow cover.

Troubleshooting

  • The checks look like ribbing. You forgot to swap after two rows.
  • Tight cast on. Cast on with a needle one size bigger, then switch back.
  • Curling edges. Pat the panel damp and flat. Once sewn down, it stays put.

What you'll need

Step-by-Step Guide

10 steps · about 9 minutes.Check off each step as you go and your progress saves automatically.

1

Make a Slip Knot in the Chunky Yarn

1:51
Step 1: Make a Slip Knot in the Chunky Yarn - How to Knit a Pillow Cover

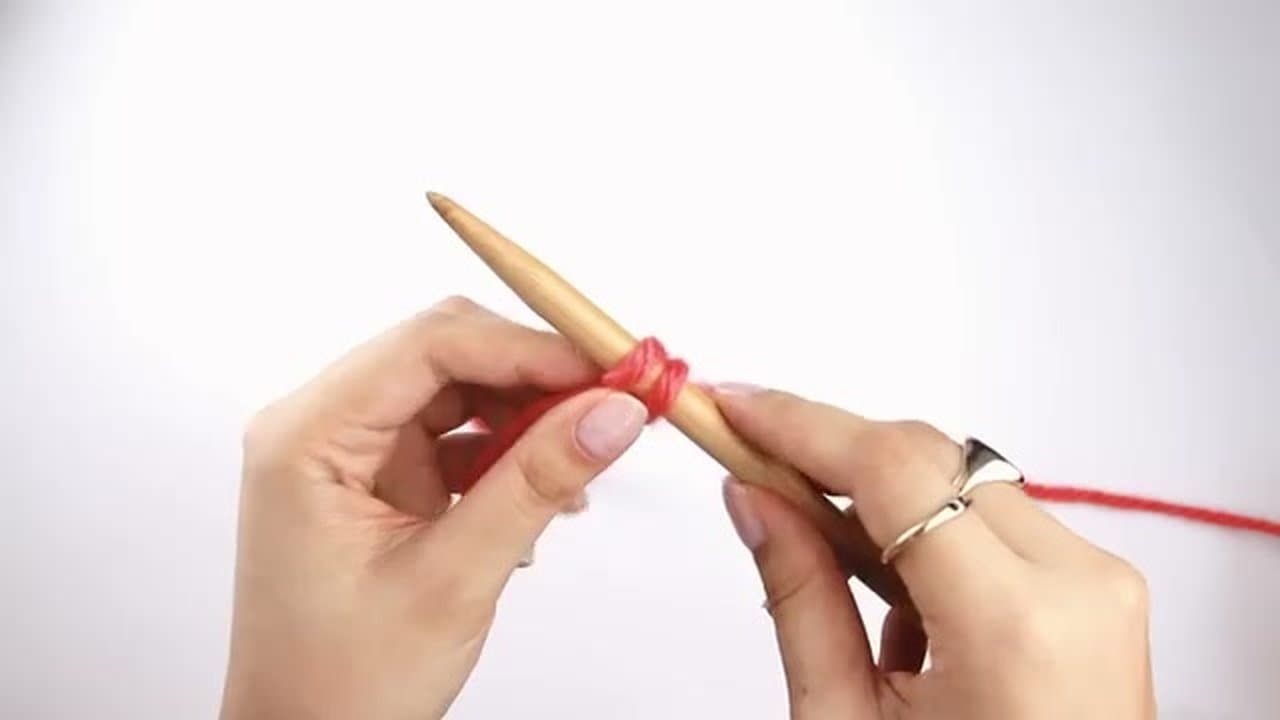
Leave a tail about 6 inches long. Make a loop in the yarn, then pull a second loop up through it and tighten it gently. That little knot is your first stitch. Slide it onto the needle in your left hand and snug it up so it moves along the needle without falling off. Kristabel is right-handed, so she talks about left and right needles all the way through.

Tip

Pull the tail end, not the working yarn, if the loop is too big.

2

Knit Cast On 32 Stitches for the Pillow Cover Panel

2:07
Step 2: Knit Cast On 32 Stitches for the Pillow Cover Panel - How to Knit a Pillow Cover

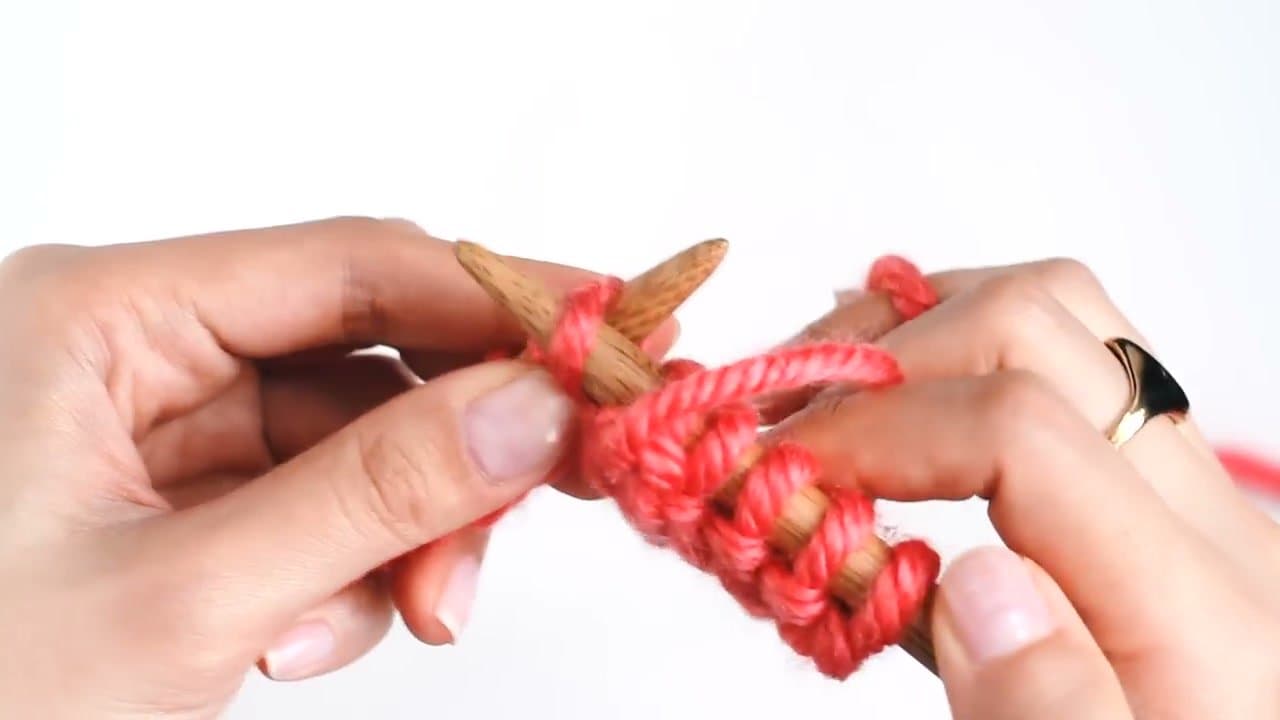
Push the right needle up through the slip knot from the front. Wrap the yarn around the right needle, pull a new loop through, and place that loop on the left needle. You now have two stitches. Repeat with the newest stitch each time until you have 32 on the needle. Count them twice. This knitted cast on gives a firm, neat bottom edge for the cushion.

Tip

Keep the new loops loose. A tight cast on makes the first row hard work.

3

Knit Two Stitches on Row 1 of the Pillow Panel

2:55
Step 3: Knit Two Stitches on Row 1 of the Pillow Panel - How to Knit a Pillow Cover

Row 1 is knit 2, purl 2, all the way across. To knit, keep the yarn behind the work. Put the right needle into the first stitch from front to back, wrap the yarn around it, pull the new loop through, and let it sit on the right needle. Slide the old stitch off the left needle. Do that twice before you switch to purl.

Tip

Say the pattern out loud as you go. It keeps you on track.

4

Purl Two Stitches to Finish the Row 1 Pattern

3:10
Step 4: Purl Two Stitches to Finish the Row 1 Pattern - How to Knit a Pillow Cover

Bring the yarn between the needles to the front. Push the right needle into the front of the next stitch from right to left, wrap the yarn around, and pull the loop out through the back. Repeat for the second purl. Take the yarn to the back again before the next knit. Keep going, knit 2 and purl 2, until the row ends with two purls.

Tip

Forgot to move the yarn? You will see an extra loop on the needle. Drop it and redo the stitch.

5

Slip the First Stitch and Work Row 2 of the Pillow Panel

4:21
Step 5: Slip the First Stitch and Work Row 2 of the Pillow Panel - How to Knit a Pillow Cover

Turn the work. Slip the first stitch from the left needle to the right without knitting it. This gives the sides a smooth, tidy edge. Knit the next stitch, then purl 2, knit 2 across the row, ending with purl 2. On this row you knit the stitches that look like knits and purl the bumpy ones, so the pattern stacks up in pairs.

Tip

Slip the stitch as if to purl so it does not twist.

6

Reverse the Knit and Purl Stitches on Rows 3 and 4

5:26
Step 6: Reverse the Knit and Purl Stitches on Rows 3 and 4 - How to Knit a Pillow Cover

Now swap them to build the checkerboard. On row 3, slip the first stitch, purl the next, then knit 2, purl 2 across, ending with knit 2. Work row 4 the same way. Where you had knits sitting on knits, you now have purls on top. That swap every two rows makes the raised squares of double moss stitch.

Tip

Use a stitch marker or a scrap of yarn to mark which row of the four you are on.

7

Repeat the Four Rows Until the Pillow Panel Is 16 Inches Tall

6:01
Step 7: Repeat the Four Rows Until the Pillow Panel Is 16 Inches Tall - How to Knit a Pillow Cover

Keep repeating rows 1 to 4. After a few repeats you will see the pattern clearly. The purls stand up as little bumps and the knits lie flat. If a square looks wrong, you will spot it right away. Kristabel knits about 40 rows. Hold the panel against the cover and stop when it reaches the top edge.

Tip

Count your rows in groups of four so you always finish on a full repeat.

8

Bind Off the Top Edge of the Knitted Pillow Panel

6:40
Step 8: Bind Off the Top Edge of the Knitted Pillow Panel - How to Knit a Pillow Cover

Knit two stitches. With the left needle, lift the first stitch on the right needle over the second and off the end. One stitch stays. Knit one more and lift the older stitch over it again. Keep going across the row. When one stitch is left, cut the yarn with a 6 inch tail and pull it through the last loop to lock it.

Tip

Bind off loosely so the top edge stretches as much as the bottom.

9

Weave In the Yarn Ends With a Crochet Hook

7:21
Step 9: Weave In the Yarn Ends With a Crochet Hook - How to Knit a Pillow Cover

Two tails are left, one at the cast on and one at the bind off. Push a crochet hook through the edge stitches near a tail, catch the yarn, and pull it through. Work it in and out along the edge for a few inches, then trim what is left. Chunky yarn is too thick for many sewing needles, and a hook makes this easy.

Tip

Weave along the edge that gets sewn down, so no ends show on the front.

10

Sew the Knitted Panel Onto the Front of the Pillow Cover

7:50
Step 10: Sew the Knitted Panel Onto the Front of the Pillow Cover - How to Knit a Pillow Cover

Lay the cover flat with the closure underneath and set the panel on top. Pin the four corners first, then pin along each side so the knitting is spread evenly. Thread a needle with thread that matches the yarn. Sew all four edges with a small running stitch through the knitting and the front layer only. Slide in the pillow form and you are done.

Tip

Keep one hand inside the cover so you never sew the front to the back.

How to Knit Socks

Keep going

How to Knit Socks

10 steps · about 20 minutes

Products Used

The Checklist

How to Knit a Pillow Cover

Tools
7
Materials
4
Steps
10
Video
9 min

Tools we recommend

Your Guide

Kristabel

As an Amazon Associate we earn from qualifying purchases. Links on this page may be affiliate links - clicking them and buying doesn't change your price, but helps support Show Me Step by Step.

Tags

Sunday How-To

New knitting tutorials, every Sunday

One short email with the week's best step-by-step guides. Free, no spam, unsubscribe anytime.

Did this work for you?

What's next

Weekly Digest

Liked this knitting tutorial?

Pick the categories you want to hear about. Weekly digest of new step-by-step tutorials. No spam, easy unsubscribe.

Send me tutorials about

We only email about new tutorials. Easy unsubscribe anytime.