How to Knit a Gauge Swatch That Measures True

KnittingEasy19:2010 stepsPart of Crafting for BeginnersBrowse more →
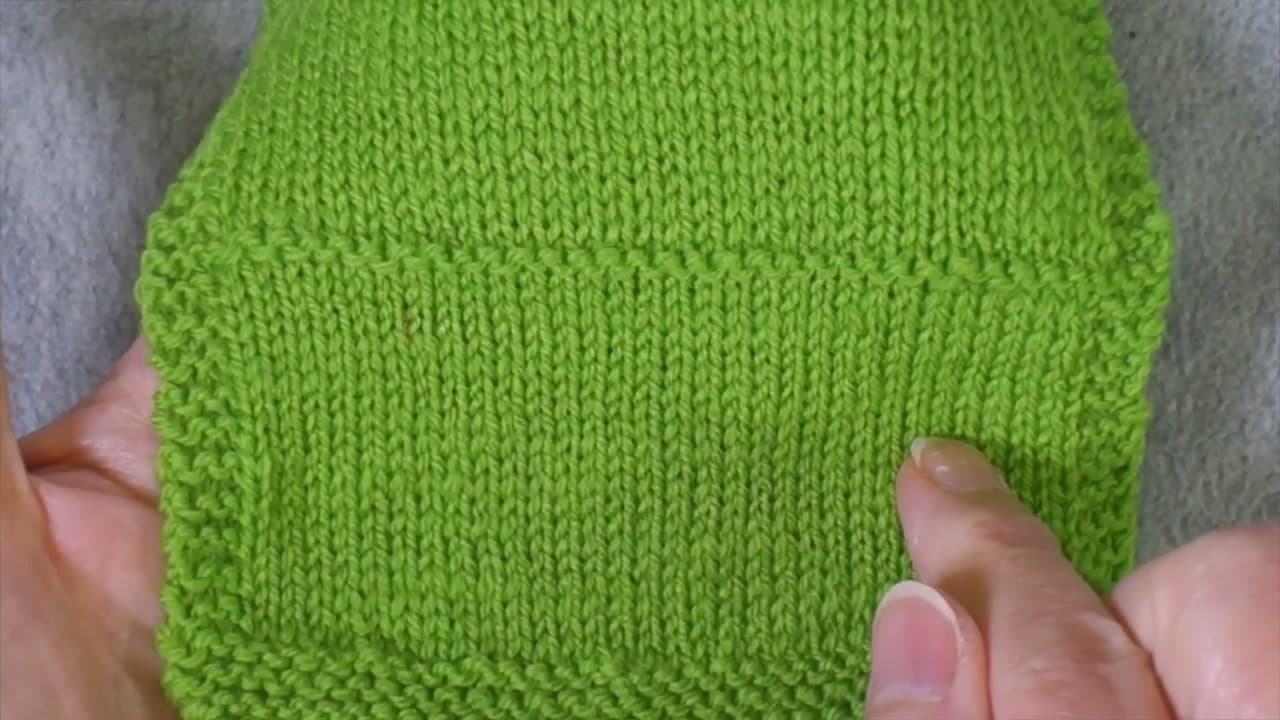
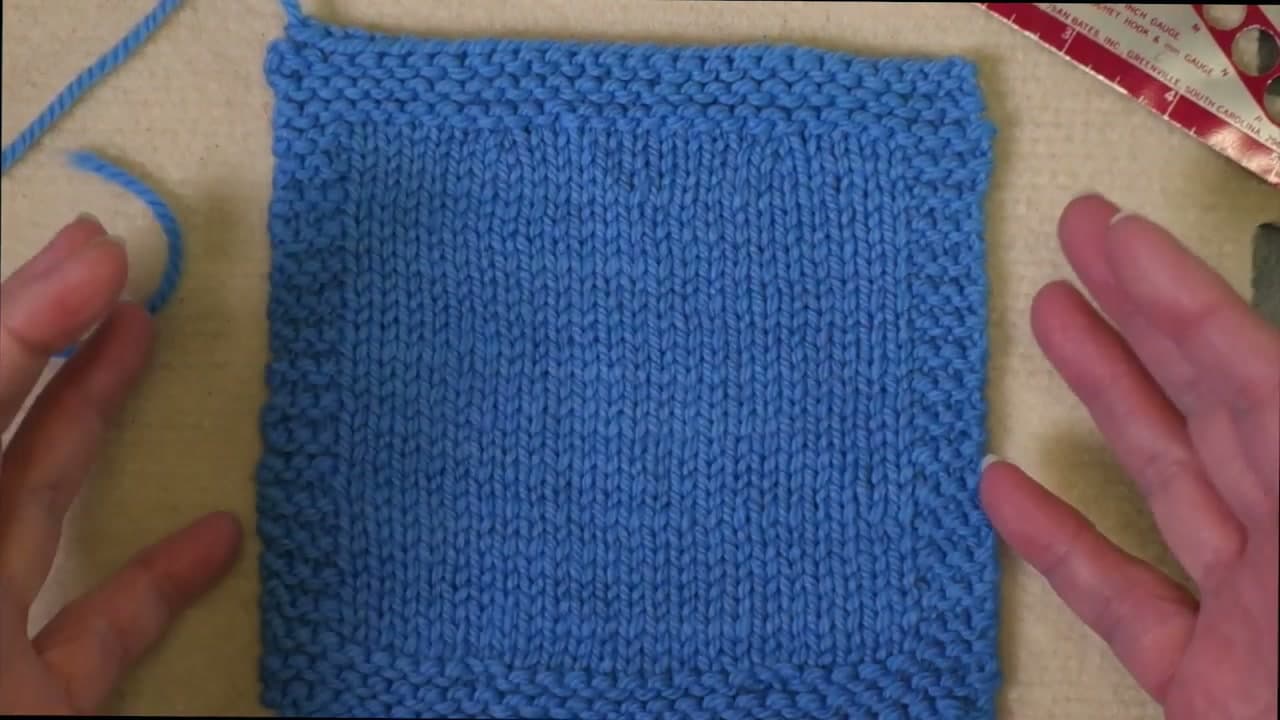
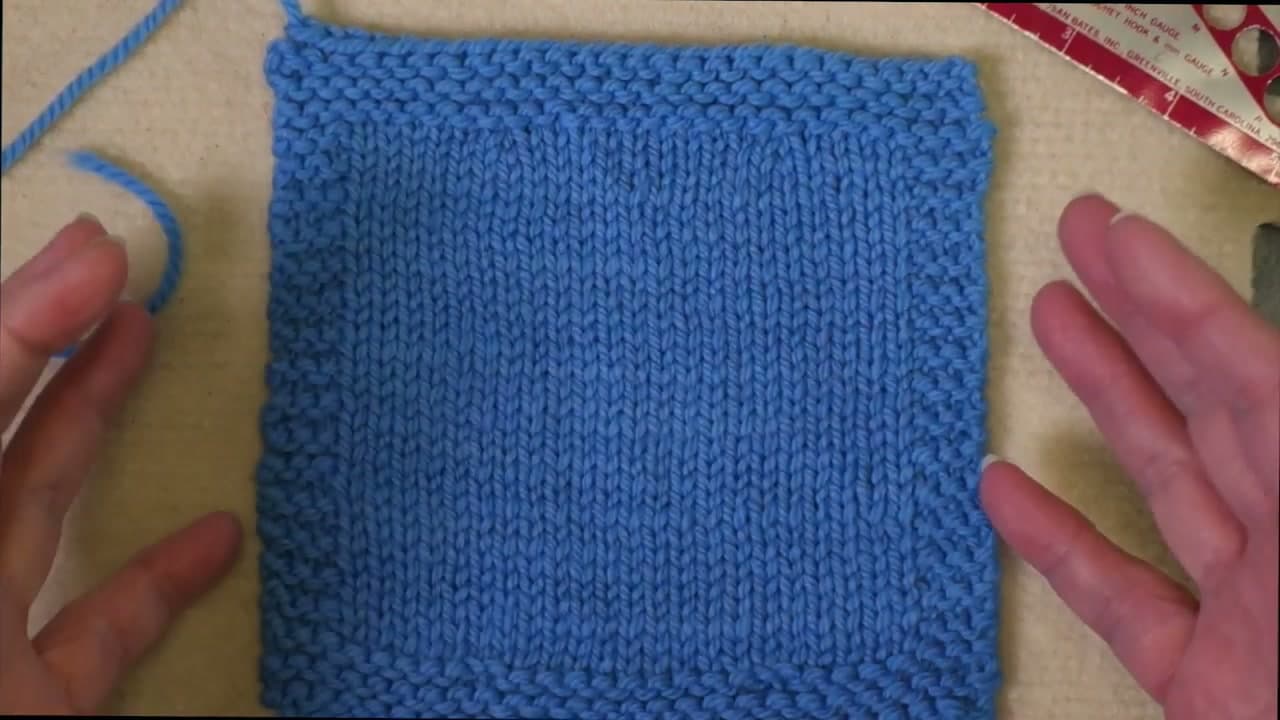
The finished result: How to Knit a Gauge Swatch That Measures True

By Show Me Step by StepPublished

Based on a video by Roxanne Richardson.

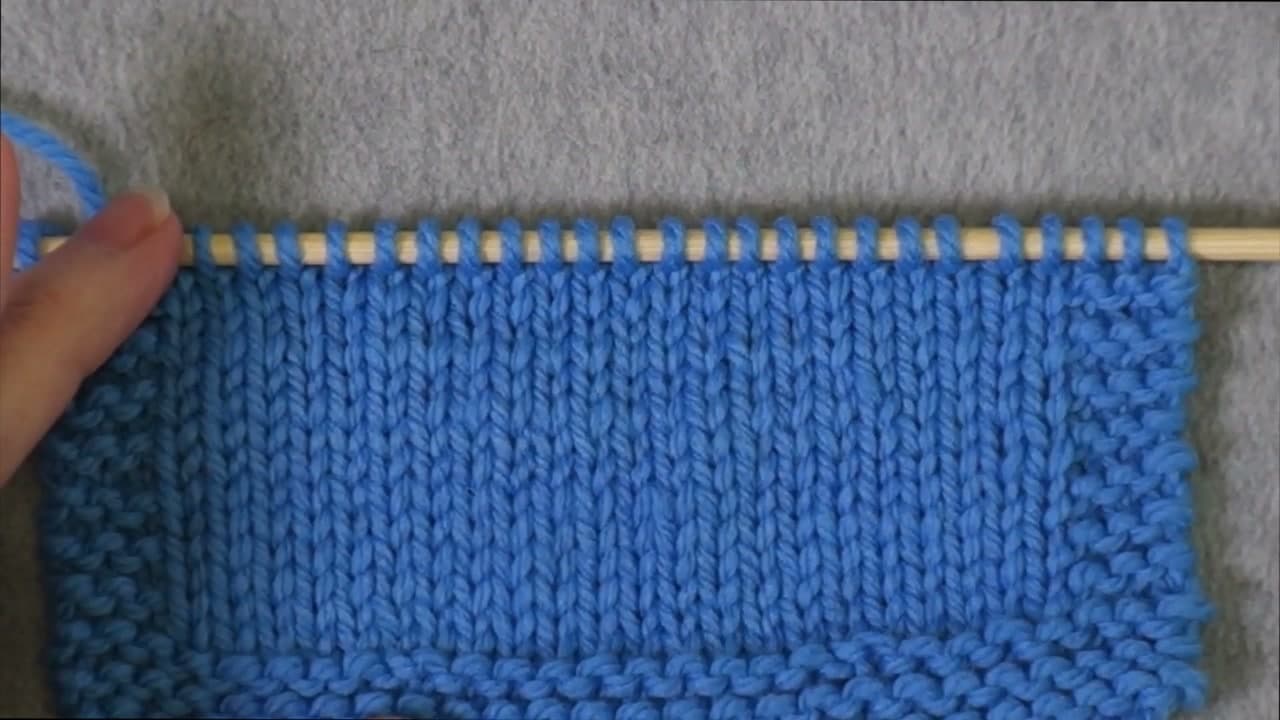
A gauge swatch is a small test square you knit before a project. It tells you if your needles make stitches the same size as the designer's. Skip it and a sweater can come out two sizes too big. Roxanne Richardson knits hers with a garter stitch border all the way around, plus a small trick at the transitions that keeps the measurement honest. Her method also makes the swatch lie flat, so washing and measuring are easy.

How to knit a gauge swatch: what you need

  • The yarn for your project. The same yarn, not a similar one. Even the same weight can knit up differently.
  • The needles the pattern suggests. Same material too. Bamboo, metal and wood can change your gauge.
  • A gauge ruler or tape measure. A ruler with a 4 inch window makes counting easy.
  • A towel and a flat place to dry it. A blocking mat is handy but not required.

How many stitches to cast on

Find the gauge in your pattern, for example 20 stitches over 4 inches. Cast on that number plus 6 for a 3 stitch garter border on each side. Then add 1 stitch for every 10 when you start the stockinette. Measuring over a full 4 inches is far more accurate than measuring over 1 inch and multiplying.

Pattern gauge (4 in)Cast onIncrease
16 sts222
20 sts262
24 sts302
28 sts343

Reading your result

Too few stitches in 4 inches means your stitches are too big. Go down a needle size. Too many means they are too small. Go up a size. One needle size usually shifts gauge by about one stitch over 4 inches. Match stitch gauge first. Row gauge matters less because most patterns tell you to knit to a length, not a row count.

Why wash the swatch

Knitting changes the first time it gets wet. It softens, relaxes and may grow. Your finished project will be washed, so the washed swatch is the one that counts. Measure before washing, then again once it is completely dry. Wet wool is always a bit bigger, so do not trust a damp measurement.

Common mistakes

  • Swatching flat for a project knit in the round. Knit the swatch the way you will knit the project.
  • Measuring the edge stitches. Leave out the border and the extra stitches next to it.
  • Stretching it while it dries. Pat it into shape and let it relax.
  • Swatching once and never again. A new yarn or a new needle brand can change your gauge, even for a knitter with years of practice.

Before you start your project

If any step here is new, start with how to cast on and how to increase. The gauge line is explained in how to read a knitting pattern, and how to block knitting covers washing and drying in more detail.

What you'll need

Step-by-Step Guide

10 steps · about 19 minutes.Check off each step as you go and your progress saves automatically.

1

Cast On the Gauge Swatch and Knit a Garter Stitch Border

3:15
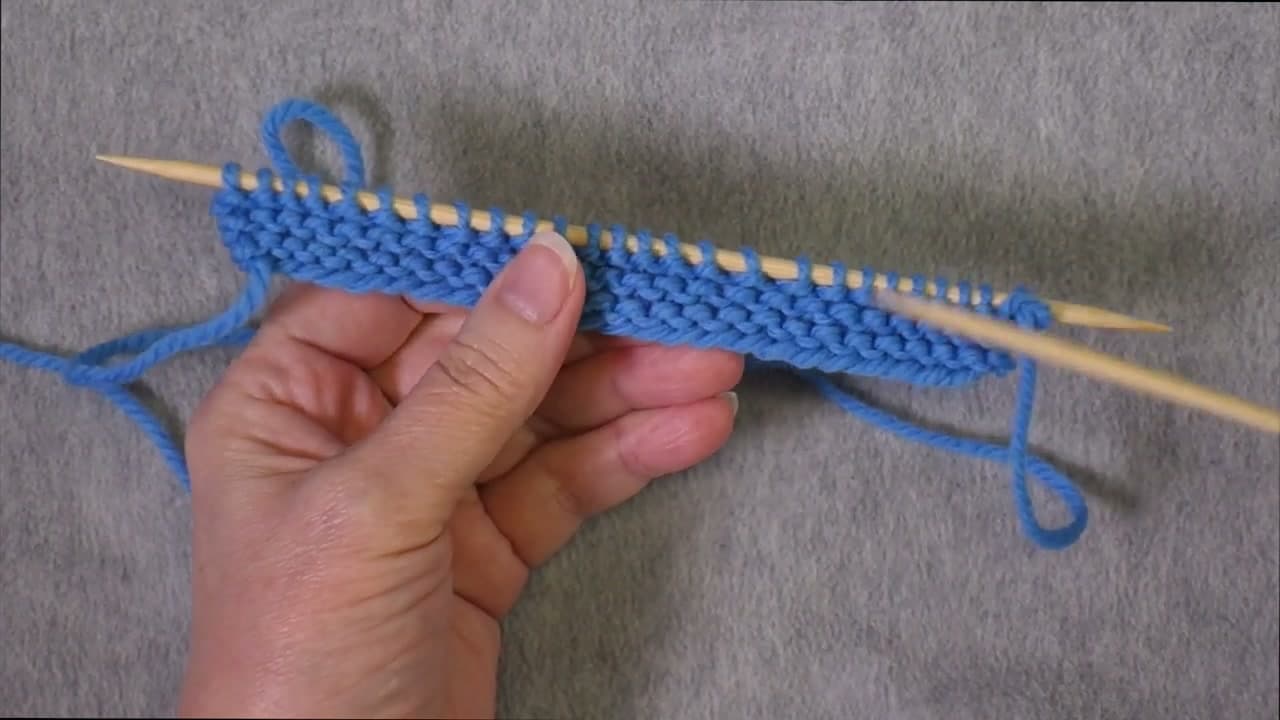
Step 1: Cast On the Gauge Swatch and Knit a Garter Stitch Border - How to Knit a Gauge Swatch That Measures True

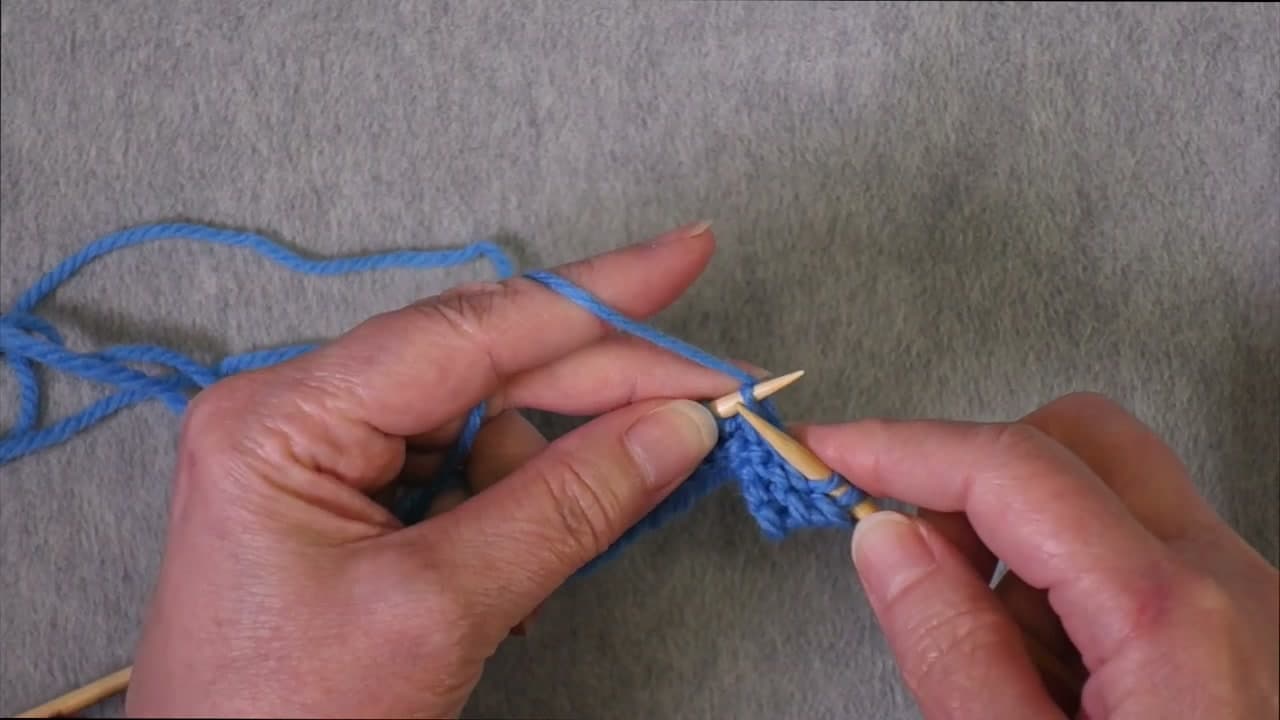
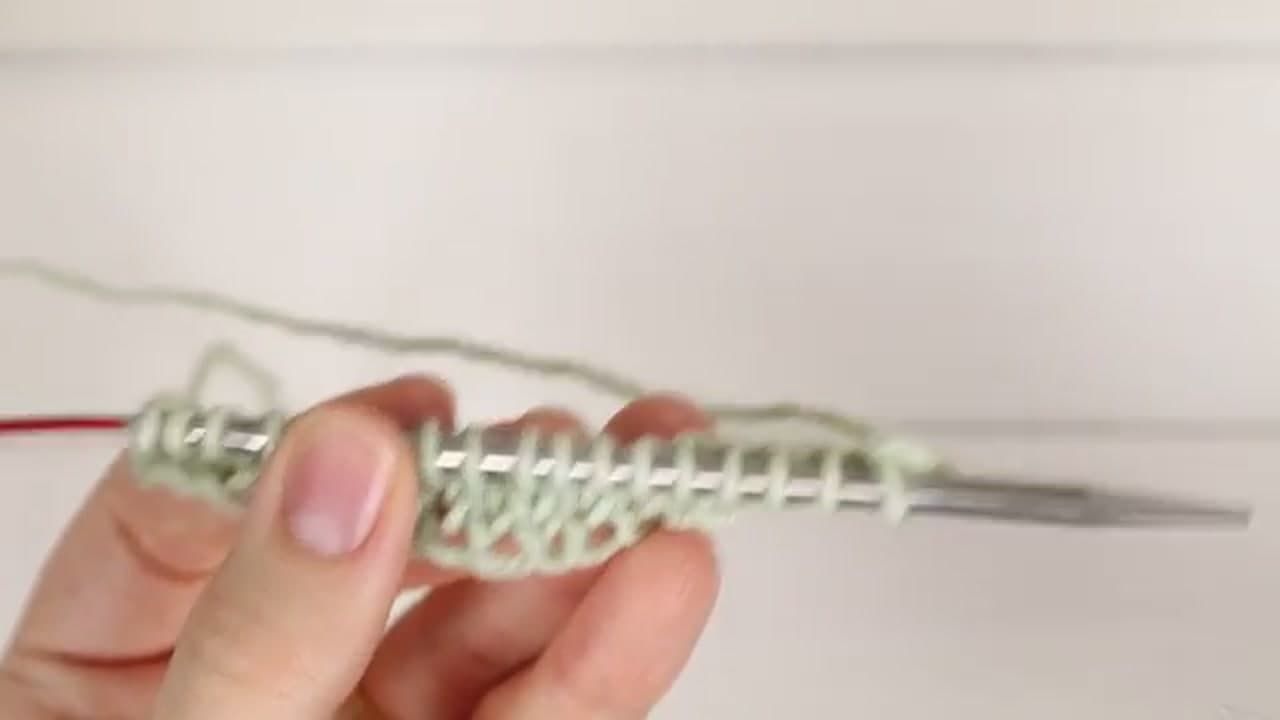
Check your pattern for the gauge, such as 20 stitches over 4 inches. Cast on that number plus 6, so 26 stitches here. Use the same yarn and needles you plan to use for the project. Knit every row for 5 or 6 rows. That makes a garter stitch border along the bottom that stops the swatch from curling.

Tip

Write the needle size on a scrap of paper and keep it with the swatch.

2

Add Increases on the First Stockinette Row of the Gauge Swatch

6:50
Step 2: Add Increases on the First Stockinette Row of the Gauge Swatch - How to Knit a Gauge Swatch That Measures True

On the next right side row, knit the first 3 stitches for the side border. Then knit about 5 stitches, make one, knit 10 more and make one again. Add 1 stitch for every 10 you planned for the stockinette. These extra stitches stop the garter border from flaring and give you spare edge stitches to leave out when you measure.

Tip

Any increase works here. Make one, knit front and back, whichever you know.

3

Purl Across the Gauge Swatch With Garter Stitch Edges

7:50
Step 3: Purl Across the Gauge Swatch With Garter Stitch Edges - How to Knit a Gauge Swatch That Measures True

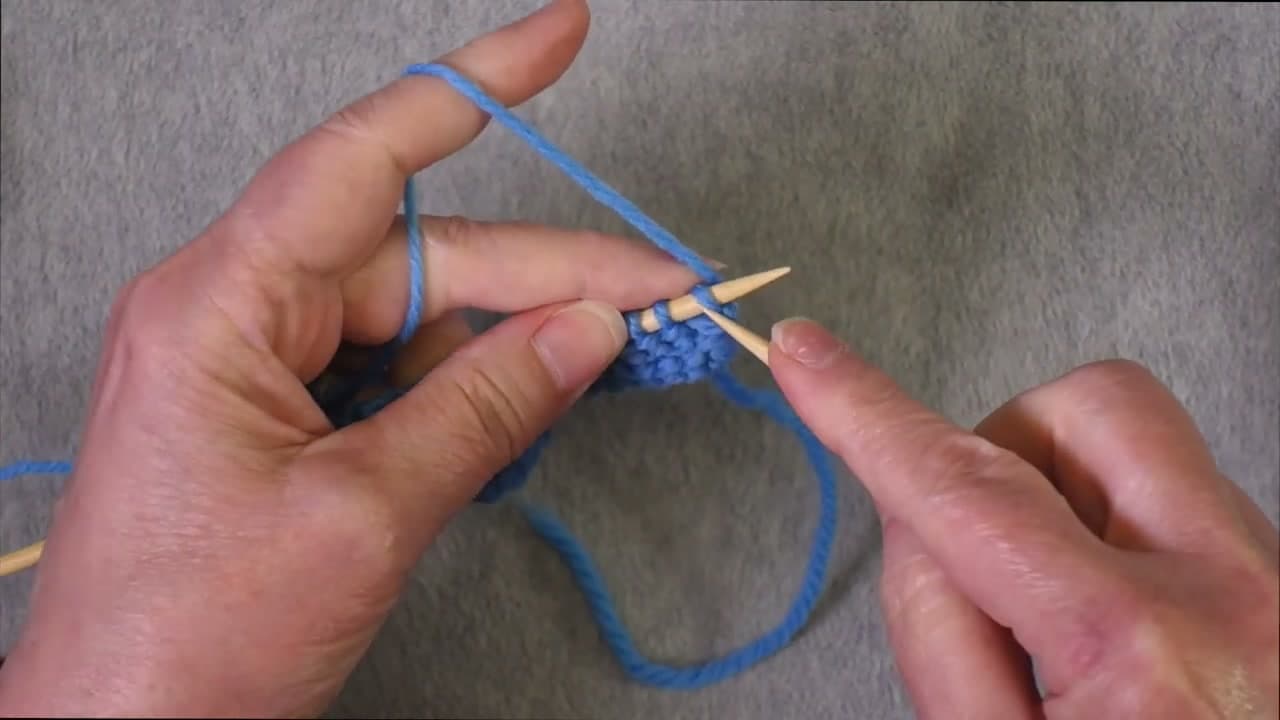
On the wrong side, knit the first 3 stitches, purl across until 3 stitches remain, then knit those last 3. On right side rows, knit every stitch. The first and last 3 stitches stay in garter stitch the whole way up. That forms a neat frame at each side so the swatch lies flat without rolling.

Tip

Clip a stitch marker after the third stitch on each side until the pattern sinks in.

4

Knit Two Inches of Stockinette in the Gauge Swatch

8:48
Step 4: Knit Two Inches of Stockinette in the Gauge Swatch - How to Knit a Gauge Swatch That Measures True

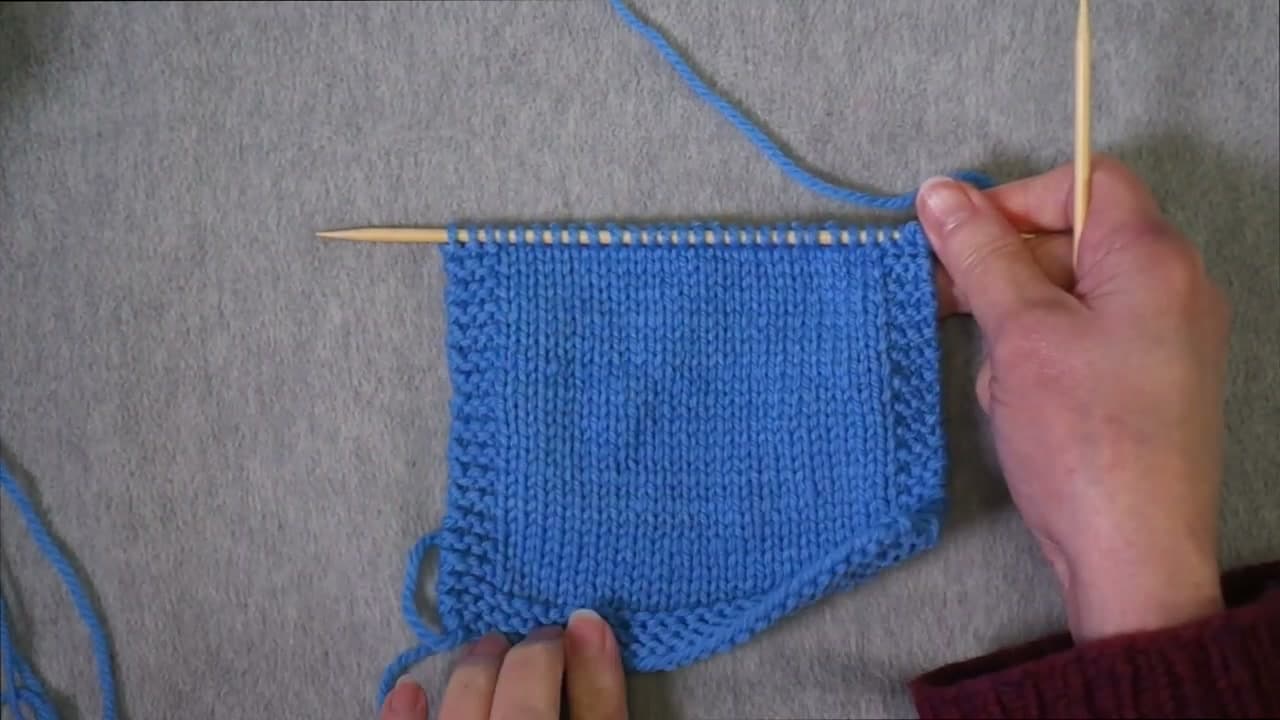
Keep working the rows until you have about 2 inches of stockinette above the border. Finish on a right side row. Two inches is enough fabric to get a fair first reading without the top and bottom edges pulling at the stitches. It also saves you from knitting a full swatch on the wrong needles.

Tip

Knit at your normal pace. Tense or careful knitting changes gauge too.

5

Take a Preliminary Gauge Measurement on the Needle

9:12
Step 5: Take a Preliminary Gauge Measurement on the Needle - How to Knit a Gauge Swatch That Measures True

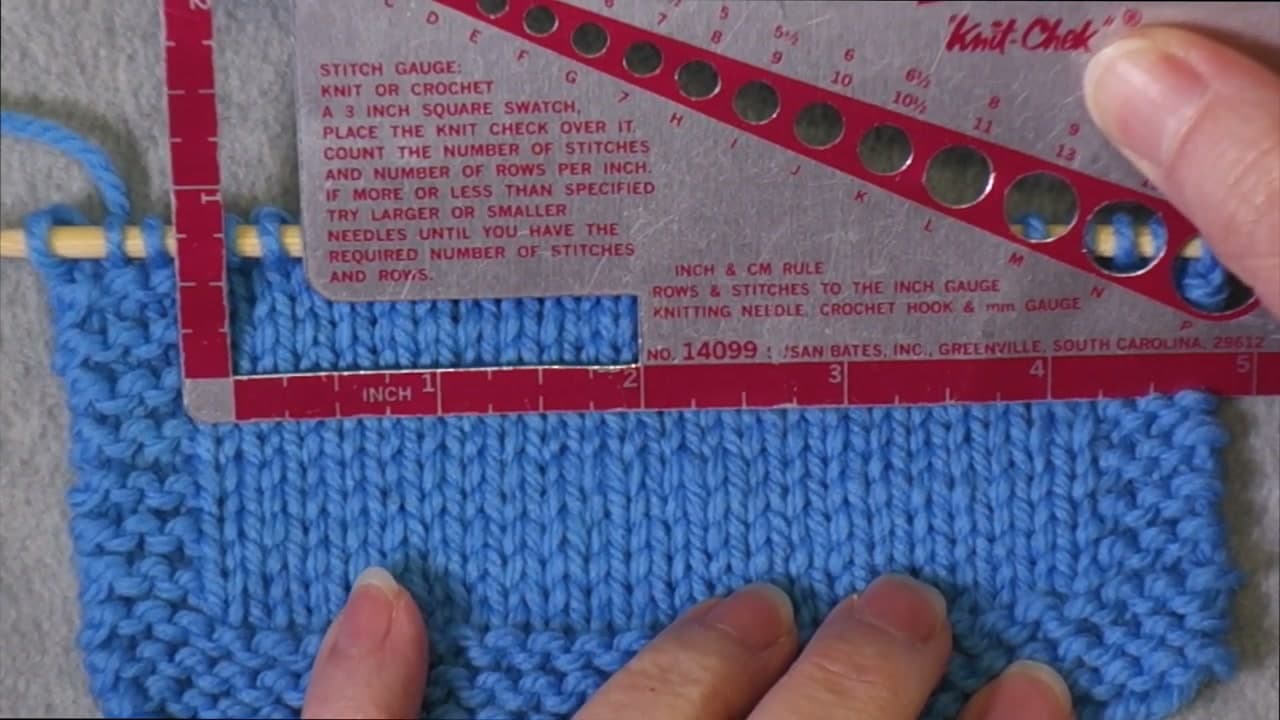
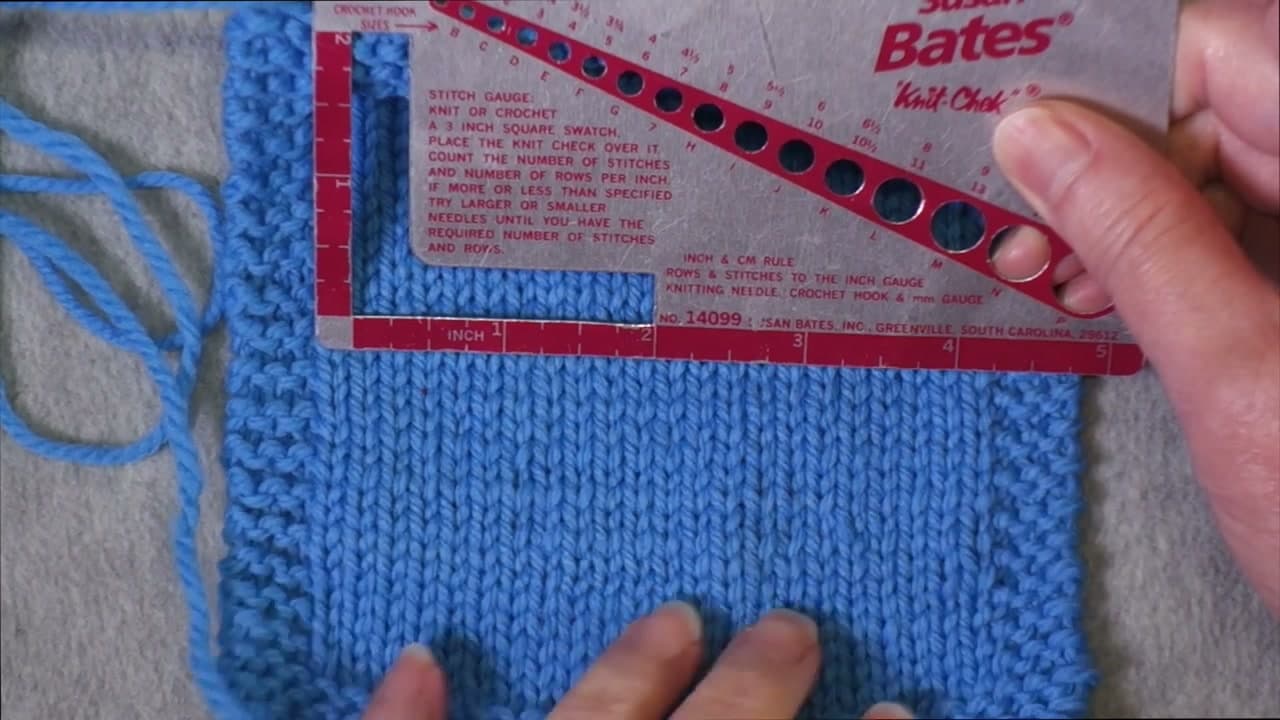
Lay the swatch flat with the needle still in. Set a gauge ruler on the stockinette and count the stitches across 4 inches. Leave out the border and the two extra stitches next to it. Roxanne counted exactly 20, so she kept going. If you are off by a full stitch or more, plan to change needles.

Tip

Count the little V shapes. Each V is one stitch.

6

Change Needle Size Mid Swatch With a Garter Ridge

12:18
Step 6: Change Needle Size Mid Swatch With a Garter Ridge - How to Knit a Gauge Swatch That Measures True

If your gauge is off, do not rip it out. Grab the next needle size up or down. Knit across the next wrong side row instead of purling. That leaves a garter ridge that marks where the needles changed. Then knit another 2 inches with the new pair, and note which needle made which section.

Tip

Fewer stitches than you need means smaller needles. More means bigger needles.

7

Decrease and Knit the Top Garter Border of the Gauge Swatch

12:45
Step 7: Decrease and Knit the Top Garter Border of the Gauge Swatch - How to Knit a Gauge Swatch That Measures True

Once the stockinette reaches about 4 inches, work 2 decreases on the next right side row, in about the same places as your increases. That brings you back to the cast on count. Knit 5 or 6 rows of garter stitch for the top border, then bind off loosely. Fresh off the needles it will roll a little and feel stiff.

Tip

Bind off with a larger needle if your bind offs tend to be tight.

8

Measure the Gauge Swatch Before Washing

14:20
Step 8: Measure the Gauge Swatch Before Washing - How to Knit a Gauge Swatch That Measures True

Lay the swatch flat without stretching it. Measure across the center stockinette again, leaving out the edge stitches. Write down the stitches per 4 inches and the rows per 4 inches. You need this number to see how much the fabric changes after washing. Some knitters find it grows quite a bit.

Tip

Measure in two or three places and use the average.

9

Soak the Gauge Swatch and Roll It in a Towel

16:06
Step 9: Soak the Gauge Swatch and Roll It in a Towel - How to Knit a Gauge Swatch That Measures True

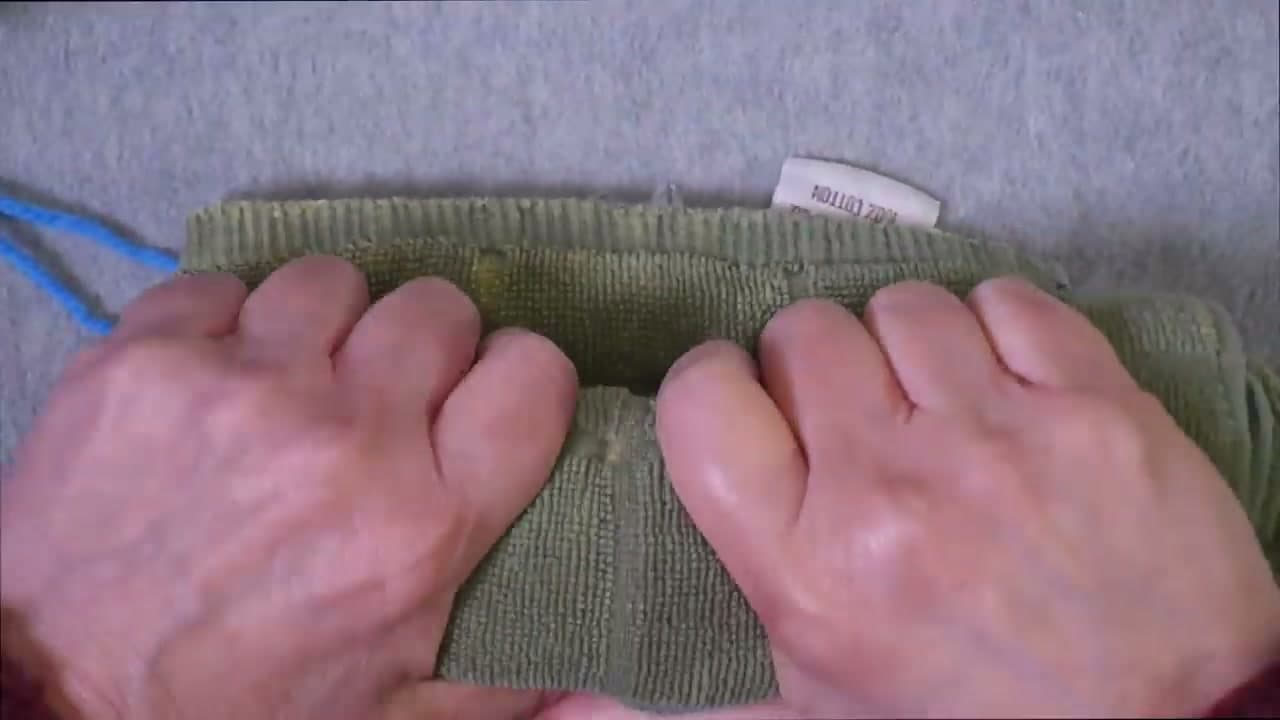
Wash the swatch the way the yarn label says. For plain wool, soak it in a bowl of warm water for at least 20 minutes. Wool holds air and needs time to soak through. Squeeze the water out gently, never wring it. Then roll the swatch up in an old towel and press to pull out as much water as you can.

Tip

Add a little wool wash so the swatch is treated the way your project will be.

10

Dry the Gauge Swatch Flat and Measure It Again

17:25
Step 10: Dry the Gauge Swatch Flat and Measure It Again - How to Knit a Gauge Swatch That Measures True

Lay the damp swatch on a mat or towel. Smooth the stitches with your hands and push it in a little so nothing is stretched. Pin the garter corners only if you want to. Let it dry completely, then measure once more. That dry, washed number is your true gauge. Pick the needle that matches it.

Tip

Keep the swatch with your project notes. It is a handy color and yarn reference later.

How to Knit Socks

Keep going

How to Knit Socks

Products Used

The Checklist

How to Knit a Gauge Swatch That Measures True

Tools
6
Materials
2
Steps
10
Video
19 min

Tools we recommend

Your Guide

Roxanne Richardson

As an Amazon Associate we earn from qualifying purchases. Links on this page may be affiliate links - clicking them and buying doesn't change your price, but helps support Show Me Step by Step.

Tags

Sunday How-To

New knitting tutorials, every Sunday

One short email with the week's best step-by-step guides. Free, no spam, unsubscribe anytime.

Did this work for you?

What's next

Weekly Digest

Liked this knitting tutorial?

Pick the categories you want to hear about. Weekly digest of new step-by-step tutorials. No spam, easy unsubscribe.

Send me tutorials about

We only email about new tutorials. Easy unsubscribe anytime.