How to Install a Kitchen Faucet in 7 Steps

Also in:Adulting

By ShowMeStepByStepPublished Updated

Based on a video by The Home Depot.

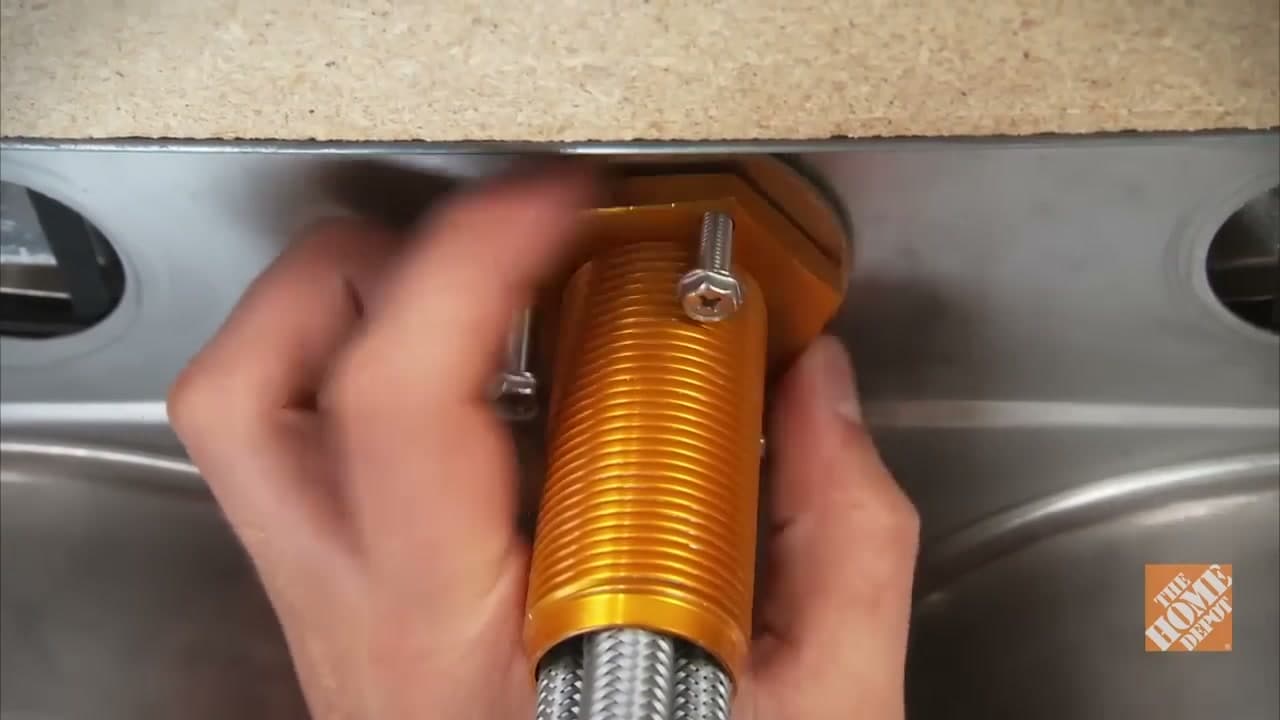
Install a kitchen faucet yourself and skip the $200 plumber call-out. Replacing a kitchen faucet is a 7-step DIY project that runs about 45-60 minutes once the supply valves are off and the cabinet is cleared. This walkthrough covers a single-handle pull-down install, but the same steps apply to two-handle and bridge faucets - the only thing that changes is the deck-plate hole count.

Most kitchen faucet installs come down to two skills: working in a tight cabinet on your back, and reading the manufacturer's quick-connect diagram. Once you've done one, the next one takes half the time. While you're under the sink, it's worth eyeballing the rest of your plumbing too. For the connected cluster, see how to replace a toilet flapper, how to fix a leaky faucet, how to install a thermostat, and how to install an interior door.

How long does it take to install a kitchen faucet?

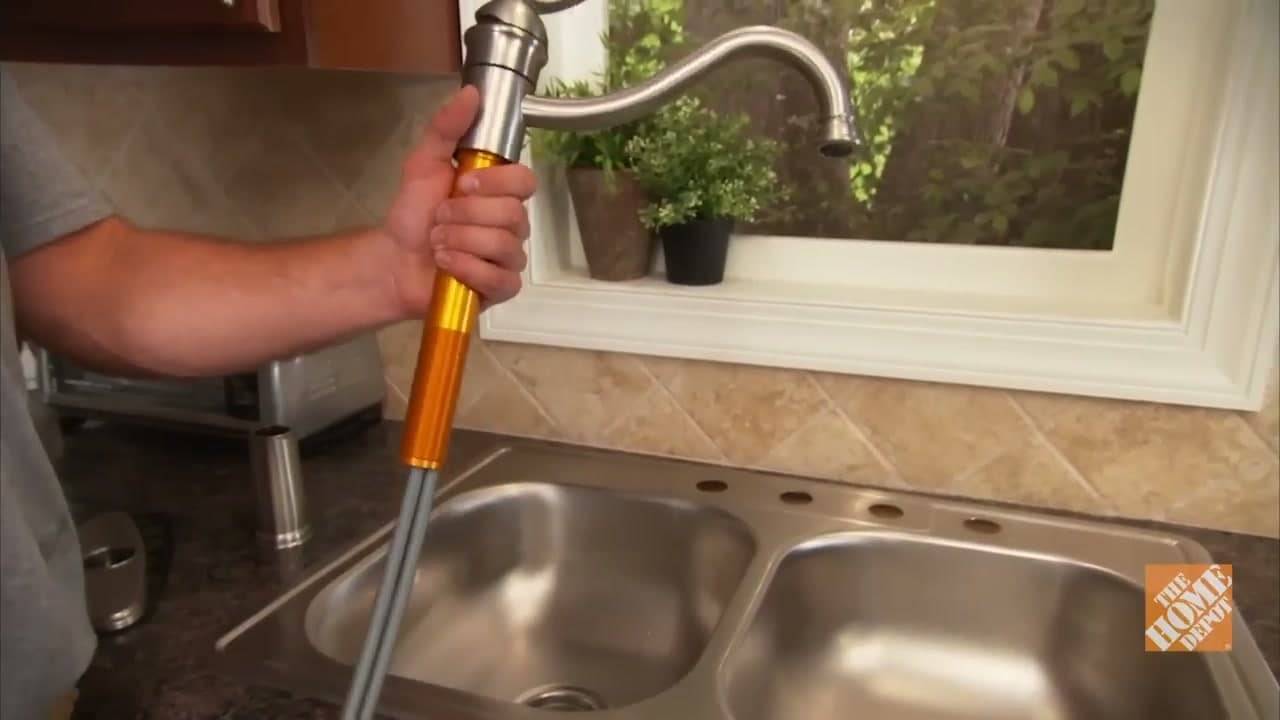
Plan on 45-60 minutes for a straight swap. First-time installs usually run an hour. The slowest part is loosening the old mounting nut in the cramped space behind the basin - a basin wrench cuts that down to 5 minutes.

Do I need a plumber to install a kitchen faucet?

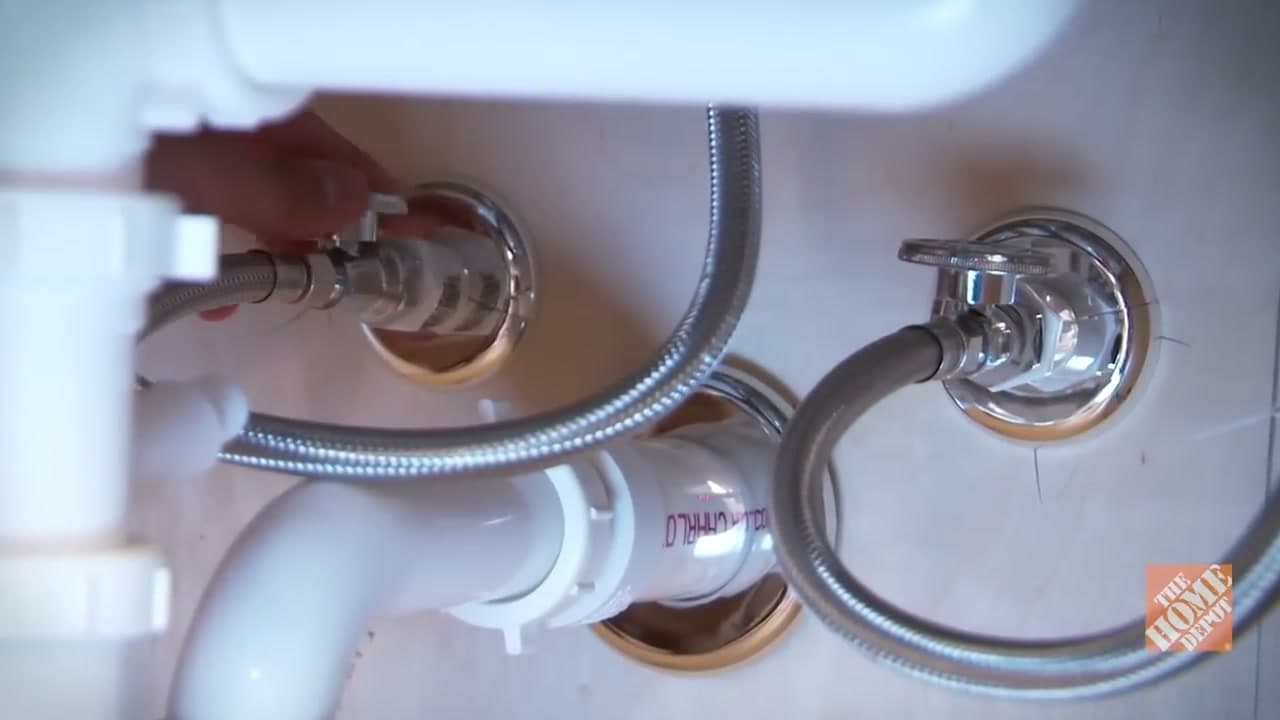
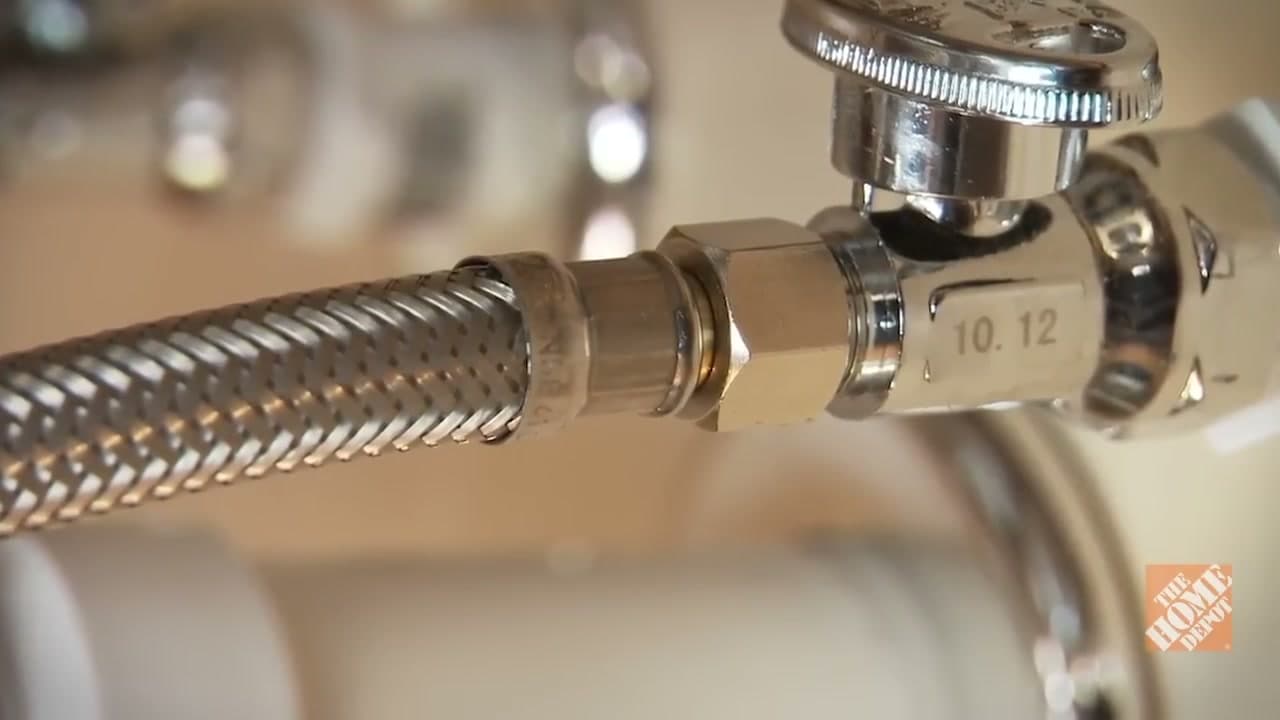
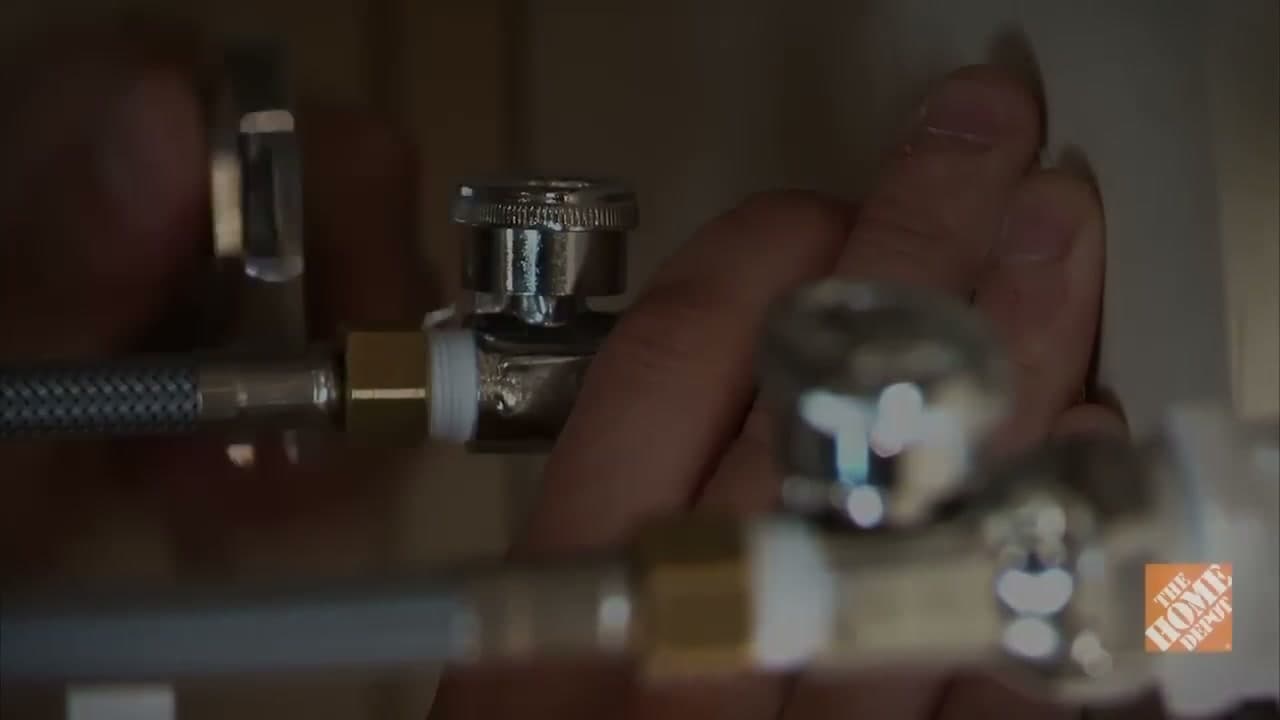
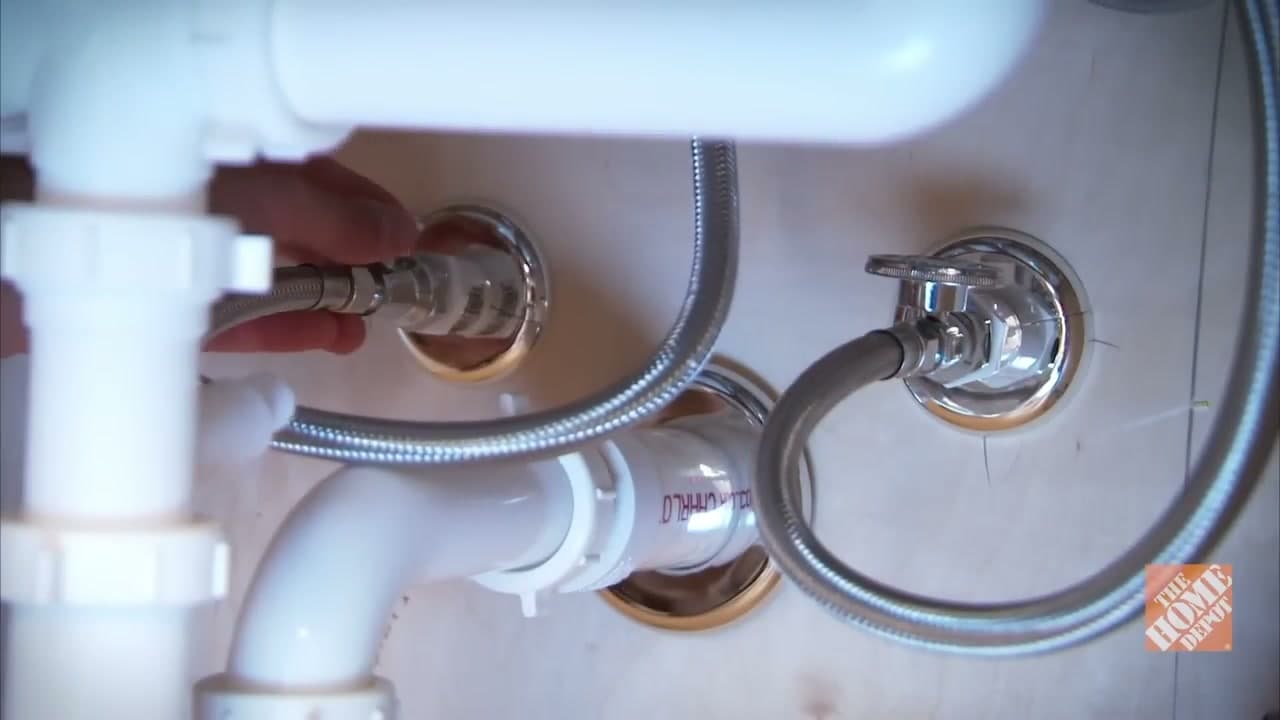
No. A kitchen faucet install is a low-risk DIY job. The shutoffs sit right under the sink, the supply lines are flexible braided hoses with quick-connect fittings, and the deck plate drops straight in. As long as you can shut off the valves and tighten a nut, you can replace a kitchen faucet.

What tools do I need to install a kitchen faucet?

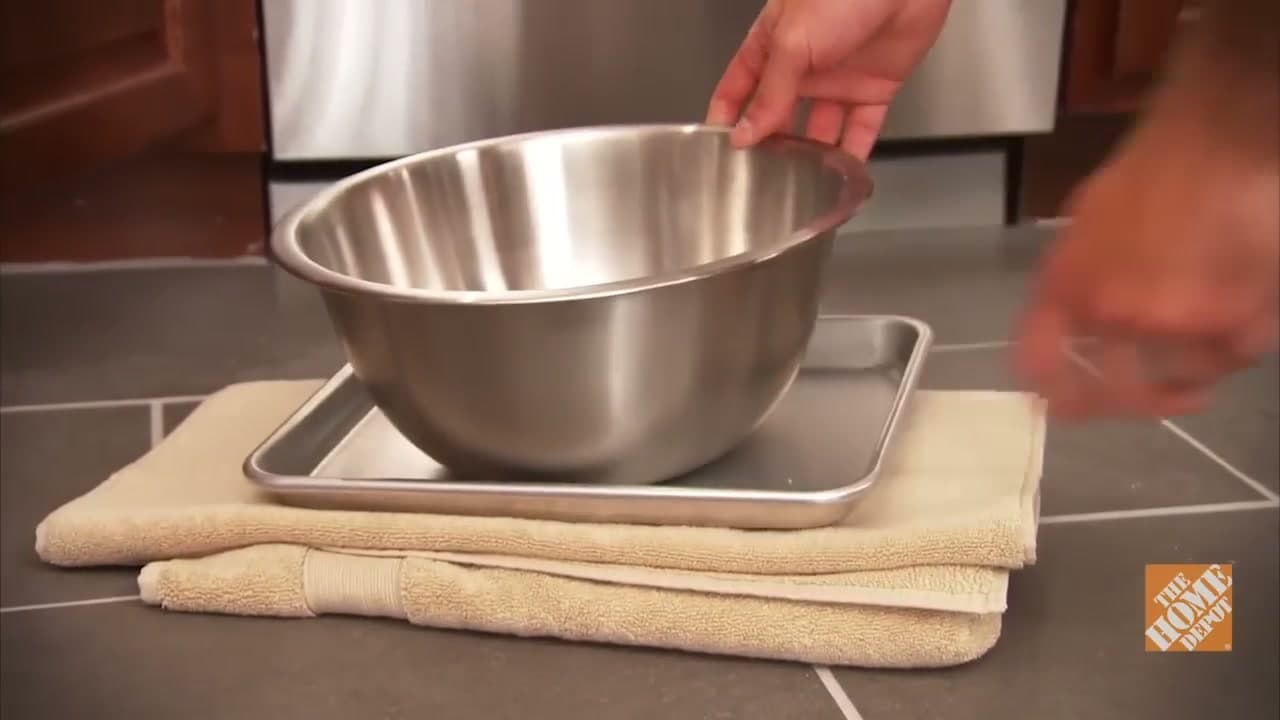
You need a basin wrench (the long-handle one for reaching behind the sink), an adjustable wrench, a flashlight or headlamp, a bucket and rag for residual water, and plumber's tape. The new faucet usually ships with the supply lines and mounting hardware you need.

How do I know if my new kitchen faucet will fit?

Count the holes in your sink deck. Single-handle pull-down faucets need 1 hole (the deck plate covers any extras). Two-handle bridge faucets need 3 holes spaced 8 inches apart. Most modern faucets ship with an optional deck plate so they'll cover 1-hole or 3-hole sinks.

Step-by-Step Guide

1

Step 1: Clear Out the Cabinet and Set Up Your Workspace

0:12
Step 1: Step 1: Clear Out the Cabinet and Set Up Your Workspace

Pull everything out from under the sink. Cleaning supplies, the bucket of mystery sponges, all of it. You need clear access to the back of the cabinet and room to lay on your back. Slide a shallow pan and a couple of old towels into place to catch the water that will drain out of the supply lines. A pillow under your head makes the next hour bearable. Watch at 0:12 for the workspace setup. If there's an outlet under the sink for a disposal or dishwasher, kill its breaker before you start.

Tip

Wear safety glasses. Old caulk, mineral deposits, and rust flakes all love to fall straight into your eyes when you're working upside down.

2

Step 2: Shut Off Hot and Cold Supply Valves

0:48
Step 2: Step 2: Shut Off Hot and Cold Supply Valves

Reach behind the drain trap and find the two shutoff valves on the wall - one for hot, one for cold. Turn each clockwise until it stops. Depending on the style, that's anywhere from a quarter turn to several full turns. If the valves are stiff from years of sitting idle, grip them through a rag or use a pair of pliers for leverage. Watch at 0:48. Once both valves are off, walk back up top and lift the faucet handle to drain any pressure left in the line.

Tip

If you don't have shutoff valves at all, you'll have to kill water to the whole house at the main. Add installing shutoffs to your project list while you're under there.

Products used in this step

3

Step 3: Disconnect the Supply Lines from the Shutoff Valves

1:40
Step 3: Step 3: Disconnect the Supply Lines from the Shutoff Valves

Each supply line has a threaded nut where it meets the valve. Slip an adjustable wrench around the nut and turn counterclockwise. Hold the valve body steady with your other hand or a second wrench - if you let the valve spin freely, you can break the connection inside the wall and turn a faucet swap into a drywall job. Watch at 1:40. A small slug of water will dribble out into your pan when the nut backs off. Repeat for the other side.

Tip

If a valve keeps dripping even with the handle fully closed, the valve itself is bad. Shut off water to the whole house and replace the valve before installing the new faucet.

Products used in this step

4

Step 4: Remove the Old Faucet

6:40
Step 4: Step 4: Remove the Old Faucet

With both supply lines free, go back above the sink and look at what you're removing. Mounting hardware lives under the deck - usually a large nut threaded onto the faucet shank, sometimes with separate mounting screws. Reach up with a basin wrench (the ratcheting head pivots 90 degrees so you can grip nuts in tight spots) and turn the mounting nut counterclockwise until it backs off. Watch at 4:20. Lift the old faucet straight up and out. If it won't budge, the caulk seal underneath is holding it - work a putty knife around the base.

Tip

Rusted hardware? Hit it with PB Blaster, walk away for 10 minutes, then try again. A second application is normal.

5

Step 5: Set the New Faucet and Tighten the Mounting Hardware

8:08
Step 5: Step 5: Set the New Faucet and Tighten the Mounting Hardware

Scrape and clean the sink deck so the new faucet sits on a flat surface. Drop your new gasket onto the underside of the base (or the escutcheon plate if you're covering three holes with a single-handle unit). Feed the supply lines down through the center hole and seat the faucet on the deck. Crawl back under and slide the mounting washer and nut up the shank. Thread the nut by hand, then tighten the mounting screws evenly with a Phillips driver until the faucet is rock solid against the cabinet underside. Watch at 8:08.

Tip

Have someone hold the faucet straight from above while you tighten from below. A faucet that ends up cocked to one side is a pain to straighten out later.

6

Step 6: Connect the Supply Lines

9:53
Step 6: Step 6: Connect the Supply Lines

Tear a small strip of Teflon tape and wrap it clockwise around the threads of each shutoff valve - three or four turns is plenty. Watch at 9:53. The cold supply line from your faucet goes to the cold valve (usually on the right). Hot goes to hot. Thread each nut on by hand first to make sure it isn't cross-threaded, then snug it down with an adjustable wrench. Brace the valve body with your free hand again so it doesn't rotate.

Tip

Snug, not gorilla-tight. Compression fittings and braided lines seal with the gasket inside the nut, not with brute force.

7

Step 7: Turn the Water Back On and Check for Leaks

11:18
Step 7: Step 7: Turn the Water Back On and Check for Leaks

Reach back behind the cabinet and open both shutoff valves slowly, counterclockwise. Stand the handle up and let water run through for a full minute on hot, then on cold. Watch at 11:18. While the water flows, grab the flashlight and inspect all four connections: faucet-to-line on hot, faucet-to-line on cold, line-to-valve on hot, line-to-valve on cold. Run a dry finger or paper towel under each joint. Any moisture means tighten a quarter turn and recheck. If a joint keeps weeping, shut the water back off, add another wrap of Teflon tape, and reseat the connection.

Tip

After the leak check passes, unscrew the aerator from the spout, run the faucet wide open for a minute to flush debris from the lines, then thread the aerator back on.

Products Used

Your Guide

The Home Depot

As an Amazon Associate we earn from qualifying purchases. Links on this page may be affiliate links - clicking them and buying doesn't change your price, but helps support ShowMeStepByStep.

Tags

Test your knowledge

Did the lesson stick? Find out in 2 minutes.

5 quick questions covering what you just read. No signup, no score saved — just a gut check.

Quick reference

Key takeaways from How to Install a Kitchen Faucet in 7 Steps

5 questions, answers, and one-line explanations. Tap to expand.

  1. 1.First step before touching anything?

    Answer: Shut off angle stops

    Shut the angle stops first. Skipping this is how a swap becomes a flood.

  2. 2.Loosening a supply nut at the shutoff, what to brace?

    Answer: The valve body itself

    If the valve body spins, you can crack the pipe inside the wall. Always grip the valve with a second wrench.

  3. 3.What's a basin wrench for?

    Answer: Mount nuts in tight spots

    Its 90-degree pivoting head grabs nuts under the faucet shank in spots a regular wrench cannot reach.

  4. 4.What goes on shutoff threads before reconnecting?

    Answer: Teflon tape clockwise

    A few wraps clockwise seals the threaded joint. Wrap counterclockwise and it unwinds as you tighten.

  5. 5.After turning water back on, what do you check?

    Answer: Run hot + cold, look

    Run both for about a minute and inspect all four connections for drips. Catch them now, not after the cabinet rots.

What's next

Related collections

Curated theme pages that include this tutorial.

Weekly Digest

Liked this home improvement tutorial?

Pick the categories you want to hear about. Weekly digest of new step-by-step tutorials. No spam, easy unsubscribe.

Send me tutorials about

We only email about new tutorials. Easy unsubscribe anytime.