How to Propagate an African Violet (Leaf Cuttings in Soil)

GardeningEasy8:387 stepsBrowse more →

By ShowMeStepByStepPublished

Based on a video by Erika Lodes.

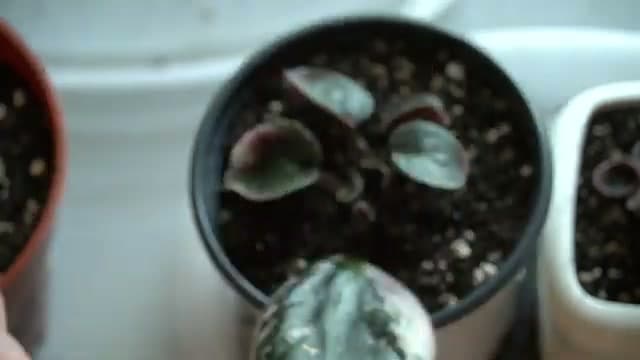
African violets are one of the easiest houseplants to multiply, and you don't need any fancy gear to do it. Erika Lodes walks through her favorite method in this video: take a few leaf cuttings, tuck them into soil inside a covered container, and wait for tiny new plants to sprout from the base of each leaf. She films the whole thing over half a year so you can see exactly what the babies look like at every stage.

The reason Erika likes this soil method over water rooting is that it skips the trickiest part. There's no fragile move from water to soil, so the success rate is higher and you barely have to fuss over it. Pop the lid on, set the container under a grow light or by a window, and check in every few weeks. That's really the whole job.

If you catch the propagation bug, the same patient approach works on plenty of other houseplants. Try propagating a fiddle-leaf fig or a jade plant next, and if you love the idea of free plants from a single leaf, here's how to propagate succulents the same lazy way.

Step-by-Step Guide

7 steps · about 9 minutes.Check off each step as you go and your progress saves automatically.

1

Step 1: Cut a Few Outer Leaves

1:36
Step 1: Step 1: Cut a Few Outer Leaves

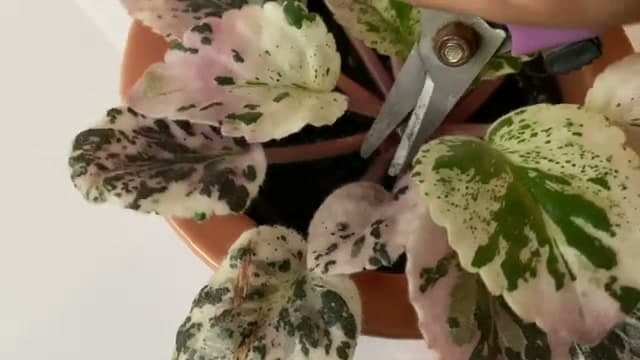
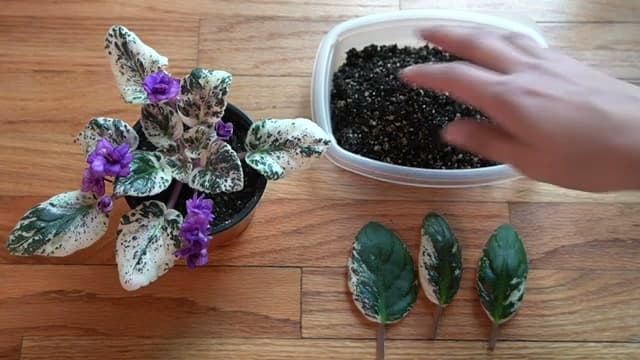
Pick three or four leaves from the outer edge of the plant. Those are the oldest ones, and they're the easiest to spare. Damaged or plain-looking leaves are perfect - taking them off tidies up the mother plant while giving you cuttings for free.

Snip each leaf as close to the base as you can so you don't leave a stubby stump behind. No shears handy? The stems snap off cleanly with a gentle pinch.

Tip

Watch this step Wipe your blades with rubbing alcohol first so you don't spread anything between plants. A firm, healthy leaf roots far better than a soft mushy one.
2

Step 2: Fill a Lidded Container with Soil

2:12
Step 2: Step 2: Fill a Lidded Container with Soil

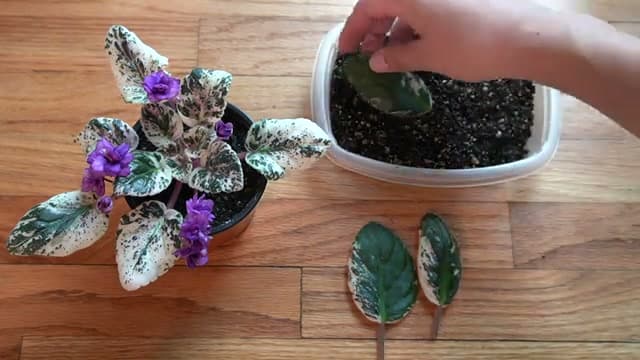
Grab a clear food container or takeout tub that has a lid. You don't need to drill any drainage holes. The whole trick here is that the lid traps humidity, and that damp, still air is what coaxes roots out of the leaf stems.

Pour in a couple of inches of African violet mix. Any potting soil works if that's what you have. The soil is just a place to hold the leaves upright while they root.

Tip

Watch this step A shallow, wide container fits more leaves and takes up less shelf space under a grow light. Clear plastic lets you peek at progress without opening the lid.

3

Step 3: Tuck the Leaf Stems into the Soil

2:28
Step 3: Step 3: Tuck the Leaf Stems into the Soil

Set each leaf on the soil and push the stem down until it's buried, keeping the leaf blade sitting up above the surface. That buried stem base is where the new baby plant forms, so it's the part that matters.

Space the leaves out with a little room between them. If you want the plantlets to come up closer to the old leaf, trim the stems shorter before you plant them. Either way works.

Tip

Watch this step Angle each leaf slightly so the stem base points down into the mix. Firm the soil around it just enough to hold the leaf steady.

Products used in this step

4

Step 4: Water and Close the Lid

2:50
Step 4: Step 4: Water and Close the Lid

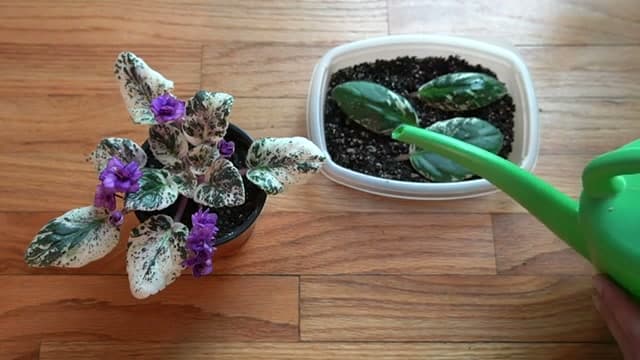
Add water until the soil is fully saturated. Pour it into one corner and let it soak across on its own. Try to keep the fuzzy leaves dry, since water sitting on them can leave spots.

Snap the lid on to seal in the humidity. Then set the container under grow lights or on a bright windowsill and walk away. This little terrarium does the work for you.

Tip

Watch this step A small watering can with a narrow spout makes it easy to water one spot without splashing the leaves. Grow lights give the most consistent results if your windows are dim.

5

Step 5: Wait for Baby Plantlets to Appear

3:18
Step 5: Step 5: Wait for Baby Plantlets to Appear

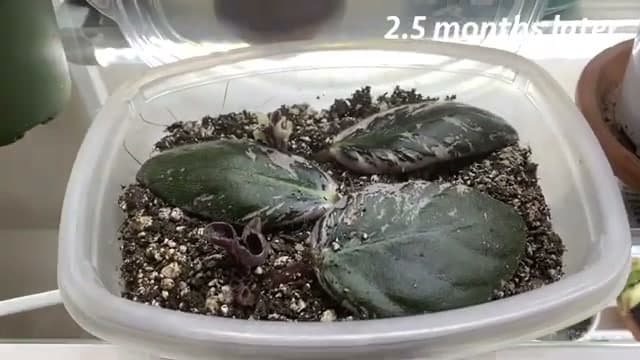
Now the patient part. Over the next two to four months, tiny new plantlets push up from the base of each buried stem. The sealed lid keeps things so humid that you'll only need to water once every few weeks.

Leave the container closed and let it ride. When the babies grow so tall the lid won't shut anymore, that's your cue they're ready to move into their own pots.

Tip

Watch this step A steady, warm spot speeds things up. If nothing's happening after a month, don't panic - African violet leaves are slow to get going.

Products used in this step

6

Step 6: Separate and Pot Up the New Plants

4:24
Step 6: Step 6: Separate and Pot Up the New Plants

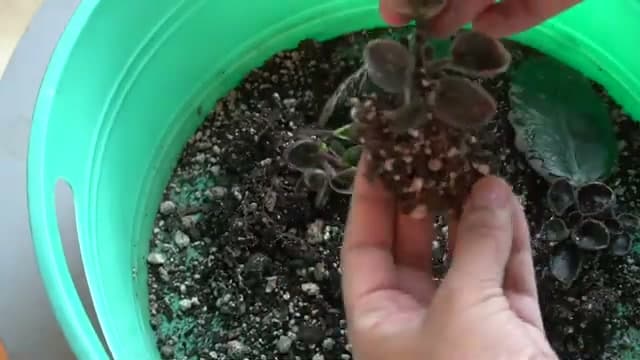
Tip the whole clump out and shake off the loose soil. You'll see each original leaf now has its own little cluster of rooted babies attached. Gently tease the plants apart so each one can go into its own pot.

Move each new plant into a small nursery pot with fresh African violet mix. If your soil is dense, stir in a handful of perlite so it drains well and stays airy around the young roots.

Tip

Watch this step A few roots will tear as you split the clump and that's fine. Small nursery pots suit young plants better than a big pot, which stays wet too long.

7

Step 7: Brush the Leaves Clean and Water In

6:06
Step 7: Step 7: Brush the Leaves Clean and Water In

Got soil on the fuzzy leaves while potting? Don't rinse it off with water. Instead, whisk it away with a soft, dry makeup or paint brush. Keep that brush around - it's the easiest way to dust African violets for the rest of their life.

Give each new plant its first proper drink, soaking the soil right through. Out of the humid container now, they'll dry out faster, so plan to water more often than you did before.

Tip

Watch this step A cheap fluffy brush from any drugstore works great. African violets like to be watered from the bottom, so setting the pots in a shallow tray of water keeps the leaves dry.

Products Used

☐ The Checklist

How to Propagate an African Violet (Leaf Cuttings in Soil)

Tools
3
Materials
4
Steps
7
Video
9 min

Your Guide

Erika Lodes

As an Amazon Associate we earn from qualifying purchases. Links on this page may be affiliate links - clicking them and buying doesn't change your price, but helps support ShowMeStepByStep.

Sunday How-To

New gardening tutorials, every Sunday

One short email with the week's best step-by-step guides. Free, no spam, unsubscribe anytime.

Did this work for you?

What's next

Related collections

Curated theme pages that include this tutorial.

Weekly Digest

Liked this gardening tutorial?

Pick the categories you want to hear about. Weekly digest of new step-by-step tutorials. No spam, easy unsubscribe.

Send me tutorials about

We only email about new tutorials. Easy unsubscribe anytime.