How to Build Raised Garden Beds: 7 Step DIY Guide With Corrugated Metal

By ShowMeStepByStepPublished Updated

Based on a video by SimonSaysDIY.

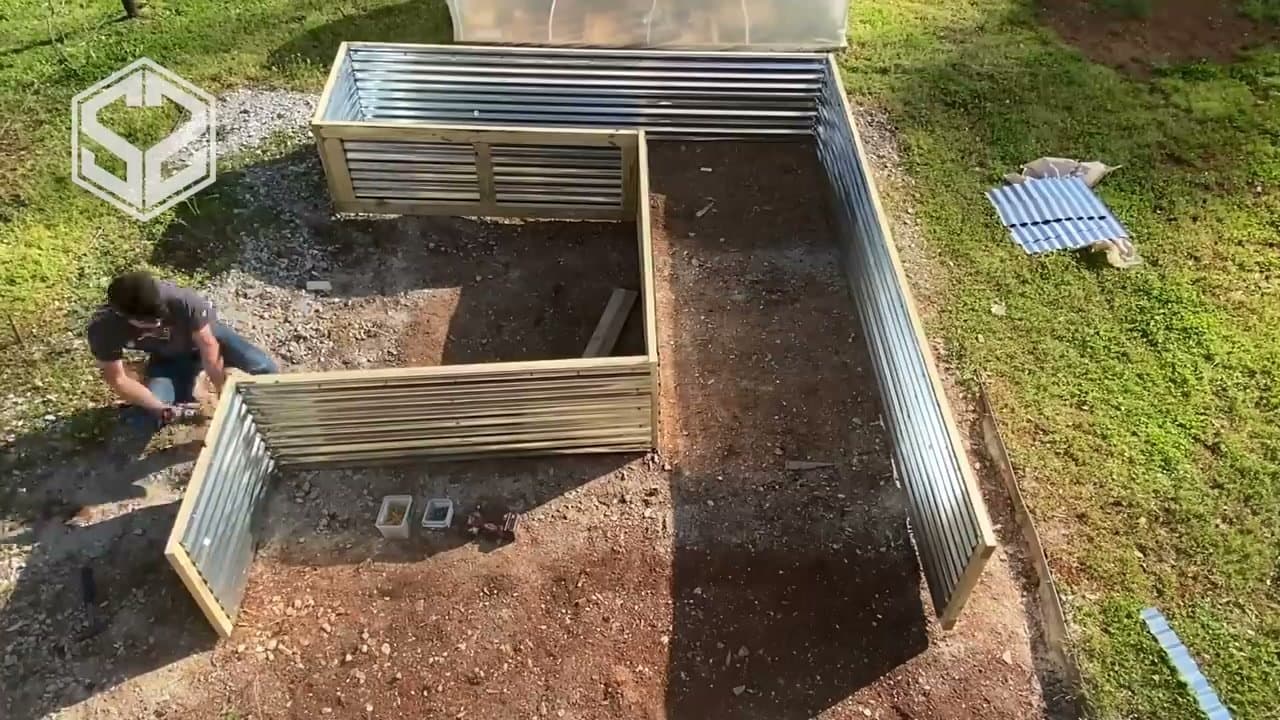
Old-school raised beds built from pressure-treated 2x6s last 3-5 years before the dirt-side boards rot through and the bugs find them. This corrugated-metal-plus-2x4 design lasts much longer because the metal does the soil-contact work and the wood only frames it.

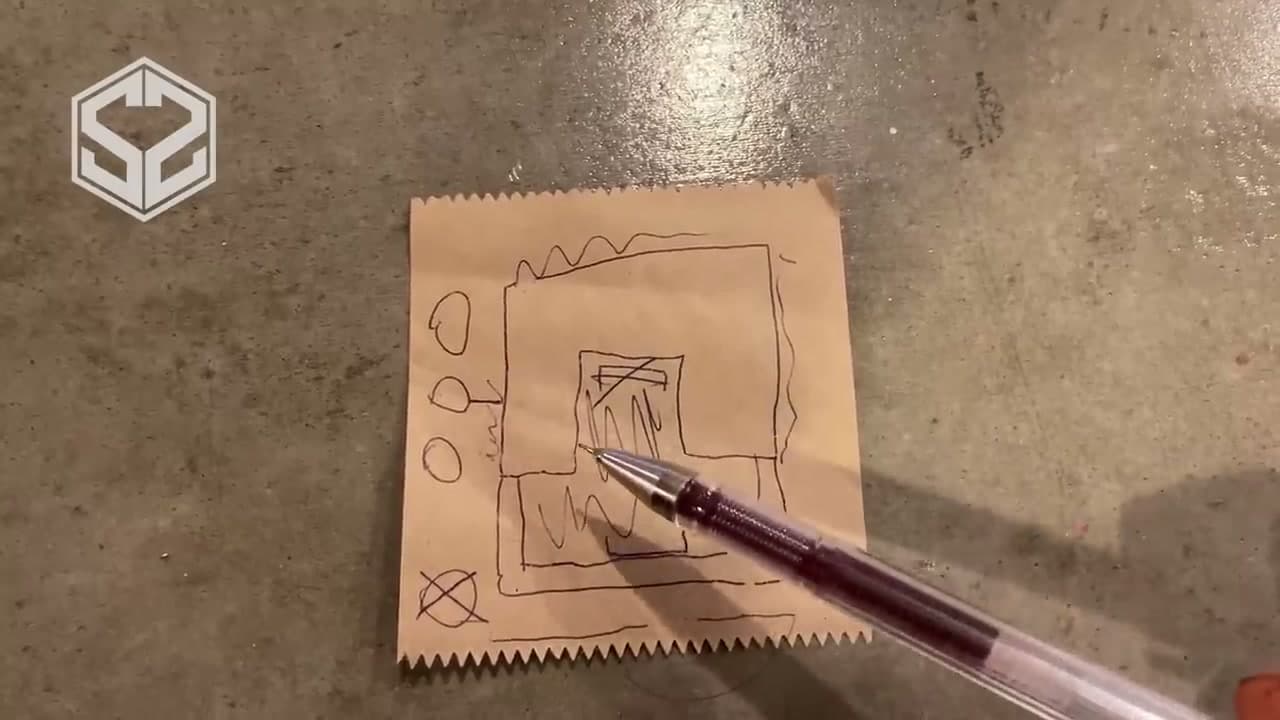
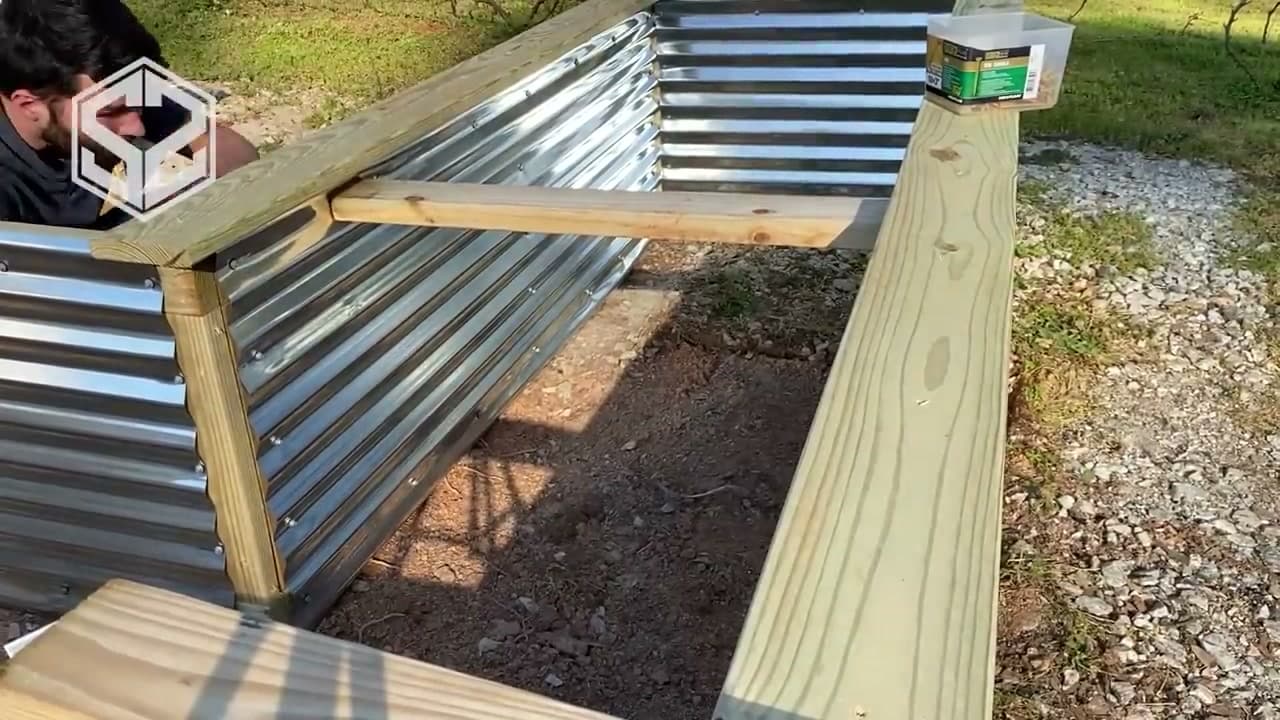
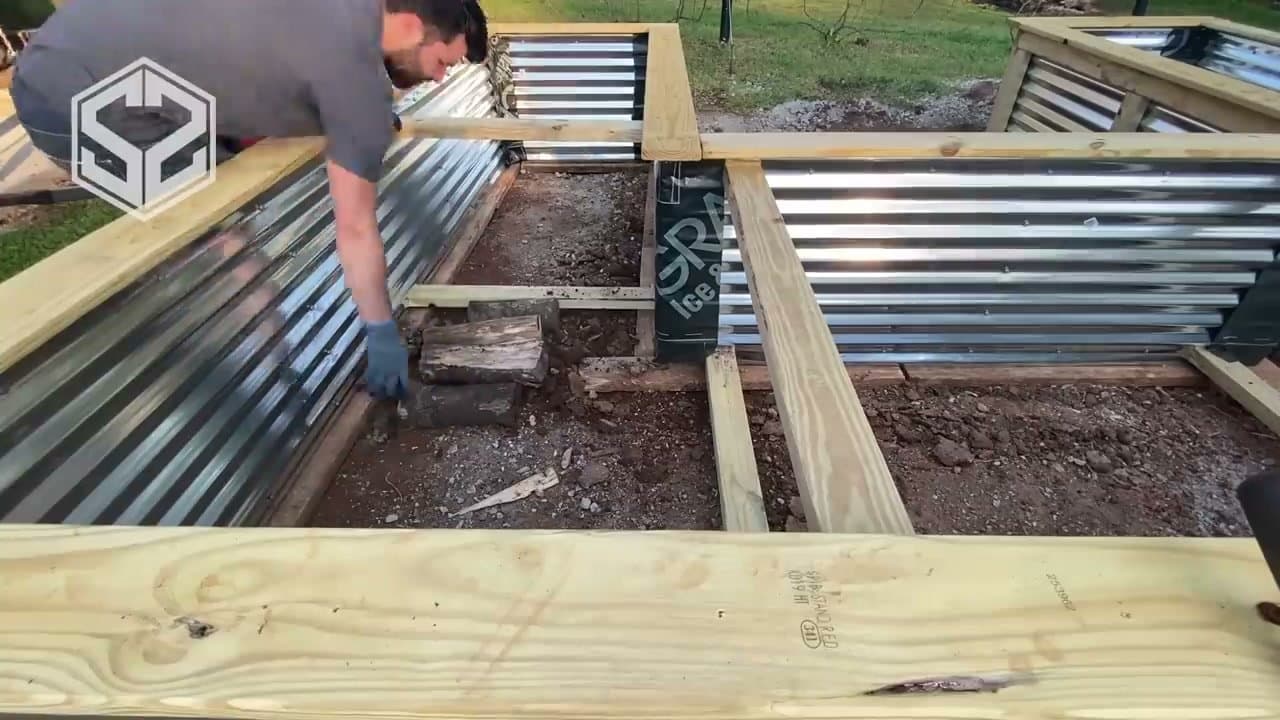
This walkthrough from SimonSaysDIY breaks the build into seven steps. The trickiest part is keeping the panels square and the long sides supported - a 10-foot bed has enormous outward pressure from a yard of soil pushing against it. The cross-supports in step 6 stop that pressure from blowing out the long walls over time.

Build in a Weekend: The Fastest Method

If you want a raised bed up and planted by Sunday night, skip the saw work. A pre-cut cedar kit (Vego Garden, Greenes Fence, or the Costco cedar kit when it comes back in stock) lands in 4-6 boxes and slots together with the included corner brackets in about 90 minutes. Budget around $80-150 for a 4-by-8 bed, plus soil.

The other shortcut is buying stackable corner brackets (search for "raised bed corner brackets" or "Eden Made bed brackets") and pairing them with off-the-shelf cedar fence boards from the big-box store. No miter saw needed - the brackets accept boards up to 2 inches thick and stack to whatever height you want. You can have a 4-by-8 bed framed and standing in under an hour.

The 2x4-and-corrugated-metal build below outlasts both kit options by years, so it is still the right pick if you want one bed that lasts a decade. The kit and bracket routes are the right pick if you want three beds in by Memorial Day.

Saturday-to-Sunday Timeline

Here is the realistic weekend schedule for the 2x4 + metal build below, assuming you already have the tools on hand and the lumber pre-cut by the yard (most yards will do this free with a list).

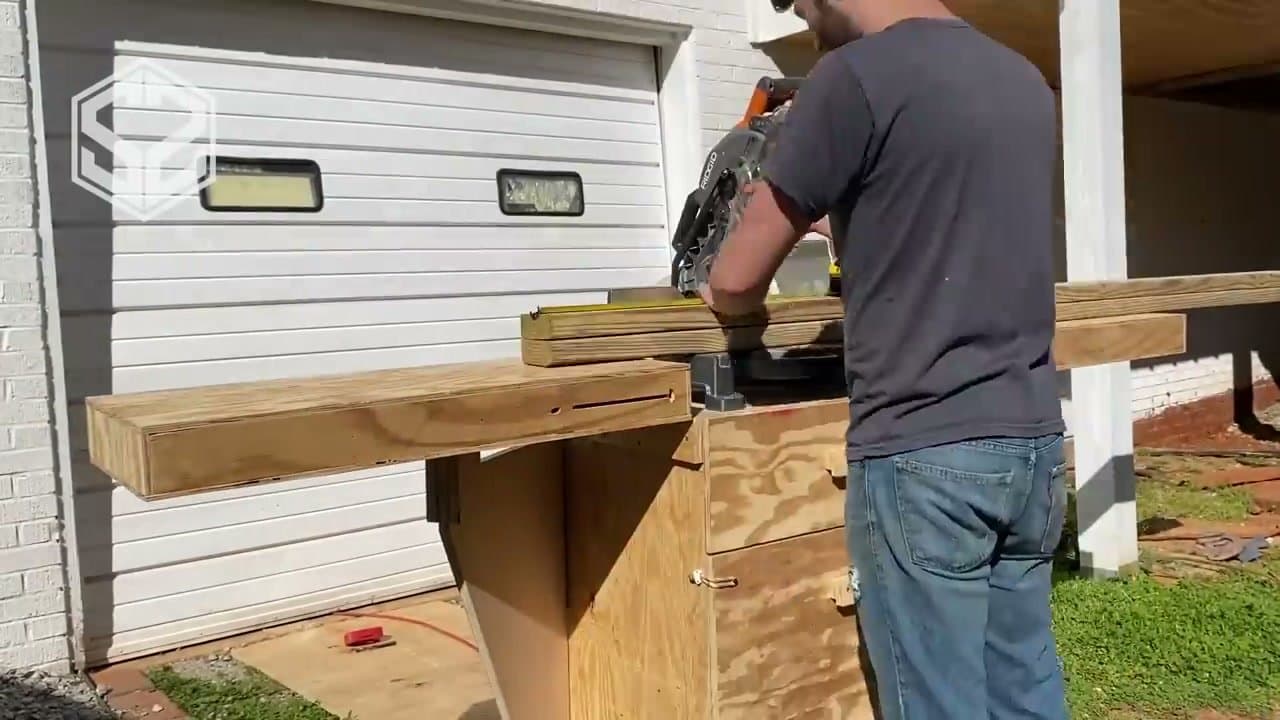
Saturday morning (3 hours): Lay out the footprint, level the ground, and frame panels one and two. This is the slowest part because the first panel teaches you the toenailing rhythm.

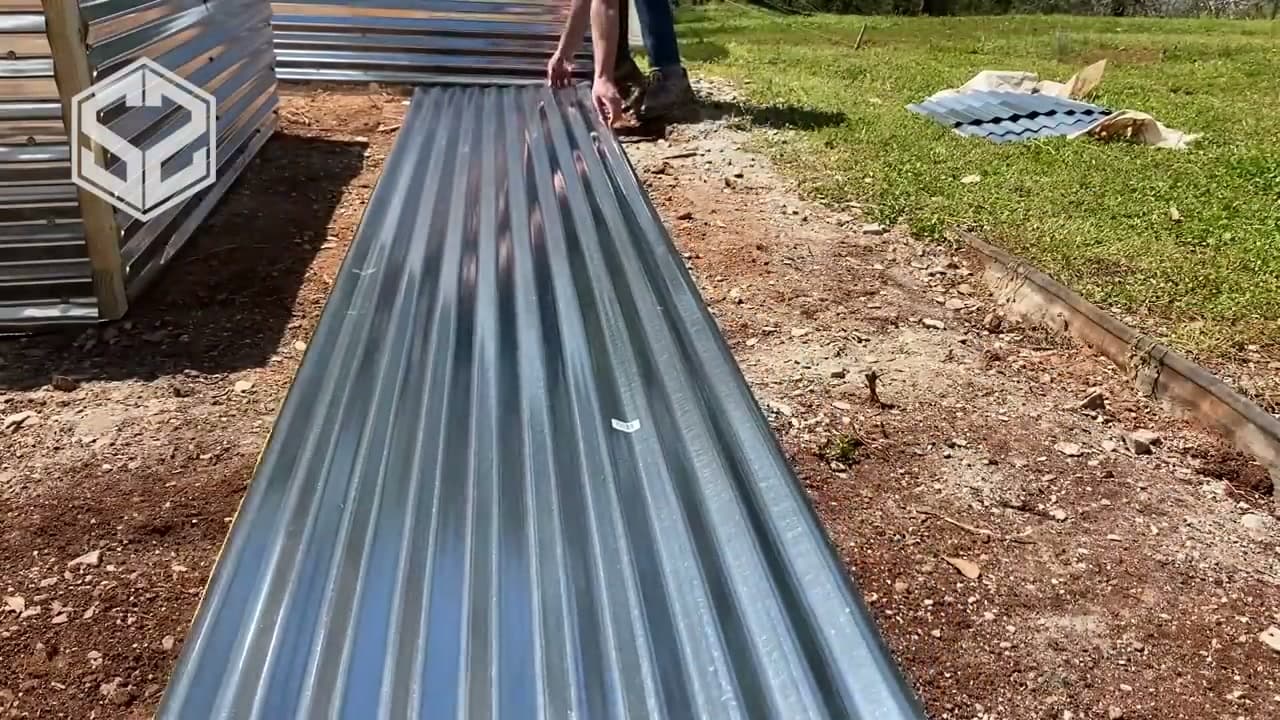
Saturday afternoon (2-3 hours): Frame the remaining panels, cut the corrugated metal to size, and screw it into the panel backs. Stop here for the day - the metal edges are sharp and you are tired.

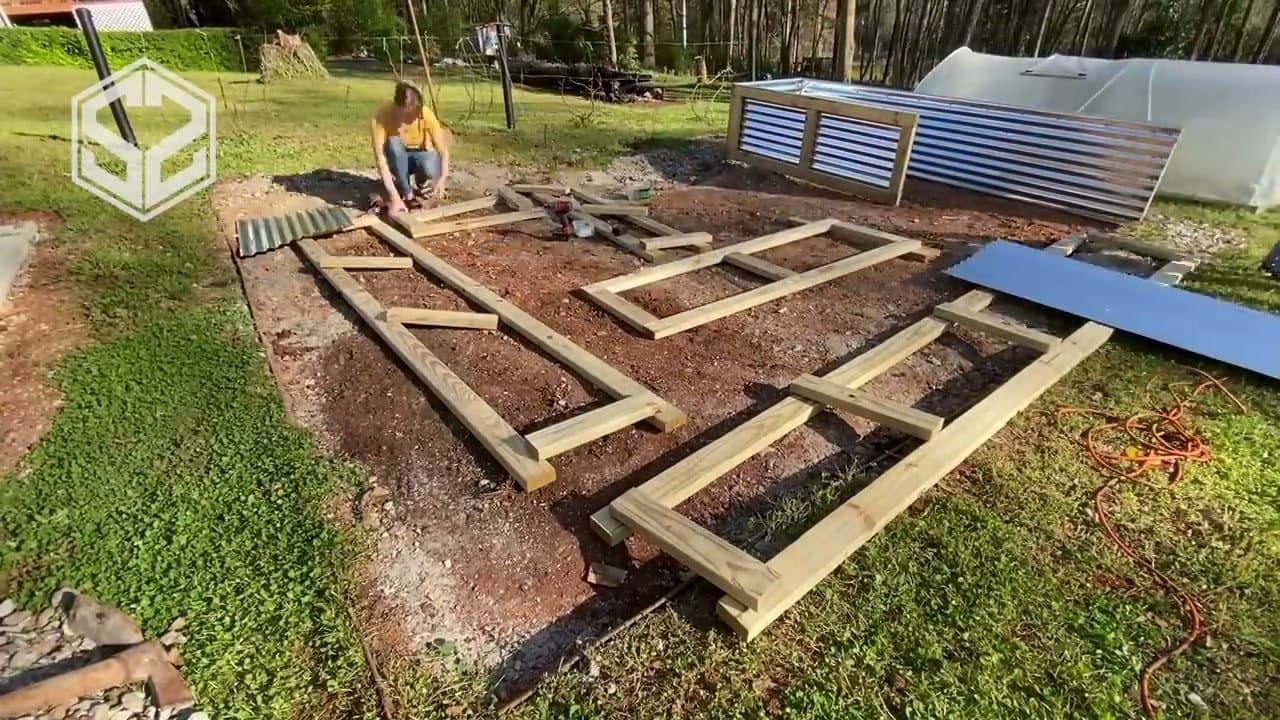
Sunday morning (2 hours): Stand the panels, connect the corners, add the top rail and cross supports. The bed is now structurally complete.

Sunday afternoon (2-4 hours): Layer in the wood and yard waste, top with soil and compost, water it down to settle, and plant. Done. Plant tomatoes if it is past your last frost date - late spring through early summer is the sweet spot for getting transplants established before the heat.

Step-by-Step Guide

1

Step 1: Plan the Dimensions and Footprint

2:10
Step 1: Step 1: Plan the Dimensions and Footprint

Sketch the bed dimensions before cutting anything. The example here is a 12-foot section split into 6-foot end panels and 10-foot side panels, 18 inches tall. Smaller layouts work too - just keep individual panel runs under 12 feet and the height under 24 inches.

Mark the corners on level ground with the planned rectangle outlined. Dig out any sod or roots inside the footprint and check the surface is roughly level - shimming a finished bed level is much harder than starting on flat ground.

2

Step 2: Cut the 2x4 Frame Pieces

2:25
Step 2: Step 2: Cut the 2x4 Frame Pieces

Cut all the 2x4 frame pieces ahead of time. Each panel needs a top rail, a bottom rail, and 18-inch vertical supports placed every 3 feet maximum. End uprights at each corner; intermediate ones evenly spaced.

The vertical supports brace the corrugated metal sheet from buckling under soil pressure. Wider spacing means weaker walls. 3 feet is the maximum span - go closer if you're stacking taller beds.

3

Step 3: Build Each Panel With Toenailed Screws

3:55
Step 3: Step 3: Build Each Panel With Toenailed Screws

Lay each panel flat on the ground in its final shape - top rail, bottom rail, vertical supports between them. Pre-drive two 3-inch screws into each end of every vertical support before fitting them into place. The screws bite the rails as you set the support upright.

Toenailing pre-drilled like this is much faster than trying to drive screws into a vertical 2x4 you're holding still. Two screws per joint is plenty for a panel that's mostly held by the corrugated metal in the next step.

4

Step 4: Attach Corrugated Metal to the Inside

5:25
Step 4: Step 4: Attach Corrugated Metal to the Inside

Lay each panel face-down. Place a corrugated metal sheet on top, sized to fit between the uprights. Drive roofing screws (the kind with rubber gaskets) every 8-10 inches along the rails and at every vertical support.

The gaskets seal each screw hole against water - critical, since water sitting against bare metal rusts and against bare wood rots. Use tin snips, an angle grinder, or a sawzall with a metal blade if you need to trim panels to length.

5

Step 5: Connect the Panels at the Corners

6:20
Step 5: Step 5: Connect the Panels at the Corners

Stand the panels in place around the marked footprint. Drive 3-inch deck screws through the corner verticals into the adjacent panel - about four screws per corner staggered top-to-bottom.

Square up the bed with a tape measure across the diagonals (equal diagonals = square corners) and a level on the top rails before driving the last screws. Once the corners are screwed tight, the geometry is locked.

6

Step 6: Add a Top Rail and Cross Supports

6:50
Step 6: Step 6: Add a Top Rail and Cross Supports

Run a 1x6 or 1x8 deck board along every panel's top rail, screwed straight down. The board prevents the top from bowing outward as soil pushes against the metal. Mitering the corners gives a finished look but butt joints work too.

For long spans (10+ feet), add a 2x4 cross-support running across the bed at the bottom and the top of the panel. The support equalizes outward pressure between the two long walls and stops the bottom from kicking out over time.

7

Step 7: Fill With Wood, Then Dirt and Compost

11:40
Step 7: Step 7: Fill With Wood, Then Dirt and Compost

Don't fill the whole bed with bagged soil - that's hundreds of dollars of dirt. Layer 6-10 inches of rotted firewood, sticks, leaves, or yard clippings on the bottom. The wood decomposes over a few years, generating heat and feeding the soil while reducing how much actual soil you need.

Top with garden soil, then mix in a layer of cow manure or finished compost on the top few inches. Plant directly into the compost layer for the strongest start.

Tip

If you want extra rot prevention on the bottom rail (which is the only wood touching dirt), wrap it with ice-and-water shield (the rubbery roofing membrane) before backfilling. Adds another 5-10 years of life to that board.

Products Used

☐ The Checklist

How to Build Raised Garden Beds: 7 Step DIY Guide With Corrugated Metal

Tools
5
Materials
5
Steps
7
Video
17 min

Your Guide

SimonSaysDIY

As an Amazon Associate we earn from qualifying purchases. Links on this page may be affiliate links - clicking them and buying doesn't change your price, but helps support ShowMeStepByStep.

Tags

Test your knowledge

Did the lesson stick? Find out in 2 minutes.

5 quick questions covering what you just read. No signup, no score saved — just a gut check.

Quick reference

Key takeaways from How to Build Raised Garden Beds: 7 Step DIY Guide With Corrugated Metal

5 questions, answers, and one-line explanations. Tap to expand.

  1. 1.Why this design uses 2x4 wood frames plus corrugated metal panels?

    Answer: Metal won't rot like wood

    Pressure-treated wood against wet soil still rots in 5-10 years. The metal sits against the soil instead, and the 2x4 frame stays dry.

  2. 2.Maximum spacing between vertical 2x4 supports on each panel?

    Answer: Every 3 feet

    Wet soil exerts huge outward force. Without verticals every 3 feet, the metal sheet bows out within a season.

  3. 3.Why use roofing screws (with rubber gaskets) for the metal panels?

    Answer: Gaskets seal the holes

    Plain screws leave a tiny gap where water gets in and rusts the panel from inside out. The rubber washer makes a watertight seal.

  4. 4.Why add a flat top rail board across each panel?

    Answer: Stops the panels from bowing

    The vertical supports stop outward bow at the middle; the top rail stops it at the top edge where leverage is highest.

  5. 5.Why layer rotted wood and yard debris before adding bagged soil?

    Answer: Saves cost on bagged soil

    An 18-inch bed filled entirely with bagged soil runs into hundreds of dollars. Rotted wood fills the lower 6-10 inches free and decomposes into nutrients.

What's next

Related collections

Curated theme pages that include this tutorial.

Weekly Digest

Liked this gardening tutorial?

Pick the categories you want to hear about. Weekly digest of new step-by-step tutorials. No spam, easy unsubscribe.

Send me tutorials about

We only email about new tutorials. Easy unsubscribe anytime.