How to Paint a Flower

PaintingEasy10:396 steps
Also in:Crafts

By ShowMeStepByStepPublished Updated

Based on a video by Katie Jobling Art.

Painting a flower looks impossible until someone shows you the trick: it's the brushstroke itself that shapes the petals, not careful drawing. Katie Jobling builds her acrylic roses in three layers - a warm base, cool shadows for depth, and bright detail work to bring it to life.

The whole tutorial uses just three paint colors: red, yellow, and white. Mix them on the palette to get every shade - warm red, light pink, dark red, even cool purple shadows. No need for fancy brushes either; one medium round brush handles 90% of the work, with a smaller detail brush for the final highlights.

Plan on about an hour from start to finish. Acrylics dry fast, but each layer needs five to ten minutes between coats. The result fits comfortably on a small canvas (8x10 inches works) and looks much harder than it is.

Step-by-Step Guide

1

Step 1: Gather your materials

0:15
Step 1: Step 1: Gather your materials

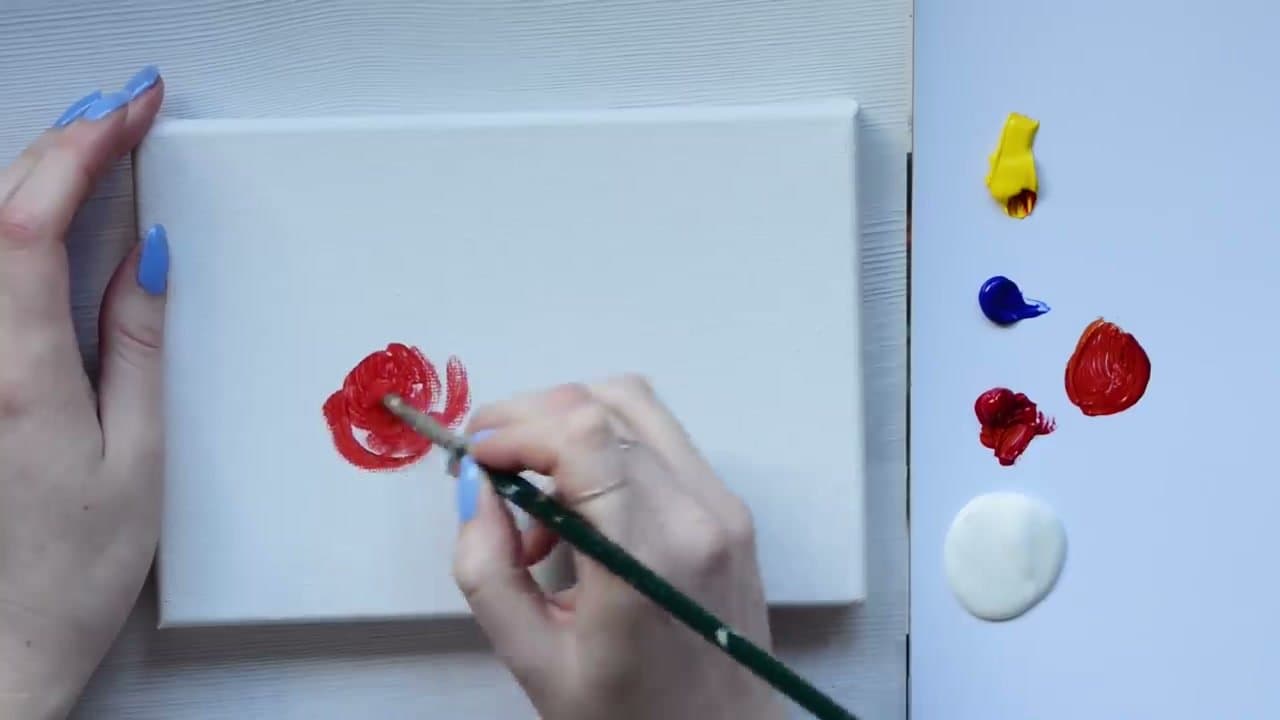
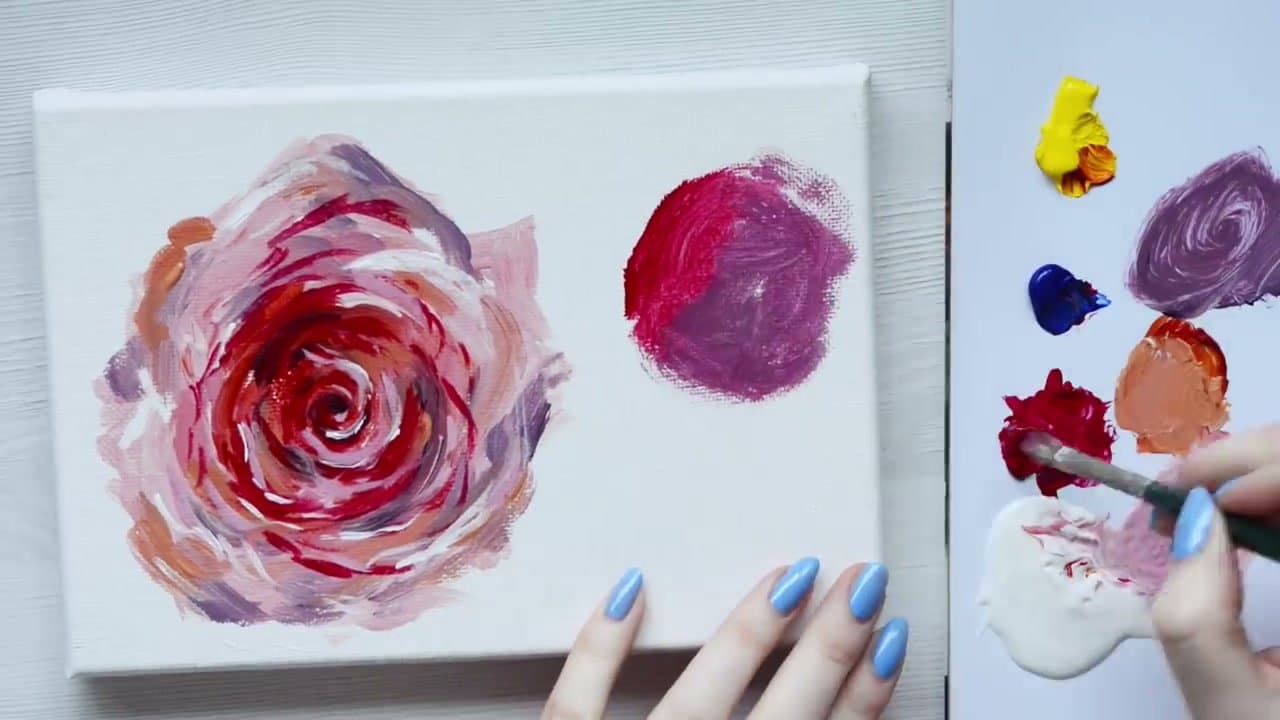
Pull out three acrylic paint colors - red, yellow, and white - plus a small canvas (8x10 or larger), one medium round brush, and one small detail brush. Squeeze a small dab of each color onto a paper plate or palette.

If you have a reference photo of a rose, set it next to your canvas. Looking at a real rose helps you keep the petal shapes natural even if you're going to paint loosely.

Tip

Cheap acrylics work fine for this - you're not blending across a huge area, so paint quality matters less than usual. Save the expensive tubes for color-mixing-heavy projects.

2

Step 2: Paint the warm base gradient

1:00
Step 2: Step 2: Paint the warm base gradient

Mix red with a small touch of yellow on your palette to get a warm red. Load the round brush and start at the center of where the rose will sit. Use short curved strokes to build outward in a spiral pattern.

The strokes themselves suggest the curl of petals coming out from the middle. Don't outline anything; just let the brush make the petals as you go. Cover about the inner half of the rose shape.

3

Step 3: Build the outer petals with lighter shades

2:10
Step 3: Step 3: Build the outer petals with lighter shades

Mix the same warm red with white to lighten it into a soft pink. Paint over the outer half of the rose, overlapping the warm-red base by about an inch so the colors blend along the seam.

As you reach the very edge, add even more white to your mix to make it almost cream-pink. Real rose petals lighten dramatically where they curl outward, so exaggerate this fade for a more lifelike look.

Tip

Don't worry about a perfect circle outline. Real roses have jagged edges where petals curl. Let some pink streaks extend past where you'd expect for a more natural shape.

4

Step 4: Add cool shadows for depth

4:40
Step 4: Step 4: Add cool shadows for depth

Mix red with a tiny bit of blue (or use a touch of any blue you have) to make a cool purple-red. Load the round brush and paint this color into the gaps between petals where shadows would naturally fall - never over the whole rose, just in the negative spaces.

Stop before the rose looks purple. The cool tones are there to suggest depth, not to dominate. Aim for hints of shadow rather than a full layer.

Tip

If you don't have blue paint, a tiny bit of black mixed with red also gives you a cool dark shadow tone. Just be even more sparing with it - black overpowers fast.

5

Step 5: Add deep red details to define the petals

7:40
Step 5: Step 5: Add deep red details to define the petals

Take pure red straight from the tube onto a very small brush - no white, no mixing. Working from the center of the rose outward in a spiral, paint sharp curved lines where one petal would curl over another.

This is the step that makes the rose look three-dimensional instead of like a flat color blob. Don't rush; place each line where you can already see a soft transition in the layers below.

Products used in this step

6

Step 6: Add bright white highlights

8:15
Step 6: Step 6: Add bright white highlights

Use white paint straight from the tube on the small detail brush. Place tiny dabs along the upper edges of the petals where light would catch - not on every petal, just the ones at the top and front of the rose.

Don't be subtle. Exaggerated bright-white highlights are what pop against the deep red shadows and make the whole flower come alive. Stop the moment the rose looks finished, even if it's tempting to keep tweaking.

Tip

If you overshoot a highlight, wait for it to dry, then scumble a bit of pink over it. Wet white on wet red turns into a muddy puddle.

Products used in this step

Products Used

Your Guide

Katie Jobling Art

As an Amazon Associate we earn from qualifying purchases. Links on this page may be affiliate links - clicking them and buying doesn't change your price, but helps support ShowMeStepByStep.

Tags

Related Tutorials