How to Make a No-Sew Cheesecloth Ghost (Floating Halloween Decor)

By ShowMeStepByStepPublished

Based on a video by She's Making Something.

This is the floating cheesecloth ghost that goes viral on Pinterest every October, and it is a no-sew Halloween craft start to finish. No needle, no thread, no glue gun until the very end when you stick on the face. The total cost is about five dollars in materials if you already own a 2-liter bottle and a plastic bowl - and you do.

The trick is liquid starch. You soak a square of cheesecloth in it, drape the cloth over a bottle-and-bowl form to shape the body, add floral wire underneath to give it floating arms, let it dry overnight, then lift the stiffened ghost off the form. The cheesecloth holds the shape on its own. Add a paper or felt face and you have a free-standing ghost that looks like it is hovering mid-air.

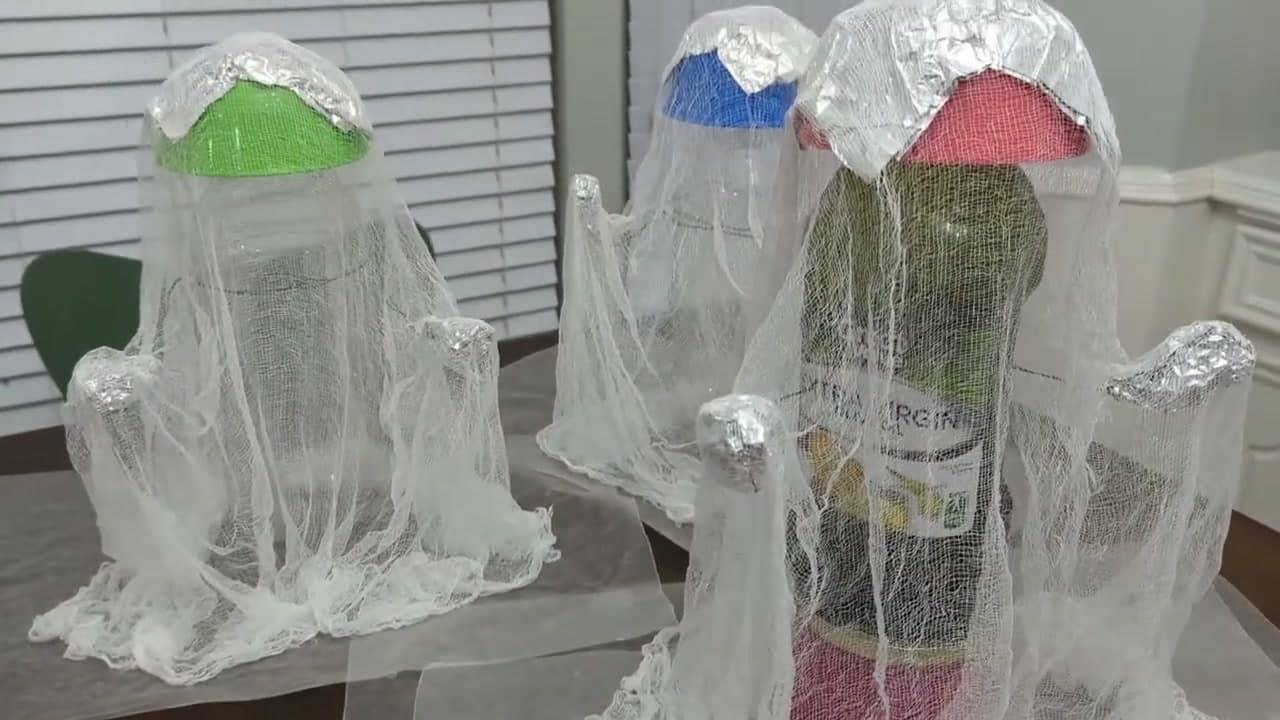
What makes this read as Pinterest-grade and not Pinterest-fail is in the shaping. The cheesecloth needs to be clumped and bundled around the base - all those little folds dry stiff and become the legs the ghost stands on. If you spread the cheesecloth out flat, it dries flat. Clump it, bunch it, fold it. The video creator made nine of these for a community event centerpiece. We are walking through one.

She's Making Something is the channel behind the original how-to, and her version is the cleanest tutorial out there - clear materials, no fluff, and a finished ghost choir that does the heavy lifting on the Pinterest pin. Credit where it is due.

If you are building a whole Halloween mantel or porch this weekend, pair these floating ghosts with no-crochet yarn pumpkins for matching no-skill Halloween decor. Add a carved jack-o-lantern for the porch and painted pumpkins for the mantel - the whole vignette runs under twenty dollars.

Step-by-Step Guide

1

Step 1: Gather Your No-Sew Ghost Supplies

0:27
Step 1: Step 1: Gather Your No-Sew Ghost Supplies

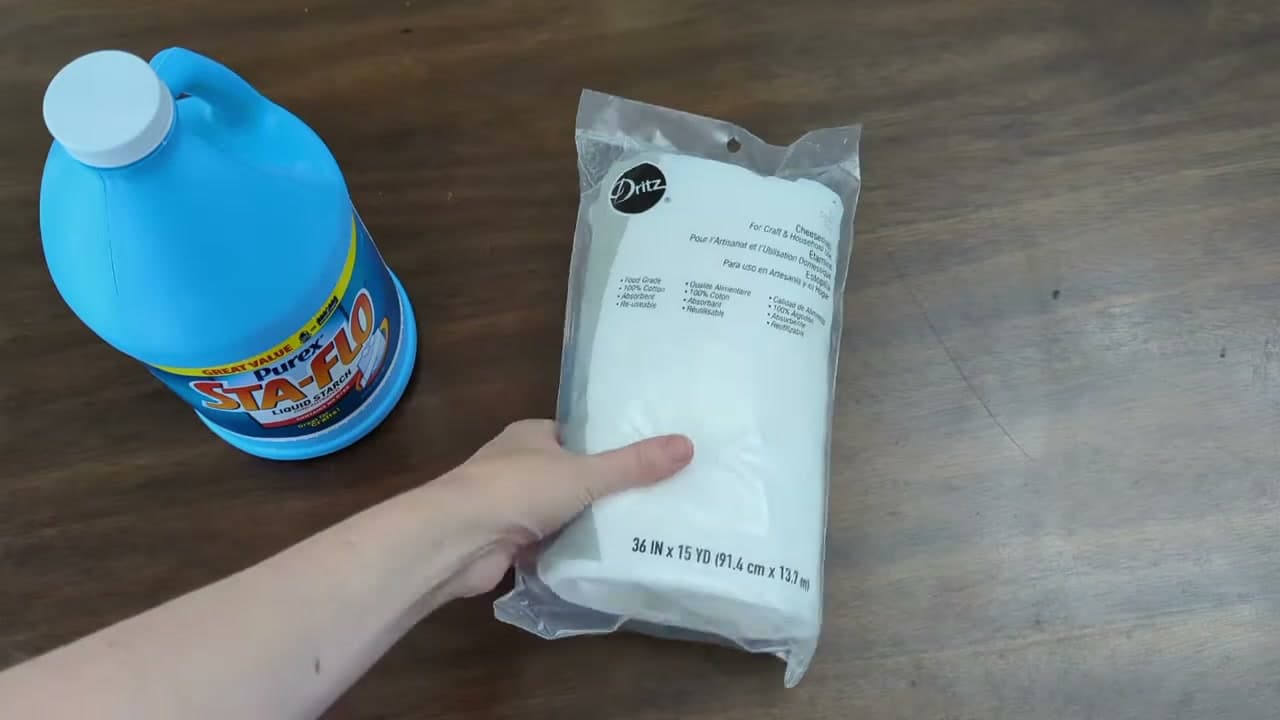
Lay out everything in one spot before you start. You need cheesecloth (a 15-yard craft pack from the fabric store is around three dollars and makes about nine ghosts), liquid starch (Purex Sta-Flo is the brand the video uses), an empty 2-liter bottle, a small plastic bowl, a sheet of wax paper, floral wire, clear Scotch packing tape, aluminum foil, and black construction paper or felt for the face later.

The whole materials pile costs about five dollars per ghost if you are starting from zero, and closer to two dollars per ghost if you already have a bottle, a bowl, and wax paper at home. You probably do.

Tip

Use clear packing tape, not masking tape or duct tape. The starch sticks to anything paper-based, which means a masking-tape arm will end up glued to your ghost. Clear plastic tape stays clean and lets the cheesecloth release.
2

Step 2: Cut a 3-Foot Square of Cheesecloth

1:15
Step 2: Step 2: Cut a 3-Foot Square of Cheesecloth

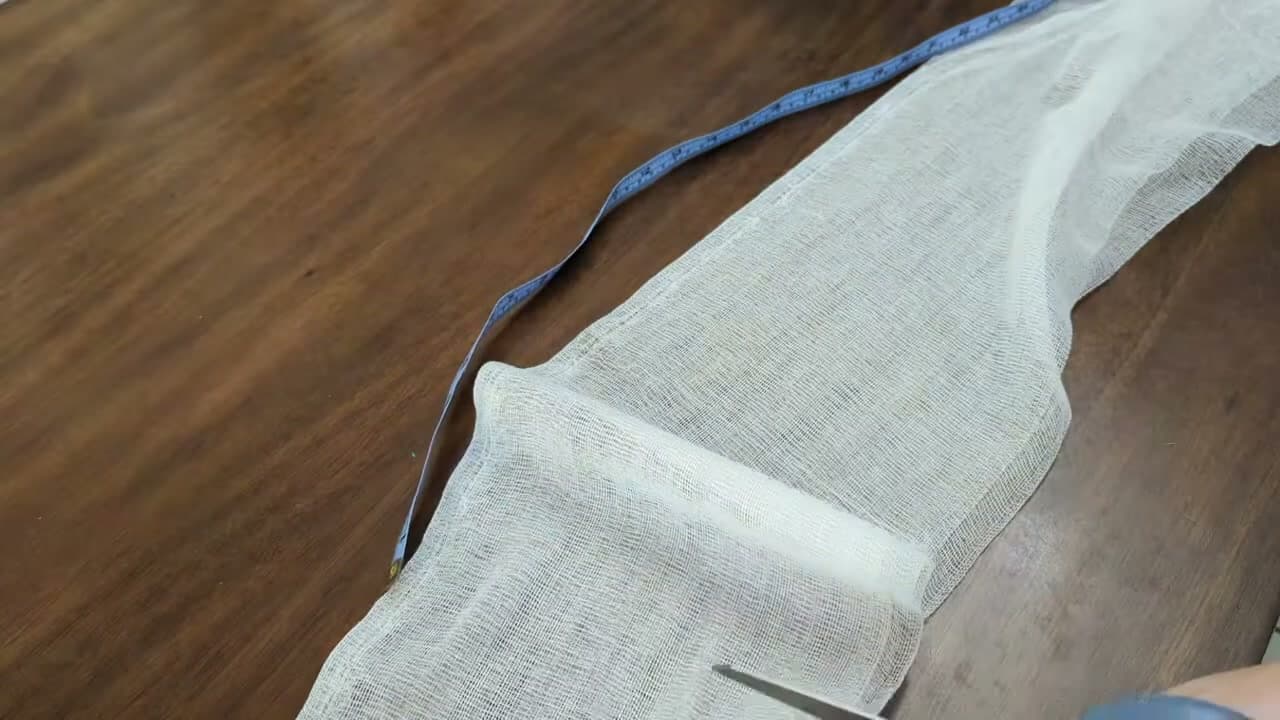
Roll out the cheesecloth and measure a square roughly three feet by three feet. Most craft-store cheesecloth comes off a roll that is already three feet wide, so just measure three feet down the length and snip across.

One three-foot square is enough for a single small ghost. If you want a taller ghost, scale up to a four-by-four square. If you are making a centerpiece pile of nine like the video, cut all nine squares now while the roll is already out.

Tip

Do not stress about a perfectly square cut. The bottom edges are the part you bunch and clump, so a wonky edge actually dries with more character than a clean one.

3

Step 3: Build the Bottle-and-Bowl Ghost Form

2:08
Step 3: Step 3: Build the Bottle-and-Bowl Ghost Form

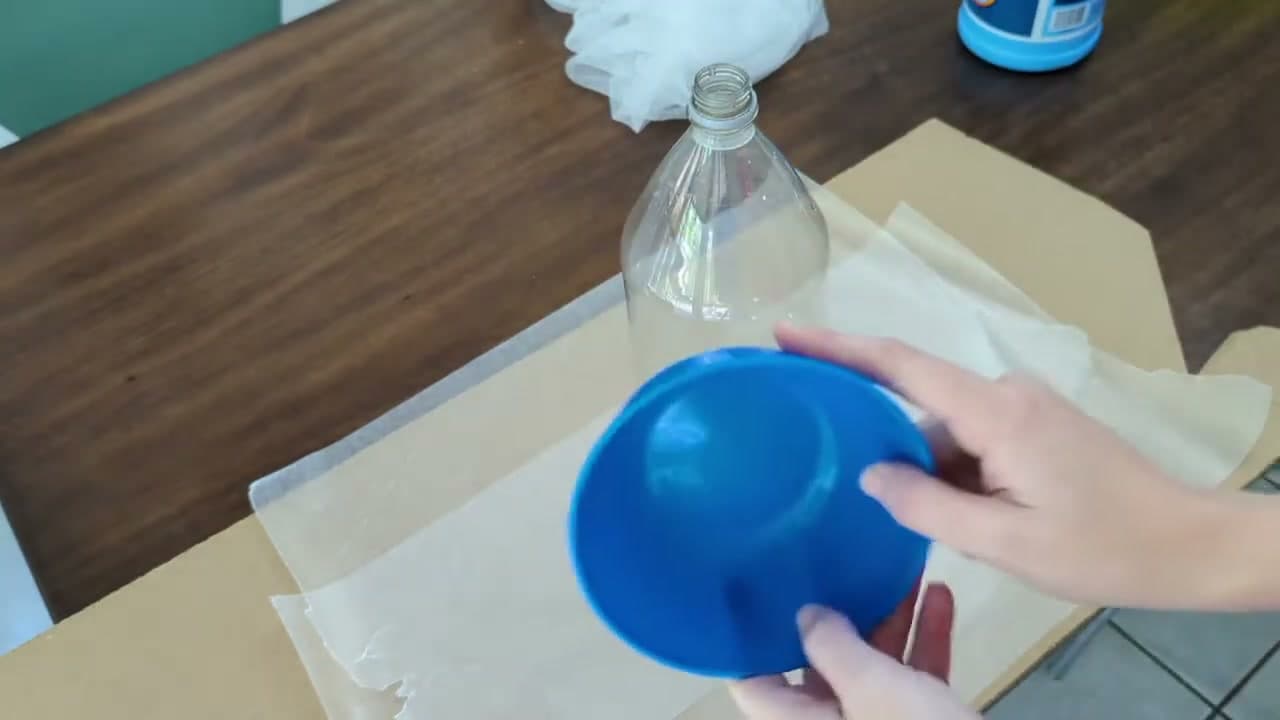
Tear off a sheet of wax paper big enough to fit your finished ghost, and lay it on a cardboard sheet or a tray that you can move once the ghost is wet. The wax paper stops the starch from gluing the cheesecloth to your work surface.

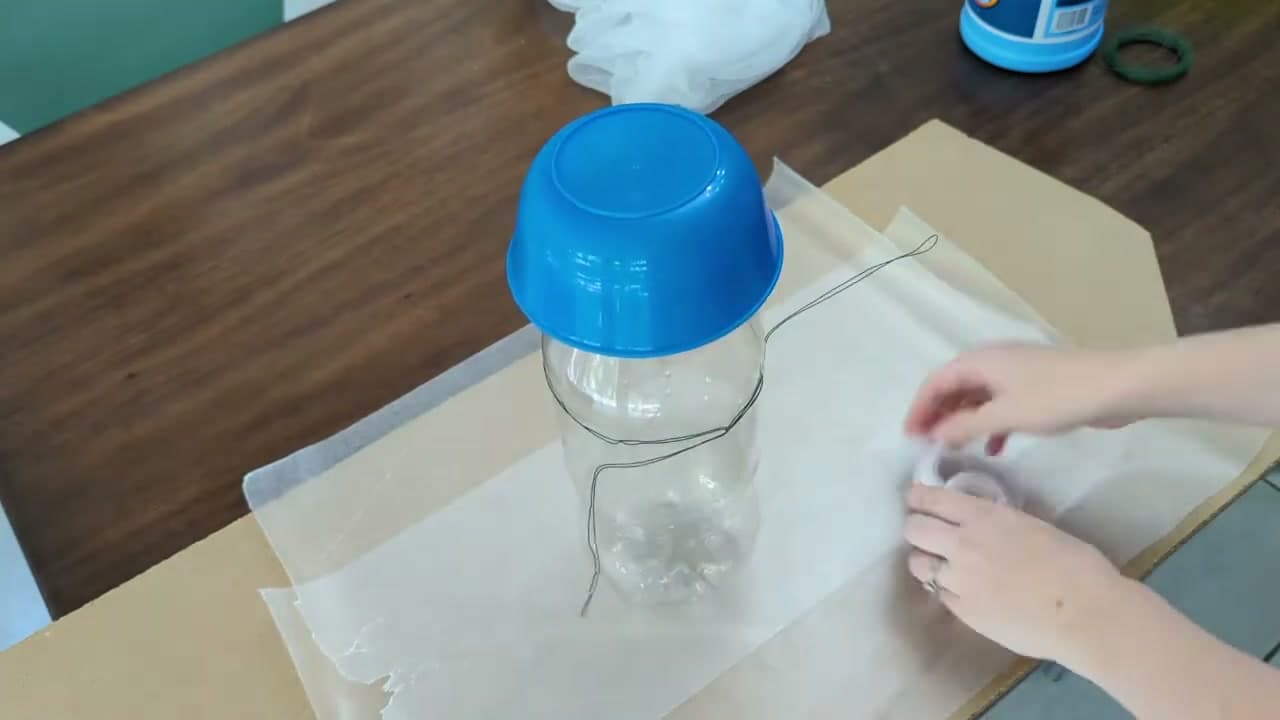
Stand the empty 2-liter bottle upright on the wax paper. Flip a small plastic bowl upside down and set it on top of the bottle. That bowl is the ghost's head, the bottle is the body. Tape the rim of the bowl to the top of the bottle with a piece of clear Scotch tape so it does not slide off when you start draping the cheesecloth.

Tip

A plastic bowl gives a slightly flat top, which can leave the ghost with a flat head once it dries. The video creator's fix is to crumple a bit of foil and tuck it on top of the bowl to round out the dome. Worth doing now while the form is bare.

4

Step 4: Add Floating Arms with Floral Wire and Foil

2:55
Step 4: Step 4: Add Floating Arms with Floral Wire and Foil

Cut a length of floral wire about twice the width of the bottle. Wrap it once around the body of the bottle at roughly shoulder height, with the two ends sticking straight out as arms.

Secure the wire to the bottle with two strips of clear Scotch tape so it cannot slide or rotate. Wrap a small piece of aluminum foil around each free end of the wire, just enough to round the tip into a soft hand shape. Without the foil, the arms dry to needle-sharp points that snag the cheesecloth.

Tip

The arms should angle slightly down, like a ghost mid-float. If you angle them straight out at ninety degrees, the cheesecloth pulls down off the wire as it dries and the arms end up drooping anyway. Pre-angle them where you want them.

5

Step 5: Soak the Cheesecloth in Liquid Starch

4:00
Step 5: Step 5: Soak the Cheesecloth in Liquid Starch

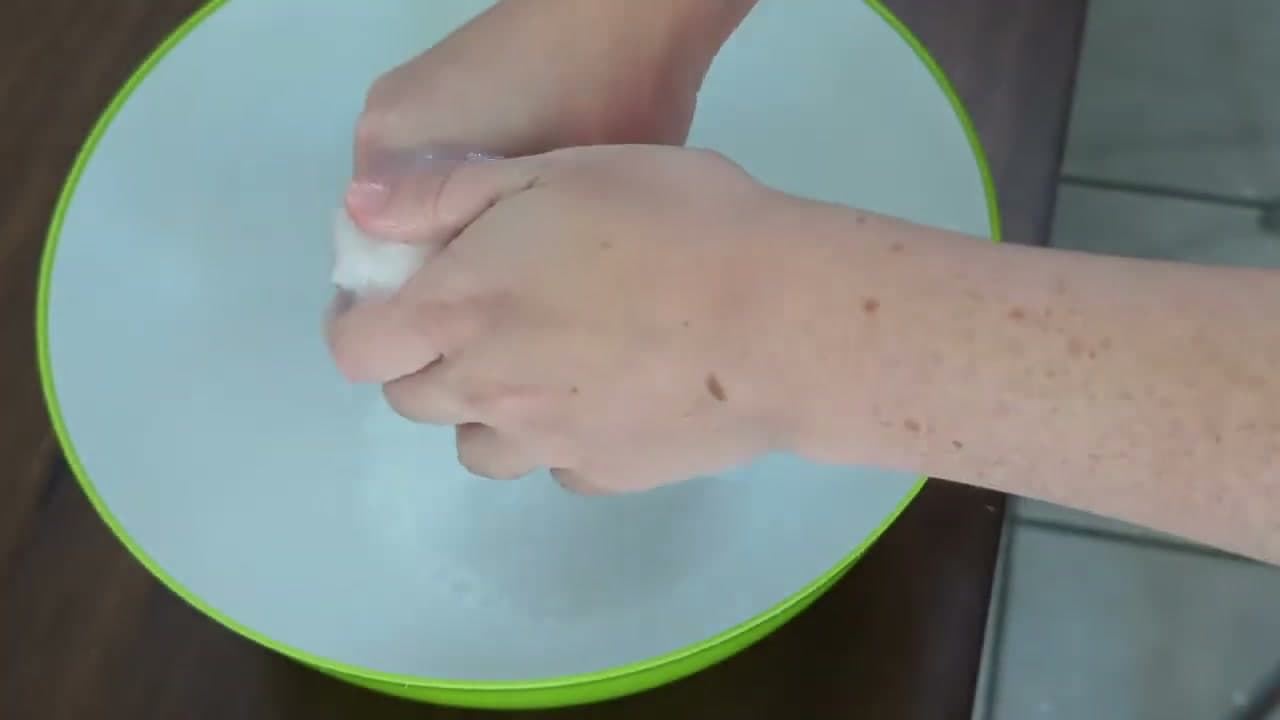
Pour liquid starch straight into your plastic bowl - no need to dilute it with water. You only need an inch or so in the bottom; cheesecloth soaks the stuff up like a sponge.

Unfold the cheesecloth before you dunk it. Wet cheesecloth that is still folded is a tangled nightmare to open back up, and you will rip it. With it spread out, dunk the whole square into the starch, push it down until it is fully saturated, then lift it out and wring out the excess so it is wet but not dripping.

Tip

Starch does not dry quickly. You have several minutes of working time once the cheesecloth is wet, so there is no need to rush. Wring just enough that it stops dripping - too dry and it will not hold the shape, too wet and it pools on the wax paper.

6

Step 6: Drape, Shape, and Clump the Folds

4:27
Step 6: Step 6: Drape, Shape, and Clump the Folds

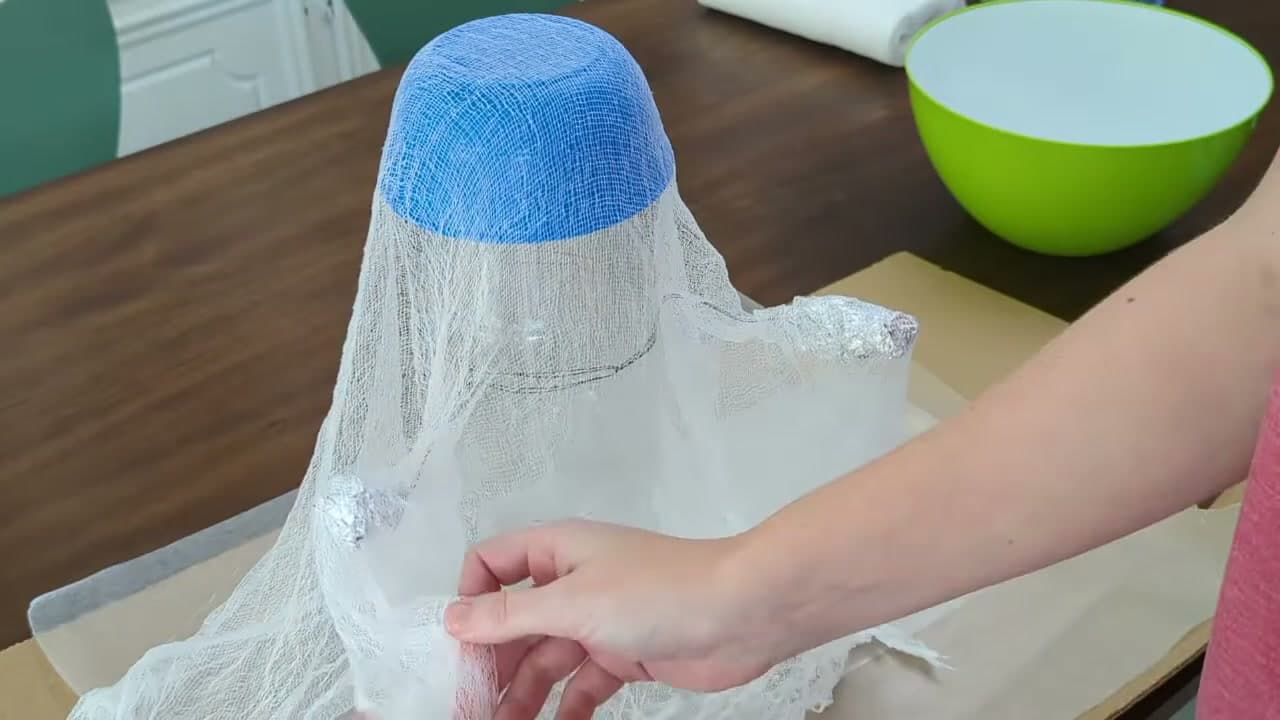
Open the wet cheesecloth back up and drape it over the form with the center of the square sitting on top of the head. Pull the cloth down over the arms so the floating wire and foil hands push through the fabric. Adjust until the silhouette reads as ghost from the front.

Now the most important shaping move: clump the cheesecloth around the base. All those bunched folds at the bottom dry stiff and become the legs the ghost stands on. Pinch downward folds running from the head to the floor - they dry stiffer than spread-out fabric, and they are what gives the ghost its shape.

Tip

If the cheesecloth slides off the head, dab a little extra starch on the top of the head with your finger - the head needs to grip while it dries. The base bunching is doing structural work. Do not skip it or your ghost will dry flat like a sheet over a chair.

7

Step 7: Dry 6 to 8 Hours, Then Lift the Ghost Off

6:06
Step 7: Step 7: Dry 6 to 8 Hours, Then Lift the Ghost Off

Move the wax-paper tray to a warm, dry corner where nothing will bump it. Six to eight hours is the minimum; overnight is safer. Do not poke at it while it dries - the starch is still soft for the first couple of hours and any pressure will compress the shape.

Once it is fully dry and stiff to the touch, peel the base of the cheesecloth off the wax paper carefully. Then gently lift the whole ghost upward off the bottle-and-bowl form. If a section sticks, give it a gentle squeeze through the fabric - that loosens the starch and pops the cheesecloth free.

Tip

Make a second and a third form while the first one is drying. The creator built three at a time so she could turn out a batch of nine in one weekend. The forms are recyclables, so you are not using up any real materials by running parallel batches.

Products used in this step

8

Step 8: Add a No-Sew Paper or Felt Face

7:11
Step 8: Step 8: Add a No-Sew Paper or Felt Face

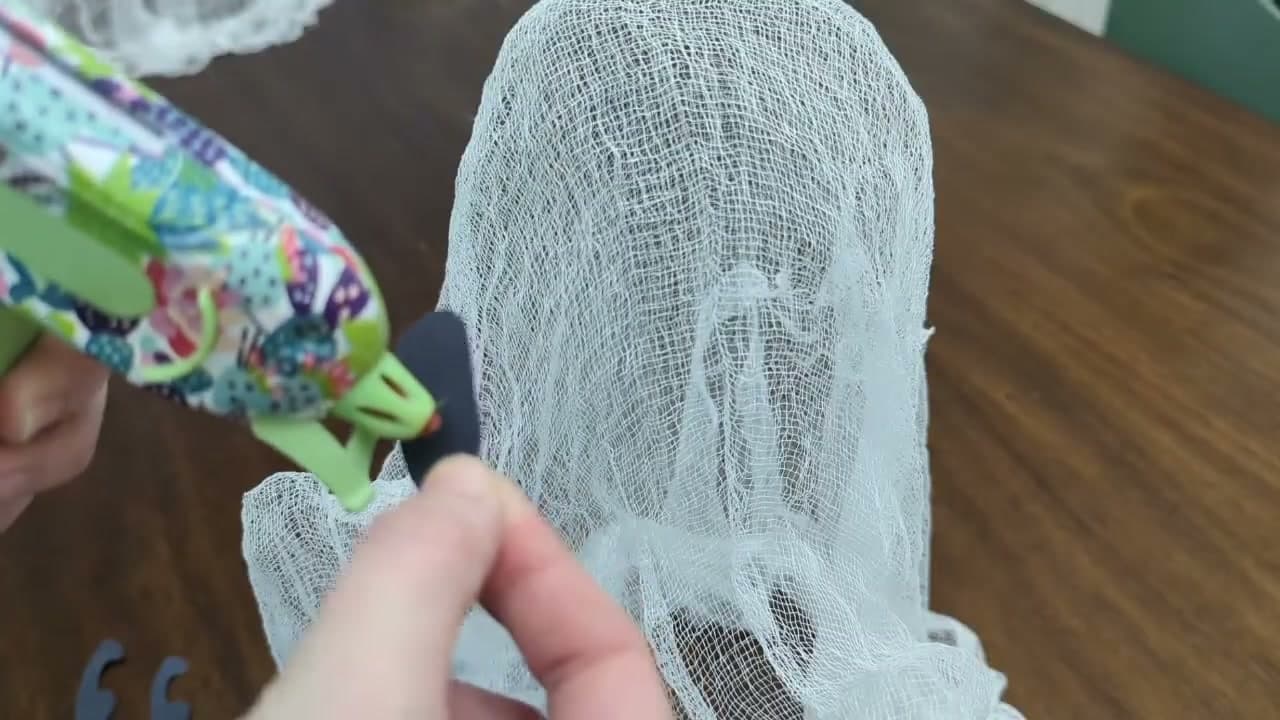
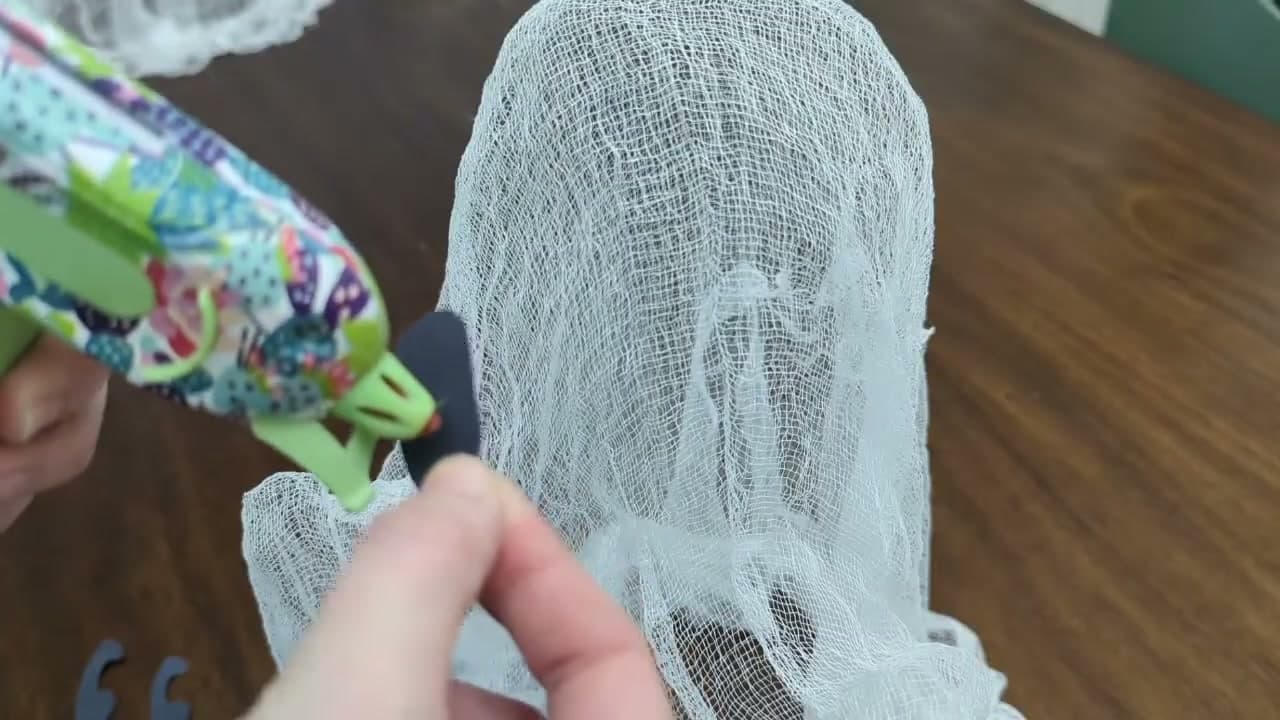
Cut two eyes and a mouth out of black construction paper or black felt. Big oval eyes with one smaller mouth read as cute, two narrow eyes with a wide grin read as spooky. Either works. Felt lasts longer if the ghost will live outside; paper is fine for an indoor mantel.

Plug in the hot glue gun and dab a small bead of glue on the back of each shape, then press it gently against the cheesecloth at the head. Hold for about three seconds while the glue cools. The hot glue is the only adhesive in the whole project, and it goes on at the very end so the rest of the build stays truly no-sew.

Tip

Press lightly. Too much pressure and you push the feature through the cheesecloth and onto the inside of the head, where it stays stuck and looks like a black eye on the inside. A quick three-second hold is enough.

Products Used

☐ The Checklist

How to Make a No-Sew Cheesecloth Ghost (Floating Halloween Decor)

Tools
4
Materials
9
Steps
8
Video
9 min

Your Guide

She's Making Something

As an Amazon Associate we earn from qualifying purchases. Links on this page may be affiliate links - clicking them and buying doesn't change your price, but helps support ShowMeStepByStep.

Tags

Test your knowledge

Did the lesson stick? Find out in 2 minutes.

5 quick questions covering what you just read. No signup, no score saved — just a gut check.

Quick reference

Key takeaways from How to Make a No-Sew Cheesecloth Ghost (Floating Halloween Decor)

5 questions, answers, and one-line explanations. Tap to expand.

  1. 1.What size square of cheesecloth makes a small ghost?

    Answer: About 3 ft by 3 ft

    3x3 ft square per small ghost; scale up to 4x4 for a taller one.

  2. 2.What does the ghost form consist of?

    Answer: A 2-liter bottle (body) with a small plastic bowl taped on top (head)

    Bottle + upside-down bowl on top, taped together - cheap, disposable form.

  3. 3.What's draped over the form to make the ghost shape rigid?

    Answer: Cheesecloth soaked in LIQUID STARCH (no dilution)

    Liquid starch (like Purex Sta-Flo) - cheesecloth soaks it up like a sponge.

  4. 4.Why wrap aluminum FOIL around the wire arm tips?

    Answer: Without foil, the arms dry to needle-sharp points that snag the cheesecloth

    Foil rounds the wire tips into soft hand shapes so they don't tear the fabric.

  5. 5.Why clump cheesecloth folds around the base?

    Answer: Bunched folds at the base dry stiff and become the legs the ghost stands on

    The clumped folds dry into the rigid legs that let the ghost stand free after demolding.

What's next

Weekly Digest

Liked this crafts tutorial?

Pick the categories you want to hear about. Weekly digest of new step-by-step tutorials. No spam, easy unsubscribe.

Send me tutorials about

We only email about new tutorials. Easy unsubscribe anytime.