How to Draw a Fish (Step by Step Goldfish Tutorial)

CraftsEasy10:227 stepsBrowse more →
Also in:Painting

By ShowMeStepByStepPublished Updated

Based on a video by Cartooning Club Focus.

Drawing a fish looks intimidating until you break it into shapes. A goldfish is really just a teardrop, a fan-shaped tail, a few fins, an eye, and a pattern of scales. Stack those shapes in the right order and you end up with something that looks like a fish - even on your first try.

Marty from Cartooning Club Focus builds this goldfish with a 2B pencil and a sketchpad. The early steps look rough on purpose. You're sketching loose construction lines, then refining the edges, then layering scales and shading on top. By the end you have a portrait that would look at home framed on a wall.

If you've worked through other animal drawings like how to draw a dog or how to draw a cat, the construction method here will feel familiar. The eye work in particular borrows the same approach as how to draw eyes - a circle, a pupil, and a tiny highlight to bring it to life.

Step-by-Step Guide

1

Step 1: Sketch the Teardrop Body Outline

0:25
Step 1: Step 1: Sketch the Teardrop Body Outline

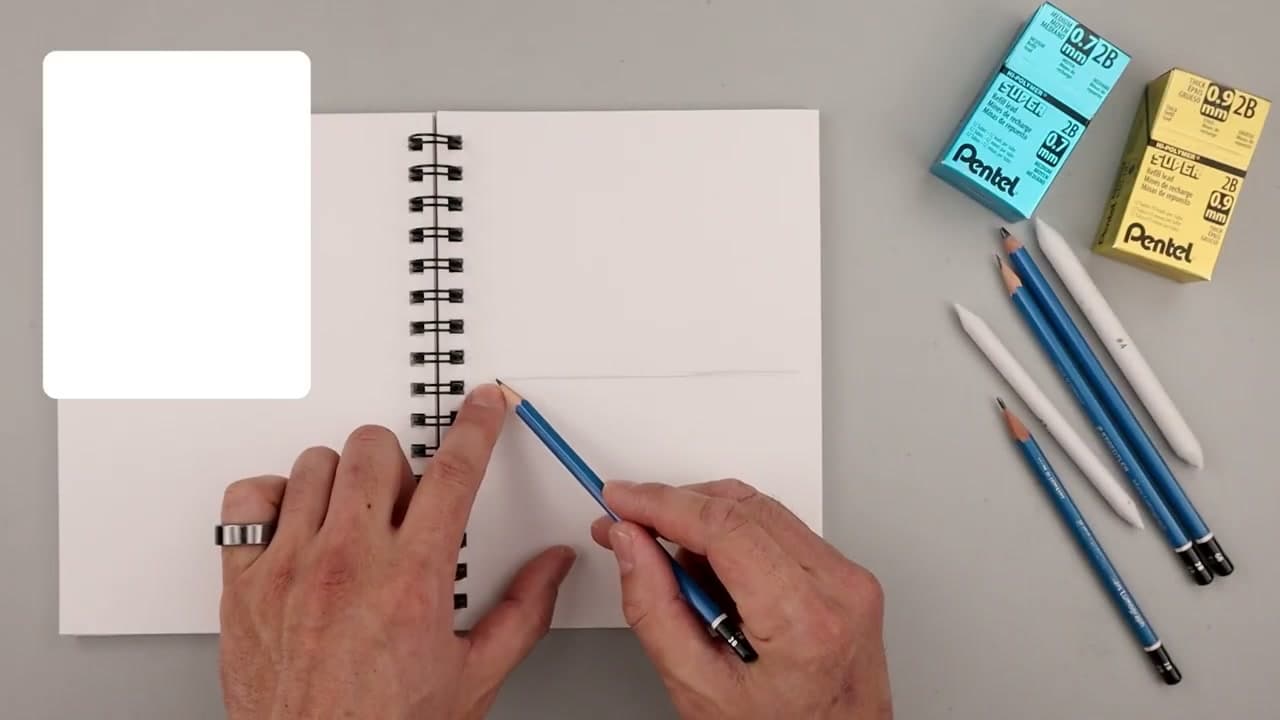
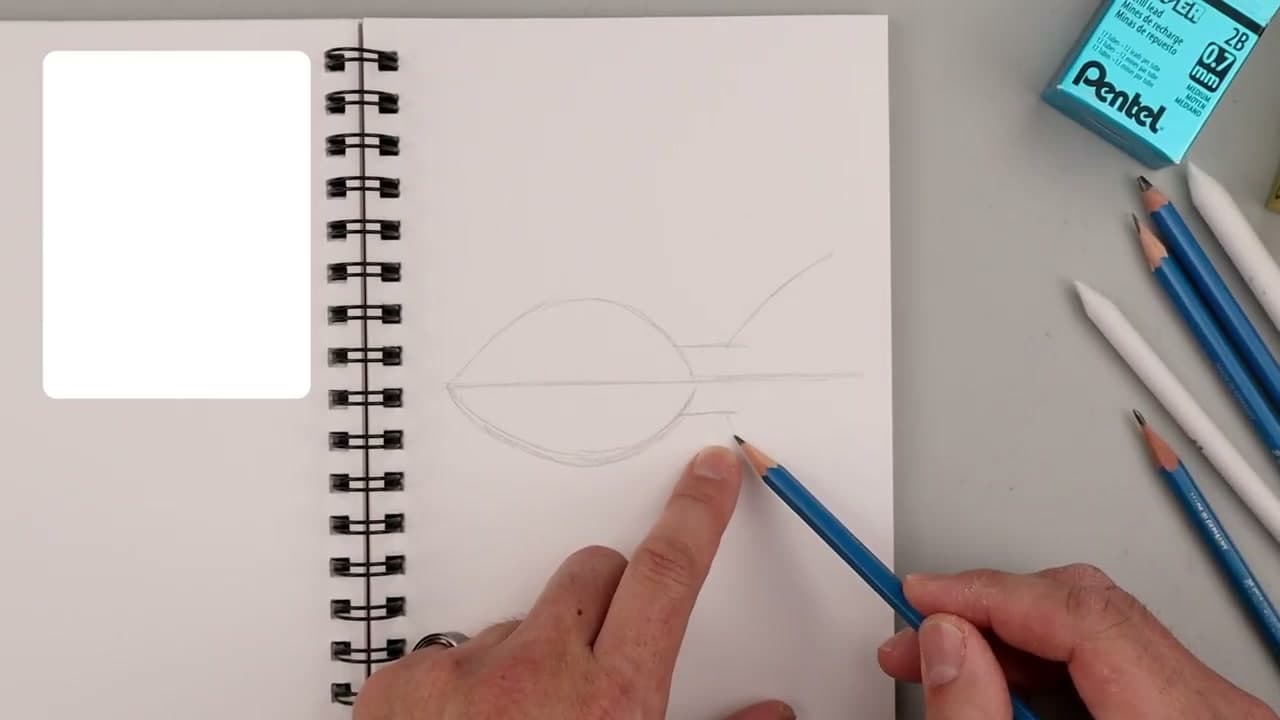
Draw a light horizontal line straight across the center of the page. This is your symmetry guide - the spine the rest of the fish builds around.

From the left side, curl a line up to the top of where the body will sit, then bring it down and to the right to meet the center line. Mirror that same curve below the center line so the body forms a soft teardrop pointing right. Keep your pencil loose and your lines light. You're feeling out the shape, not committing to it.

Tip

Don't draw the outline in one continuous stroke. Use short, searching marks so you can re-trace and refine the curve as you go.

Products used in this step

Staedtler Mars Lumograph Drawing Pencil Set (HB, 2B, 4B)
Strathmore 400 Series Drawing Paper Pad
2

Step 2: Block In the Fanned Tail Fin

0:55
Step 2: Step 2: Block In the Fanned Tail Fin

From the right tip of the body, sketch a line that angles up and out. Then from the bottom tip, do the same thing in the opposite direction - down and out. Close the tail with a short straight line connecting the two outer points.

The tail should look like a fan or flag flaring off the back of the body. Goldfish tails are wider at the tip than at the base. Keep these lines light too - you'll come back and refine the shape later once the body's full silhouette is in place.

Tip

If your tail looks too thin and pointed, you've made it too narrow. Widen the outer points so the silhouette feels flowing, not stiff.

3

Step 3: Add the Dorsal and Pectoral Fins

1:45
Step 3: Step 3: Add the Dorsal and Pectoral Fins

Starting along the top of the body, draw a fin that curves up and back, then sweeps around and returns down to meet the body. That's the dorsal fin.

For the front pectoral fin, start near the gill area on the left, drop the line down, then bend it outward and flatten the tip before tapering back up toward the body. Add one more small fin underneath the body for the lower pelvic fin. The fish silhouette is now complete - body, tail, top fin, side fin, bottom fin.

Products used in this step

Faber-Castell 9000 Graphite Pencil Set
4

Step 4: Place the Eye and Pupil

1:20
Step 4: Step 4: Place the Eye and Pupil

In the center of the head area, draw a small circle for the eye. Place a smaller solid circle inside it for the pupil, slightly off-center so it has direction.

Keep the eye small relative to the head. Goldfish have round eyes but they aren't oversized like a cartoon character. The pupil is the darkest spot on the drawing at this stage, so press a little harder when you fill it in. Leave a tiny dot of paper white near the top of the pupil - that's the highlight that will make the eye look alive when you shade later.

Tip

The highlight is what sells the eye. Don't try to add it with white pencil at the end. Leave the paper white now and shade around it.

5

Step 5: Add the Mouth and Gill Line

2:10
Step 5: Step 5: Add the Mouth and Gill Line

Separate the head from the body with a curved line that arcs from the top of the body across the head, then back down toward the bottom. That's the gill.

For the mouth, work on the front of the head. Bring the snout out, in, and down to form the top of the lip. Then step in and back out for a small lower lip, with a slight overlap that gives the mouth dimension. Refine the eye edges while you're here - clean up the circle, darken the pupil a touch more.

6

Step 6: Layer In the Scale Pattern

8:15
Step 6: Step 6: Layer In the Scale Pattern

Switch to the tip of your pencil. Starting near the gill, draw a row of small overlapping curves - little U-shapes or half-circles that face the head.

Layer the next row of scales behind the first, offsetting them so they nest into the gaps. Keep going all the way to the base of the tail. Make the scales slightly smaller as you move toward the back. Don't fill the entire body - fade the texture out as you reach the top edge and the belly so the pattern doesn't feel uniformly busy.

Tip

Vary the size and pressure on each scale so the pattern looks organic. Perfectly identical scales read as wallpaper, not skin.

Products used in this step

Kneaded Rubber Eraser
X-ACTO Pencil Sharpener
7

Step 7: Shade and Finish the Goldfish

9:55
Step 7: Step 7: Shade and Finish the Goldfish

Use the side edge of your pencil for broad shading. Darken across the top of the head and fade the value down toward the belly. Add a band of darker reflection across the center of the body - that's the line that makes the fish look round instead of flat.

Darken the center of each scale to deepen the texture. Push the shadows in the tail and fins so they pull away from the body. Add a small highlight inside the eye by leaving paper white, then tighten any final details. Sign your work in the corner - your goldfish is done.

Tip

Shading direction matters. The top of the fish should be the darkest, fading to lightest along the belly. That single value shift is what creates the illusion of three-dimensional form.

Products Used

Staedtler Mars Lumograph Drawing Pencil Set (HB, 2B, 4B)Strathmore 400 Series Drawing Paper PadFaber-Castell 9000 Graphite Pencil SetKneaded Rubber EraserX-ACTO Pencil Sharpener
☐ The Checklist

How to Draw a Fish (Step by Step Goldfish Tutorial)

Tools
4
Steps
7
Video
10 min

Your Guide

Cartooning Club Focus

As an Amazon Associate we earn from qualifying purchases. Links on this page may be affiliate links - clicking them and buying doesn't change your price, but helps support ShowMeStepByStep.

Tags

What's next

Weekly Digest

Liked this crafts tutorial?

Pick the categories you want to hear about. Weekly digest of new step-by-step tutorials. No spam, easy unsubscribe.

Send me tutorials about

We only email about new tutorials. Easy unsubscribe anytime.