How to Paint a Pumpkin (No-Carve Halloween Decor)

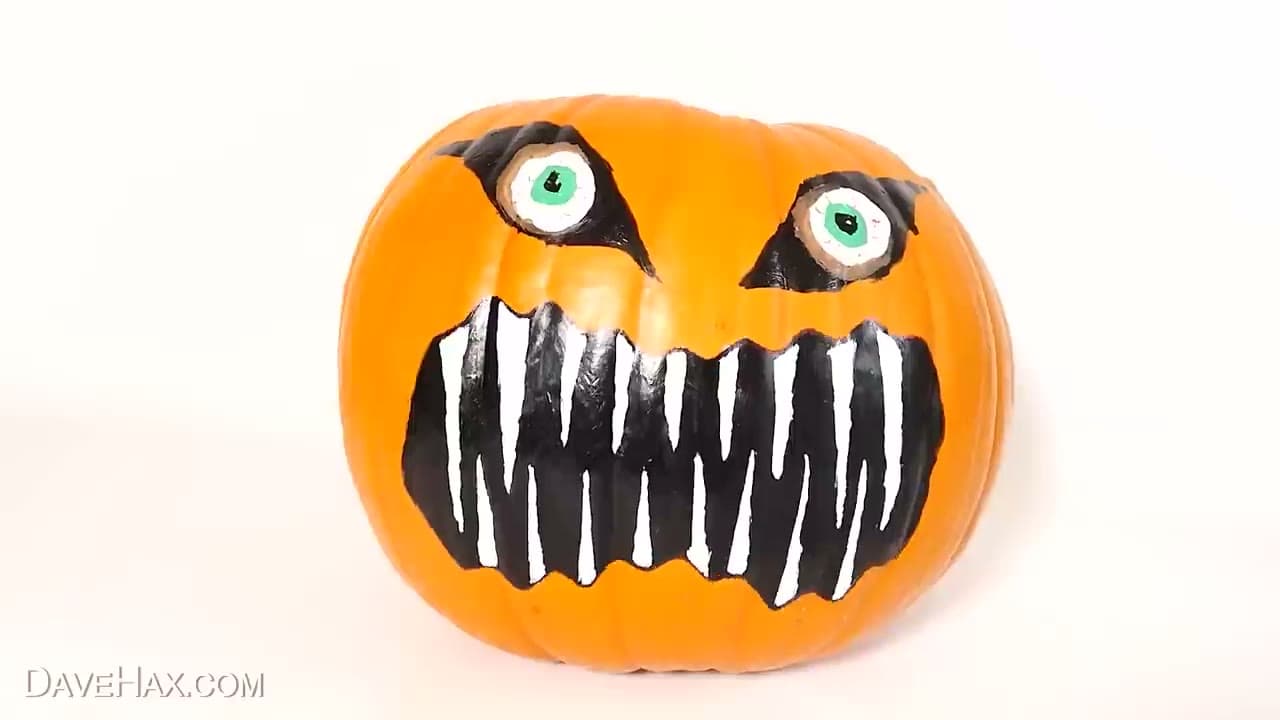
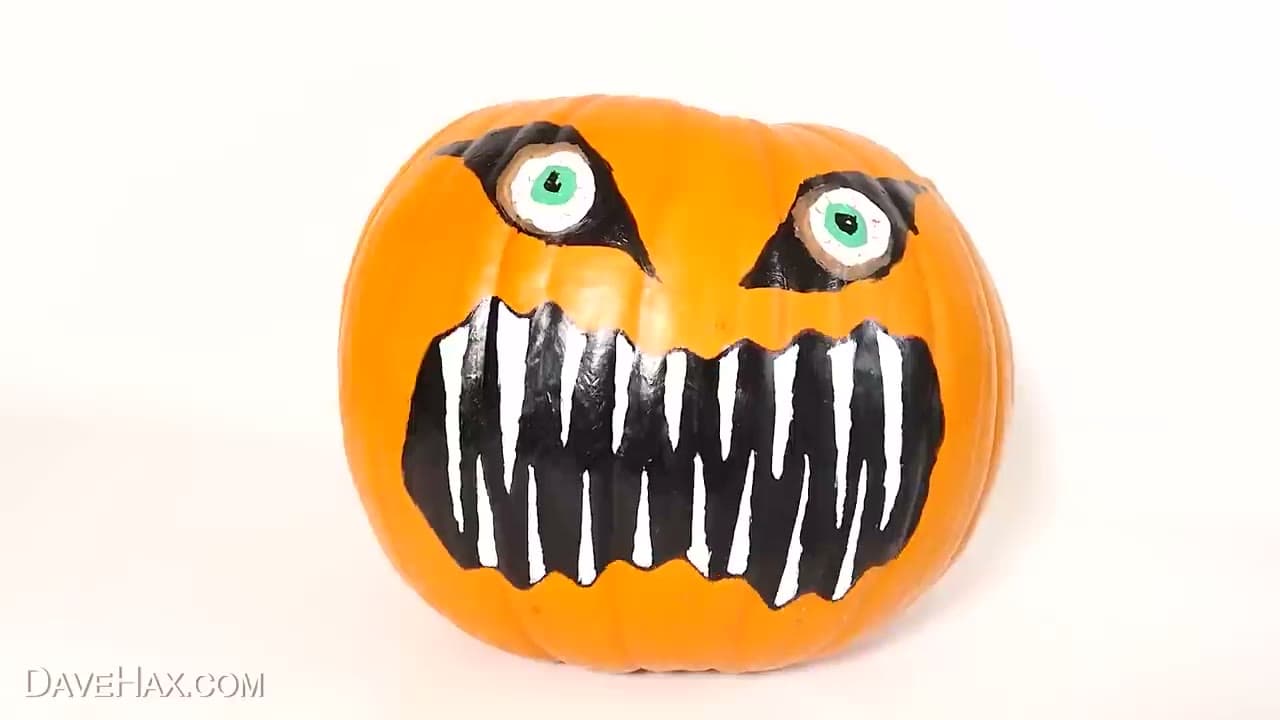
The finished result: How to Paint a Pumpkin (No-Carve Halloween Decor)
Also in:Other Crafts

By ShowMeStepByStepPublished Updated

Based on a video by DaveHax.

Painting a pumpkin takes one evening and a six-dollar set of craft acrylics. No knife, no scooping, no slimy newspaper on the table, and no pumpkin caving in on itself by mid-October. A five-year-old can do it. So can anyone who looked at a carving kit and quietly put it back.

Dave from DaveHax paints a black-and-white toothy ghoul face in the source video, and the steps below follow it. Good first project: every shape is flat color, so nothing here punishes a shaky hand. The rest of this page applies to any design you want on a pumpkin.

Real Pumpkin or Foam Pumpkin

Decide before you buy paint. A real pumpkin is cheap and dead in two to three weeks. The skin is waxy, so acrylic sits on top instead of soaking in, and once the flesh softens the paint lifts off in sheets.

Foam pumpkins - Funkins is the brand most craft stores carry - cost more once and then last forever. The surface has a slight tooth, so paint grabs and stays. Painting with kids for the front step? Buy real. Doing a matching set of three for a mantel? Buy foam.

The Prep That Makes Paint Stick

Wash it. Field dirt is fine grit, and paint over grit flakes off within a month. Warm water and your hands are enough.

Then dry it completely. People rush this one and it is the step that ruins the job. A pumpkin that feels dry still holds water in the ribs and around the stem, so give it half an hour.

Last, wipe the surface with rubbing alcohol. That strips the wax coating growers spray on, and it is the difference between paint you can scratch off with a fingernail and paint that stays. Skip primer - on a real pumpkin it peels with the skin, and foam does not need it.

Which Paint to Use

Craft acrylic is the answer for almost everybody. A few dollars a set, dry to the touch in ten minutes, covers orange in two coats, rinses out with water. If you have never used it, acrylic painting for beginners covers how much to load on the brush.

Chalk paint gives you the flat matte finish behind every farmhouse pumpkin on Pinterest. It goes on thick and needs no prep at all on foam.

Spray paint is for base coats only. One can turns three pumpkins white or matte black in five minutes. Do it outside and let it flash off for an hour before you paint on top. If the color you want is not in your set, mixing acrylic paint colors gets you sage, rust and cream out of the primaries.

Four Designs That Need No Drawing Skill

  • Color block. Base coat the whole pumpkin, then take the stem and the top third in a second color. Two flat shapes, no lines to get wrong.
  • Polka dots. Dip the blunt end of a brush handle in paint and press. Every dot comes out the same size.
  • Vinyl face. Cut the eyes and mouth from black adhesive vinyl and stick them on a painted base. It is the one that looks store-bought.
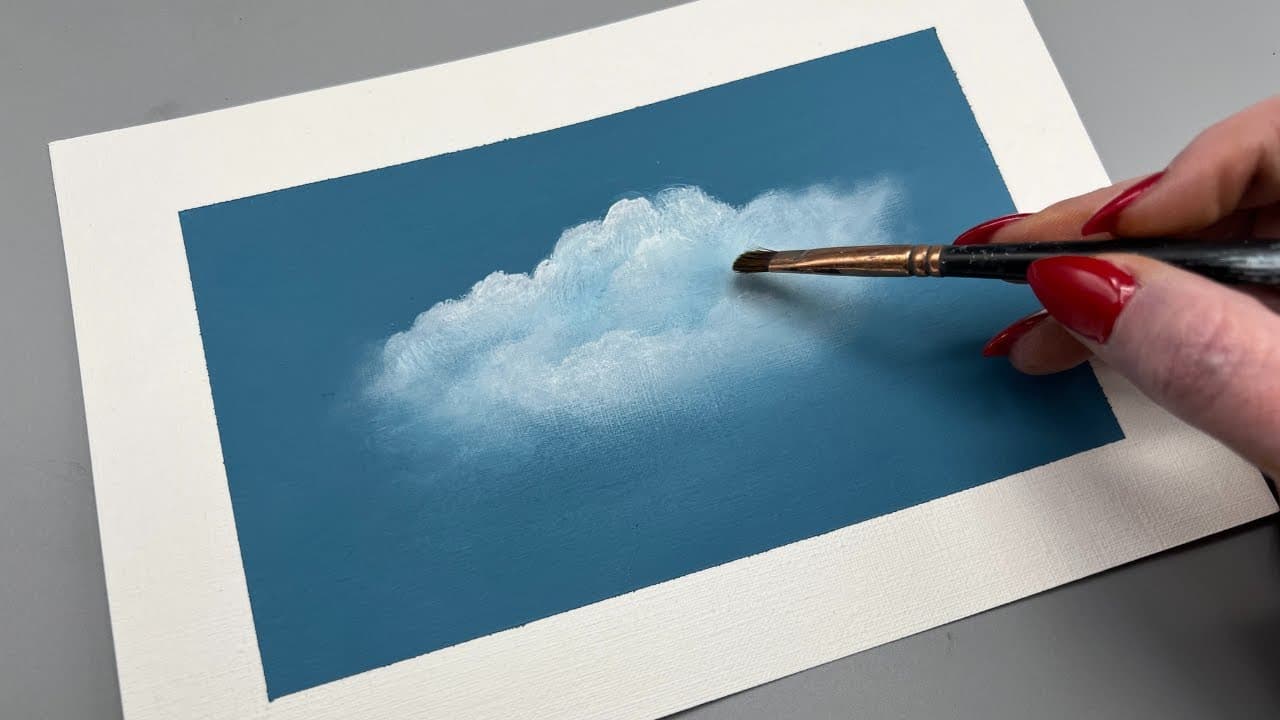
  • Dry-brushed white. Almost no paint on a stiff brush, dragged across the ribs. High spots catch it, grooves stay dark. Same wrist motion as blending acrylic paint.

A crackle paint finish over a dark base coat gives you a weathered pumpkin in two coats. Painted flowers read as autumn rather than Halloween, so that pumpkin stays out through November - painting a flower covers the petal strokes.

Sealing It, and Storing It for Next Year

Clear acrylic spray sealer keeps a porch pumpkin from streaking the first time it rains. Two light coats beat one heavy coat, which runs down the ribs and pools at the base. Hold the can a foot back and keep it moving. Matte sealer looks like a pumpkin. Gloss looks like a toy.

Foam pumpkins store in a cardboard box with newspaper between them, somewhere that does not freeze. The paint survives fine; what wrecks them is weight stacked on top. Next October you pull the box out and the decorating is done. If you want one carved as well, cut that one the week of so it lasts.
What you'll need

Step-by-Step Guide

7 steps · about 8 minutes.Check off each step as you go and your progress saves automatically.

1

Gather Acrylic Craft Paint and a Clean Pumpkin

0:22
Step 1: Gather Acrylic Craft Paint and a Clean Pumpkin - How to Paint a Pumpkin (No-Carve Halloween Decor)

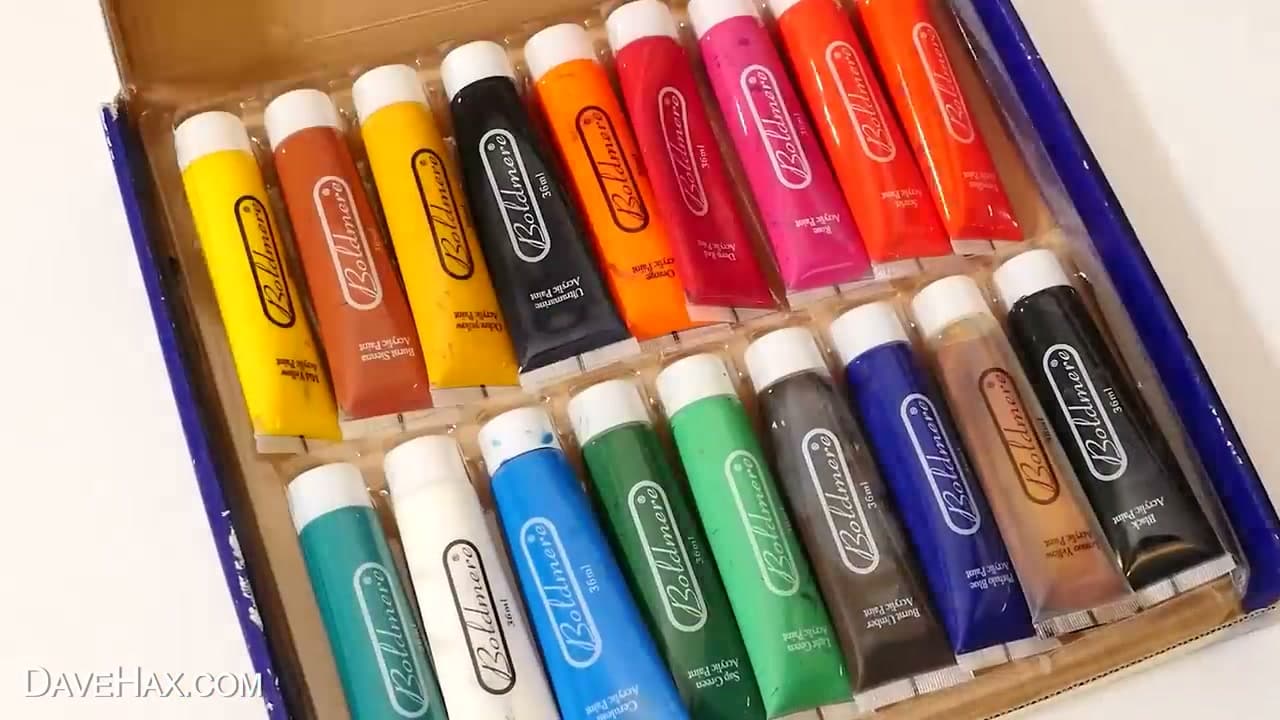
You need an actual paint - not a marker. Acrylic craft paint works perfectly on the pumpkin's waxy skin, dries in about ten minutes, and is easy to touch up. A small starter set with black, white, orange, green, and yellow is plenty for almost any Halloween face. Skip watercolour - it beads up on the pumpkin and never quite covers.

Pick a pumpkin with a clean, dry, smooth-ish side facing you. Wipe any dirt off with a damp paper towel and let it air-dry before you paint. Faux pumpkins from the craft store work just as well and last forever if you want a decoration you can reuse next October.

Tip

Squeeze a little of each colour onto a paper plate as a palette. That keeps the tubes clean and gives you somewhere to load the brush.

2

Sketch the Pumpkin Face with a Fine-Tip Sharpie

0:15
Step 2: Sketch the Pumpkin Face with a Fine-Tip Sharpie - How to Paint a Pumpkin (No-Carve Halloween Decor)

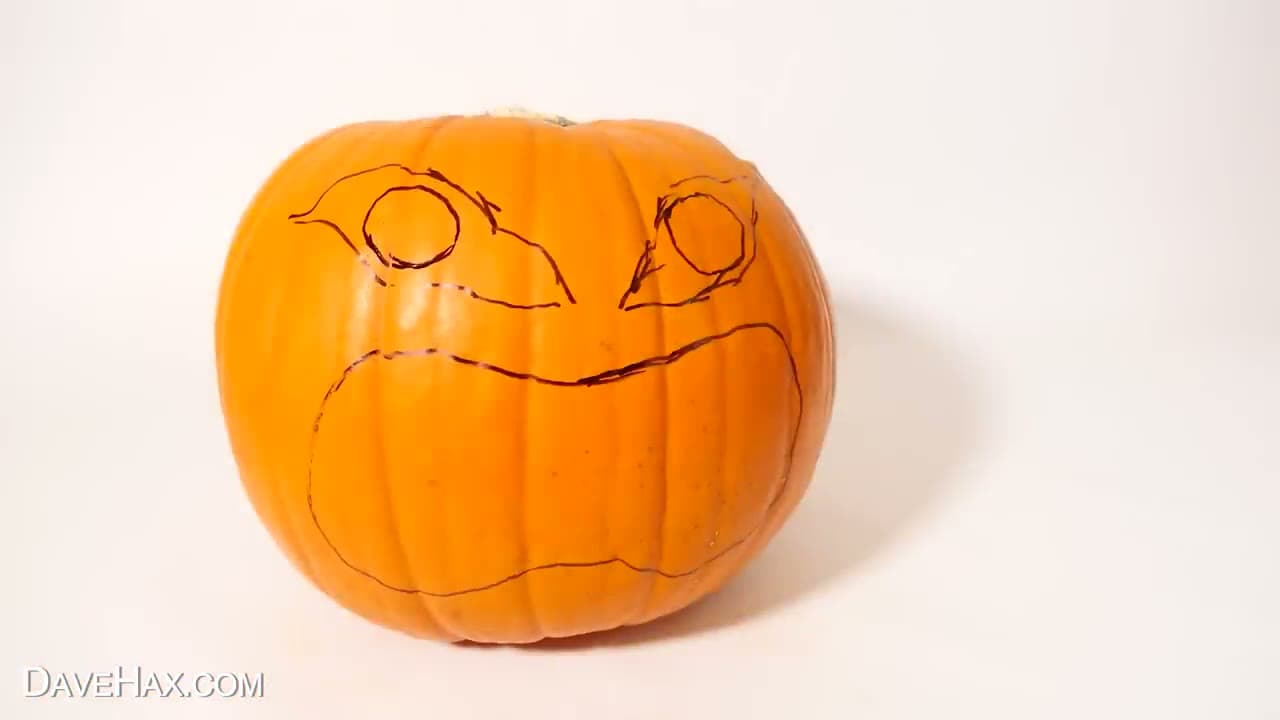
Before any paint touches the pumpkin, draw your design on lightly with a fine-tip Sharpie or a soft pencil. You want loose outlines - two angular eyes, a wide mouth, maybe a row of triangle teeth. Don't aim for symmetry. Crooked is scarier.

If you mess up a line, wipe it off with a tiny bit of rubbing alcohol on a cotton round and try again. Once you start blocking in paint the sketch lines disappear under it anyway, so don't overthink them.

Tip

Sketch with the pumpkin sitting the way it will sit on the porch. A face drawn while the pumpkin is lying on its side ends up tilted once you stand it back up.

3

Block In the Eyes with Black Acrylic Paint

0:52
Step 3: Block In the Eyes with Black Acrylic Paint - How to Paint a Pumpkin (No-Carve Halloween Decor)

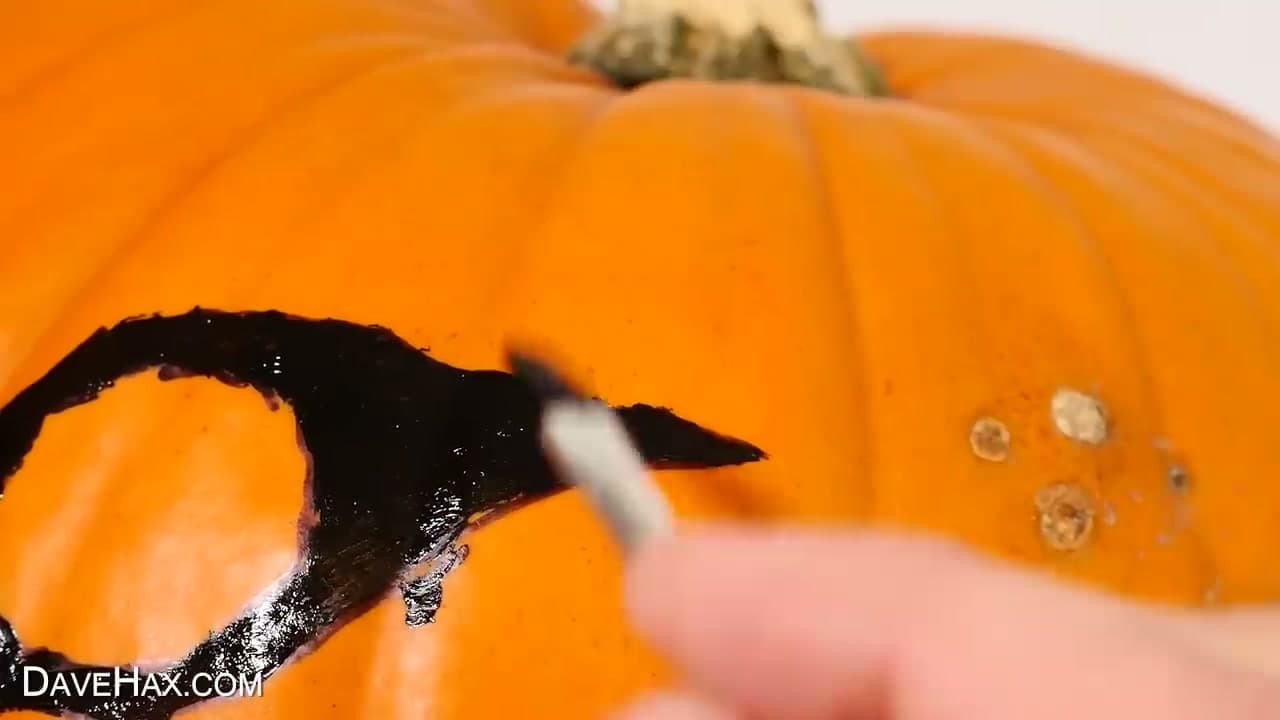
Load a medium round brush with black acrylic and fill in the eye shapes first. Pumpkin skin is a little uneven so push paint into the dimples - one coat is rarely enough on the first eye. Most acrylics dry quickly enough that you can lay down a second coat after five minutes.

Use the tip of the brush to keep the outer edge crisp where it meets the orange. A jagged silhouette eye reads as monster eye; a soft fuzzy edge reads as a smudge. Take your time on the outline; the middle of the shape can be sloppy because nobody can see it.

Tip

If a drip lands on the pumpkin, dab it with a dry paper towel immediately. Once acrylic dries you have to paint over it in orange to hide the mistake.

4

Paint the Toothy Mouth and the White Teeth

3:28
Step 4: Paint the Toothy Mouth and the White Teeth - How to Paint a Pumpkin (No-Carve Halloween Decor)

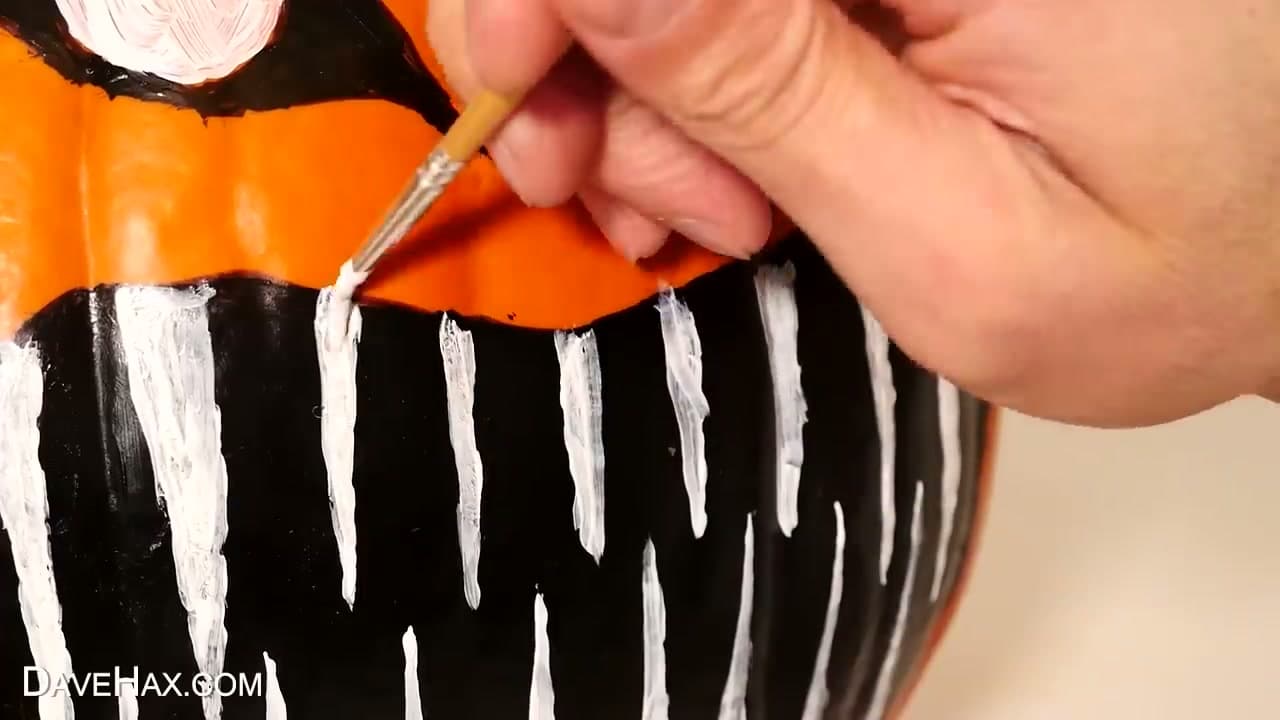
Block in the wide mouth shape with solid black paint - go bigger than feels natural, monster mouths look better oversized. Let the black layer dry for a few minutes so the white doesn't smear into it.

Now switch to a small detail brush loaded with white. Drag short vertical strokes from the top edge of the mouth down toward the middle for the upper teeth, then a matching set going up from the bottom edge. Each tooth is one pull of the brush - thin at the tip, wider at the base. Don't make them uniform; uneven teeth look more sinister.

Tip

Let the black mouth dry all the way before any white goes on. White dragged into damp black turns grey, and the only fix is repainting the whole mouth.

5

Paint the White Eyeballs and Green Irises

3:38
Step 5: Paint the White Eyeballs and Green Irises - How to Paint a Pumpkin (No-Carve Halloween Decor)

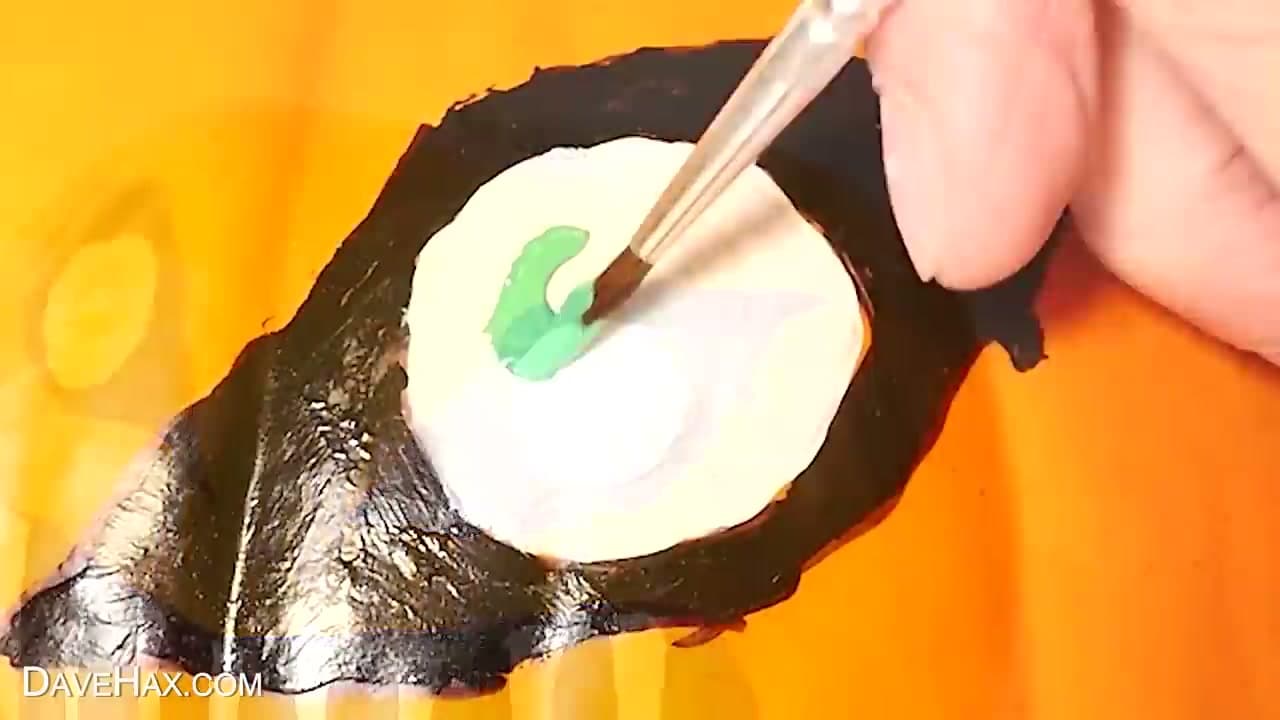
Inside each black eye socket paint a roughly circular white pupil-ball. Don't centre it - eyes off to one side look like the pumpkin is glaring at someone behind you. Two thin coats of white usually beat one thick blobby coat.

Once the white is dry, drop a green iris in the middle with the detail brush, then a smaller black pupil dot in the middle of the iris. Add a tiny dot of pure white inside the pupil at the top corner - that one highlight pixel is what makes the eye look wet and alive.

Tip

Green and red are the standard scary-eye colours, but yellow or orange irises look excellent against the pumpkin. Pick whatever colour you already have in the set.

6

Paint a Second Pumpkin Design on the Back

6:20
Step 6: Paint a Second Pumpkin Design on the Back - How to Paint a Pumpkin (No-Carve Halloween Decor)

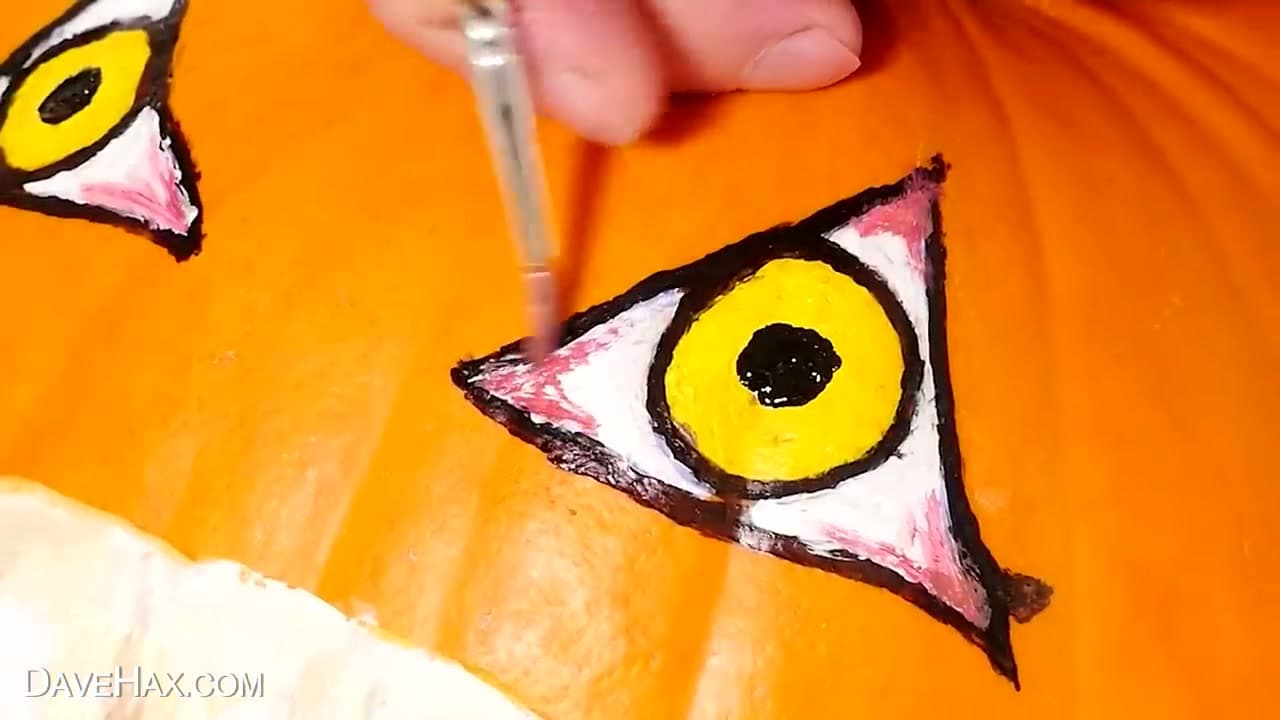
Pumpkins have two sides. Spin yours around and try a totally different look on the back - a single oversized triangular eye in yellow, a row of stars, a witchy silhouette. The second design is also where you can practise a technique that scared you on the front.

If you live somewhere kids walk past, the back-facing design is what your neighbours actually see all month. Make that one count too.

Tip

Point the practice design at the front door and the good one at the street. You see the back of the pumpkin every time you come home.

7

Seal the Painted Pumpkin with Clear Acrylic Spray Sealer

4:00
Step 7: Seal the Painted Pumpkin with Clear Acrylic Spray Sealer - How to Paint a Pumpkin (No-Carve Halloween Decor)

Leave the painted pumpkin somewhere flat to dry for at least an hour - longer if the kitchen is humid. Acrylic feels dry to the touch in ten minutes but isn't fully cured for closer to a day.

For an outdoor pumpkin, give it a couple of light coats of clear acrylic spray sealer once it is bone dry. The sealer keeps rain from streaking the design and stretches the lifespan of a real pumpkin by a week. Set it on the porch with a little battery-powered candle nearby and you are done.

Keep going

How to Make a Concrete Leaf Casting

Products Used

The Checklist

How to Paint a Pumpkin (No-Carve Halloween Decor)

Tools
5
Materials
5
Steps
7
Video
8 min

Tools we recommend

Your Guide

DaveHax

As an Amazon Associate we earn from qualifying purchases. Links on this page may be affiliate links - clicking them and buying doesn't change your price, but helps support ShowMeStepByStep.

Tags

Sunday How-To

New painting tutorials, every Sunday

One short email with the week's best step-by-step guides. Free, no spam, unsubscribe anytime.

Test your knowledge

Did the lesson stick? Start with this one.

5 questions covering what you just read. No signup, no score saved, and you can stop after this one.

Question 1 of 5

Which paint type works best on pumpkin skin?

Quick reference

Key takeaways from How to Paint a Pumpkin (No-Carve Halloween Decor)

5 questions, answers, and one-line explanations. Tap to expand.

  1. 1.Which paint type works best on pumpkin skin?

    Answer: Acrylic craft paint - dries in 10 min on the waxy skin, easy to touch up

    Watercolor beads up on wax; acrylic adheres and covers in one or two coats.

  2. 2.Before painting, what should you SKETCH the design with?

    Answer: Fine-tip Sharpie or soft pencil (loose outlines - they disappear under paint anyway)

    Sketch lines guide the paint and vanish under it; alcohol wipes off mistakes.

  3. 3.Why are CROOKED eyes scarier than perfectly symmetric ones?

    Answer: Symmetric reads as friendly; uneven angular shapes read as monster

    Don't aim for symmetry - it weakens the spooky factor.

  4. 4.What tiny detail makes the eye look 'wet and alive'?

    Answer: A tiny dot of pure WHITE at the top corner of the pupil - that one highlight pixel

    The white highlight is what eyes have in real life; without it the eye reads flat.

  5. 5.For an outdoor pumpkin, what extra step protects the design from rain?

    Answer: Once bone dry, give it a couple of light coats of CLEAR ACRYLIC SPRAY SEALER

    Acrylic sealer stops rain streaking and also extends the pumpkin's life.

Did this work for you?

What's next

Related collections

Curated theme pages that include this tutorial.

Weekly Digest

Liked this painting tutorial?

Pick the categories you want to hear about. Weekly digest of new step-by-step tutorials. No spam, easy unsubscribe.

Send me tutorials about

We only email about new tutorials. Easy unsubscribe anytime.