Hot Cocoa Bomb Recipe: How to Make Them at Home

CookingMedium15:178 stepsPart of Cooking BasicsBrowse more →
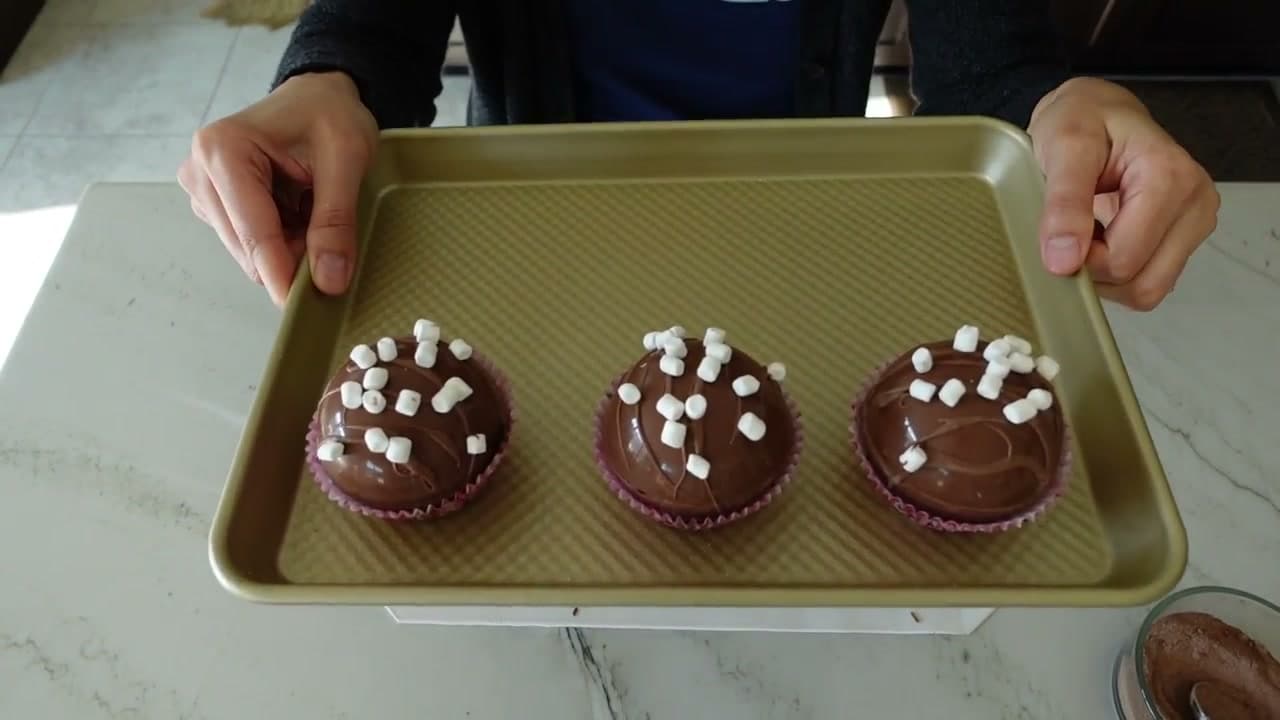
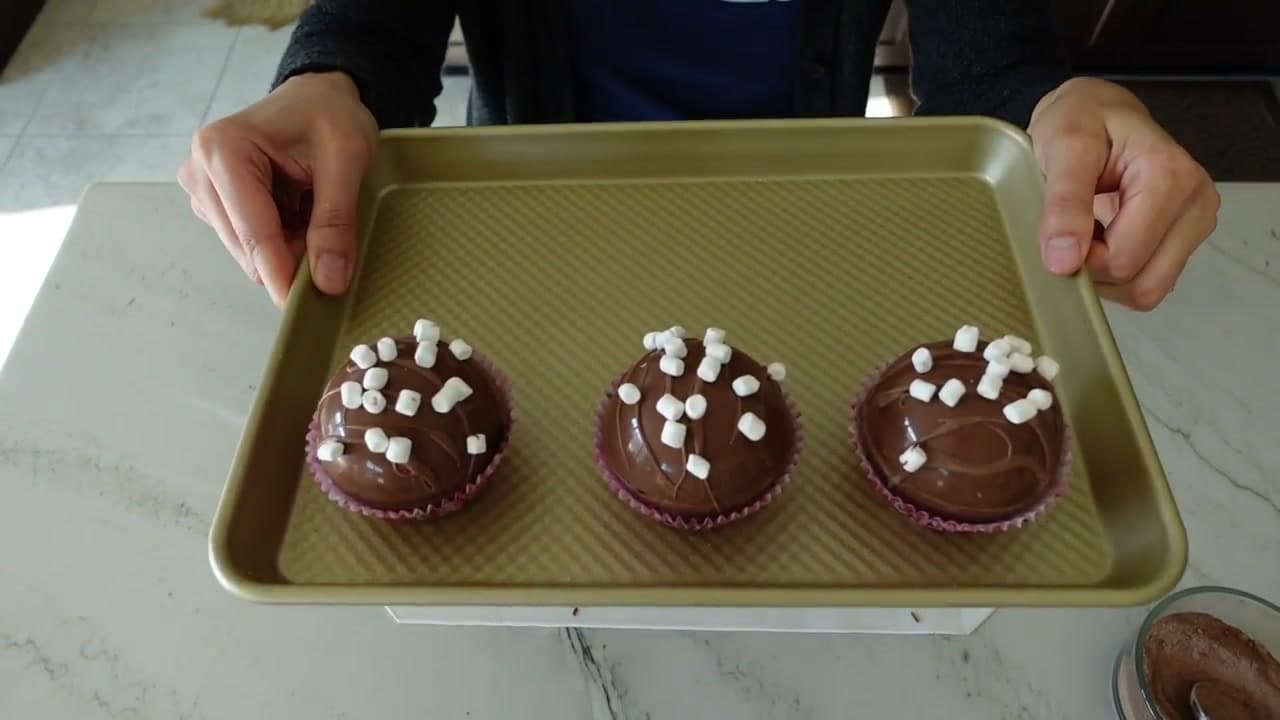
The finished result: Hot Cocoa Bomb Recipe: How to Make Them at Home

By ShowMeStepByStepPublished

Based on a video by Sugarologie.

A hot cocoa bomb is a hollow chocolate sphere with cocoa mix and marshmallows sealed inside. Pour steaming milk over one in a mug and the shell gives way, the marshmallows float up, and you have hot chocolate. Adrianna of Sugarologie makes nine of them here, three each from milk, dark and white chocolate, and she films the two parts most tutorials rush past: how thick the shell has to be, and how to weld the halves together without a gap.

Two decisions come before any melting. The mold has to be thin, floppy silicone you can turn inside out, because a rigid one cracks the dome as you pull it free. And use melting wafers or a real chocolate bar, never chocolate chips, which are built to hold their shape in a cookie and set dull and streaky in a mold. Wafers are the easy road because they need no tempering. For real chocolate, Adrianna tempers in the microwave by melting 75 percent of it and stirring the reserved 25 percent back in.

Budget about 30 minutes of hands-on work and two short trips to the fridge. One 8 ounce bag of wafers fills six cavities, which is three finished bombs.

The drink is the easy half. See how to make hot chocolate for the from-scratch version, and finish a mug with homemade whipped cream. If you are filling a holiday tin, peppermint bark and fudge come out of the same bag of chocolate.

What you'll need

Tools

Ingredients

  • 8 ozmilk chocolate melting wafers
  • 6 to 8 ozdark chocolate bar or couverture discs
  • 8 ozwhite chocolate melting wafers
  • 1 tbsp per bombhot cocoa mix
  • a handful per bombmini marshmallows
  • to decoratedehydrated marshmallow bits
  • hot milk

Step-by-Step Guide

8 steps · about 15 minutes.Check off each step as you go and your progress saves automatically.

1

Pick a Silicone Sphere Mold That Turns Inside Out

0:44
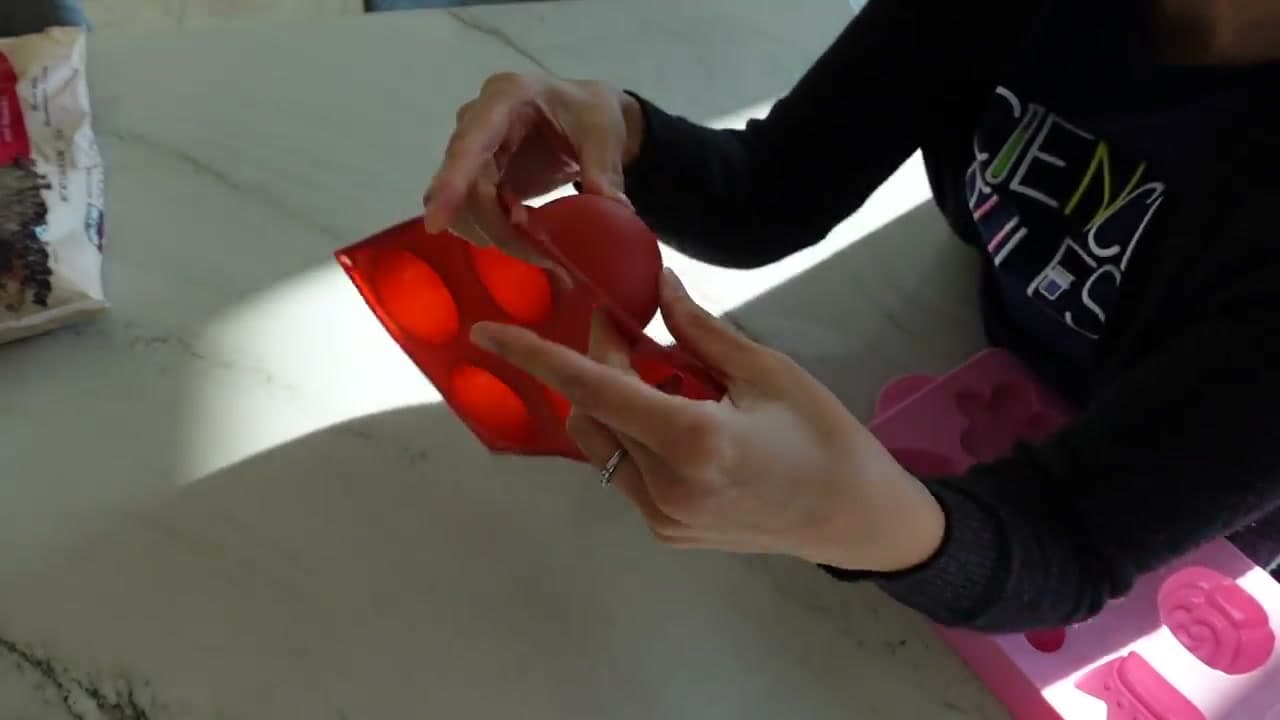
Step 1: Pick a Silicone Sphere Mold That Turns Inside Out - Hot Cocoa Bomb Recipe: How to Make Them at Home

Before any chocolate goes near it, push one cavity of the mold inside out with your thumbs. It should flip without fighting you. That flex is the whole reason a cheap floppy mold beats a heavy one. You peel the silicone off the set chocolate instead of shoving the dome out and snapping it.

Look for cavities 2.5 to 2.75 inches across. Six cavities give you six halves, which is three finished bombs. Rigid silicone holds its shape when you press on it, and the shell cracks along the rim every time.

Tip

If the only mold you own is the thick kind, chill the shells hard and work from the outside edge inward. You will still lose one or two.

Used in this stepsemi-sphere silicone mold
2

Melt the Chocolate Wafers in 30-Second Bursts

3:10
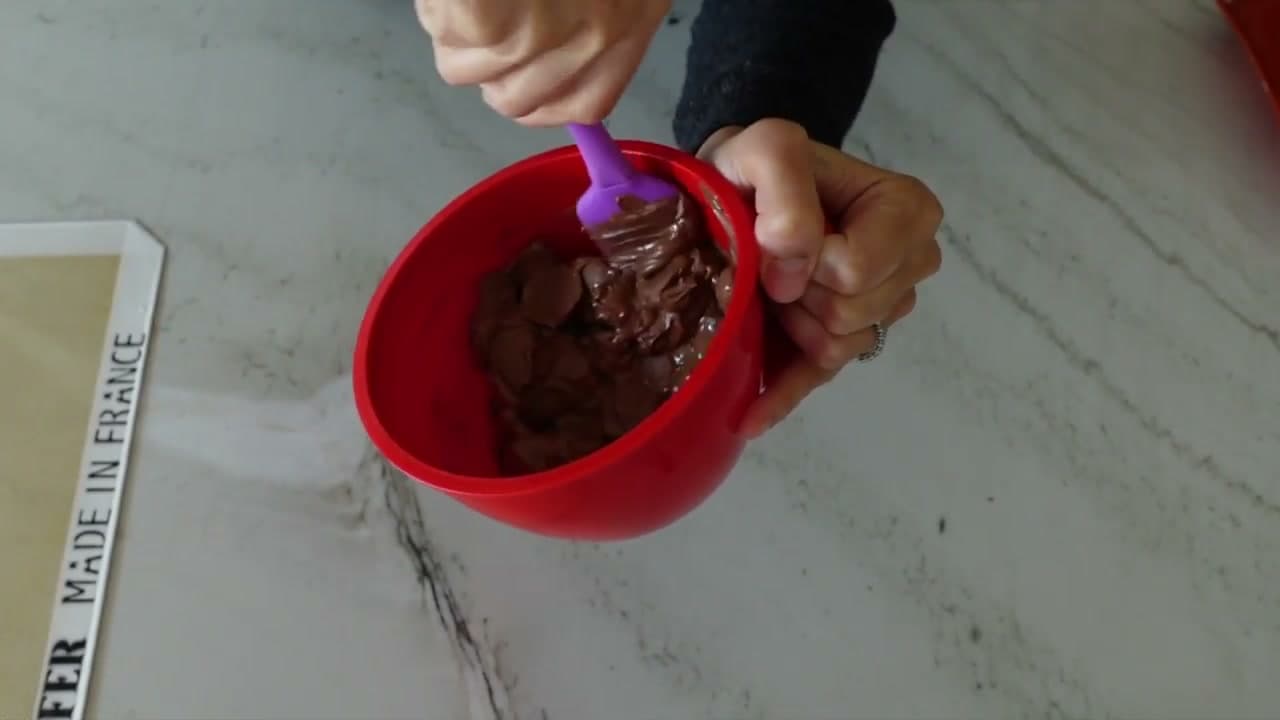
Step 2: Melt the Chocolate Wafers in 30-Second Bursts - Hot Cocoa Bomb Recipe: How to Make Them at Home

Tip 8 ounces of melting wafers into a silicone or microwave-safe plastic bowl. Heat for 30 seconds, pull it out, and stir the whole bowl with a spatula before it goes back in. Repeat until the last lumps disappear. Eight ounces takes about a minute in total.

Stirring between every burst is doing real work. It moves heat out of the hot spots and into the unmelted wafers so the batch comes to one temperature instead of scorching at the bottom. Skip the glass bowl. Glass holds heat and keeps cooking the chocolate after it leaves the microwave.

Tip

Leave this chocolate thick. Thinning it with oil or paramount crystals is for coating cake pops. A hollow shell needs the body.

3

Spoon Two Tablespoons of Chocolate into Each Cavity

4:23
Step 3: Spoon Two Tablespoons of Chocolate into Each Cavity - Hot Cocoa Bomb Recipe: How to Make Them at Home

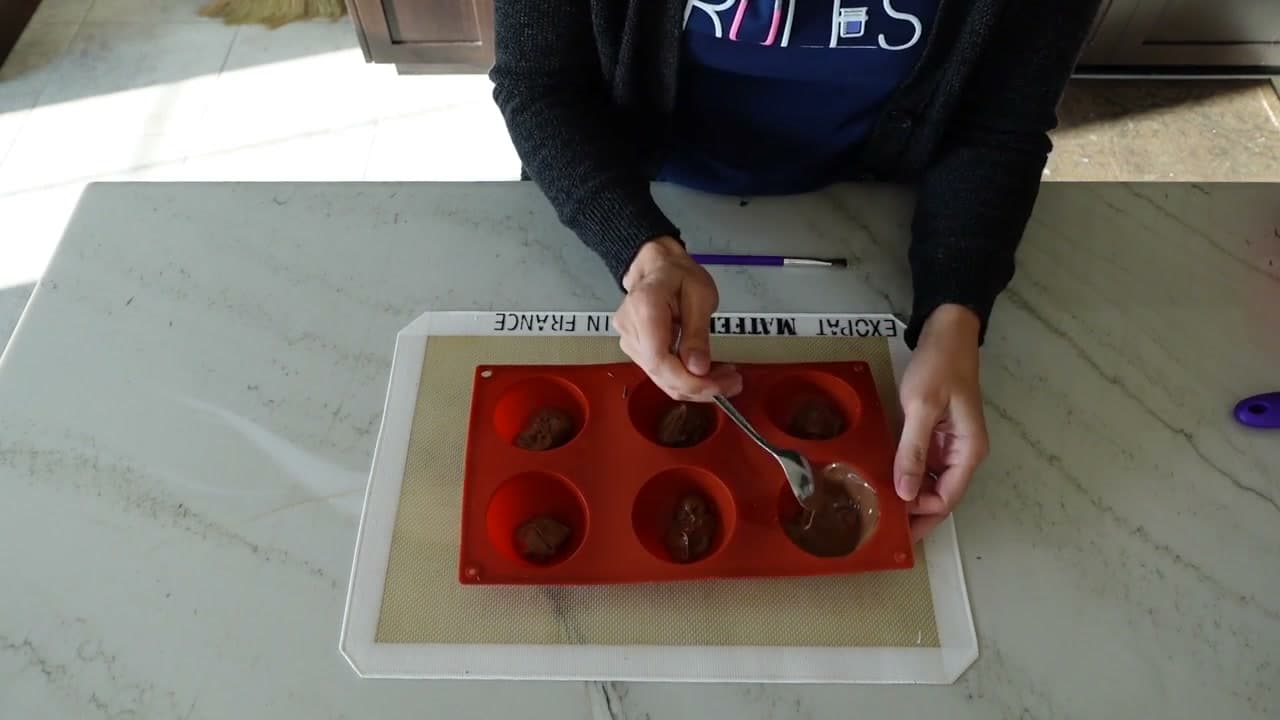
Drop about two tablespoons of melted chocolate into each cavity. Use the back of a small spoon to push it up and around the curve. The bowl of the spoon matches the shape of the dome, so it spreads the chocolate without dragging it thin.

Coat the whole inside surface of all six before you go back for a second pass. You can also lift the mold and tilt it so the chocolate runs around the walls on its own. The silicone is cooler than the chocolate, so every pass leaves another film behind and the coating creeps thicker.

Tip

Two tablespoons per cavity is the number to remember. Below that you are building a shell you will not be able to handle.

Used in this stepsilicone baking mat
4

Build the Shell Walls Thick with a Pastry Brush

5:10
Step 4: Build the Shell Walls Thick with a Pastry Brush - Hot Cocoa Bomb Recipe: How to Make Them at Home

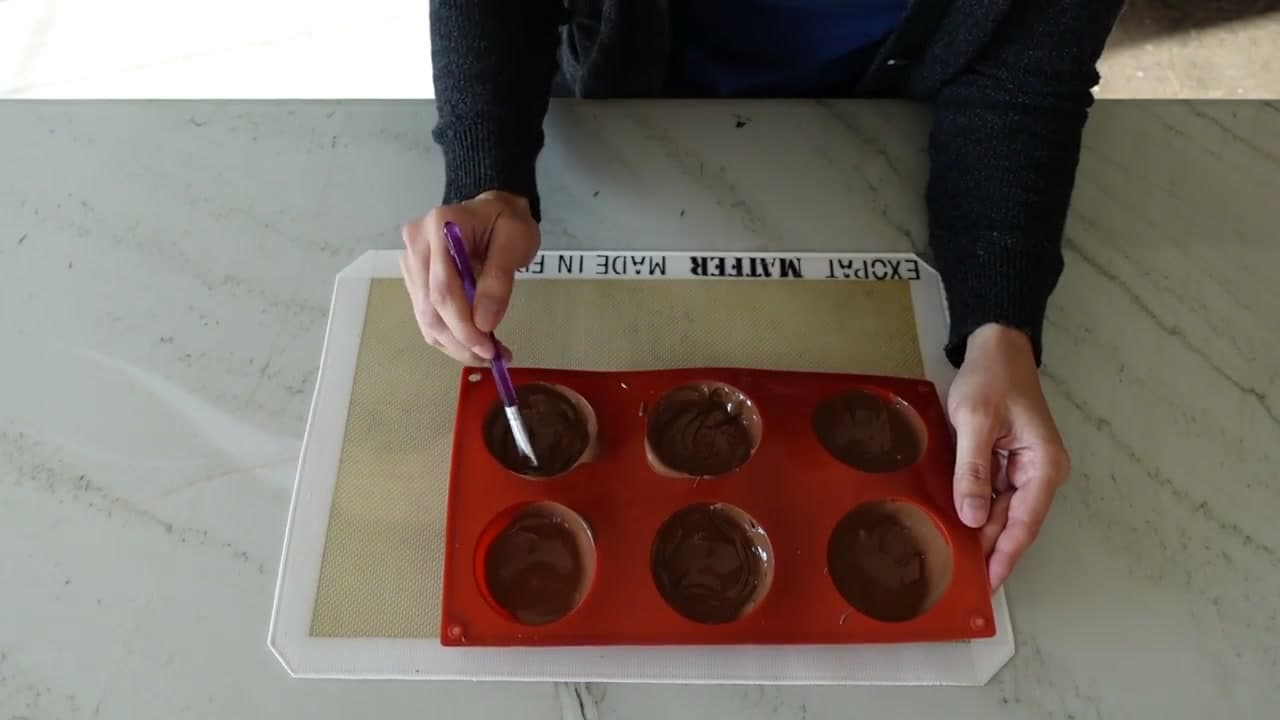
Go back over every cavity with a small pastry brush, pulling chocolate from the pooled bottom up onto the sides. A brush is gentler than a spoon, which can scrape a stripe right down to bare silicone. Keep working until no light shows through the walls.

This step decides whether the bombs survive. The mold sits right side up while it sets, so the chocolate sags to the bottom and the sides finish thin. Thin sides crack the moment you press two halves together, and a cracked half spills cocoa mix across the counter.

Tip

Hold the mold up to a window. If a cavity glows at the rim, brush more chocolate onto that spot before it sets.

Used in this stepsilicone pastry brush
5

Chill the Mold, Then Peel It Back Off the Shells

6:41
Step 5: Chill the Mold, Then Peel It Back Off the Shells - Hot Cocoa Bomb Recipe: How to Make Them at Home

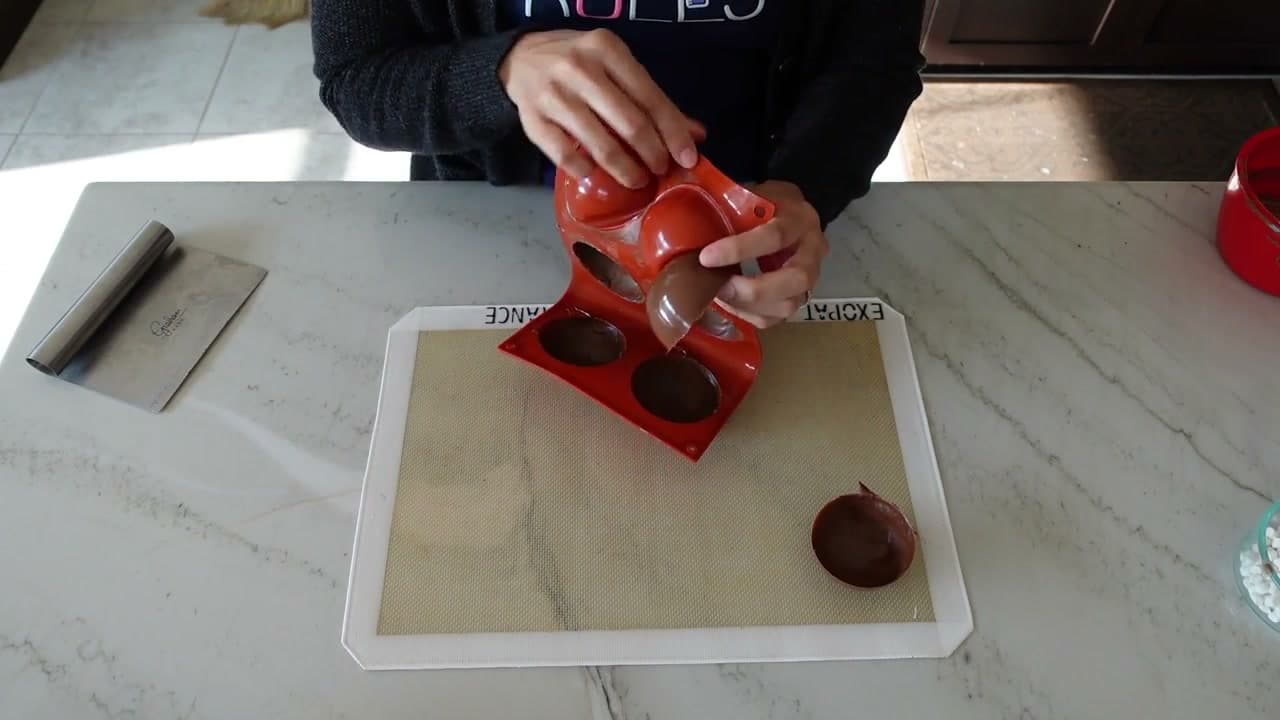
Turn the mold over and let the extra chocolate fall onto a silicone mat. Run an offset spatula flat across the top to shave the rims clean. Neat rims let two halves sit flush later. Then into the fridge for 5 to 10 minutes, until the shells are firm to the touch.

To release them, bend the silicone away from the chocolate rather than pressing on the dome. Once an edge is exposed, peel the rest back like a glove. Set each half flat side down. The chocolate you dumped out sets hard and scrapes up for the next batch.

Tip

Handle the shells by the rim. Chocolate melts at body temperature and fingertips leave dull prints across the dome.

Used in this stepoffset spatula
6

Fill the Shells with Cocoa Mix and Mini Marshmallows

7:41
Step 6: Fill the Shells with Cocoa Mix and Mini Marshmallows - Hot Cocoa Bomb Recipe: How to Make Them at Home

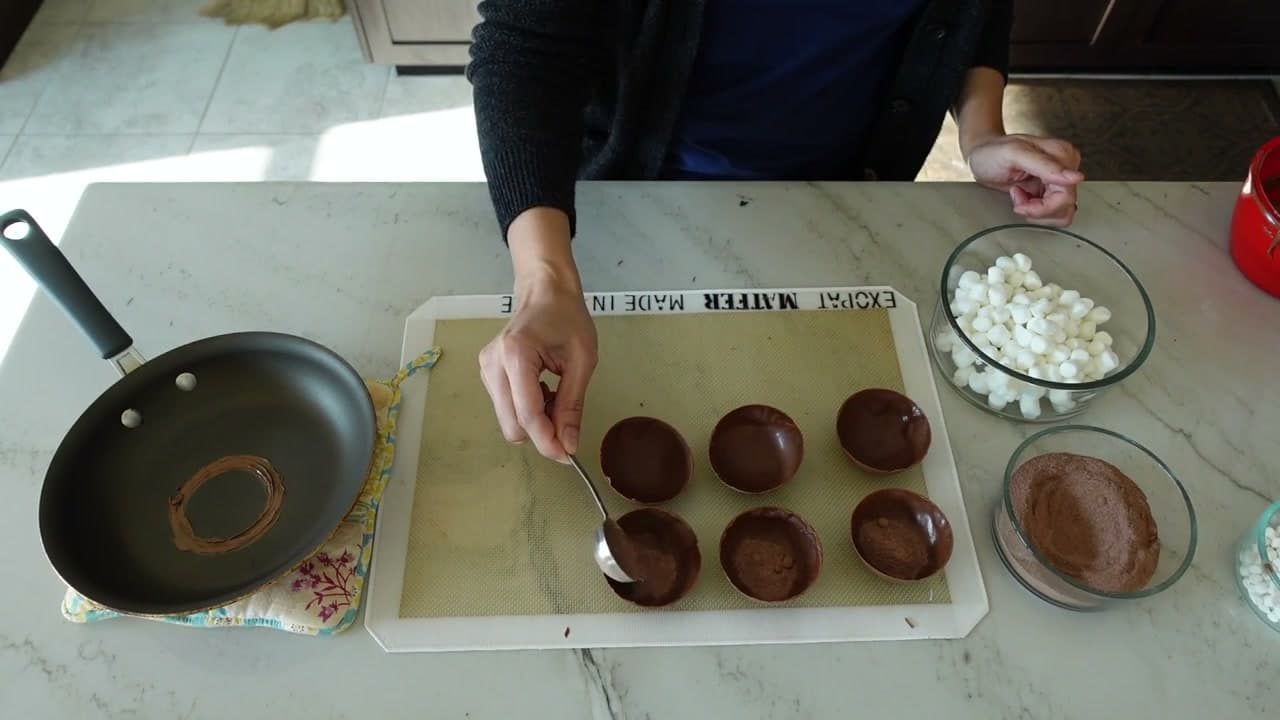
Spoon about a tablespoon of hot cocoa mix into half of your shells and leave the rest empty, since those become the lids. Any mix works. The one in the video is sugar and cocoa powder, which you can stir together yourself rather than buying a tin.

Add mini marshmallows on top of the powder. The whole point is the moment everything floats up out of the melting shell, so be generous with them. Keep the filling below the rim, though, so nothing sits in the way of the seal.

Tip

Crushed candy cane, freeze-dried strawberries or a spoon of malted milk powder all go in alongside the cocoa. Keep the total near a tablespoon.

7

Weld the Two Halves Together on a Warm Pan

8:04
Step 7: Weld the Two Halves Together on a Warm Pan - Hot Cocoa Bomb Recipe: How to Make Them at Home

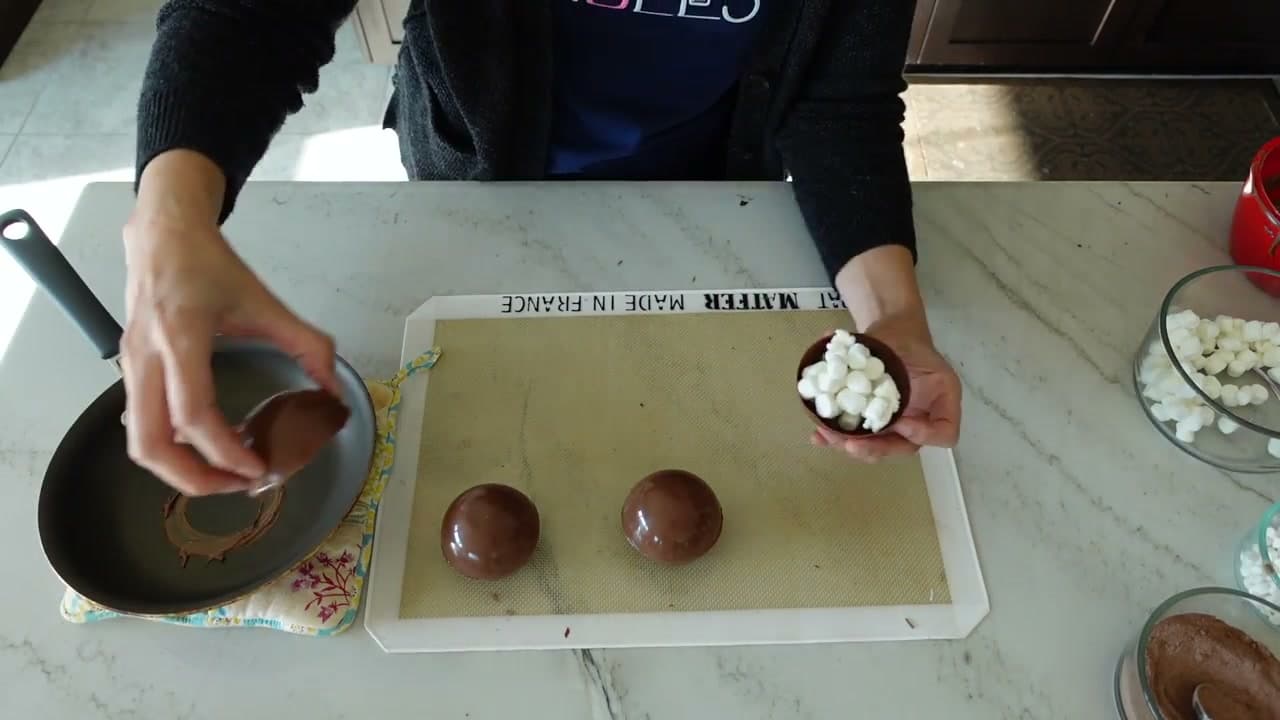
Set a nonstick pan on the burner for around 10 seconds, then take it off the heat. Barely warm is enough, because chocolate needs very little to melt. Press an empty shell rim-down on the pan for a few seconds, until the edge turns wet and glossy.

Lift it straight up and lower it onto a filled half, lining the rims up as you go. The melted chocolate sets within seconds and welds the two into one sphere. Pressing down or twisting cracks it, so place it and let go.

Tip

A gap around the equator is normal and disappears under the drizzle in the next step. If the pan stops melting the rims, give it another few seconds of heat.

Used in this stepnon-stick frying pan
8

Drizzle the Tops and Set Each Bomb in a Cupcake Liner

8:58
Step 8: Drizzle the Tops and Set Each Bomb in a Cupcake Liner - Hot Cocoa Bomb Recipe: How to Make Them at Home

Hold a finished sphere over the bowl of leftover chocolate and flick a spoonful across the top, letting the excess drip back into the bowl. While the drizzle is still wet, scatter dehydrated marshmallow bits over it so they stick. Whatever goes on top should hint at what is waiting inside.

Sit each one in a cupcake liner. They fit the 2.5 inch dome closely and keep fingers off the chocolate when you hand them out. To use one, stand it in a mug and pour steaming milk over the top.

Tip

Store them at cool room temperature, not in the fridge. Condensation on cold chocolate leaves a chalky bloom and softens the marshmallows inside.

Keep going

How to Spatchcock a Turkey

Products Used

The Recipe

Hot Cocoa Bomb Recipe: How to Make Them at Home

American
Serves
Makes 3 bombs per 8 oz batch (9 in the video, 3 each of milk, dark and white)
Prep
30 min
Cook
10 min
Total
40 min

Ingredients

7 items
  • 8 ozmilk chocolate melting waferscompound chocolate, no tempering needed. Merckens or Ghirardelli. Do not use chocolate chips.
  • 6 to 8 ozdark chocolate bar or couverture discsoptional, for a tempered real-chocolate batch. Chop 75 percent fine, hold back 25 percent as seed.
  • 8 ozwhite chocolate melting wafersoptional, for a white batch
  • 1 tbsp per bombhot cocoa mixor your own sugar and cocoa powder blend
  • a handful per bombmini marshmallows
  • to decoratedehydrated marshmallow bits
  • hot milksteaming, poured over each bomb to melt it

Method

  1. 1
    Pick a Silicone Sphere Mold That Turns Inside Out. Before any chocolate goes near it, push one cavity of the mold inside out with your thumbs.
  2. 2
    Melt the Chocolate Wafers in 30-Second Bursts. Tip 8 ounces of melting wafers into a silicone or microwave-safe plastic bowl.
  3. 3
    Spoon Two Tablespoons of Chocolate into Each Cavity. Drop about two tablespoons of melted chocolate into each cavity.
  4. 4
    Build the Shell Walls Thick with a Pastry Brush. Go back over every cavity with a small pastry brush, pulling chocolate from the pooled bottom up onto the sides.
  5. 5
    Chill the Mold, Then Peel It Back Off the Shells. Turn the mold over and let the extra chocolate fall onto a silicone mat.
  6. 6
    Fill the Shells with Cocoa Mix and Mini Marshmallows. Spoon about a tablespoon of hot cocoa mix into half of your shells and leave the rest empty, since those become the lids.
  7. 7
    Weld the Two Halves Together on a Warm Pan. Set a nonstick pan on the burner for around 10 seconds, then take it off the heat.
  8. 8
    Drizzle the Tops and Set Each Bomb in a Cupcake Liner. Hold a finished sphere over the bowl of leftover chocolate and flick a spoonful across the top, letting the excess drip back into the bowl.

The Checklist

Hot Cocoa Bomb Recipe: How to Make Them at Home

Tools
12
Steps
8
Video
15 min

Your Guide

Sugarologie

As an Amazon Associate we earn from qualifying purchases. Links on this page may be affiliate links - clicking them and buying doesn't change your price, but helps support ShowMeStepByStep.

Tags

Sunday How-To

New cooking tutorials, every Sunday

One short email with the week's best step-by-step guides. Free, no spam, unsubscribe anytime.

Did this work for you?

What's next

Related collections

Curated theme pages that include this tutorial.

Weekly Digest

Liked this cooking tutorial?

Pick the categories you want to hear about. Weekly digest of new step-by-step tutorials. No spam, easy unsubscribe.

Send me tutorials about

We only email about new tutorials. Easy unsubscribe anytime.