How to Remove a Splinter

Home SurvivalEasy5:268 stepsBrowse more →

By ShowMeStepByStepPublished

Based on a video by TMITM Home.

A splinter looks tiny, but leaving it in can lead to soreness or infection. The good news is most of them come out at home with a few things you already have in a drawer.

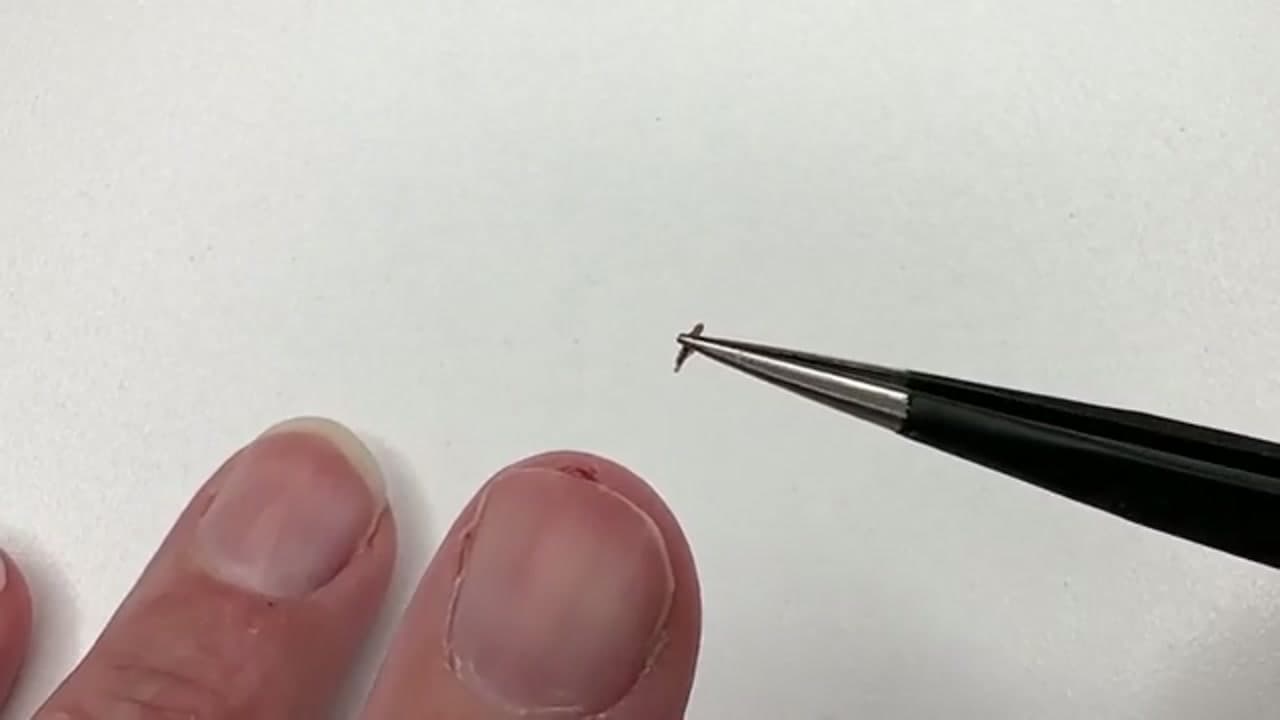
This guide follows the close-up approach from TMITM Home, who filmed the whole thing against a clean white background so you can see exactly where the tweezers go. You will work through inspecting the splinter, sterilizing your tools, grabbing the end, and pulling it out along the angle it went in.

Go slow and stop if it gets too painful. A splinter that is deep or near the eye is a job for a doctor, not a pair of tweezers.

Step-by-Step Guide

1

Step 1: Inspect the Splinter and Wash Up

0:25
Step 1: Step 1: Inspect the Splinter and Wash Up

Before you touch anything, take a good look. Which way did the splinter go in, and how much of it is sticking out? That angle decides how you pull it later. If your eyes cannot make out the end, hold a magnifying glass over it or move into brighter light. Then wash your hands and the skin around the splinter with soap and water. Clean skin means you are not pushing dirt in alongside the splinter, and it keeps the whole area from getting infected.

Tip

Do not squeeze the area to pop it out. That usually just breaks the splinter and drives the tip deeper.

Products used in this step

2

Step 2: Sterilize Your Tweezers and Needle

5:20
Step 2: Step 2: Sterilize Your Tweezers and Needle

Grab a pair of fine-tip pointed tweezers. Regular flat-tip ones tend to slip off a small splinter, so the sharper the points, the better. Wipe the tips with rubbing alcohol or an antiseptic wipe, and do the same to a sewing needle if you think you will need one. Anything touching broken skin should be clean first. Let the alcohol air dry for a few seconds so you are not introducing a sting on top of everything else.

Tip

No alcohol handy? Hold the needle tip in a flame for a few seconds, then let it cool before it goes anywhere near your skin.

3

Step 3: Soak the Finger if the Splinter Is Deep

0:40
Step 3: Step 3: Soak the Finger if the Splinter Is Deep

If the splinter is buried or the skin is thick, a soak makes a real difference. Rest the finger in warm, soapy water for five to ten minutes. The skin softens and swells a little, which can push a stubborn splinter closer to the surface. Some people add a spoonful of baking soda to the water and let it sit longer, since the paste can help draw the splinter up. Dry off and look again before you reach for the tweezers.

Tip

For a splinter you genuinely cannot see or reach, a baking soda paste left on under a bandage for a few hours can coax it out on its own.

Products used in this step

4

Step 4: Grip the End With the Tweezers

4:35
Step 4: Step 4: Grip the End With the Tweezers

Here is the part that matters most. Bring the fine tips down onto the exposed end of the splinter and pinch it firmly. Get as close to the skin as you can without grabbing the skin itself. A good, solid grip on the very end gives you the control to pull it straight out. If the tips keep sliding off, you probably do not have enough of the end exposed yet, which is your cue to move to a needle first.

Tip

Steady your hand by resting it on a table. A tiny wobble is enough to lose your grip on something this small.

Products used in this step

5

Step 5: Pull Along the Entry Angle

4:40
Step 5: Step 5: Pull Along the Entry Angle

Now pull, but not straight up. Draw the splinter out slowly in the same direction it went in. Following that original angle lets it slide back out the way it came instead of catching and snapping. If you feel resistance, stop and check the angle rather than yanking harder. A splinter that breaks off leaves a piece behind, and that is much harder to deal with than the whole thing coming out clean.

Products used in this step

6

Step 6: Free a Buried Tip With a Needle

1:40
Step 6: Step 6: Free a Buried Tip With a Needle

Sometimes the end is under the skin or tucked beneath a nail, with nothing to grab. This is where the sterilized needle earns its keep. Use the point to gently lift or tease open the skin right over the buried end. You are not digging, just uncovering enough of the splinter that the tweezers have something to bite. Once a bit of the end is exposed, switch back to the tweezers and grip it.

Tip

Work in good light and take your time. If it hurts a lot or the splinter is under a fingernail and will not budge, it is fine to let a doctor handle it.

Products used in this step

7

Step 7: Clean and Cover the Spot

2:25
Step 7: Step 7: Clean and Cover the Spot

Once the splinter is out, wash the area with soap and water one more time. A little pressure with a clean tissue stops any small bit of bleeding. Dab on some antiseptic, then cover it with an adhesive bandage to keep dirt out while it heals. Small as it was, that opening is still a way in for bacteria, so a day or two under a bandage is worth it.

Tip

Keep an eye on the spot over the next few days. Redness that spreads, swelling, or pus means it is time to see a doctor.

Products used in this step

8

Step 8: Check It Came Out Whole

5:00
Step 8: Step 8: Check It Came Out Whole

Do not skip this last look. Hold the removed splinter up and check the end. If the tip looks jagged or broken off, a fragment may still be under the skin. Compare what you pulled out against how much you saw going in. If a piece is missing, go back and check the skin, and soak again if you need to. When the whole splinter is out and the spot is clean and covered, you are done.

Products used in this step

Products Used

☐ The Checklist

How to Remove a Splinter

Tools
3
Materials
3
Steps
8
Video
5 min

Your Guide

TMITM Home

As an Amazon Associate we earn from qualifying purchases. Links on this page may be affiliate links - clicking them and buying doesn't change your price, but helps support ShowMeStepByStep.

Tags

Sunday How-To

New home survival tutorials, every Sunday

One short email with the week's best step-by-step guides. Free, no spam, unsubscribe anytime.

Did this work for you?

What's next

Weekly Digest

Liked this home survival tutorial?

Pick the categories you want to hear about. Weekly digest of new step-by-step tutorials. No spam, easy unsubscribe.

Send me tutorials about

We only email about new tutorials. Easy unsubscribe anytime.