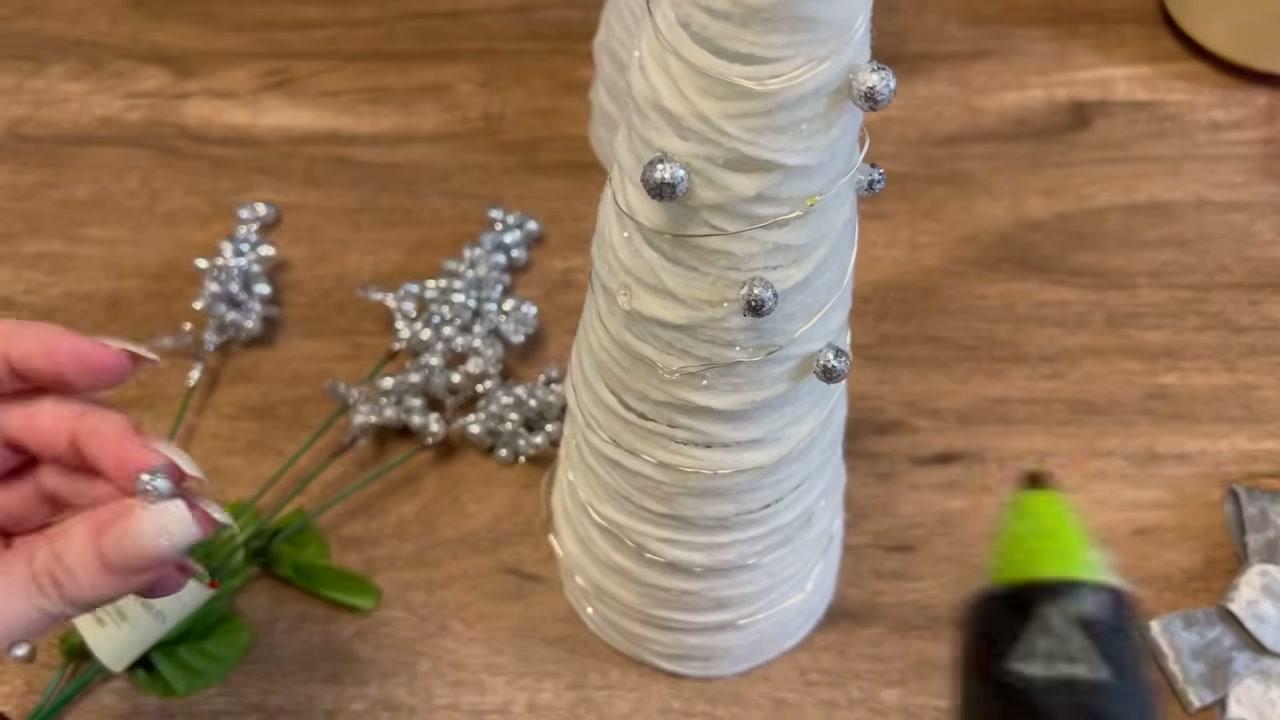
How to Make a Yarn Wrapped Christmas Tree (Easy Cone Trees)

CraftsEasy7:1010 stepsPart of Crafting for BeginnersBrowse more →
The finished result: How to Make a Yarn Wrapped Christmas Tree (Easy Cone Trees)
Also in:Fiber Arts

By Show Me Step by StepPublished

Based on a video by Home Goodiys.

These yarn Christmas trees look like something from a boutique, but they cost a few dollars each. The creator of Home Goodiys wraps paper mache cones in yarn, soaks the yarn in thinned Mod Podge, and lets it dry stiff. Then the yarn shell slides off the cone and stands on its own. One skein of yarn made her one large and two small trees, and the cones can be used again and again.

How to make a yarn wrapped Christmas tree: the short version

  • Cover a paper mache cone in plastic wrap.
  • Wrap it tightly in yarn from tip to base, then fill every gap.
  • Soak the yarn with Mod Podge thinned with a little water.
  • Let it dry overnight, slide it off and peel out the plastic.
  • Decorate with glitter, lights or berries.

Why the plastic wrap and the water matter

The plastic wrap keeps the glue off the cone, so the tree releases cleanly and the cone stays dry for the next one. The water thins the Mod Podge so it soaks through every layer of yarn. Her first tree used Mod Podge straight from the jar, and it stayed soft in spots and slumped. Aim for a mix about the thickness of heavy cream.

Picking yarn and cones

Smooth acrylic worsted weight yarn works best because it soaks up glue and holds a crisp shape. White or cream gives that snowy look, but try sage green, blush or a heathered gray for a modern set. Chunky or chenille yarn covers faster but needs more glue. Paper mache cones come in sets of sizes at most craft stores. Make three heights for a natural looking little forest.

Ways to decorate yarn trees

  • Glitter tip: brush Mod Podge on the top third and shake on chunky and fine glitter together.
  • Fairy lights: wind a battery wire light string around the tree and hide the box inside the hollow base.
  • Ornaments: hot glue glitter berries, tiny pearls or mini pompoms in a spiral.
  • Display: group them on a mantel or tray with white houses, reindeer and battery candles. Keep real flames away from yarn.

Storing and gifting them

The trees are light and hollow, so they nest inside a box with tissue paper and last for years. A set of three in a clear bag makes a sweet gift for a neighbor or teacher.

Common problems

  • The tree leans or caves in. There was not enough yarn. Hot glue a few bamboo skewers inside to brace it.
  • Dry, fuzzy patches. The glue did not soak through. Brush on more thinned Mod Podge and press it in.
  • It will not come off the cone. It is still damp inside. Give it more time.
  • Loose loops everywhere. Keep tension on the yarn with your free hand as you wrap.

Learn more about the glue in how to use Mod Podge. For more trees, try a paper Christmas tree or a macrame Christmas tree. Leftover yarn? Make a pom pom wreath or a Christmas garland.

What you'll need

Step-by-Step Guide

10 steps · about 7 minutes.Check off each step as you go and your progress saves automatically.

1

Gather Yarn, Cones and Mod Podge for Yarn Christmas Trees

0:52

Step 1: Gather Yarn, Cones and Mod Podge for Yarn Christmas Trees - How to Make a Yarn Wrapped Christmas Tree (Easy Cone Trees)

You need paper mache tree cones in one or two sizes, a skein of white acrylic yarn, Mod Podge, plastic wrap, a small container and a foam brush. One skein covers a large cone and two small ones. The cones are only a mold, so you can reuse them every year. Add glitter, fairy lights or berry picks if you want to decorate.

Tip

Craft stores often mark cones down after Halloween. Stock up then.
2

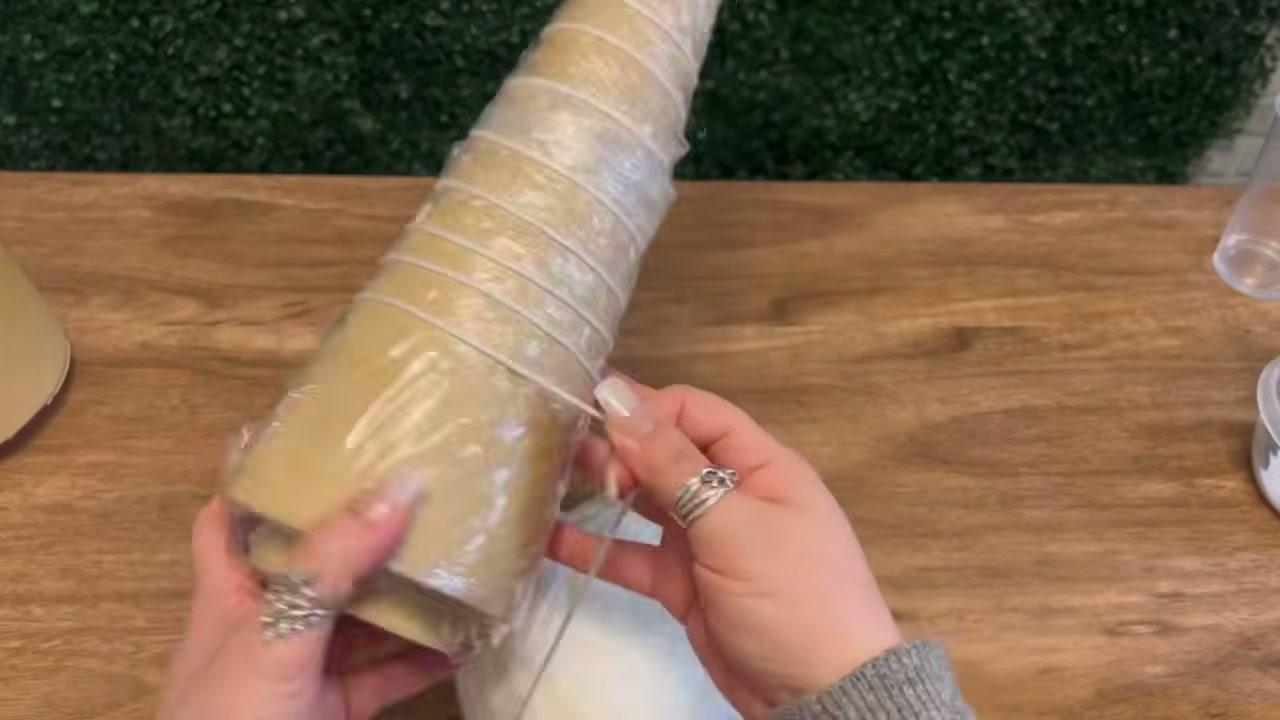
Cover the Paper Mache Tree Cone in Plastic Wrap

1:02
Step 2: Cover the Paper Mache Tree Cone in Plastic Wrap - How to Make a Yarn Wrapped Christmas Tree (Easy Cone Trees)

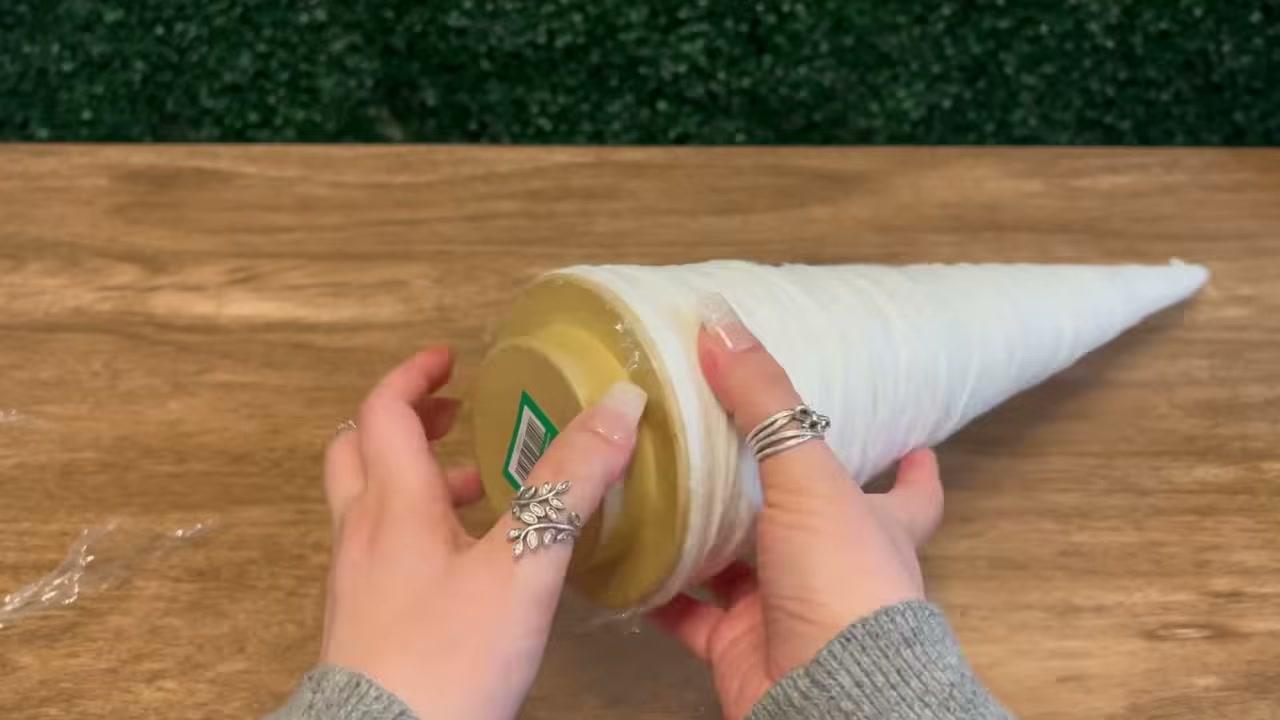
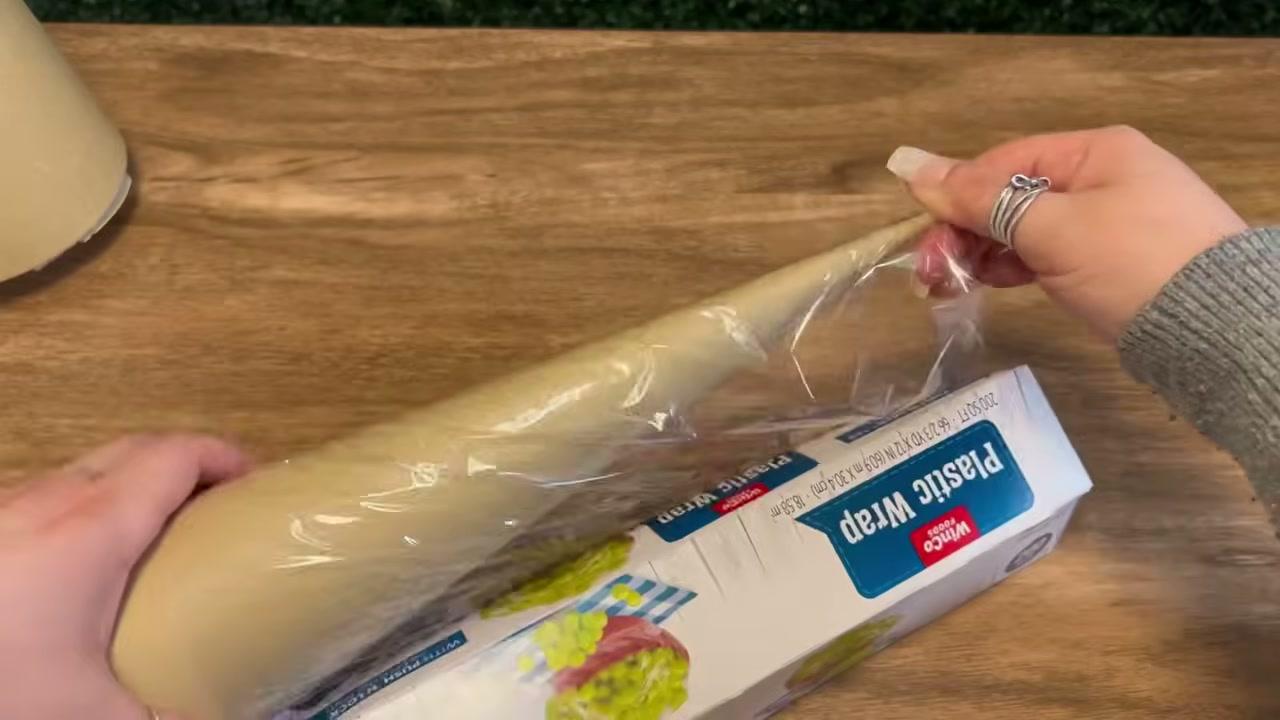
Hold the plastic wrap at the tip of the cone and wind it down to the base, overlapping as you go. Cover every bit of the cone so no glue can reach it. Press the wrap flat with your hands so it hugs the shape. Smooth plastic means a smooth tree and an easy release later.

Tip

Leave a little extra wrap past the base. It gives you something to pull on later.

3

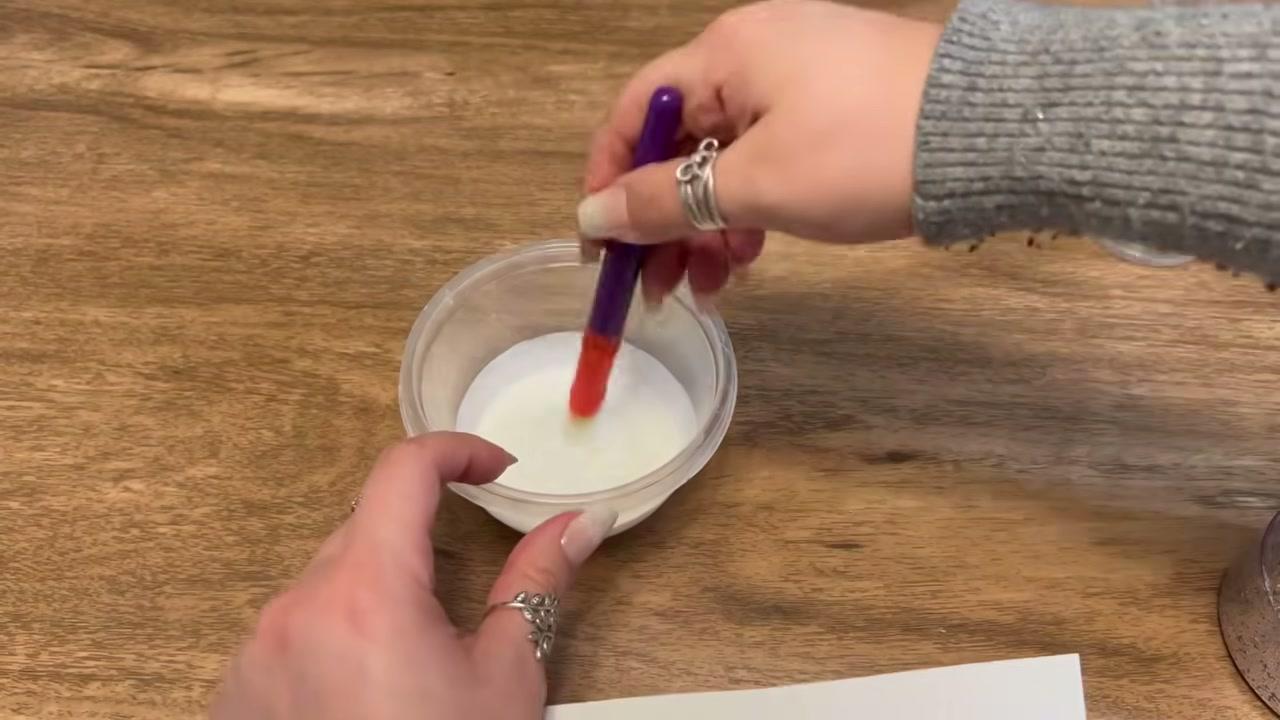
Thin the Mod Podge With Water for the Yarn Tree

1:40
Step 3: Thin the Mod Podge With Water for the Yarn Tree - How to Make a Yarn Wrapped Christmas Tree (Easy Cone Trees)

Pour some Mod Podge into a container and stir in a little water at a time. You do not need much. You want it slightly runny, about like heavy cream, so it soaks into every layer of yarn. Thick glue sits on top and leaves dry patches inside, and the tree ends up floppy.

Tip

Add water a spoonful at a time. You can always add more, but you cannot take it out.

4

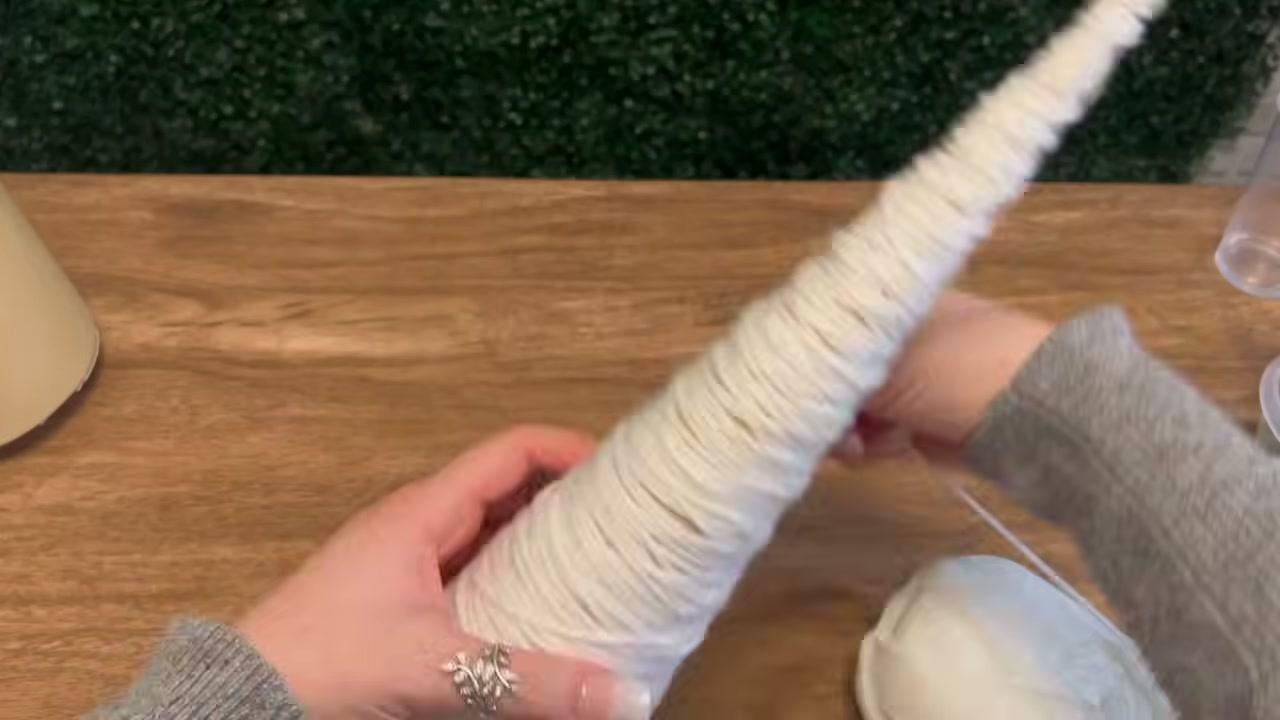
Start Wrapping Yarn Around the Tree Cone at the Tip

2:04
Step 4: Start Wrapping Yarn Around the Tree Cone at the Tip - How to Make a Yarn Wrapped Christmas Tree (Easy Cone Trees)

Hold the yarn end at the very tip and wrap over it a few times to lock it in place. Then spiral down the cone. Keep the strand taut with your other hand the whole time. Work down and back up a few times so the yarn holds the plastic wrap in place while you build up layers.

Tip

Slack yarn makes loose loops. Keep gentle tension on the strand as you wrap.

5

Fill the Gaps Until the Yarn Covers the Whole Cone

2:44
Step 5: Fill the Gaps Until the Yarn Covers the Whole Cone - How to Make a Yarn Wrapped Christmas Tree (Easy Cone Trees)

Once most of the cone is covered, go back and fill the gaps. Wrap at slightly different angles so the strands cross over each other. This is what makes the tree sturdy. Her first tree had too little yarn and caved in. When no plastic shows through, cut the yarn and tuck the end under.

Tip

Hold it up to a light. Any bright spots are gaps that need more yarn.

6

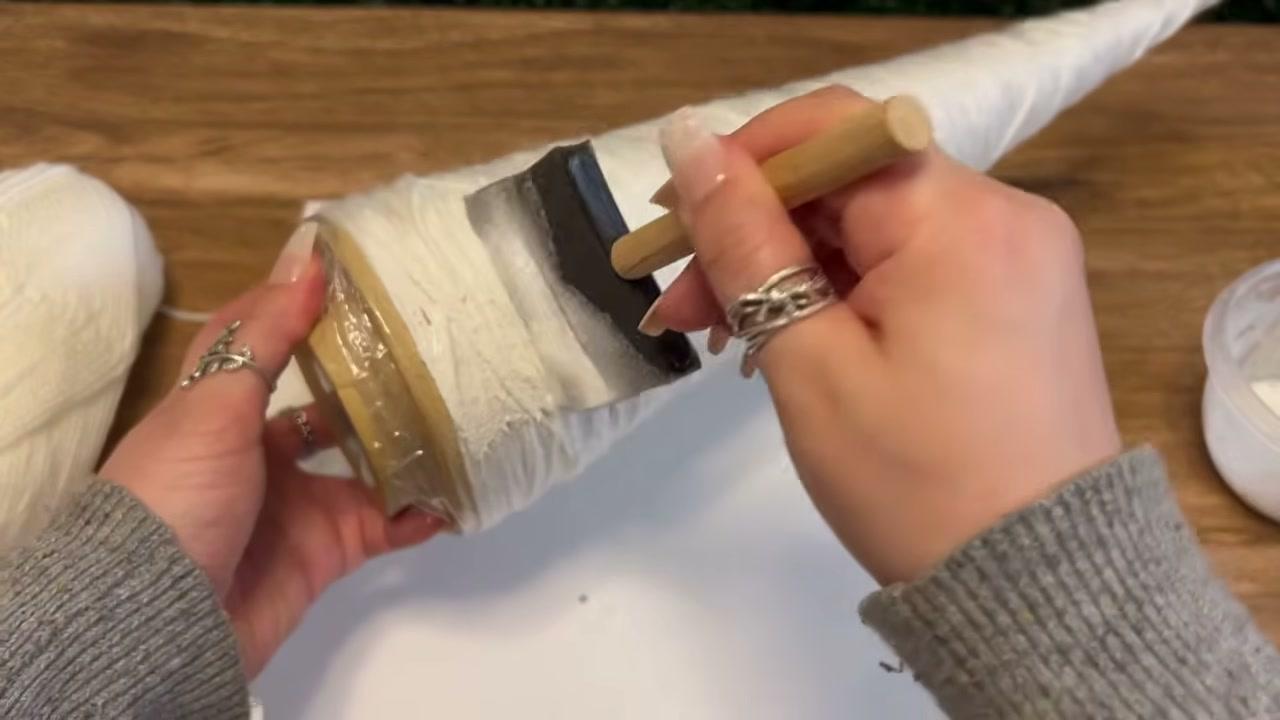
Saturate the Yarn Wrapped Cone With Mod Podge

3:02
Step 6: Saturate the Yarn Wrapped Cone With Mod Podge - How to Make a Yarn Wrapped Christmas Tree (Easy Cone Trees)

Load a foam brush with the thinned Mod Podge and coat the whole tree generously. Press the brush into the yarn as you go so the glue soaks through to the bottom layers. The yarn should look wet all over. Set the cone upright on a covered surface and let it dry overnight, until it is stiff with no damp spots.

Tip

Cover your table. The thinned glue drips more than you expect.

7

Slide the Dry Yarn Tree Off the Cone Form

3:48
Step 7: Slide the Dry Yarn Tree Off the Cone Form - How to Make a Yarn Wrapped Christmas Tree (Easy Cone Trees)

Pull away any loose plastic wrap at the base. Then hold the cone and push the yarn shell up, a little at a time, working your way around. Gentle but firm pressure does it. The tree should slide up and off in one piece, keeping its cone shape. If it sticks, it is still damp inside.

Tip

Go around the base in small pushes so the shell does not crease.

8

Peel the Plastic Wrap Out of the Yarn Christmas Tree

3:58
Step 8: Peel the Plastic Wrap Out of the Yarn Christmas Tree - How to Make a Yarn Wrapped Christmas Tree (Easy Cone Trees)

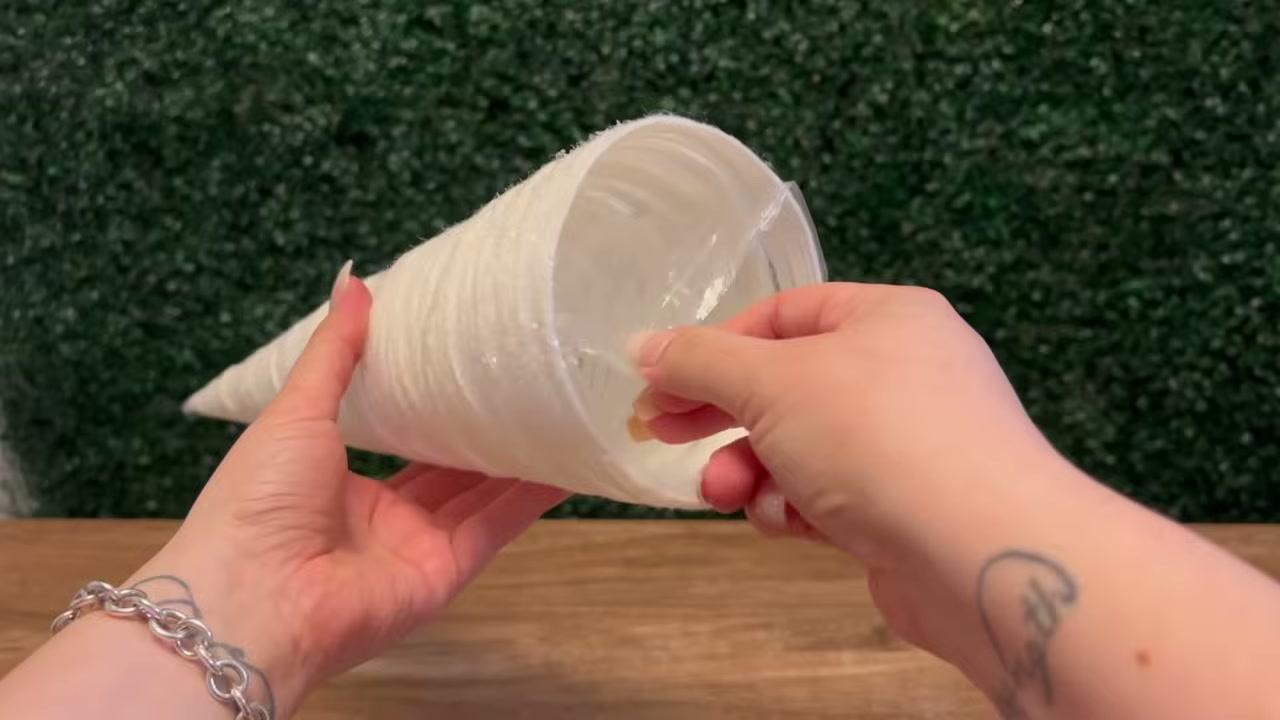
Reach inside the hollow tree and peel out the plastic wrap. It comes away easily, but take it out slowly, one section at a time, so you do not bend the tree. When it is out, stand the tree up. It should hold its shape and stand on its own. Your cone is ready for the next tree.

Tip

Pull the plastic toward the open base, not up toward the tip.

9

Add Chunky Glitter to the Tip of the Yarn Tree

4:36
Step 9: Add Chunky Glitter to the Tip of the Yarn Tree - How to Make a Yarn Wrapped Christmas Tree (Easy Cone Trees)

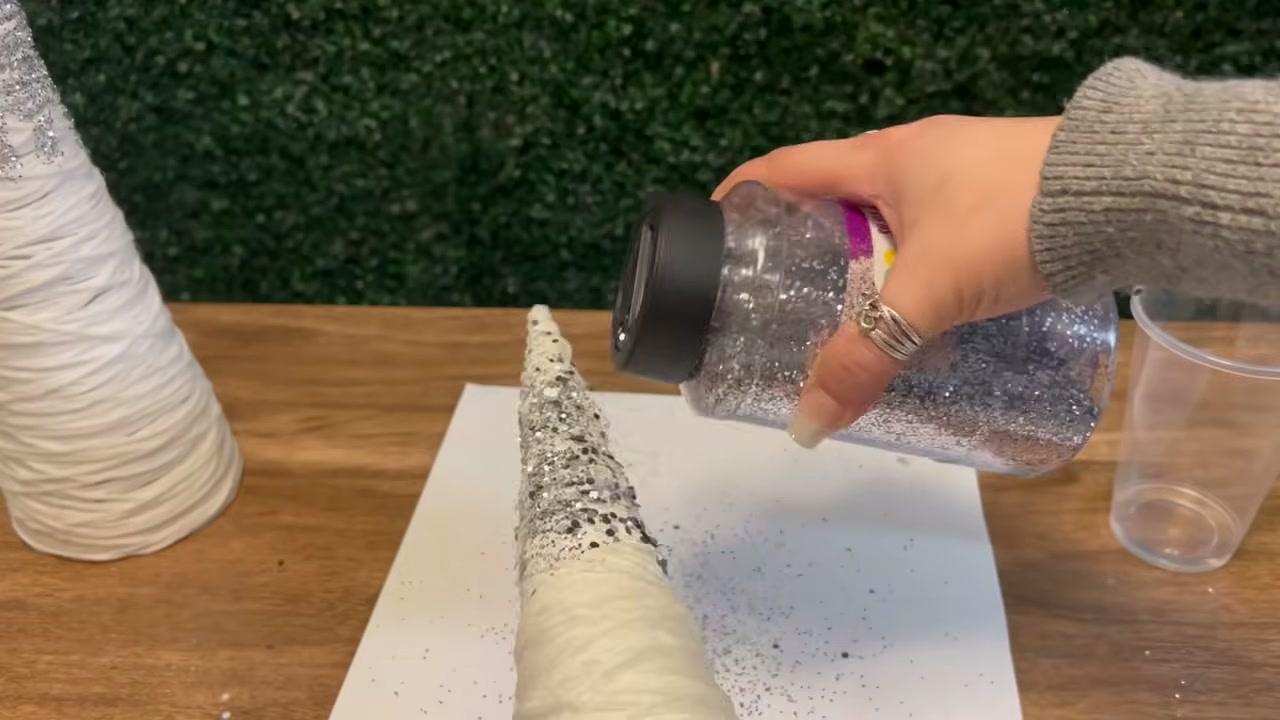
Brush Mod Podge around the top third of the tree. Set it on paper and shake chunky silver glitter over the wet glue, then a finer glitter to fill the gaps. Let the glitter fade out as it goes down the tree for a frosted look. Tip the extra glitter off the paper back into the jar.

Tip

Mixing chunky and fine glitter gives more sparkle than either one alone.

10

Decorate a Yarn Christmas Tree With Lights and Glitter Berries

6:04
Step 10: Decorate a Yarn Christmas Tree With Lights and Glitter Berries - How to Make a Yarn Wrapped Christmas Tree (Easy Cone Trees)

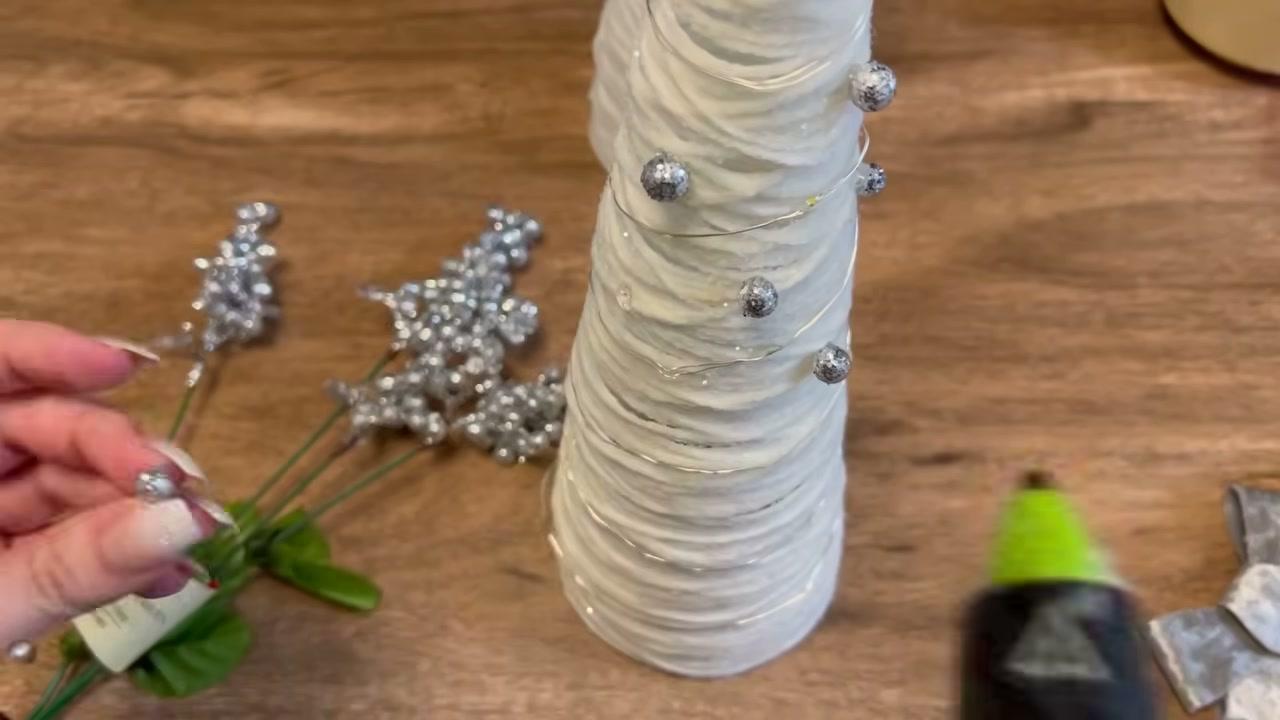
For a second tree, wind a string of battery fairy lights around it from top to bottom. Then cut silver glitter berries off their picks and hot glue them on as little ornaments. Spread them in a loose spiral. Group your finished trees in different heights on a mantel or tray.

Tip

Tuck the light battery box inside the hollow base so it stays hidden.

How to Make a Popsicle Stick Sled Ornament

Keep going

How to Make a Popsicle Stick Sled Ornament

Products Used

The Checklist

How to Make a Yarn Wrapped Christmas Tree (Easy Cone Trees)

Tools
5
Materials
6
Steps
10
Video
7 min

Tools we recommend

Your Guide

Home Goodiys

As an Amazon Associate we earn from qualifying purchases. Links on this page may be affiliate links - clicking them and buying doesn't change your price, but helps support Show Me Step by Step.

Tags

Sunday How-To

New crafts tutorials, every Sunday

One short email with the week's best step-by-step guides. Free, no spam, unsubscribe anytime.

Did this work for you?

What's next

Related collections

Curated theme pages that include this tutorial.

Weekly Digest

Liked this crafts tutorial?

Pick the categories you want to hear about. Weekly digest of new step-by-step tutorials. No spam, easy unsubscribe.

Send me tutorials about

We only email about new tutorials. Easy unsubscribe anytime.