How to Draw Waves: Easy Ocean Waves Step by Step

CraftsEasy6:128 steps5-question quiz at endBrowse more →
Also in:Painting

By ShowMeStepByStepPublished Updated

Based on a video by ArtByEdna.

Waves look tricky until you see the shortcut. They are nothing more than a row of curls. Draw a line of backward C shapes across a box, connect them into crests, and you already have ocean waves. Color does the rest.

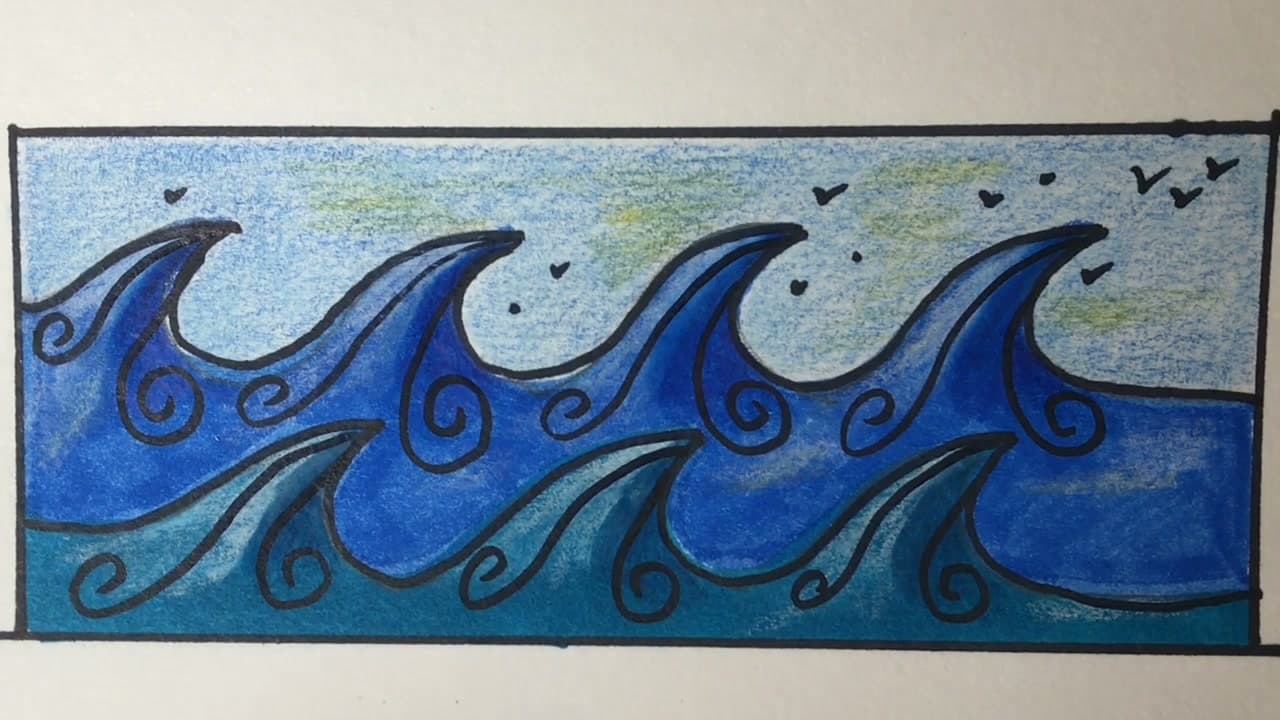
This walkthrough follows Edna of ArtByEdna as she draws a simple, stylized set of ocean waves. You will sketch the curls in pencil, outline and fill them with a blue marker, push depth into the troughs with teal colored pencil, shade a soft sky, and finish with little spiral swirls and a few birds. No fancy supplies. A marker, two or three colored pencils, and a sheet of paper.

Want to keep drawing the outdoors? This pairs well with how to draw mountains and how to draw clouds. Put them together and you have a whole seascape.
Step-by-Step Guide

1

Step 1: Sketch a Row of Curls in a Box

0:50
Step 1: Step 1: Sketch a Row of Curls in a Box

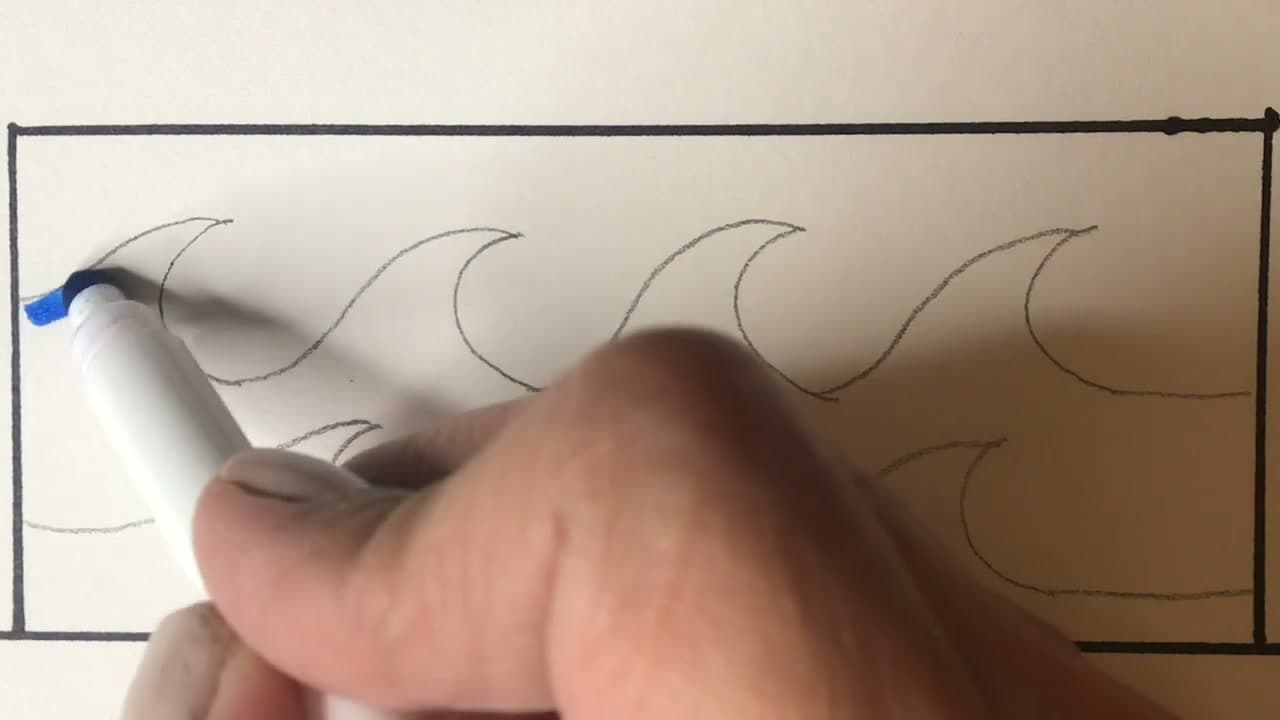
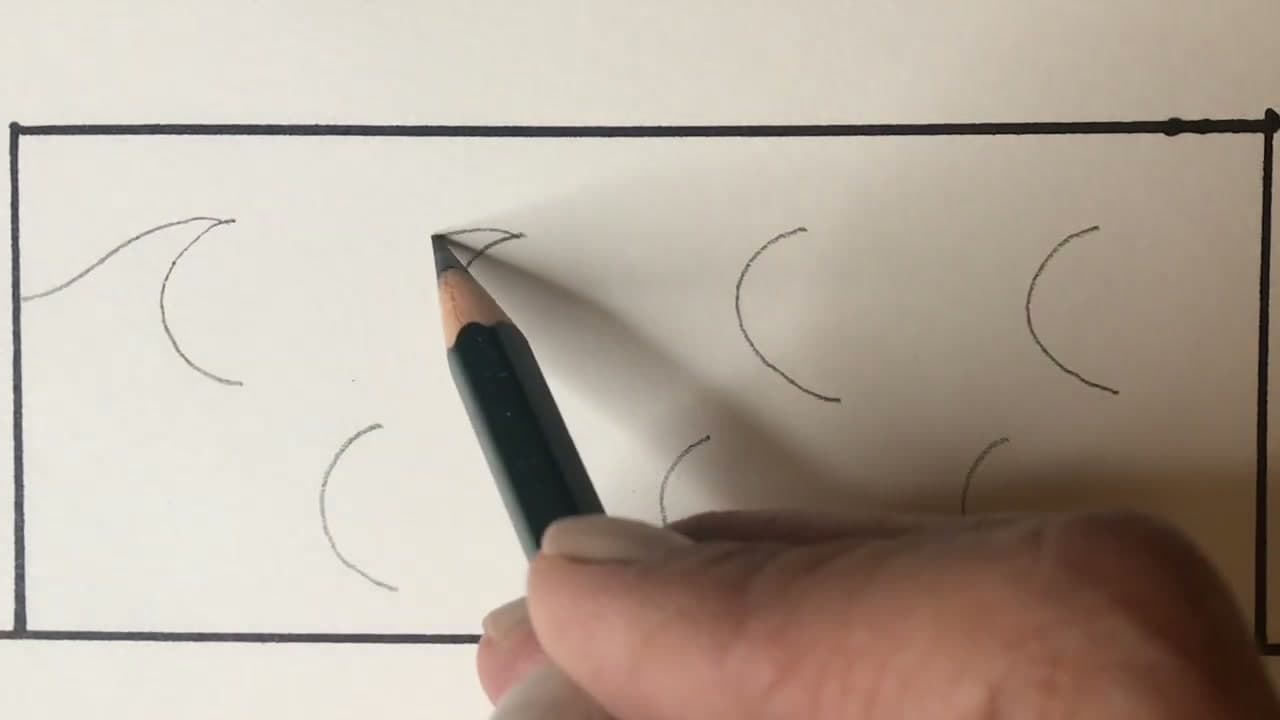
Draw a long rectangle to frame your scene, then turn it sideways. Inside the box, sketch a row of backward C shapes scattered across the paper. Each curl marks where a wave will break. Keep them light and a little uneven. Some high, some low, like real swells rolling in.

Don't fuss over even spacing. A staggered row reads more like moving water than a tidy line ever will. This is your whole map for the drawing, so keep the pencil pressure soft and easy to erase.

Tip

Watch this step and notice how loose her curls are. They don't match each other, and that is exactly what makes the finished waves feel like water.

2

Step 2: Connect the Curls Into Ocean Waves

1:15
Step 2: Step 2: Connect the Curls Into Ocean Waves

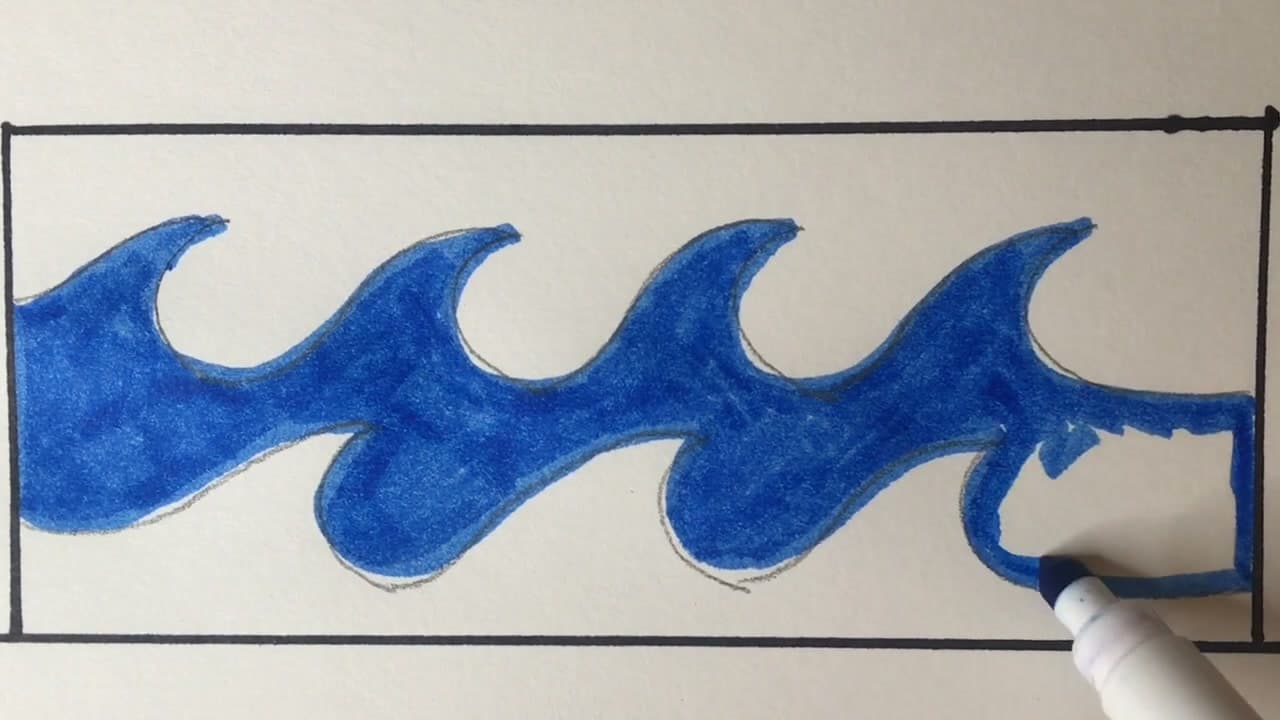
Now join the curls. From the top of each C, pull a long line down and across to the base of the next curl. That sweeping line is the back of one wave flowing into the front of the next. Keep going until the whole row links up into a connected band of ocean waves.

Once the pencil shapes look right, grab a blue marker and start tracing over your outline. Working left to right keeps your hand off the wet ink. The marker locks in the wave edges so the pencil guidelines stop mattering.

Tip

Watch this step to see how the connecting line curves. It dips low between crests, which is what gives each wave that rolling shape.

3

Step 3: Fill the Waves With Blue Marker

1:58
Step 3: Step 3: Fill the Waves With Blue Marker

Color each wave shape in solid with the blue marker. Stay inside your outline and move from the crest down into the trough. The waves stack into one another, so fill one shape fully before sliding over to the next.

Press evenly and overlap your strokes a little to avoid streaks. Marker can look patchy on the first pass, so go back over any thin spots. By the time you finish the row, you should have a band of solid blue ocean waves marching across the box.

Tip

Watch this step for her stroke direction. She follows the curve of each wave instead of scribbling straight across, and the color sits down much smoother for it.

Products used in this step

4

Step 4: Review the Full Wave Pattern

2:10
Step 4: Step 4: Review the Full Wave Pattern

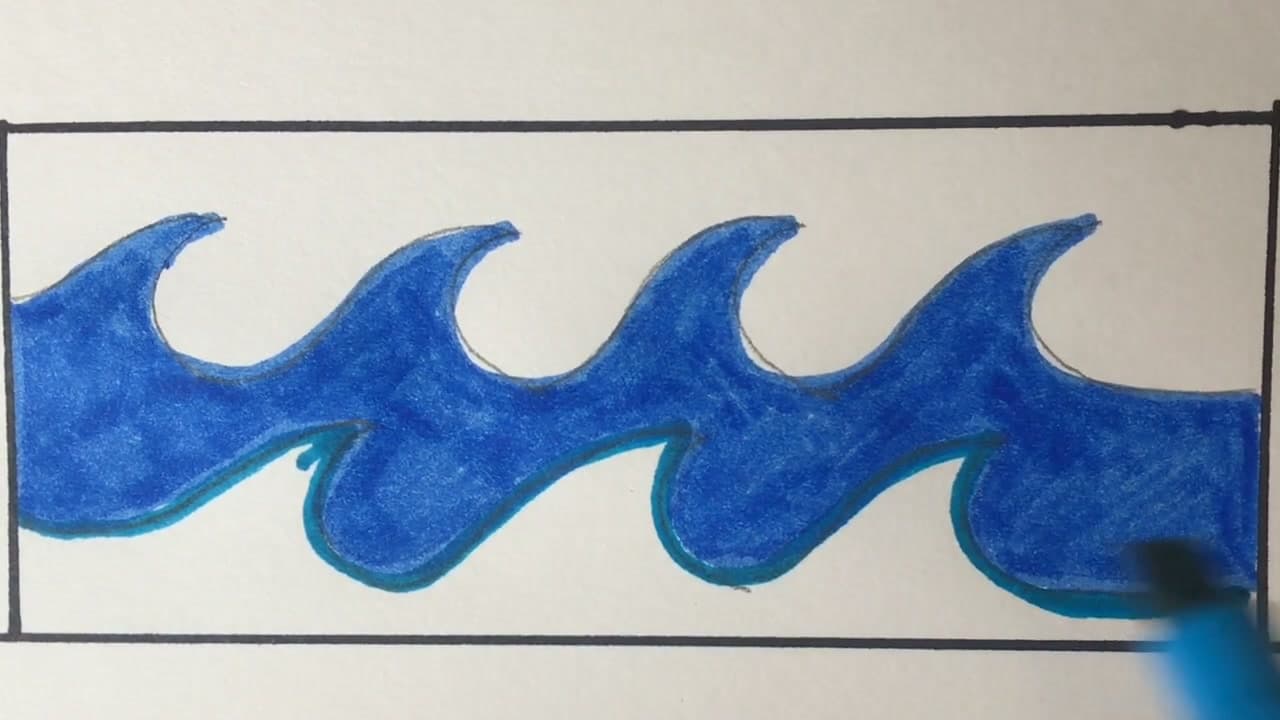
Pause here and look at the whole row. All four ocean waves are blocked in solid blue, and you can finally read the pattern. This is the moment to fix any wave that crowds its neighbor or any crest that feels off.

The shapes are flat right now, and that is fine. Flat blue is the base layer. Everything from here adds depth, light, and detail on top. A clean, even fill at this stage makes the next steps far easier, so touch up any gaps before you reach for the colored pencils.

Tip

Watch this step and compare your row to hers. If your waves are roughly evenly spaced and the crests all curl the same way, you are right on track.

5

Step 5: Add Depth With Teal Colored Pencil

2:45
Step 5: Step 5: Add Depth With Teal Colored Pencil

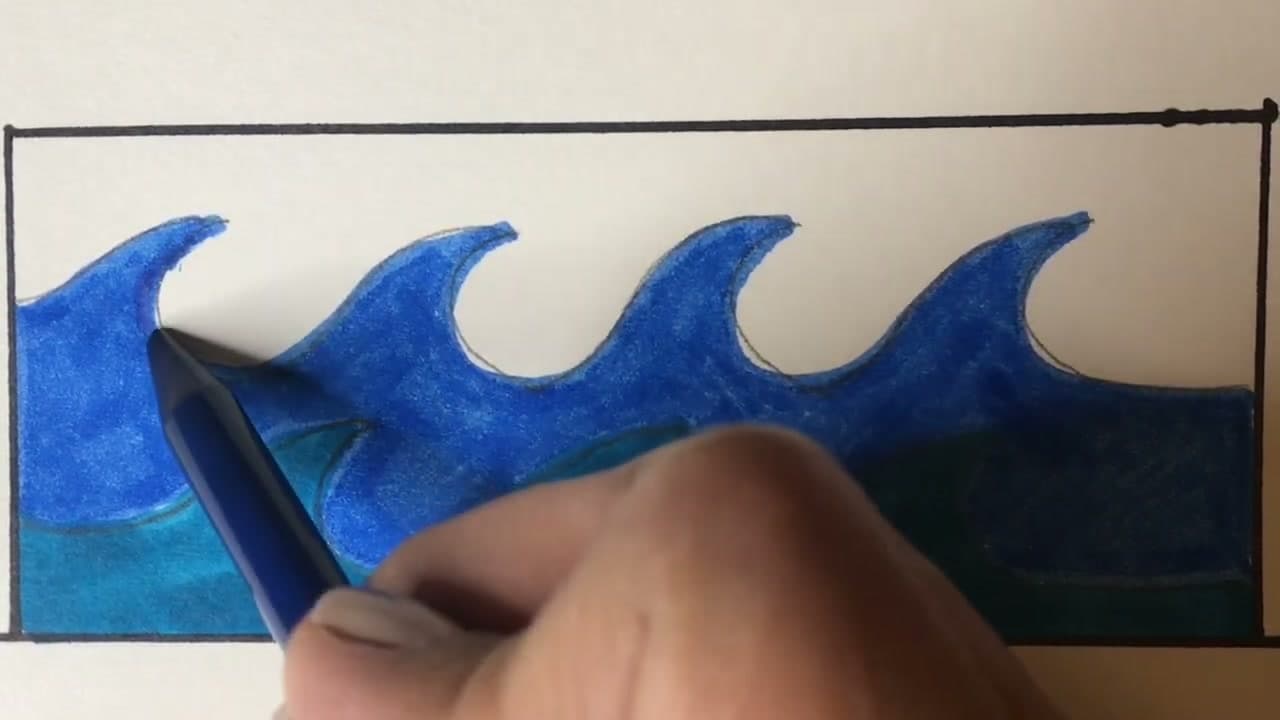
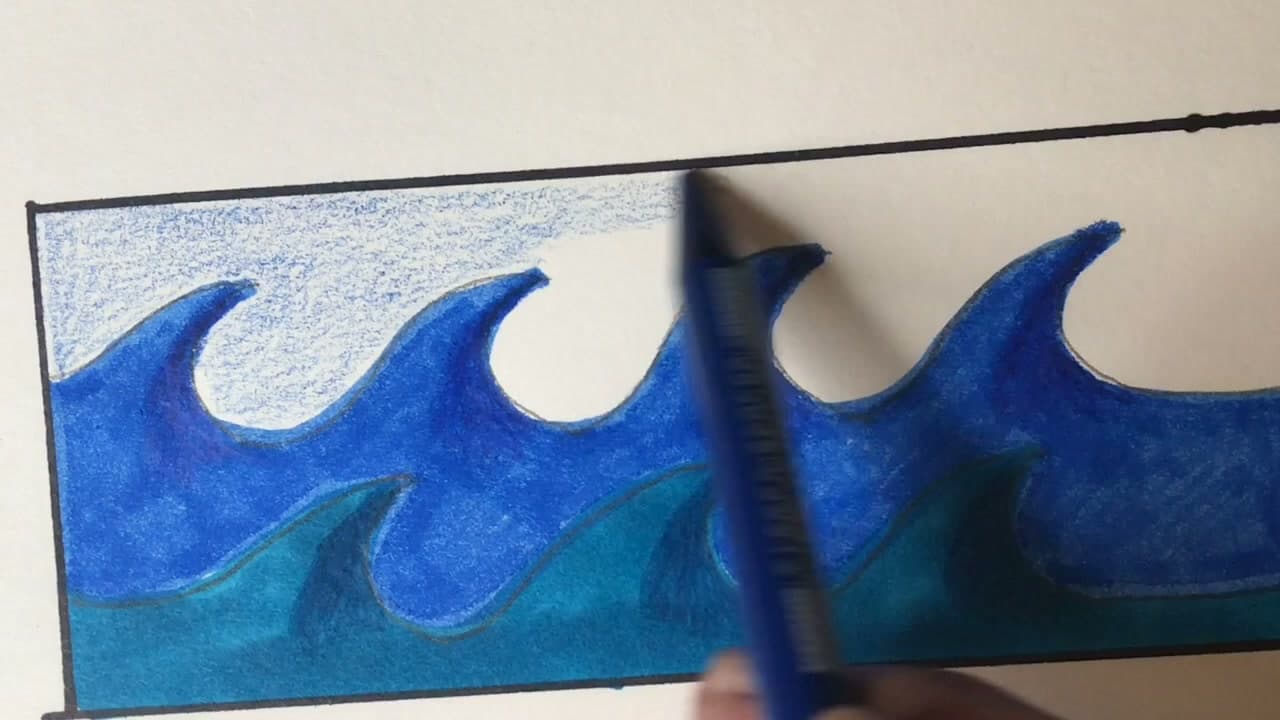
Switch to a teal or darker blue colored pencil. Work it into the troughs and along the bottom of each wave where the water sits deepest. Use a light touch and build the color up in layers instead of pressing hard.

The deeper water gets the most teal, and the curling crests stay brighter blue. That contrast between dark trough and light crest is what makes a flat shape suddenly look like it has volume. Let the pencil glide so it blends into the marker underneath.

Tip

Watch this step to see how light her pressure is. She barely touches the page, layering the teal slowly so it melts into the blue rather than sitting on top of it.

6

Step 6: Shade a Soft Sky Above the Waves

4:00
Step 6: Step 6: Shade a Soft Sky Above the Waves

Fill the open space above the crests with light blue colored pencil. Keep the strokes loose and let the color stay pale near the waves and a touch stronger up top. This soft sky frames the water and turns a row of shapes into a real ocean scene.

You can leave little gaps of bare paper to read as clouds, or smudge the blue smooth with a blending stump for a calmer sky. Edna even works in a hint of warm yellow near the horizon, which gives the whole thing an early sunrise feel.

Tip

Watch this step and keep the sky lighter than the water. If the sky gets as dark as the waves, the ocean stops standing out as the star of the drawing.

7

Step 7: Draw Spiral Swirls and Birds

5:45
Step 7: Step 7: Draw Spiral Swirls and Birds

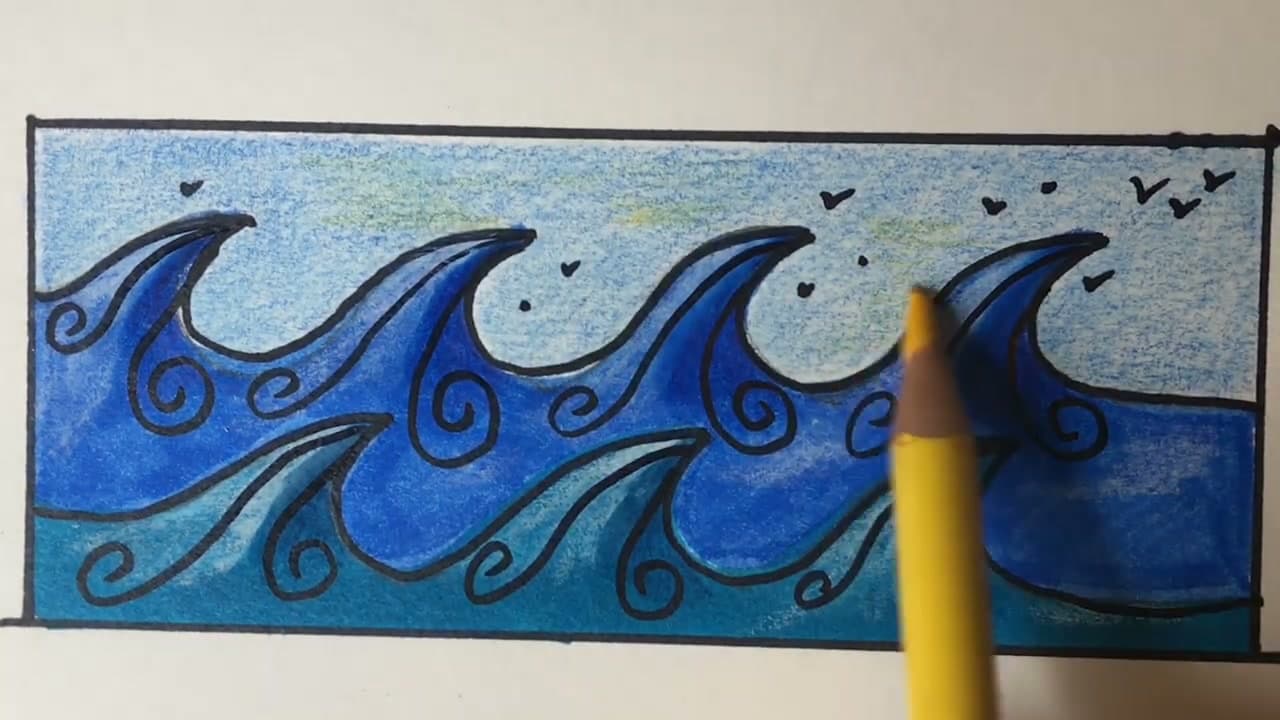
This is the step that makes the waves yours. With a fine marker, draw a little spiral curl tucked inside each wave, like the foam swirling as it breaks. Add a second smaller spiral here and there. The swirls turn plain blue shapes into stylized, decorative waves.

Then send a few birds across the sky. Each one is a simple curved check mark, two short strokes meeting at a point. Scatter them in small clusters near the horizon. They are tiny, but they make the scene feel alive and give your eye somewhere to travel.

Tip

Watch this step for the spiral direction. She curls them the same way the wave breaks, so the swirls follow the motion instead of fighting it.

8

Step 8: Finish and Tidy the Ocean Waves

6:05
Step 8: Step 8: Finish and Tidy the Ocean Waves

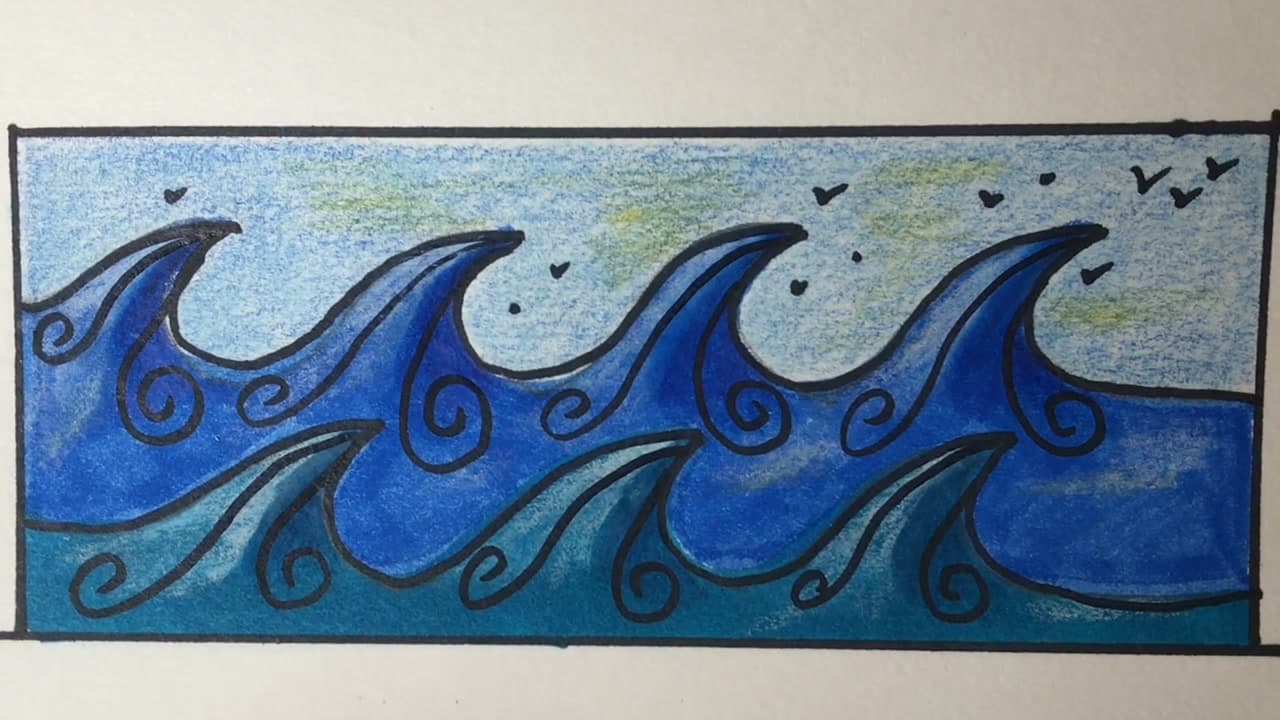
Step back and look at the finished ocean waves. The crests curl in blue, the troughs sink into teal, the sky glows soft above, and the swirls and birds tie it together. Tidy up any rough marker edges and darken the outline of the box if you want a crisp frame.

That is a full ocean wave drawing from a row of simple curls. Sign your corner and you are done. Try it again with greens for a stormy sea, or warm oranges for a sunset wave.

Tip

Watch this step for the final look. Notice how little detail it actually takes. The curls, the swirls, and the gradient do almost all the work.

Products Used

☐ The Checklist

How to Draw Waves: Easy Ocean Waves Step by Step

Tools
4
Materials
3
Steps
8
Video
6 min

Your Guide

ArtByEdna

As an Amazon Associate we earn from qualifying purchases. Links on this page may be affiliate links - clicking them and buying doesn't change your price, but helps support ShowMeStepByStep.

Tags

Test your knowledge

Did the lesson stick? Find out in 2 minutes.

5 quick questions covering what you just read. No signup, no score saved — just a gut check.

Quick reference

Key takeaways from How to Draw Waves: Easy Ocean Waves Step by Step

5 questions, answers, and one-line explanations. Tap to expand.

  1. 1.What simple shape do you start with to build the wave row?

    Answer: A row of small curls

    Starting with a row of curls gives each wave its rolling crest before you connect them.

  2. 2.After sketching the curls, what is the next move?

    Answer: Connect the curls into wave shapes

    Linking the curls turns a row of loops into a continuous run of ocean waves.

  3. 3.The tutorial layers teal colored pencil over the blue marker. Why?

    Answer: To add depth and shadow

    A second cooler tone like teal builds shadow so the water reads as three-dimensional.

  4. 4.Where does the soft sky shading go?

    Answer: Above the waves

    A light wash of sky above the water frames the scene and pushes the waves forward.

  5. 5.What small details finish the drawing and add movement?

    Answer: Spiral swirls and a few birds

    Little spiral swirls suggest sea spray and a couple of birds add life and scale.

Did this work for you?

What's next

Weekly Digest

Liked this crafts tutorial?

Pick the categories you want to hear about. Weekly digest of new step-by-step tutorials. No spam, easy unsubscribe.

Send me tutorials about

We only email about new tutorials. Easy unsubscribe anytime.