How to Make Waffles from Scratch

CookingEasy7:5010 stepsBrowse more →

By ShowMeStepByStepPublished Updated

Based on a video by Natashas Kitchen.

Homemade waffles are one of those weekend things that looks fancy on the plate and takes about ten minutes of actual work. The recipe is a one-bowl batter with pantry staples - eggs, sugar, oil, milk, flour, baking powder, salt, and a splash of vanilla. The whole bowl comes together by the time the waffle iron finishes preheating.

This is Natasha Kravchuk's method from NatashasKitchen.com. The secret is that you don't separate the eggs the way old-school Belgian waffle recipes call for. Instead, you beat the whole eggs with the sugar on high speed for three minutes until they're light and fluffy. That trapped air does the same job that whipped whites would do - tall, airy waffles with crisp edges and a soft middle - with half the dishes.

The same batter works in a Belgian waffle iron, a classic four-square waffle press, or even a hot skillet for pancakes if you don't own a waffle maker. Leftovers freeze beautifully and toast straight from frozen for a fast weekday breakfast. Pair this with pancakes from scratch for a bigger brunch spread or with homemade iced tea for a slower late-morning meal.

Step-by-Step Guide

1

Step 1: Whip the Eggs and Sugar

1:00
Step 1: Step 1: Whip the Eggs and Sugar

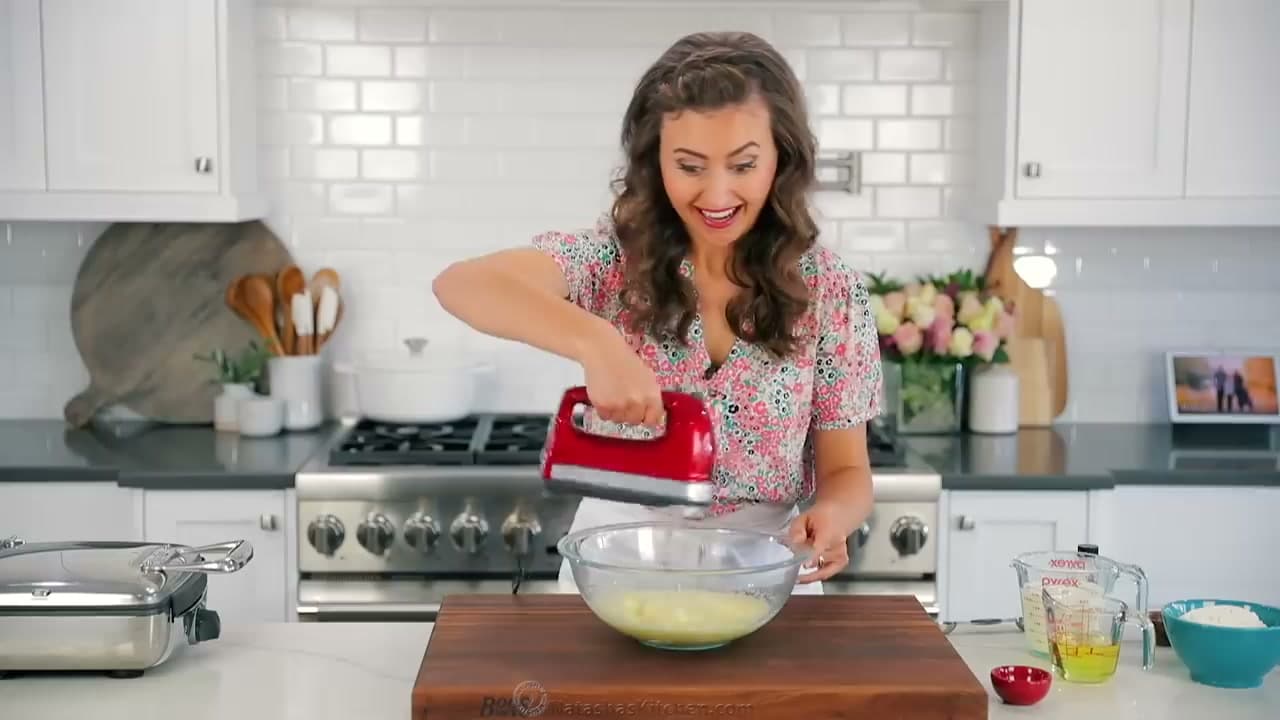
Crack two large eggs into a big mixing bowl. They can go in straight from the fridge - this recipe doesn't need room-temperature ingredients, which is one less thing to plan.

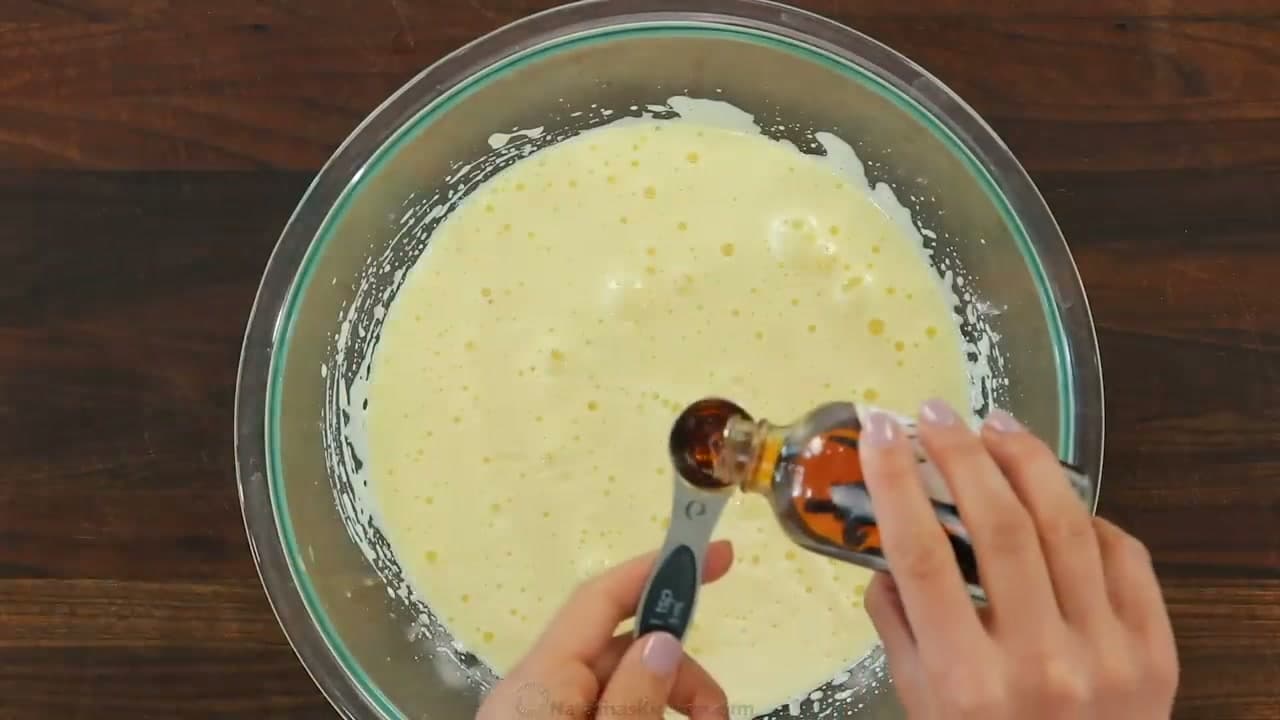
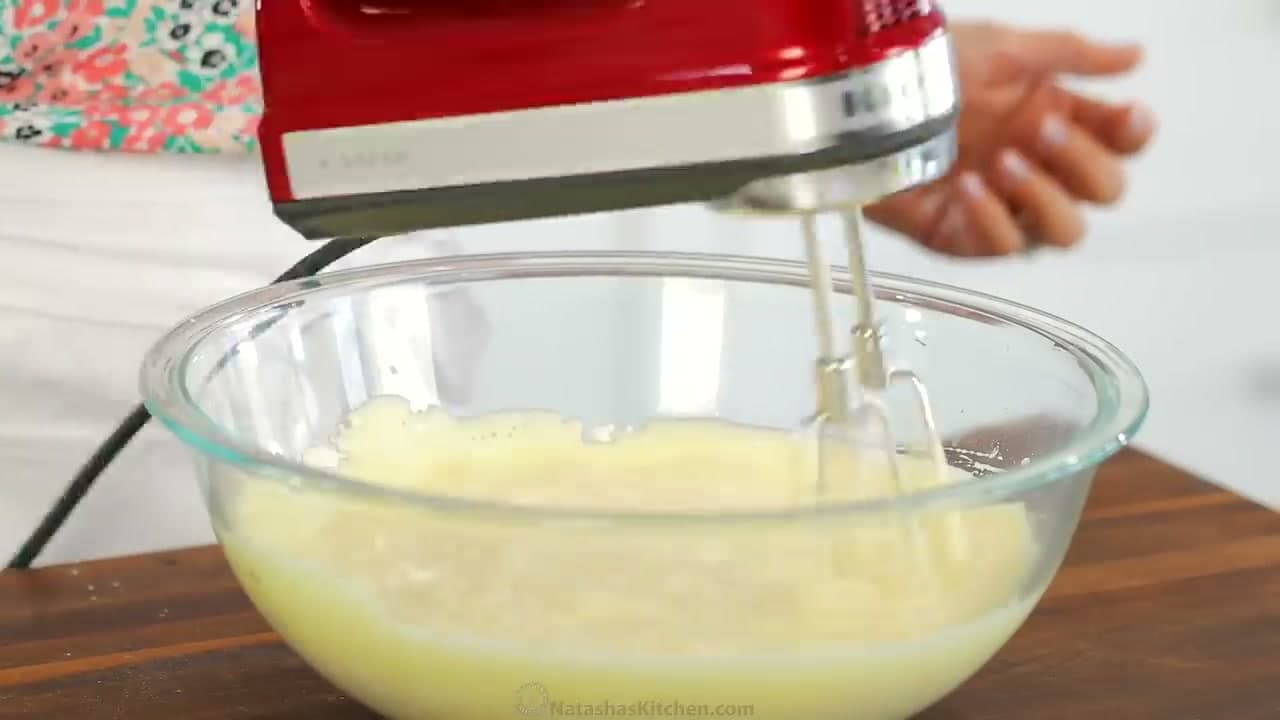
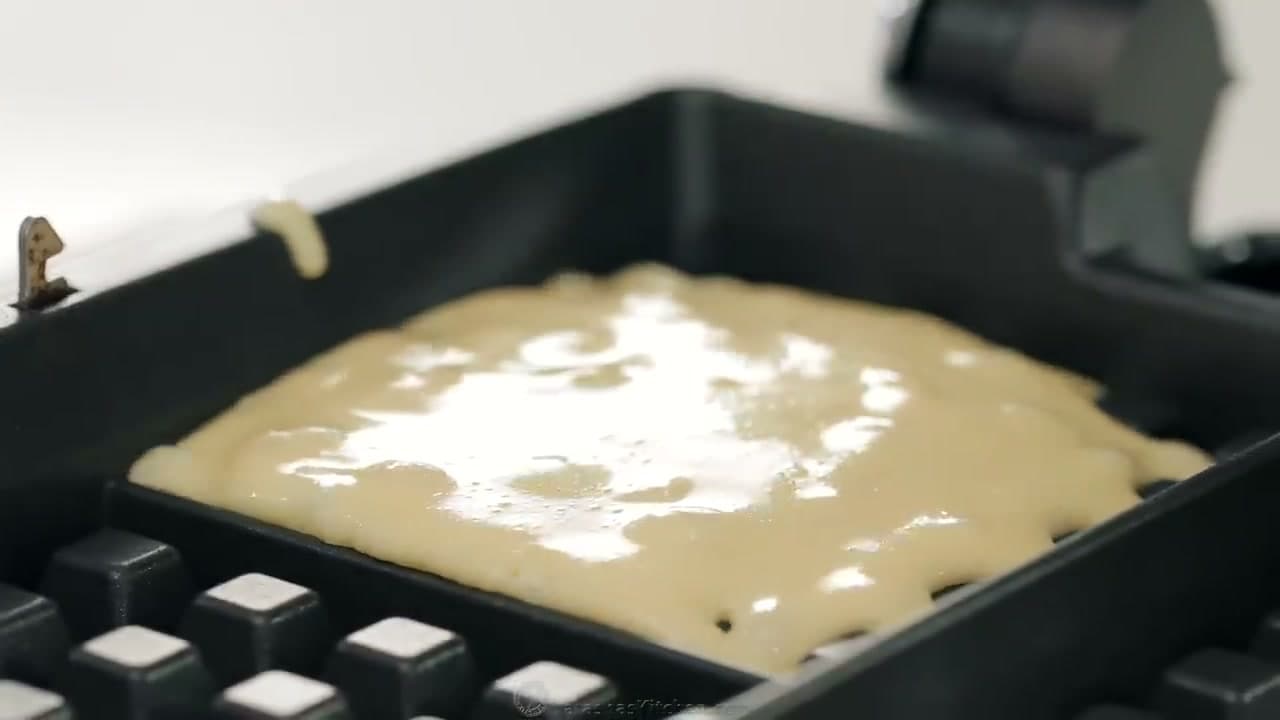
Add two tablespoons of granulated sugar. Take an electric hand mixer and beat the eggs and sugar together on high speed for a full three minutes. You're not just combining them - you're forcing air into the egg whites and yolks so they puff up pale and frothy. That trapped air is what makes the waffles rise tall in the iron without separating the whites.

Tip

Watch this step. Set a kitchen timer for three minutes. You'll be tempted to stop at one or two when it looks fluffy enough - don't. The full three minutes is what makes the waffles rise.

2

Step 2: Add the Oil, Milk, and Vanilla

1:20
Step 2: Step 2: Add the Oil, Milk, and Vanilla

Pour half a cup of light olive oil right into the whipped egg mixture. Canola or any other neutral vegetable oil works just as well. Then pour in one and three-quarters cups of milk - whole, 2%, low-fat, even non-dairy will all work here. Add two teaspoons of pure vanilla extract last.

Mix on low speed just to combine. You don't need to beat it again - the whipped eggs are already doing the lifting work. The mixture will look thin and pale yellow, which is exactly right.

Tip

Watch this step. Real vanilla extract is worth it here - imitation vanilla tastes faintly chemical against the buttery waffle. A bottle lasts months.

3

Step 3: Whisk the Dry Ingredients Separately

1:40
Step 3: Step 3: Whisk the Dry Ingredients Separately

In a small separate bowl, measure out two cups of all-purpose flour, four teaspoons of baking powder, and a quarter teaspoon of fine salt. Spoon the flour into the measuring cup and sweep it level with a knife - don't pack it down, or the waffles will come out dense.

Whisk the dry ingredients together until evenly mixed. This step matters more than it looks. Baking powder clumps if it sits in the can, and a chunk of pure baking powder in one waffle tastes bitter and metallic. Thirty seconds with a whisk solves the problem.

Tip

Watch this step. Check the expiration date on your baking powder. Once it's past, it stops fizzing and the waffles come out flat. A fresh can is a dollar at the grocery store.

4

Step 4: Combine and Stop While Lumps Remain

1:55
Step 4: Step 4: Combine and Stop While Lumps Remain

Tip the dry ingredients into the bowl of wet ingredients. Switch the mixer to its lowest speed and mix only until the flour disappears into the batter and the texture is fairly smooth - 20 to 30 seconds.

You should still see small lumps. Leave them. Over-mixing develops the gluten in the flour, and gluten is what makes waffles tough and rubbery instead of tender. The lumps will smooth out on their own as the batter rests for a minute while the iron heats up.

Tip

Watch this step. Lumpy batter, tender waffles. Smooth batter, rubbery waffles. It feels wrong but it's right - stop mixing the second the flour is mostly hidden.

5

Step 5: Preheat the Waffle Iron

2:22
Step 5: Step 5: Preheat the Waffle Iron

Plug in your waffle iron and let it come up to temperature. Belgian-style irons make tall, deep-pocket waffles; classic four-square presses make thinner, crispier ones - the same batter works in both, so use whichever you own.

Set the heat dial to about three and a half out of five if your iron has a range. That's the sweet spot for golden-brown crust without burning the surface. If the iron has a ready light or beep, wait for it before you start pouring batter.

Tip

Watch this step. A nonstick iron usually doesn't need greasing. If yours is older or sticks easily, a light spray of cooking oil or a brushed-on swipe of melted butter is enough.

6

Step 6: Pour and Cook

2:50
Step 6: Step 6: Pour and Cook

Spoon or pour enough batter onto the hot iron to just barely fill the bottom grid - the batter spreads as the lid closes, so a little less is better than a little more. Over-filling makes the batter ooze out the sides and burn against the hinge.

Close the lid and let the timer or indicator light run its course. For most irons that's three to five minutes. You'll know it's done when the steam stops billowing out the sides and the waffle is deep golden through the vents.

Tip

Watch this step. The first waffle is usually a sacrifice waffle - it tells you whether the heat is right. Adjust the dial after that one if it's pale or too dark.

7

Step 7: Transfer and Keep Warm

3:15
Step 7: Step 7: Transfer and Keep Warm

Lift the cooked waffle out with a fork or wooden tongs - skip metal forks if you have a nonstick iron. Move it onto a wire cooling rack rather than stacking on a plate, which traps steam and turns the crust soft.

If you're cooking a full batch and want to serve everyone hot, slide the finished waffles onto a baking sheet and pop them into a 175 F oven. The low heat keeps them crisp and warm for 20 to 30 minutes without drying them out. Repeat with the rest of the batter.

Tip

Watch this step. The wire rack matters. Stacked waffles steam each other within two minutes and lose all their crunch.

8

Step 8: Add Mix-Ins for Flavor Variations

3:35
Step 8: Step 8: Add Mix-Ins for Flavor Variations

The base batter takes mix-ins beautifully if you want to dress it up. Fold a half cup of fresh blueberries gently into the batter and stir just to distribute. If you're using frozen blueberries, toss them in a teaspoon of flour first so they don't bleed purple streaks through the batter.

Mini chocolate chips are the kid-favorite version - a half cup mixed in turns it into dessert for breakfast. The third option is the smartest one: zest half a lemon directly into the batter for a bright, fancy-tasting waffle that still goes with maple syrup.

Tip

Watch this step. Mix the add-ins into a portion of the batter, not the whole bowl, if you want a few of each variation. The chocolate-chip ones look the same on the outside but taste totally different.

9

Step 9: Freeze the Leftovers

5:05
Step 9: Step 9: Freeze the Leftovers

Cool any leftover waffles fully on the wire rack before bagging - warm waffles in a sealed bag steam each other into mush. Once cool, stack them in a freezer-safe zip-top bag with the air pressed out.

From frozen they reheat in about two minutes in the toaster on a medium setting or three to four minutes in an air fryer at 350 F. No thawing needed, no microwave required, no sogginess. This is the move that turns a Saturday cook session into a week of fast school-morning breakfasts.

Tip

Watch this step. Slip a piece of parchment between every two waffles in the bag if you want to grab one at a time without prying. They freeze for up to three months.

10

Step 10: Serve with Berries and Maple Syrup

5:45
Step 10: Step 10: Serve with Berries and Maple Syrup

Stack three or four waffles on a plate. Pile the top with whatever fresh berries are in season - blueberries, blackberries, sliced strawberries, raspberries. Frozen berries work too if you let them thaw on a paper towel first so they don't pool juice.

Finish with a slow pour of real maple syrup. Listen for the crunch when you cut in - that crisp shell against the airy middle is the whole point of homemade. For a savory version, swap the berries and syrup for sliced avocado and a poached egg with paprika, and the same waffle becomes lunch.

Tip

Watch this step. Real maple syrup beats pancake syrup every time - look for one ingredient on the label. A small bottle of grade-A amber goes a long way.

Products Used

❖ The Recipe

How to Make Waffles from Scratch

American
Serves
Makes 8 to 10 Belgian waffles
Prep
10 min
Cook
20 min
Total
30 min

Ingredients

9 items
  • 2large eggsstraight from the fridge - no need to bring to room temperature
  • 2 Tbspgranulated sugar
  • 1/2 cuplight olive oil, canola, or vegetable oilany neutral oil works
  • 1 3/4 cupsmilkany kind - whole, 2%, low-fat, or non-dairy
  • 2 tsppure vanilla extract
  • 2 cupsall-purpose flour250 g; spoon into the cup and level off, don't pack
  • 4 tspbaking powderdouble-acting; check the date on the can
  • 1/4 tspfine salt
  • to servefresh berries and real maple syrupblueberries, strawberries, blackberries; warm syrup is even better

Method

  1. 1
    Step 1: Whip the Eggs and Sugar. Crack two large eggs into a big mixing bowl.
  2. 2
    Step 2: Add the Oil, Milk, and Vanilla. Pour half a cup of light olive oil right into the whipped egg mixture.
  3. 3
    Step 3: Whisk the Dry Ingredients Separately. In a small separate bowl, measure out two cups of all-purpose flour, four teaspoons of baking powder, and a quarter teaspoon of fine salt.
  4. 4
    Step 4: Combine and Stop While Lumps Remain. Tip the dry ingredients into the bowl of wet ingredients.
  5. 5
    Step 5: Preheat the Waffle Iron. Plug in your waffle iron and let it come up to temperature.
  6. 6
    Step 6: Pour and Cook. Spoon or pour enough batter onto the hot iron to just barely fill the bottom grid - the batter spreads as the lid closes, so a little less is better than a little more.
  7. 7
    Step 7: Transfer and Keep Warm. Lift the cooked waffle out with a fork or wooden tongs - skip metal forks if you have a nonstick iron.
  8. 8
    Step 8: Add Mix-Ins for Flavor Variations. The base batter takes mix-ins beautifully if you want to dress it up.
  9. 9
    Step 9: Freeze the Leftovers. Cool any leftover waffles fully on the wire rack before bagging - warm waffles in a sealed bag steam each other into mush.
  10. 10
    Step 10: Serve with Berries and Maple Syrup. Stack three or four waffles on a plate.
☐ The Checklist

How to Make Waffles from Scratch

Tools
11
Materials
11
Steps
10
Video
8 min

Your Guide

Natashas Kitchen

As an Amazon Associate we earn from qualifying purchases. Links on this page may be affiliate links - clicking them and buying doesn't change your price, but helps support ShowMeStepByStep.

Tags

What's next

Related collections

Curated theme pages that include this tutorial.

Weekly Digest

Liked this cooking tutorial?

Pick the categories you want to hear about. Weekly digest of new step-by-step tutorials. No spam, easy unsubscribe.

Send me tutorials about

We only email about new tutorials. Easy unsubscribe anytime.