How to Make Cornbread in 7 Steps

CookingEasy5:597 steps

By ShowMeStepByStepPublished Updated

Based on a video by Food Wishes.

Cornbread is one of those side dishes that earns its spot on the table without any drama. You whisk a few pantry staples together, pour the batter into a hot buttered skillet, and 25 minutes later you have a golden, tender slab of bread that pairs with everything from chili to ribs. Chef John's cast iron version uses honey instead of sugar and a generous amount of butter, which gives the crust that signature crackle.

This recipe works whether you have a cast iron skillet or not, but the skillet gives you a crisp buttery edge that's worth the upgrade. Serving it alongside oven ribs or a bowl of homemade coleslaw turns a weeknight dinner into a full cookout spread.

You'll bring the batter together in one bowl, transfer it into the hot pan, and let the oven do the rest. No mixer, no fuss. Read each step before you start so the timing on the butter and the oven preheat lines up.

Step-by-Step Guide

1

Step 1: Melt Butter in the Cast Iron Skillet

0:38
Step 1: Step 1: Melt Butter in the Cast Iron Skillet

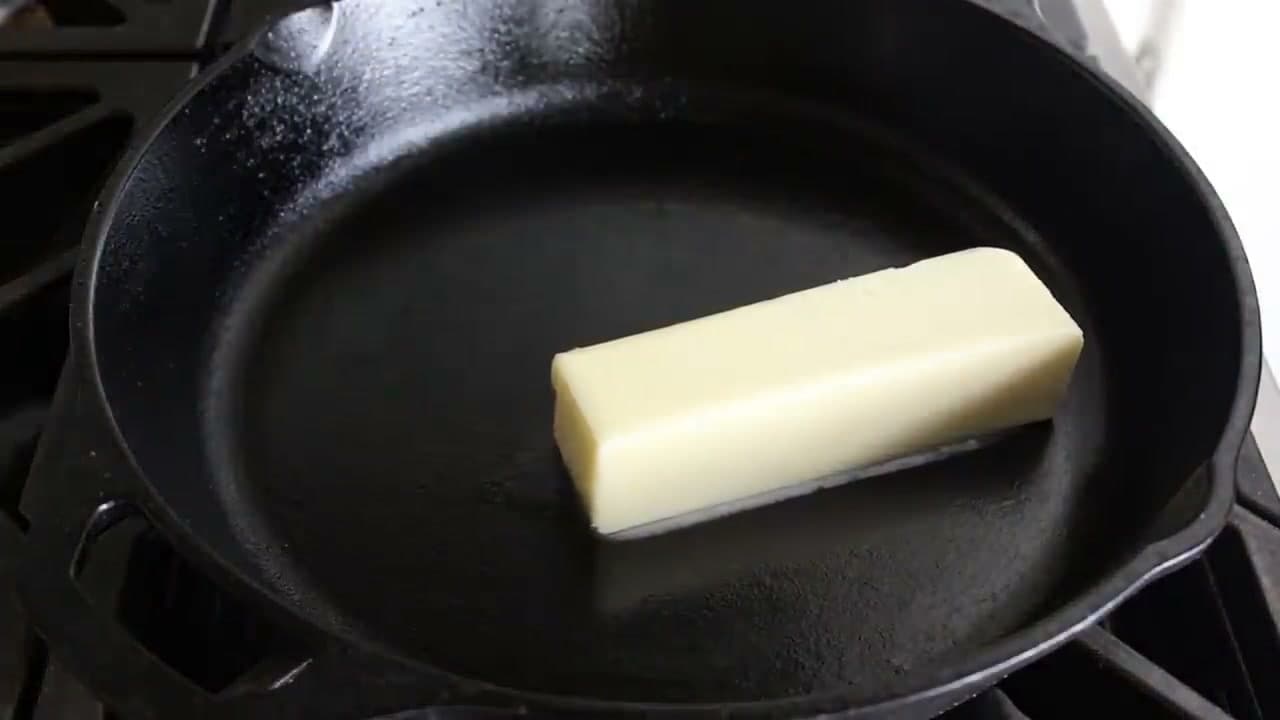
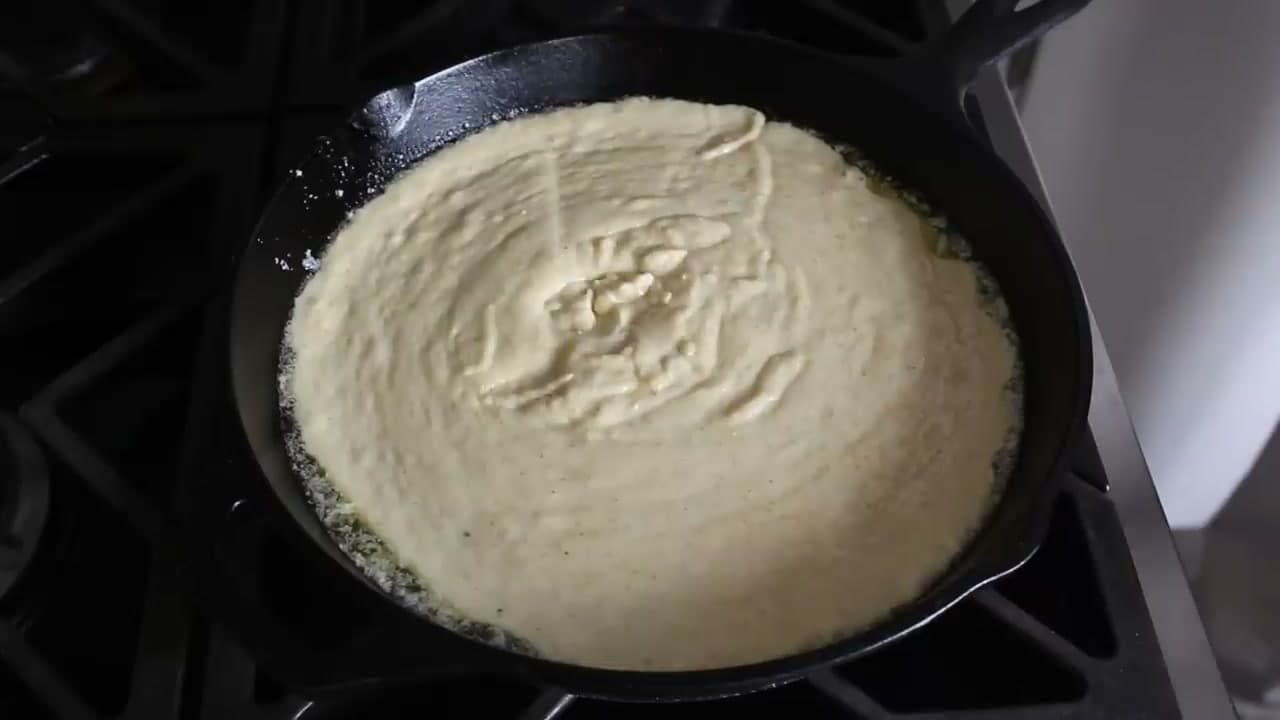
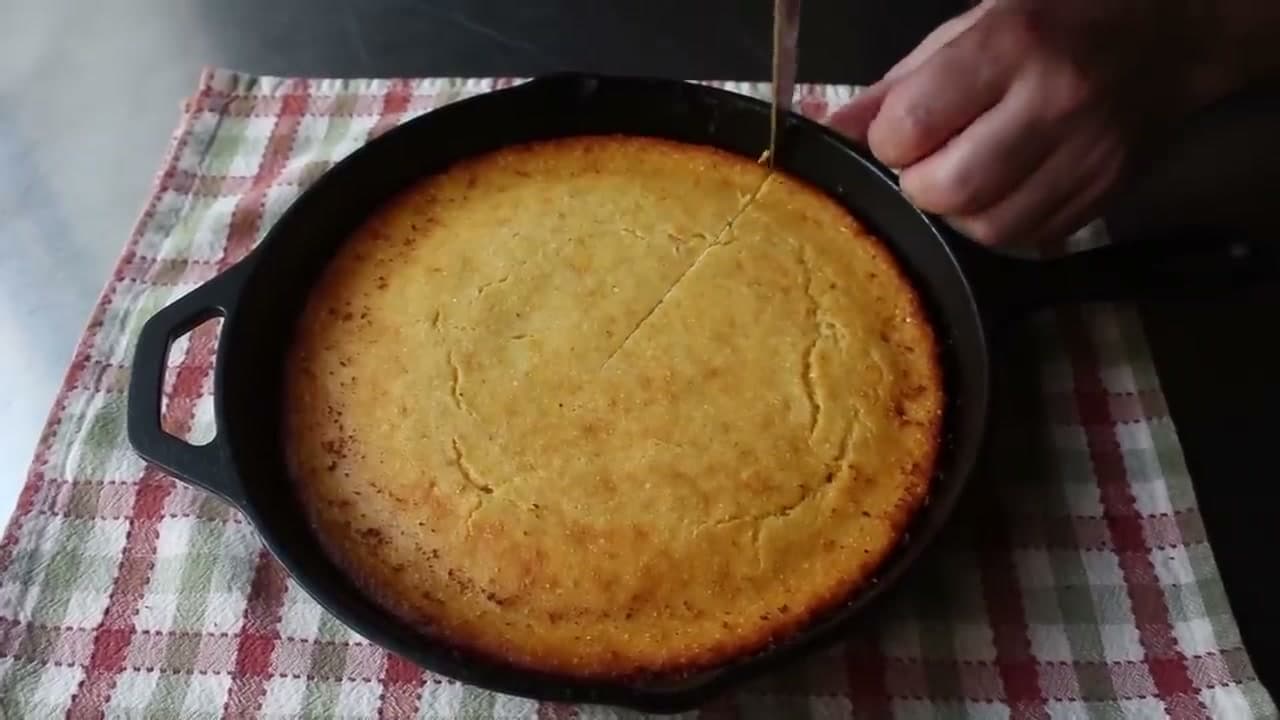
Set a 10-inch cast iron skillet over medium heat and drop in a stick of butter. As it melts, preheat the oven to 400 degrees so the pan is ready when the batter is. Once the butter is fully melted, kill the heat and let half of it stay in the pan. You'll use the other half in the batter. That hot buttered pan is what gives cornbread its crackly bottom crust, so don't skip the preheat.

Tip

No cast iron? A 9-inch metal cake pan or oven-safe nonstick skillet works fine. The flavor is the butter and honey, not the pan.

3

Step 3: Add the Honey

1:28
Step 3: Step 3: Add the Honey

Drizzle the honey straight into the cornmeal. Chef John prefers honey over white or brown sugar because it adds a softer floral note that plays well with the buttermilk tang. Pour by eye - a quarter cup is the target, but a tablespoon more or less won't break anything. If you only have sugar, that works too.

Products used in this step

4

Step 4: Whisk in the Eggs and Buttermilk

1:45
Step 4: Step 4: Whisk in the Eggs and Buttermilk

Crack two large eggs into the bowl and pour in the buttermilk. How much buttermilk you add here determines the final texture - more buttermilk gives you a moist, tender cornbread, while less gives you a drier, crumblier old-school version. A cup and a quarter is a good middle ground. Whisk until the batter is mostly smooth.

Tip

No buttermilk? Stir a tablespoon of lemon juice or vinegar into a cup of regular milk and let it sit for 5 minutes.

5

Step 5: Stir in the Flour and Remaining Butter

2:30
Step 5: Step 5: Stir in the Flour and Remaining Butter

Add the self-rising flour to the bowl and pour in half of that melted butter from the skillet. Whisk gently until the flour disappears. Don't beat it. The more you mix flour-based batters, the more gluten you develop, and gluten makes cornbread chewy instead of tender. A few small lumps are fine. Stop the moment the streaks of dry flour are gone.

Tip

If you only have all-purpose flour, add 2 teaspoons of baking powder and a half teaspoon of baking soda to the bowl with it.

6

Step 6: Pour the Batter into the Hot Skillet

3:15
Step 6: Step 6: Pour the Batter into the Hot Skillet

Scrape the batter into the buttered cast iron skillet using a spatula. You should hear the edges sizzle the moment they hit the pan. That sizzle is the crust forming. Smooth the top out with the back of the spatula so the batter sits evenly across the pan. Don't bang the pan to flatten it. Let the heat do the work in the oven.

Products used in this step

7

Step 7: Bake, Cool, and Slice

4:30
Step 7: Step 7: Bake, Cool, and Slice

Transfer the skillet to the center of the 400-degree oven and bake for about 25 minutes. The top should be deep golden with a few darker caramelized spots from the browned milk solids in the butter. A toothpick stuck in the middle should come out clean. Let the pan rest 10 minutes before slicing - cutting baked goods too hot tears them up. Cut into wedges and spread a little softened butter on top. A drizzle of extra honey doesn't hurt either.

Tip

Leftover cornbread stays good wrapped at room temperature for two days, or sliced and frozen for a month. Reheat under foil at 300 degrees so it doesn't dry out.

Products Used

❖ The Recipe

How to Make Cornbread in 7 Steps

American
Serves
Makes 8 cornbread wedges (one 10-inch cast iron skillet)
Prep
10 min
Cook
25 min
Total
35 min

Ingredients

9 items
  • 1.5 cupsstone-ground yellow cornmeal
  • 0.5 cupself-rising flouror all-purpose flour with 2 tsp baking powder added
  • 1 tspkosher salt
  • 1 pinchcayenne pepper
  • 0.25 cuphoneyor sub white or brown sugar
  • 2large eggs
  • 1.25 cupsbuttermilkuse less for a drier, crumblier texture
  • 0.5 cupunsalted buttersplit: half in the batter, half stays in the hot skillet
  • 2 tbspsoftened butter for servingoptional, spread on top of warm slices

Nutrition

estimated · per servingEstimated from the ingredient list, not measured. Actual values vary by brand, preparation, and serving size. Not a substitute for measured nutrition data.
Calories
240kcal
Protein
5g
Fat
10g
Carbs
33g
Fiber
2g
Sugar
5g
Sodium
440mg

Method

  1. 1
    Step 1: Melt Butter in the Cast Iron Skillet. Set a 10-inch cast iron skillet over medium heat and drop in a stick of butter.
  2. 2
    Step 2: Combine the Dry Ingredients. Pour the cornmeal into a large mixing bowl.
  3. 3
    Step 3: Add the Honey. Drizzle the honey straight into the cornmeal.
  4. 4
    Step 4: Whisk in the Eggs and Buttermilk. Crack two large eggs into the bowl and pour in the buttermilk.
  5. 5
    Step 5: Stir in the Flour and Remaining Butter. Add the self-rising flour to the bowl and pour in half of that melted butter from the skillet.
  6. 6
    Step 6: Pour the Batter into the Hot Skillet. Scrape the batter into the buttered cast iron skillet using a spatula.
  7. 7
    Step 7: Bake, Cool, and Slice. Transfer the skillet to the center of the 400-degree oven and bake for about 25 minutes.

Your Guide

Food Wishes

As an Amazon Associate we earn from qualifying purchases. Links on this page may be affiliate links - clicking them and buying doesn't change your price, but helps support ShowMeStepByStep.

Tags

Related Tutorials

Weekly Digest

Liked this cooking tutorial?

Pick the categories you want to hear about. Weekly digest of new step-by-step tutorials. No spam, easy unsubscribe.

Send me tutorials about

We only email about new tutorials. Easy unsubscribe anytime.