How to Carve a Ham

CookingEasy4:217 stepsPart of Cooking BasicsBrowse more →
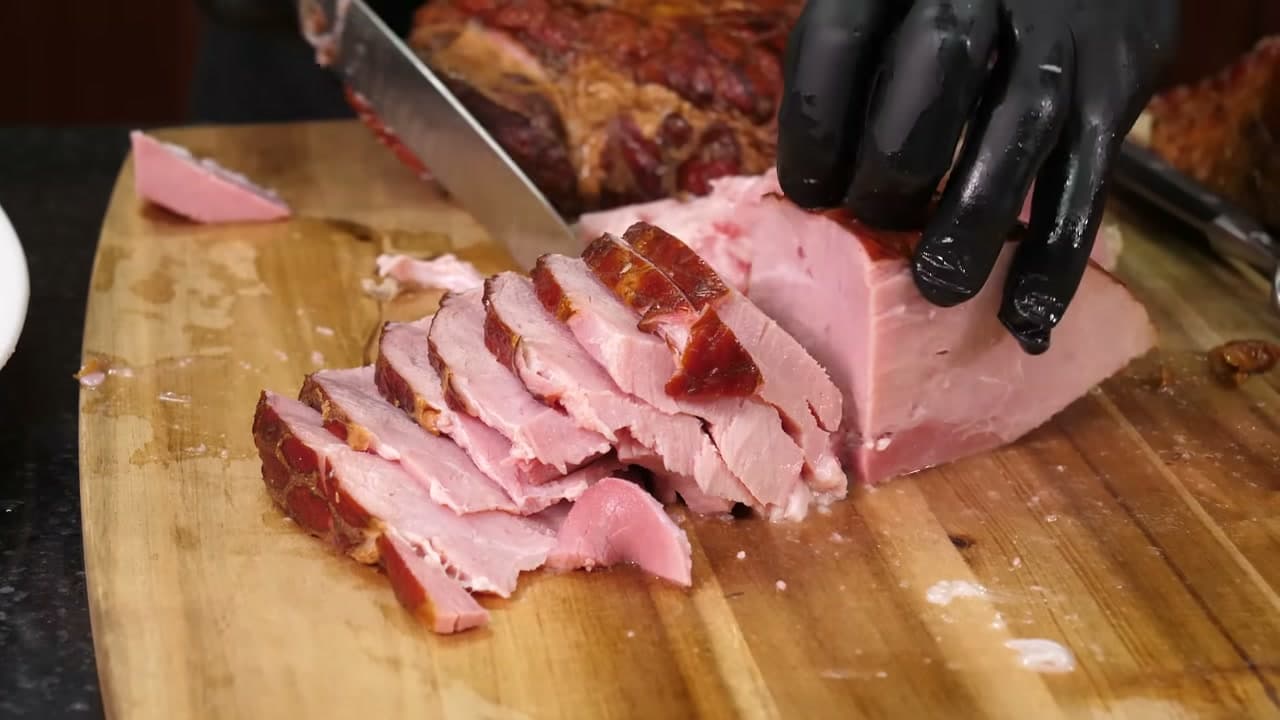
The finished result: How to Carve a Ham

By ShowMeStepByStepPublished

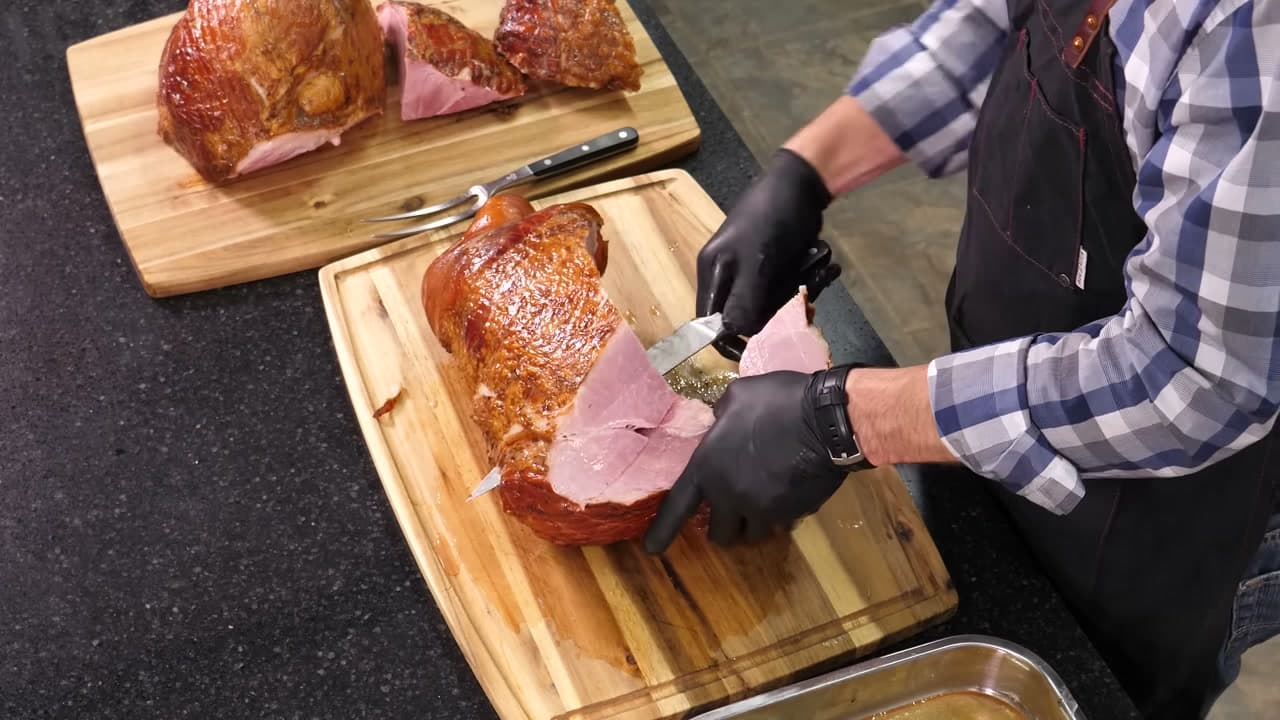
Based on a video by Frick's Quality Meats, Inc.

A whole bone-in ham looks like a problem the first time one lands on your counter. It is heavy, it is round, and there is a bone somewhere in the middle of it that you cannot see. The fix is to stop thinking of it as slicing and start thinking of it as two jobs: take the meat off the bone in big pieces, then slice those pieces.

Dave Frick of Frick's Quality Meats, Inc. does exactly that in under five minutes. He finds the aitch bone with the tip of his knife, rides the blade down it to the cutting board, and lifts off a five pound boneless chunk. Three or four cuts later the bone is bare and every slice after that happens on a flat piece of meat.

One thing to sort out before you start: a spiral cut ham is already sliced from the factory and only needs the bone released, while a whole bone-in ham needs the full sequence below. Check the cut face of yours. If you see slice lines running all the way through, you bought the spiral.

The two rules that carry the whole thing are cut along the bone and slice across the grain. Same rules as carving a turkey, different animal. Your edge does the rest, so it pays to sharpen your knives the day before. Save the pan drippings while you are at it and turn them into gravy for the table.

What you'll need

Step-by-Step Guide

7 steps · about 4 minutes.Check off each step as you go and your progress saves automatically.

1

Press the Knife Into the Ham to Find the Bone

0:33
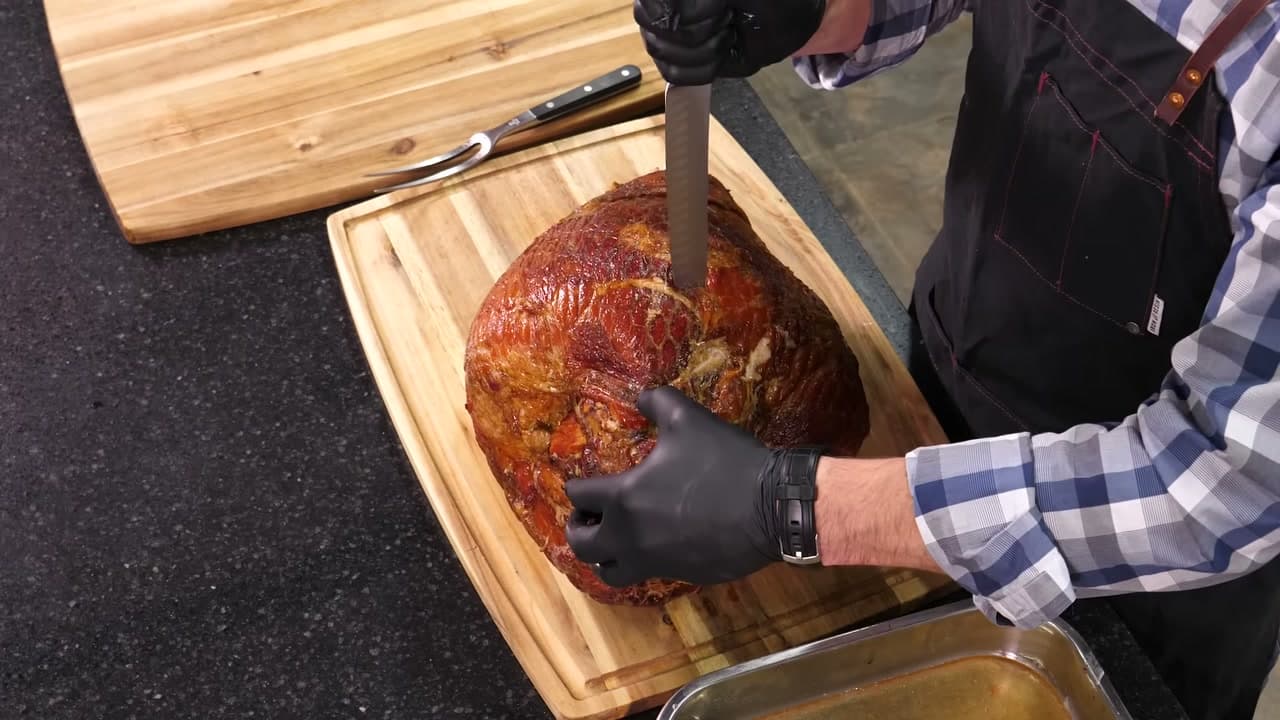
Step 1: Press the Knife Into the Ham to Find the Bone - How to Carve a Ham

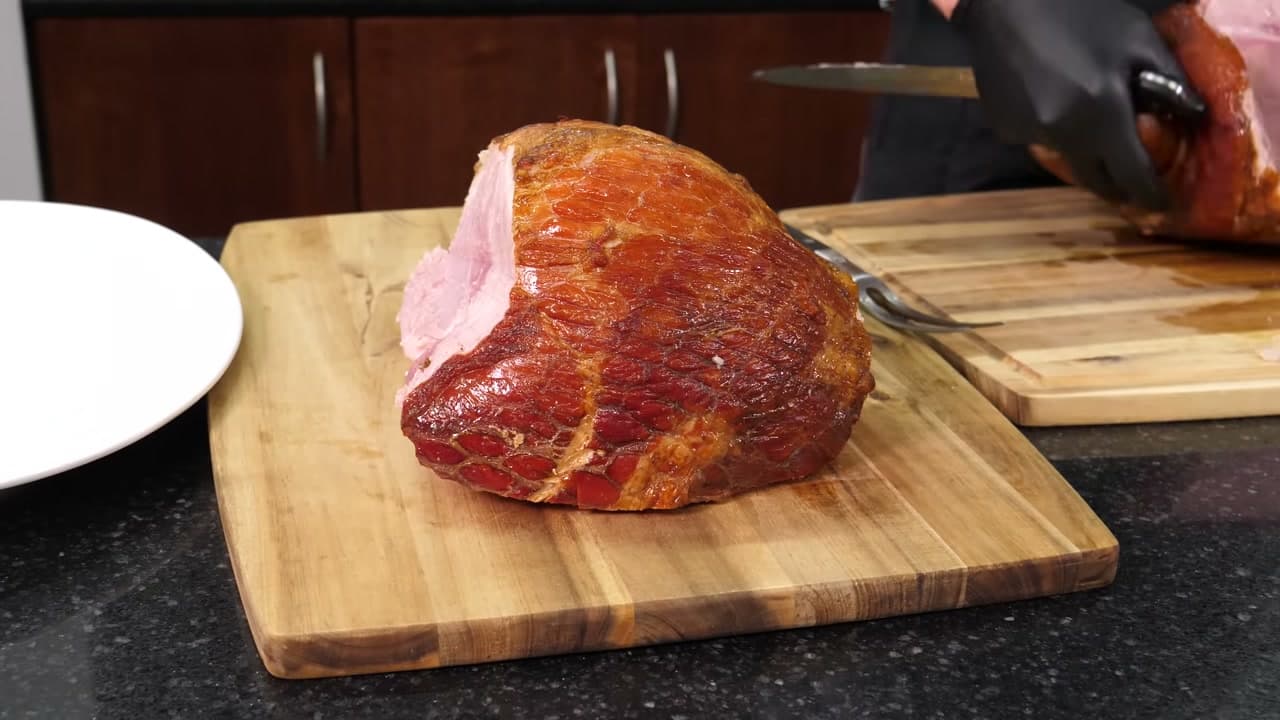
Set the ham on a big board with the fat side up and give it a minute before you cut anything. There are two bones in there. The aitch bone is a wedge of hip near the wide end, and the leg bone runs the length of the ham away from it.

Press the tip of your knife straight down in a few spots across the top until it stops on something hard. That is your map. Everything after this is a cut that rides along one of those two bones.

Tip

Bought a spiral cut ham instead? It is already sliced all the way through, so skip ahead: run your knife around the bone once to release the slices and lift them off in sections. The steps below are for a whole bone-in ham.
2

Cut Straight Down the Aitch Bone to the Board

0:58
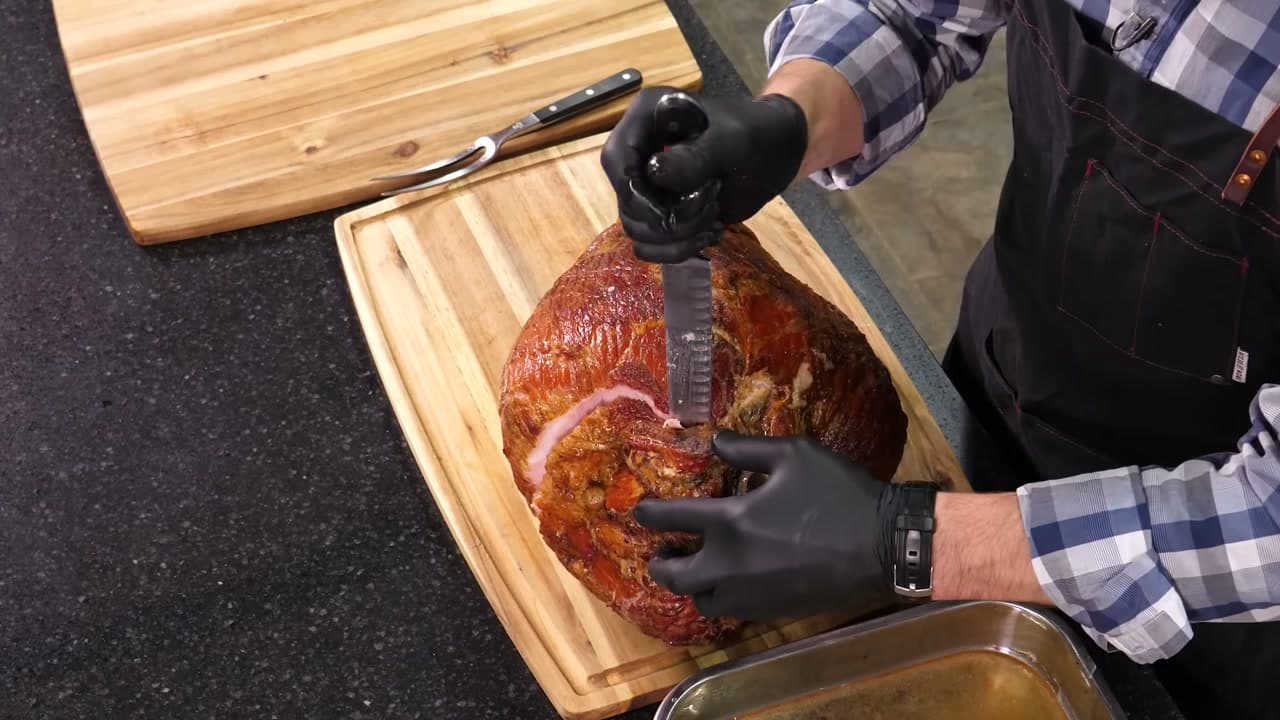
Step 2: Cut Straight Down the Aitch Bone to the Board - How to Carve a Ham

Start the blade right against the aitch bone and push it straight down until you feel the board underneath. Keep the edge in contact with the bone the whole way. Dave Frick treats this as one long cut, not a sawing motion.

You are not slicing the ham yet. This cut separates a whole section of meat from the skeleton, which turns a bone-in ham into a boneless one you can handle on a flat surface.

Tip

A dull knife wanders off the bone and leaves meat behind. Run yours over a steel before you start and again halfway through.

Used in this stepboning knife
3

Lift the First Boneless Piece Onto a Second Board

1:18
Step 3: Lift the First Boneless Piece Onto a Second Board - How to Carve a Ham

Turn the blade and follow the leg bone back toward the hock, staying tight against it, then go down to the board again. The section comes away in one piece. On a full size ham that first chunk runs around five pounds.

Move it to a second board and leave the bone where it is. All of the slicing happens on these free pieces, which is the whole trick. Nobody carves neat slices while fighting a bone.

Tip

Watch where the point of the knife is aimed as you come around the curve of the bone. Turn the ham instead of turning your wrist toward yourself.

4

Work the Knife Around the Bone for the Next Piece

1:42
Step 4: Work the Knife Around the Bone for the Next Piece - How to Carve a Ham

Rotate the ham and make the same cut on the next face. Down at the aitch bone, along the leg bone, out to the board. Another big boneless piece drops free. Do it once or twice more until the bone is bare on every side.

There is still good meat clinging to that bone, and it is worth keeping. It goes into bean soup, split pea, a pot of greens, or diced into scrambled eggs the next morning.

Tip

Bag the bone and freeze it the same day if soup is not happening this week. It keeps for months and gives you a free stock base later.

5

Halve Each Piece and Trim the Outer Edge

2:36
Step 5: Halve Each Piece and Trim the Outer Edge - How to Carve a Ham

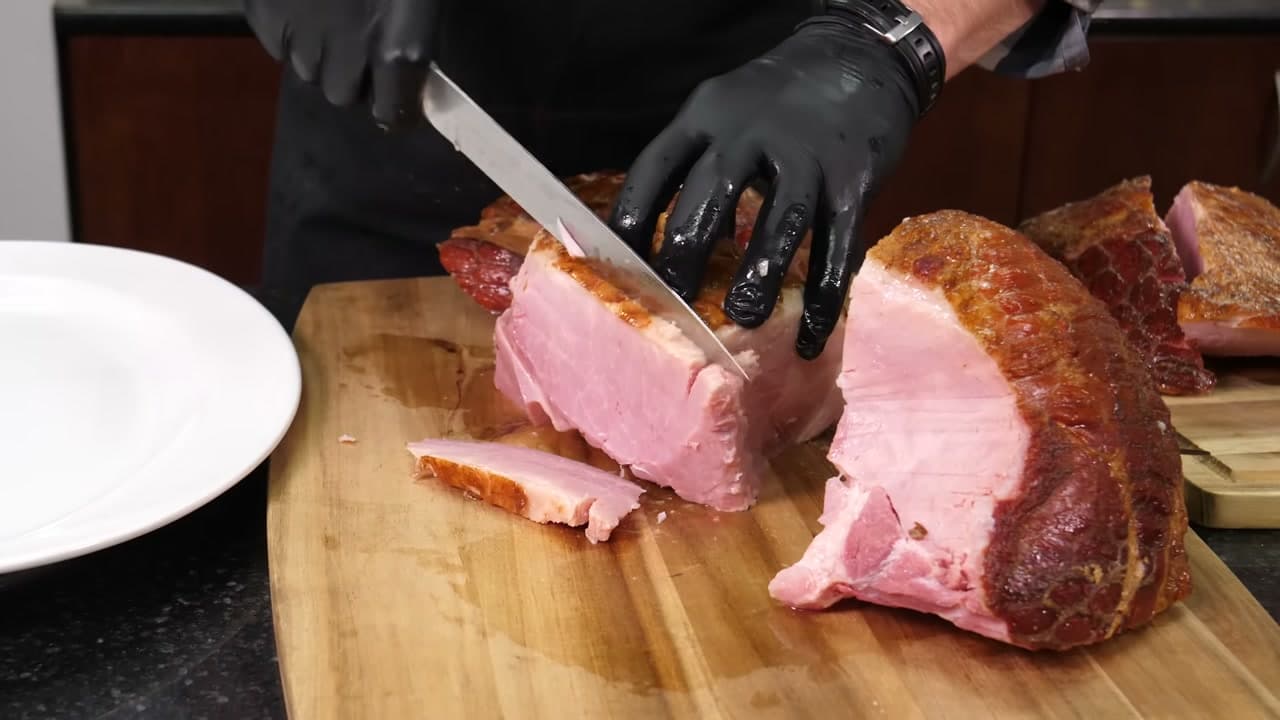
Cut the big sections in half so each one sits flat and stays a size your hand can steady. Then shave off the dry outer edge and any heavy rind before you slice.

Doing the trimming now is a small courtesy that shows up at the table. Nobody has to saw a rind off their own portion, and every slice that reaches the platter is edible end to end.

Tip

The trimmings are not waste. Chop them fine and they go straight into the soup pot with the bone, or into a pan of macaroni and cheese.

Used in this stepslicing knife
6

Slice the Ham Across the Grain

3:20
Step 6: Slice the Ham Across the Grain - How to Carve a Ham

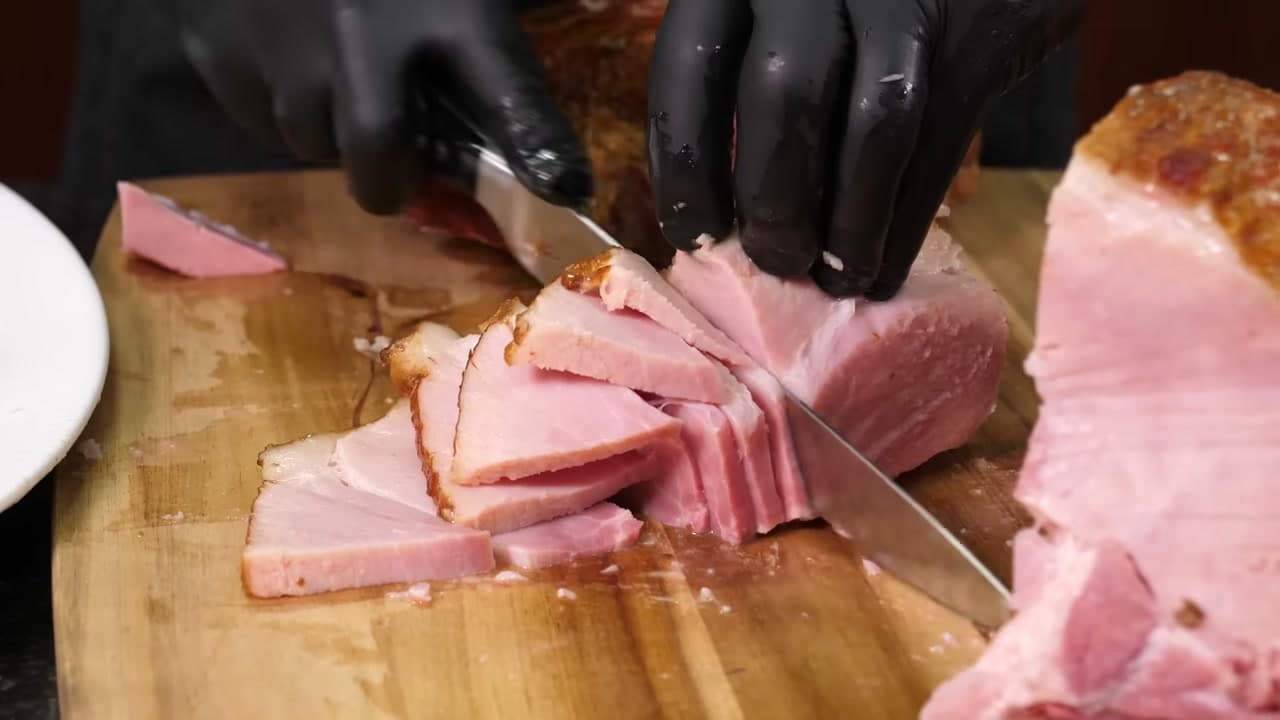
Look at the cut face and find the direction the muscle fibers run. Turn the piece so your knife crosses those fibers rather than running with them, then slice down in steady strokes at an even thickness.

Cutting across the grain shortens every fiber, and short fibers are what your teeth read as tender. Get it backwards and the ham is still good, as Dave says on camera, but it chews longer than it should.

Tip

The grain changes direction from one section to the next. Check the face again each time you start a new piece rather than assuming it runs the same way.

Used in this stepslicing knifehoning steel
7

Lay the Slices in an Overlapping Row

4:06
Step 7: Lay the Slices in an Overlapping Row - How to Carve a Ham

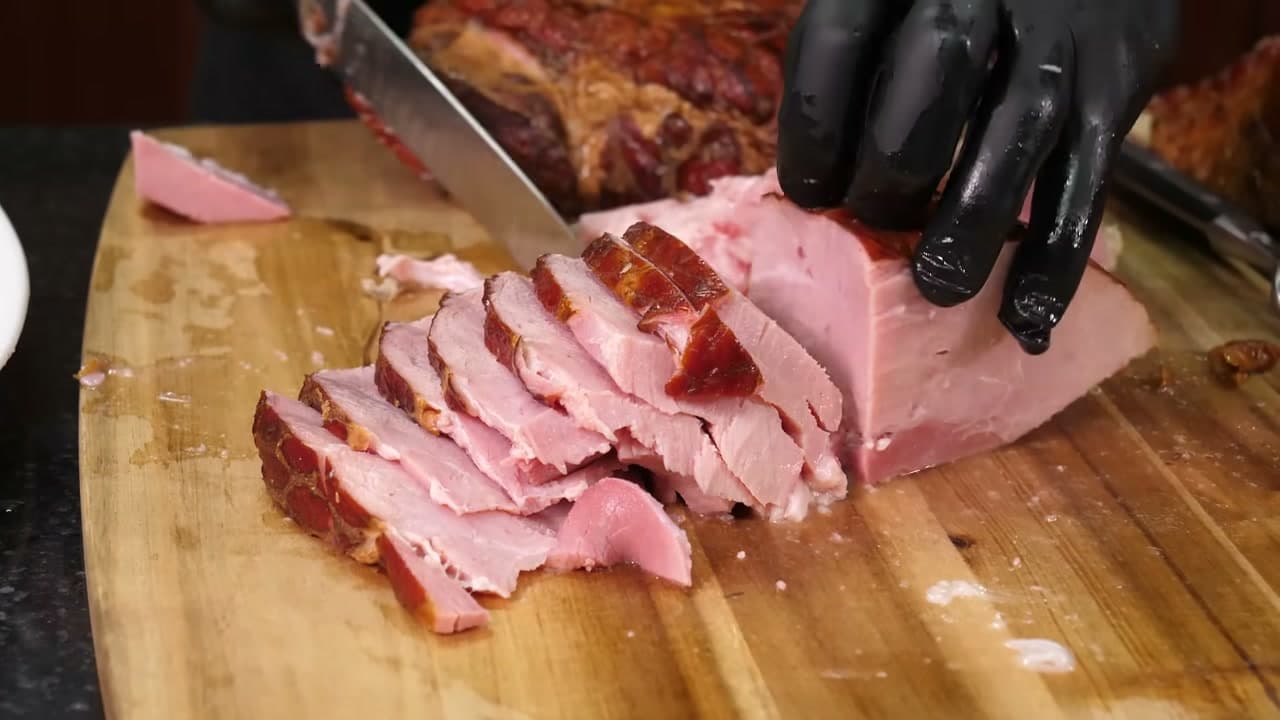
Let the slices fall into an overlapping row on the board as they come off the knife instead of stacking them in a pile. Slide a knife under the whole row and lift it onto a warm platter in one move, and the arrangement survives the trip.

Slice only what the table is going to eat. Meat left in a solid piece holds its moisture in the fridge far better than loose slices do.

Tip

Reheat leftovers with moist heat in a covered dish and pull the ham around 130F. Freezing works if you have to, but it costs you juiciness every time.

Keep going

How to Make Fudge

Products Used

The Recipe

How to Carve a Ham

American
Serves
Carves one whole bone-in ham
Prep
15 min
Total
15 min

Ingredients

1 item
  • 1 whole hamfully cooked whole bone-in hamthe first boneless section Dave lifts off this one weighs about 5 lb, so plan on a full size ham rather than a half

    Method

    1. 1
      Press the Knife Into the Ham to Find the Bone. Set the ham on a big board with the fat side up and give it a minute before you cut anything.
    2. 2
      Cut Straight Down the Aitch Bone to the Board. Start the blade right against the aitch bone and push it straight down until you feel the board underneath.
    3. 3
      Lift the First Boneless Piece Onto a Second Board. Turn the blade and follow the leg bone back toward the hock, staying tight against it, then go down to the board again.
    4. 4
      Work the Knife Around the Bone for the Next Piece. Rotate the ham and make the same cut on the next face.
    5. 5
      Halve Each Piece and Trim the Outer Edge. Cut the big sections in half so each one sits flat and stays a size your hand can steady.
    6. 6
      Slice the Ham Across the Grain. Look at the cut face and find the direction the muscle fibers run.
    7. 7
      Lay the Slices in an Overlapping Row. Let the slices fall into an overlapping row on the board as they come off the knife instead of stacking them in a pile.

    The Checklist

    How to Carve a Ham

    Tools
    11
    Steps
    7
    Video
    4 min

    Your Guide

    Frick's Quality Meats, Inc

    As an Amazon Associate we earn from qualifying purchases. Links on this page may be affiliate links - clicking them and buying doesn't change your price, but helps support ShowMeStepByStep.

    Tags

    Sunday How-To

    New cooking tutorials, every Sunday

    One short email with the week's best step-by-step guides. Free, no spam, unsubscribe anytime.

    Did this work for you?

    What's next

    Related collections

    Curated theme pages that include this tutorial.

    Weekly Digest

    Liked this cooking tutorial?

    Pick the categories you want to hear about. Weekly digest of new step-by-step tutorials. No spam, easy unsubscribe.

    Send me tutorials about

    We only email about new tutorials. Easy unsubscribe anytime.