How to Start a Fire: A Beginner's Guide to the Log Cabin Method

By ShowMeStepByStepPublished Updated

Based on a video by Little Campfires.

Most people who struggle to start a fire are missing one piece - the structure. They throw a match at a pile of logs and wonder why nothing catches. A campfire is a stack, not a heap, and it has to climb three sizes of wood before the flames stay lit. This tutorial walks through the log cabin method from Jon at Little Campfires, an Eagle Scout who learned the technique in Boy Scouts. By the end you will know the three tiers of wood, how to lay them, and how to light the whole thing with a single match.

Fire safety first. Never leave a fire unattended, not even for a quick trip inside. Keep a bucket of water and a metal shovel within arm's reach the entire time the fire is burning. Check local burn bans before you light anything - dry summers and drought conditions shut down open fires across most of the western US every year. Build only on cleared dirt or inside a proper fire pit ring, with no overhanging branches and at least 10 feet of clearance from tents, brush, or your house. When you are done, drown the coals in water, stir the ashes with the shovel, drown them again, and feel the ground with your hand before you walk away.

The seven steps below take you from a pile of cold wood to a self-sustaining flame in about eight minutes of actual work. The most common mistake is rushing past the prep - the better you stack, the less you fight the match.

Step-by-Step Guide

1

Gather Your Three Sizes of Wood

0:25
Step 1: Gather Your Three Sizes of Wood

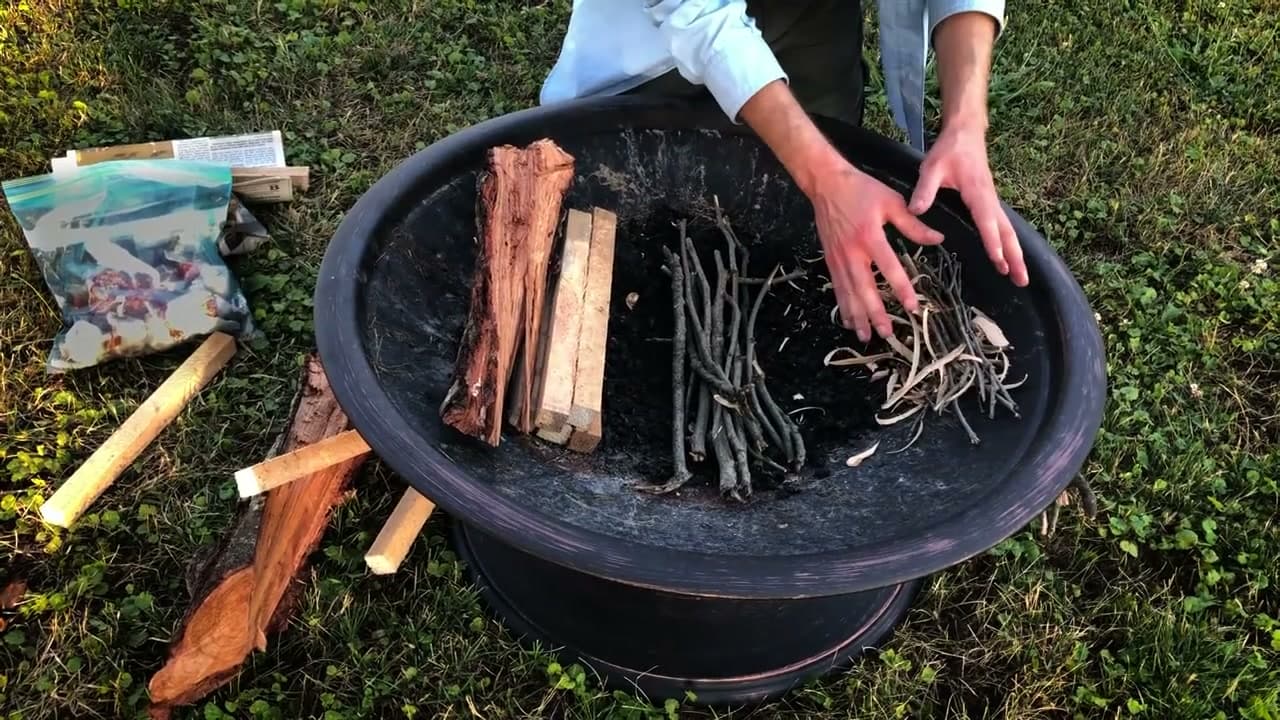
You need three tiers of wood and you need them sorted before you strike a match. Tinder is the smallest stuff - feather-thin shavings, dryer lint, cotton balls, or a handful of dead pine needles - and its job is to catch a spark and pass the flame up the chain. Kindling is the next size up, dry twigs anywhere from pencil-thin to thumb-thick. Fuel wood is the split logs that keep the fire going for hours.

Have all three piles within easy reach before you build. Once the match is lit you do not want to be hunting for sticks. Dry is the word for all of it - any wood you can snap cleanly is dry enough; anything that bends or crushes is too damp to burn well.

Tip

If everything you have is damp, split a log open with a hatchet and use the dry inside. The outer bark soaks up rain but the heartwood stays bone-dry.
2

Lay the Two Base Sticks

2:05
Step 2: Lay the Two Base Sticks

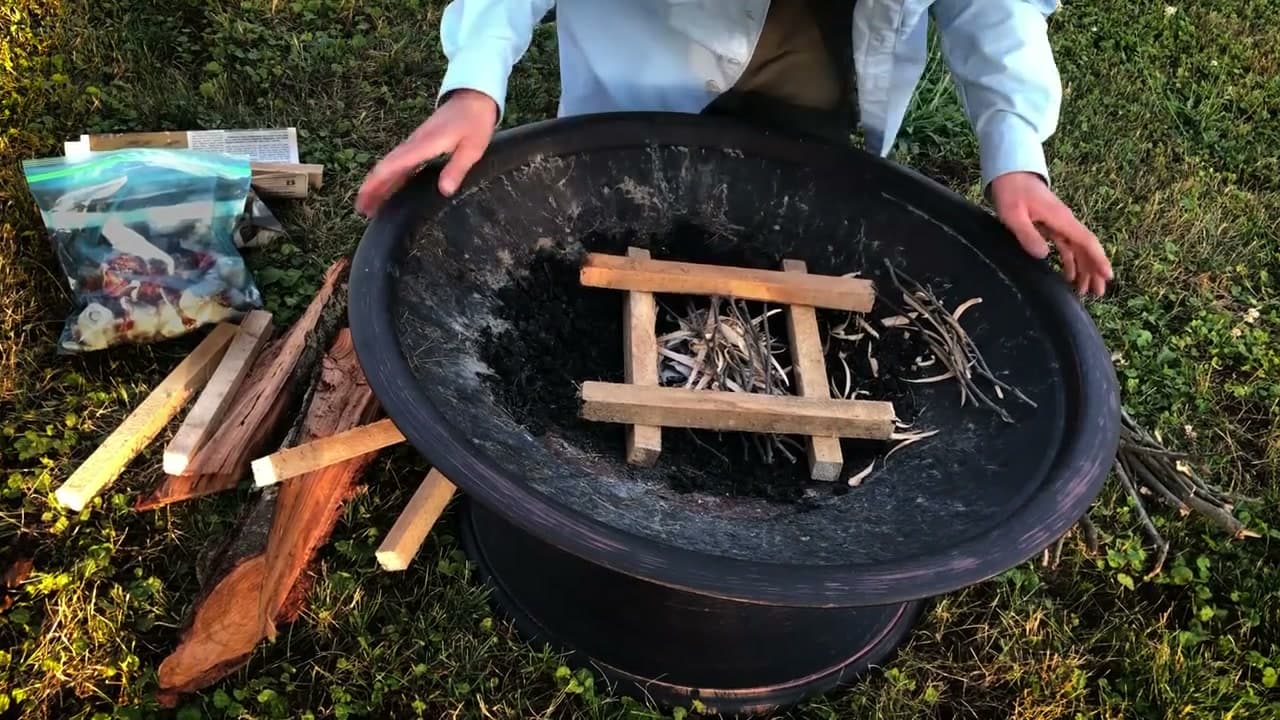
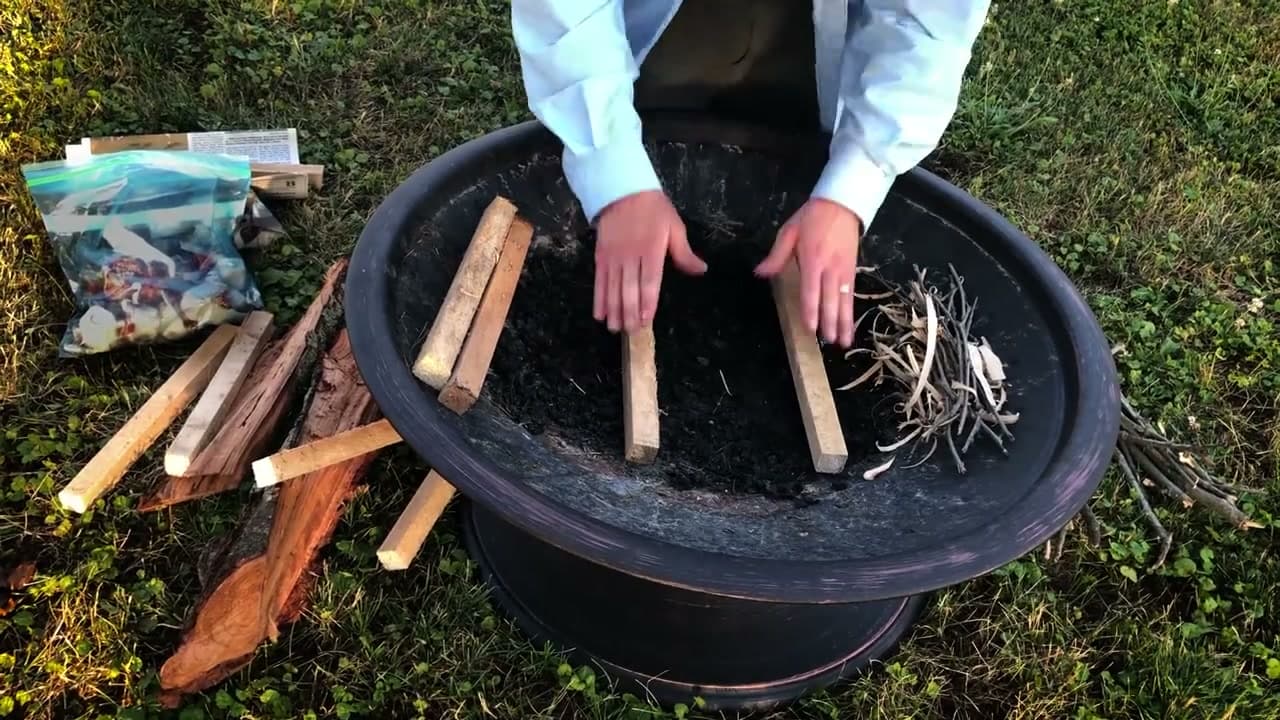
Place two parallel sticks of fuel wood across the floor of the fire pit, about a hand's width apart. These are the foundation walls of your log cabin. Pick split pieces with at least one flat side so they sit still and do not roll when you load them up.

The gap between them is where your tinder bundle goes, so size it to your hand - too narrow and you cannot reach in to light it, too wide and the kindling on top has nothing to rest on. About 4 to 5 inches works for most home fire pits.

Tip

Orient the base sticks perpendicular to the wind. The breeze will flow between them and feed oxygen up through the tinder once the fire catches.

3

Add Newspaper and Tinder Between the Base Sticks

2:40
Step 3: Add Newspaper and Tinder Between the Base Sticks

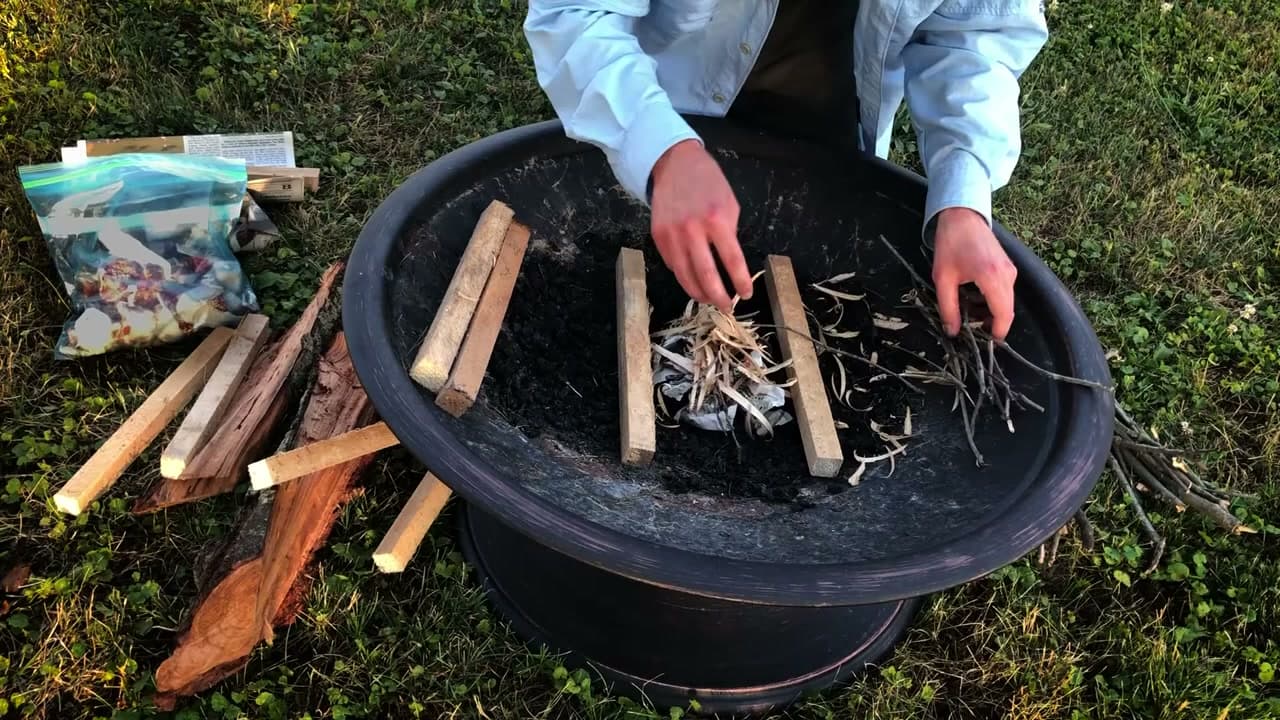
Loosely crumple a sheet or two of newspaper into a ball and tuck it down between the base sticks. Loose is the key word - tightly packed paper smothers itself and burns out before the wood catches. You want air gaps inside the ball so oxygen can move through it.

Drape your tinder shavings across the top of the paper, fluffed out so they make a fuzzy little blanket. If you are using a DIY wax-and-sawdust fire starter or a piece of fatwood, set it in the middle of the paper instead. The whole pile should look like a bird's nest, not a brick.

Tip

Save dryer lint in a tin all year. It is the cheapest, lightest, fastest-catching tinder you can carry, and it weighs nothing in a camp kit.

4

Build the First Crossbar Layer

3:15
Step 4: Build the First Crossbar Layer

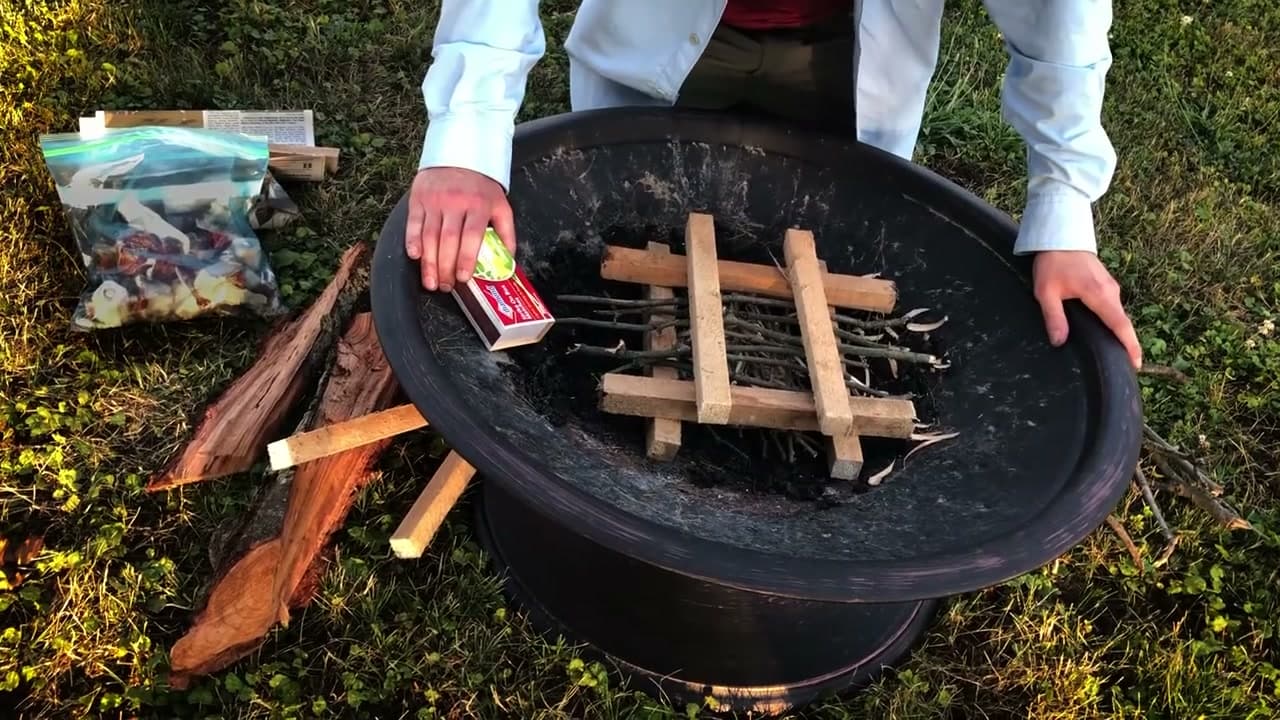
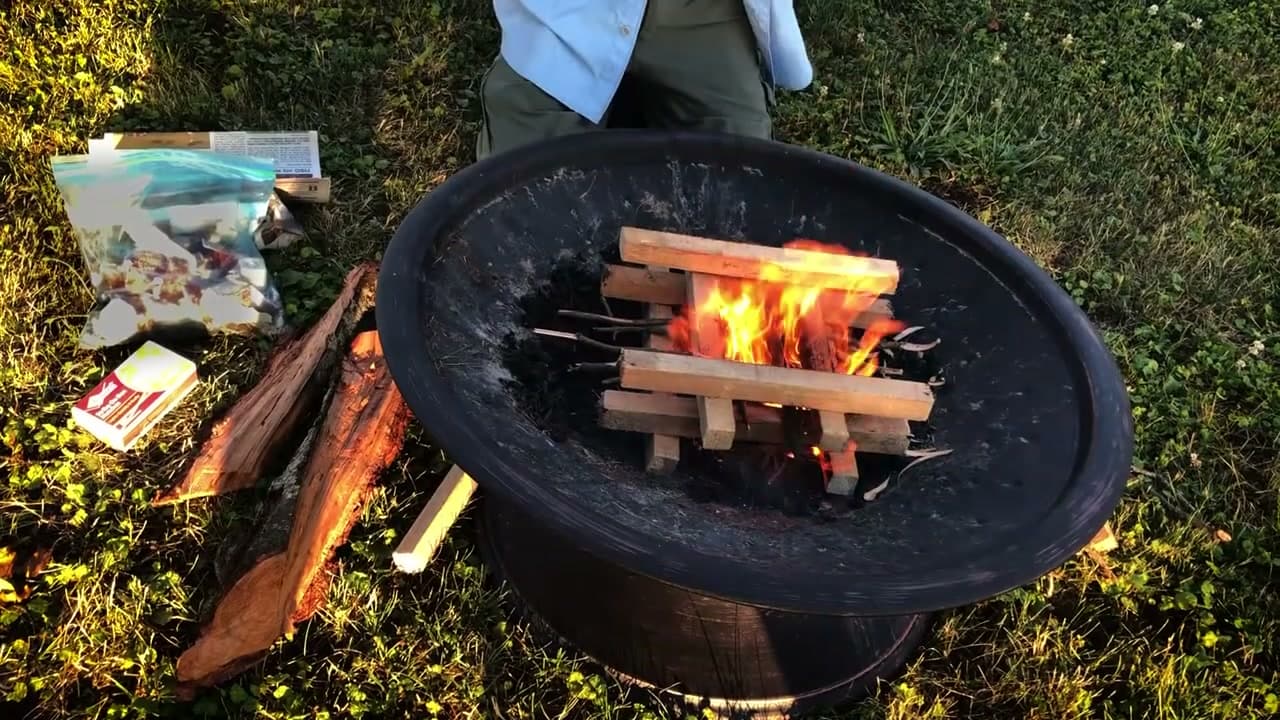
Lay your first cross layer of kindling-size wood at a right angle to the base sticks, resting the ends on top of them. Use four or five pieces spaced about a finger's width apart - tight enough to support the next layer, open enough to let flames climb through.

Sprinkle a second handful of tinder shavings or thin twigs across this layer. As the fire rises out of the tinder bundle below, this layer is what catches next. Skip it and your flame burns through the paper and dies before the fuel wood ever lights.

Tip

Look for kindling on the ground around dead trees - the lower dry branches that snap when you press them are perfect. Live green branches will hiss and steam instead of burn.

5

Add the Top Crossbar Layer

4:45
Step 5: Add the Top Crossbar Layer

Add a second crossbar layer running the same direction as your base sticks - so it crosses the first kindling layer at a right angle. This time tuck the ends in slightly so the wood sits over the flame zone in the center, not out at the edges. The video calls this a small variation from the log cabin purists, but it puts the top tier directly where the heat will rise and catches it faster.

You can keep stacking another layer or two if you want a tall structure, but two crossbar layers is plenty for a normal fire pit. Higher than that and the top tiers fall in before they catch.

Tip

Leave gaps. A log cabin is a stack with air pockets, not a brick wall. If you cannot see flames will climb through from the bottom, you have packed it too tight.

6

Light the Bottom in Two or Three Spots

6:20
Step 6: Light the Bottom in Two or Three Spots

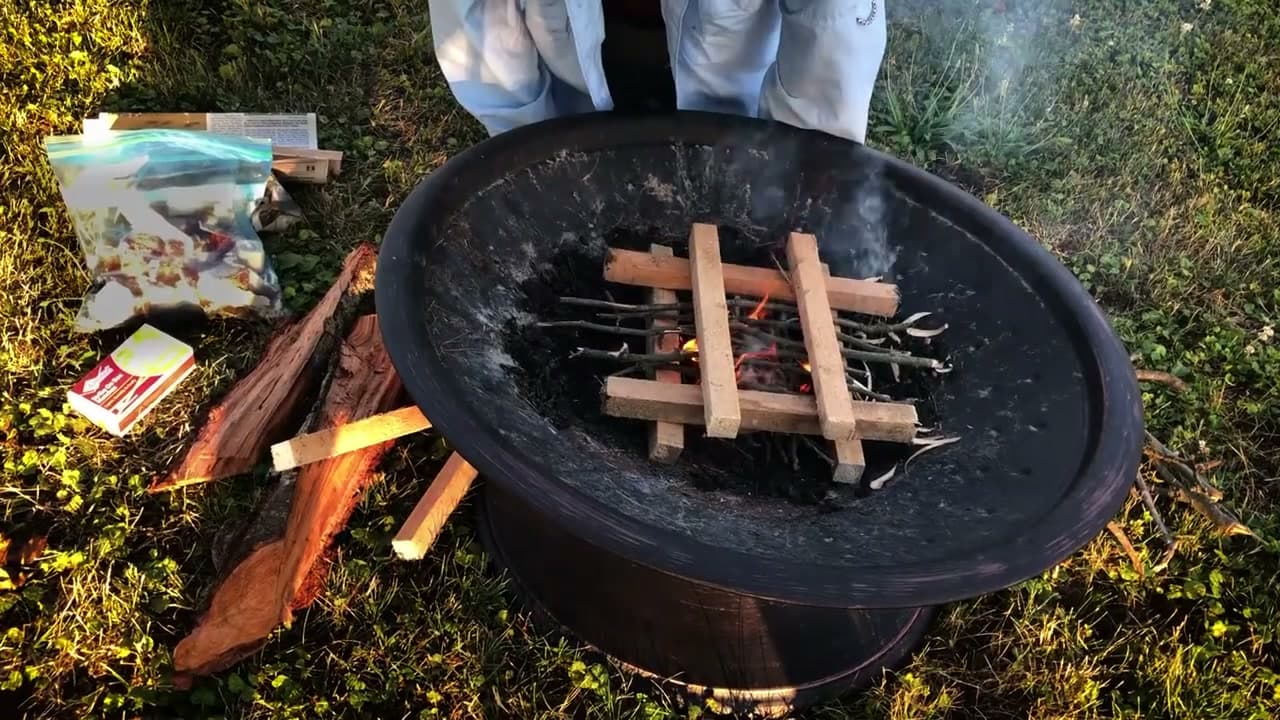
Strike your match and reach all the way down to the bottom of the fire pit before you touch it to the paper. Going deep does two things: it shields the flame from any wind across the top of the pit, and it lights the fire from the bottom up - which is the only direction fire actually wants to go.

Touch the match to the newspaper in two or three places if you can - one on each side, maybe one in the back. Lighting in multiple spots gives you redundancy if one side fails to catch and stacks the odds toward a one-match start. Jon's claim in the source video is that you should only ever need one match if your build is right.

Tip

If the wind is strong, kneel between the wind and the fire pit so your body blocks the breeze long enough for the tinder to catch and hold.

7

Feed the Flame and Let It Burn Down

7:20
Step 7: Feed the Flame and Let It Burn Down

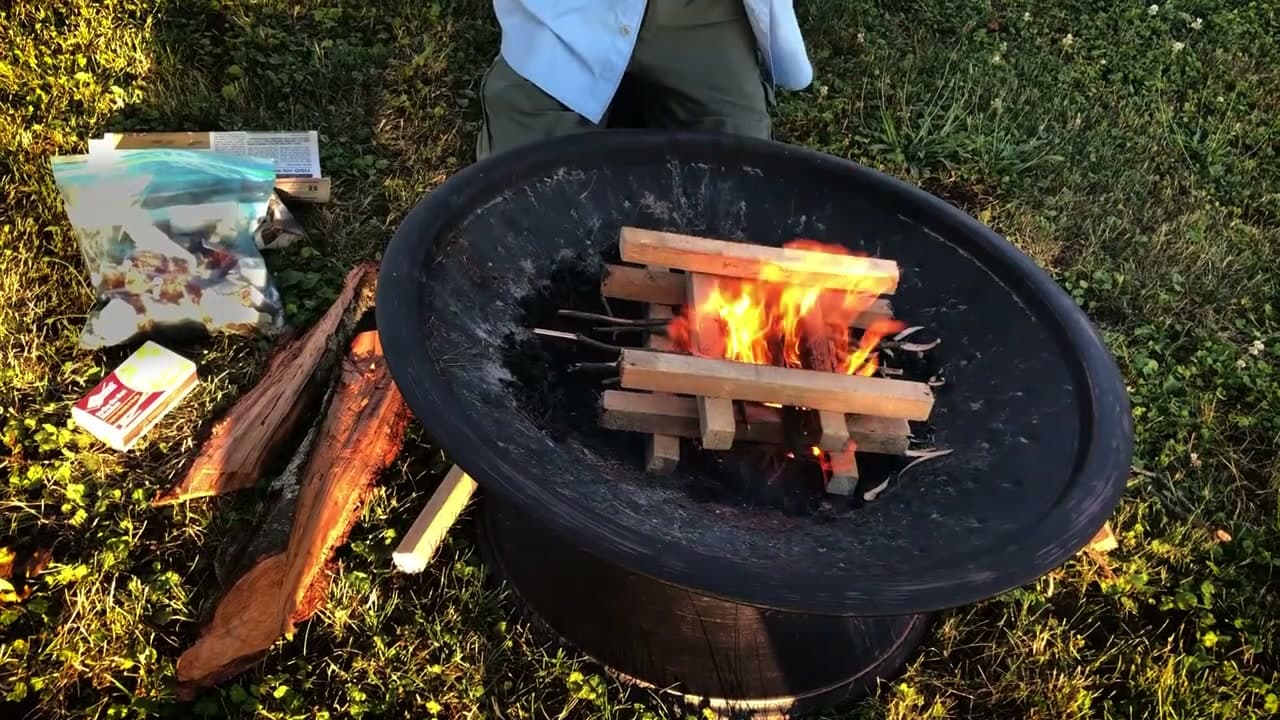
Once the tinder catches and the kindling starts to crackle, hold back. The instinct is to pile more wood on right away, but a young flame needs oxygen more than fuel. Let it grow for a minute or two on the structure you already built.

When the flames are reaching the top crossbar and you can hear the fuel wood beginning to pop, lay in another piece or two from the side. If you plan to cook, stop there and let it burn down to a bed of orange coals - food cooks on coals, not on open flame. If you just want warmth and ambience, keep feeding it. When you are done for the night, drown the coals with water, stir with a shovel, drown again, and feel the ground with the back of your hand before you walk away.

Tip

A campfire is done when the bed is cool to the touch, not when it stops flaming. Buried embers can stay hot enough to re-ignite for 24 hours - never leave a fire pit warm.

Products Used

☐ The Checklist

How to Start a Fire: A Beginner's Guide to the Log Cabin Method

Tools
7
Materials
5
Steps
7
Video
8 min

Your Guide

Little Campfires

As an Amazon Associate we earn from qualifying purchases. Links on this page may be affiliate links - clicking them and buying doesn't change your price, but helps support ShowMeStepByStep.

Tags

What's next

Weekly Digest

Liked this adulting tutorial?

Pick the categories you want to hear about. Weekly digest of new step-by-step tutorials. No spam, easy unsubscribe.

Send me tutorials about

We only email about new tutorials. Easy unsubscribe anytime.