How to Replace a Headlight Bulb

AdultingEasy4:077 steps

By ShowMeStepByStepPublished Updated

Based on a video by ChrisFix.

A burned-out headlight is one of those car problems that looks expensive and isn't. On most cars you can swap a bulb in your driveway in about ten minutes, with no shop visit and no tools beyond your hands.

The one rule that matters: don't touch the glass of a halogen bulb with your bare fingers. Oil from your skin creates a hot spot that shortens the bulb's life dramatically. Wear nitrile gloves, or hold the bulb with a clean cloth, and only handle it by the plastic base.

Before you buy a replacement, look up your car's bulb type in the owner's manual or at the auto parts store counter so you get the right fitment. This walkthrough is from ChrisFix, who keeps the focus on the universal tips and tricks that apply to almost any car.

Step-by-Step Guide

1

Step 1: Confirm which bulb is out and look up the right replacement

0:06
Step 1: Step 1: Confirm which bulb is out and look up the right replacement

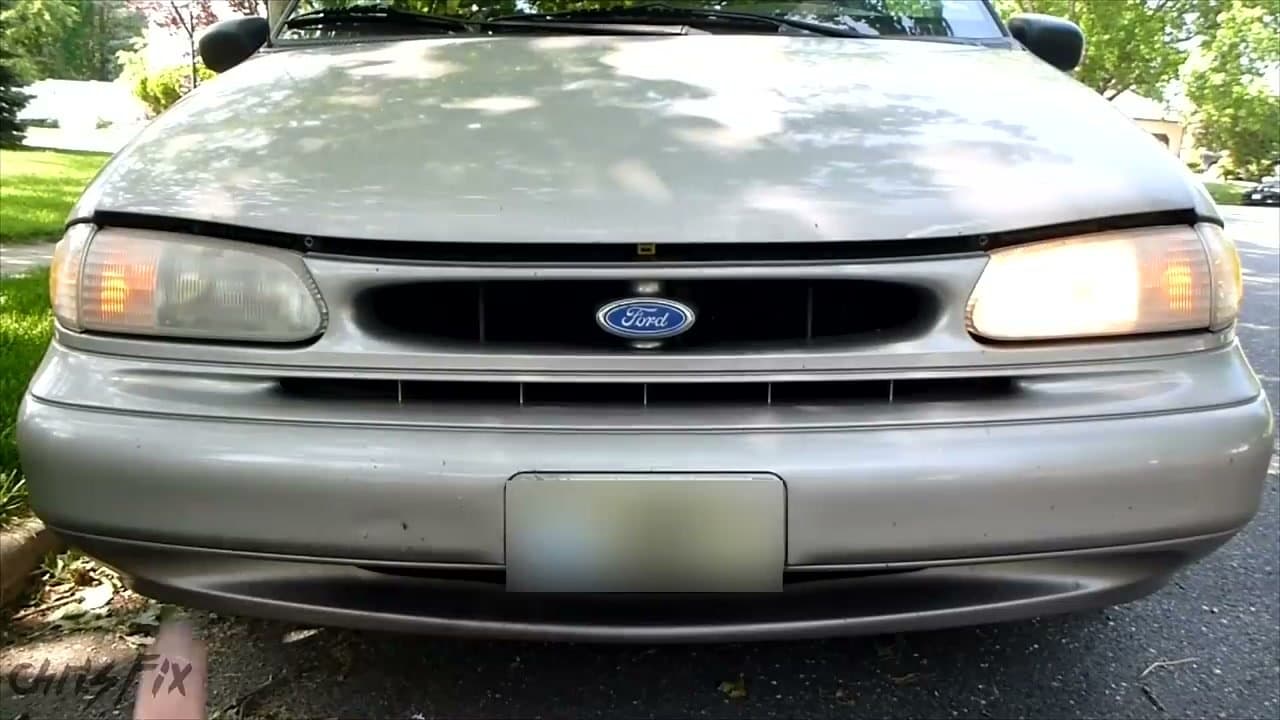
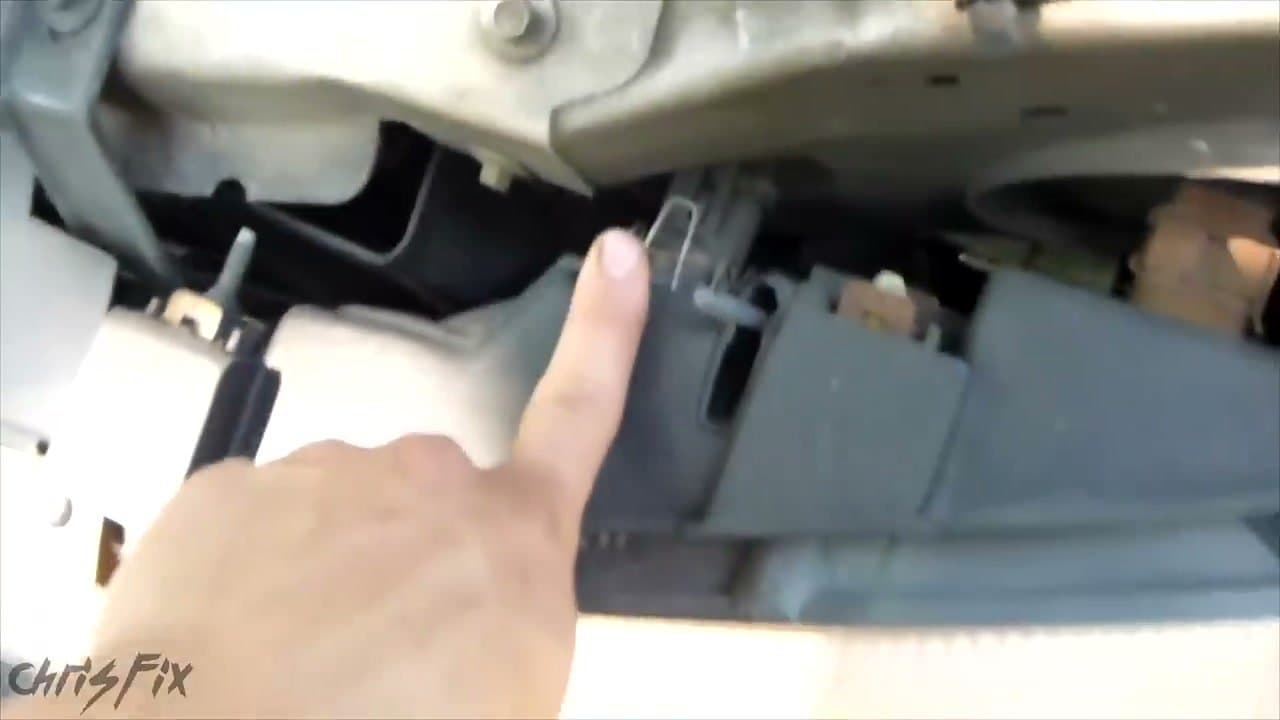
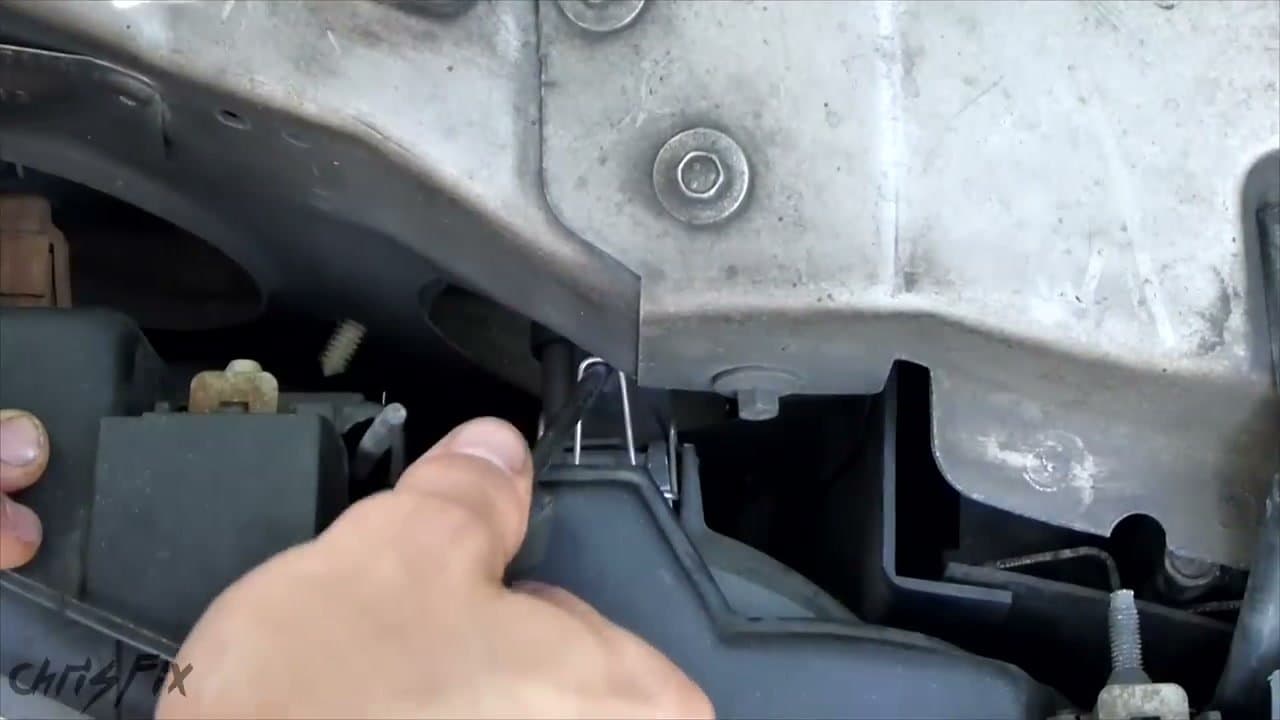
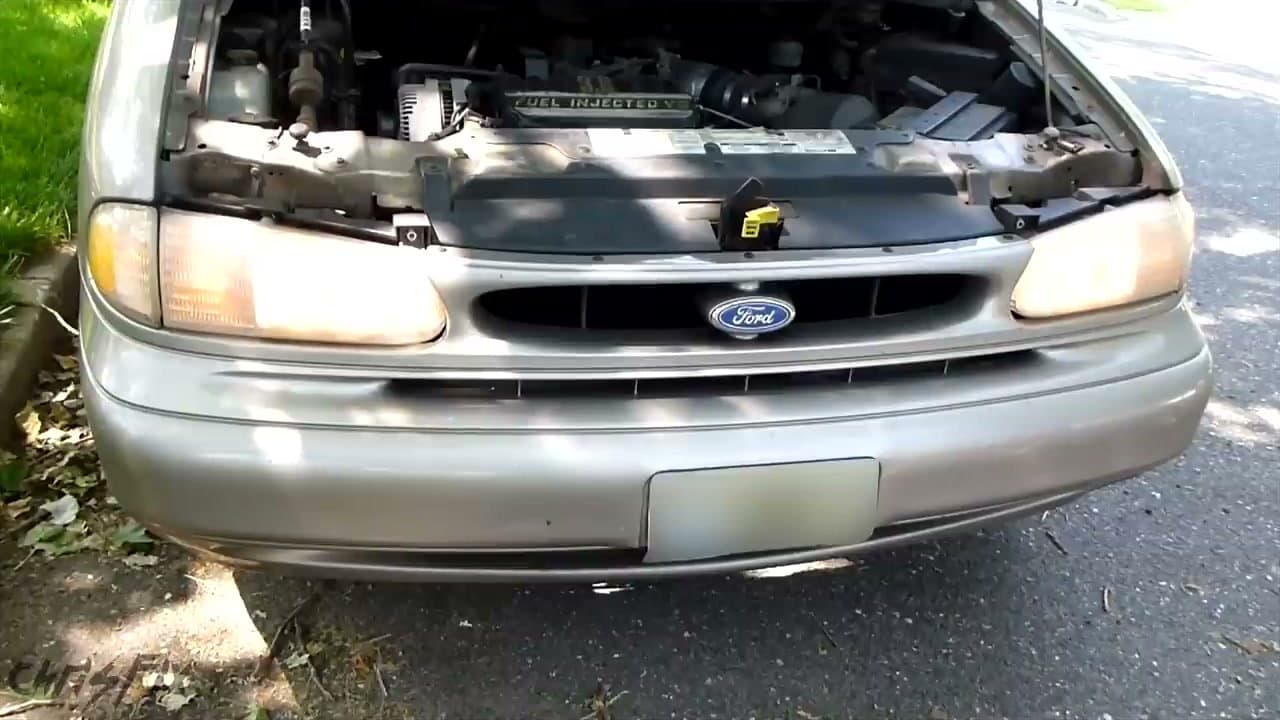
Turn the headlights on with the car parked. Walk around to the front and check both sides. Sometimes only the low beam is dead and the high beam still works, so flick the high beams on too and watch for the bulb that stays dark.

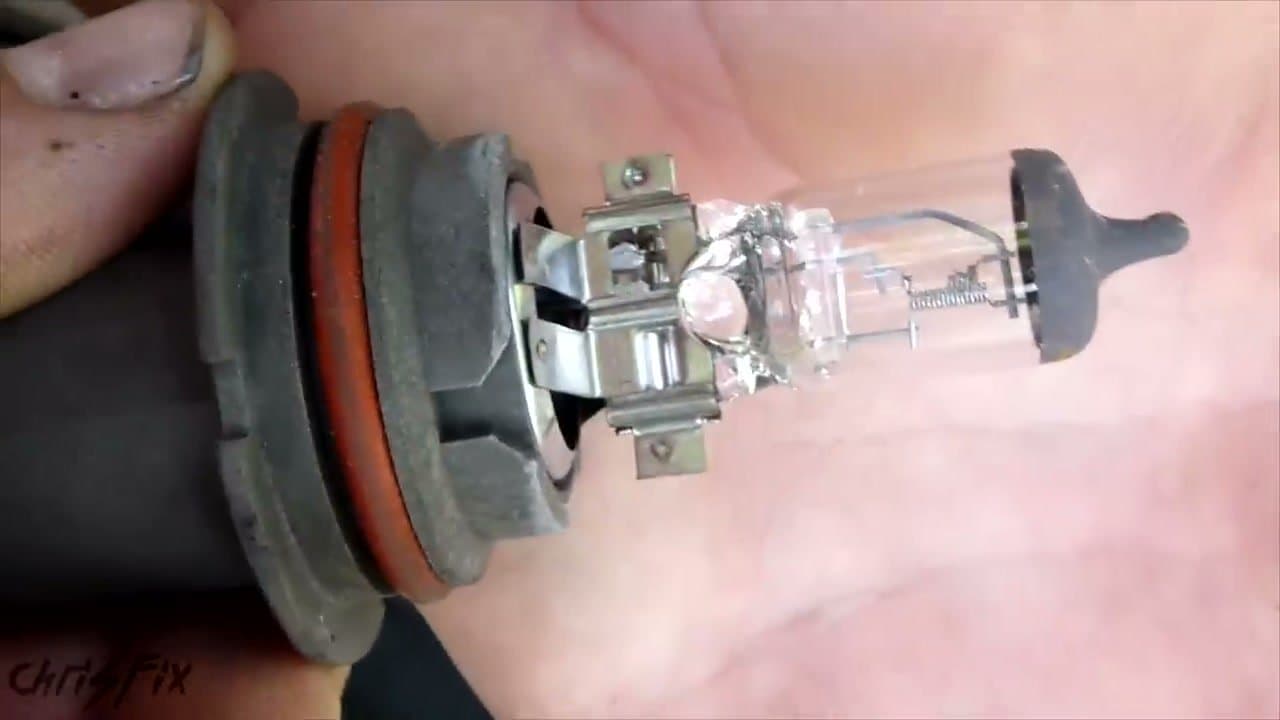
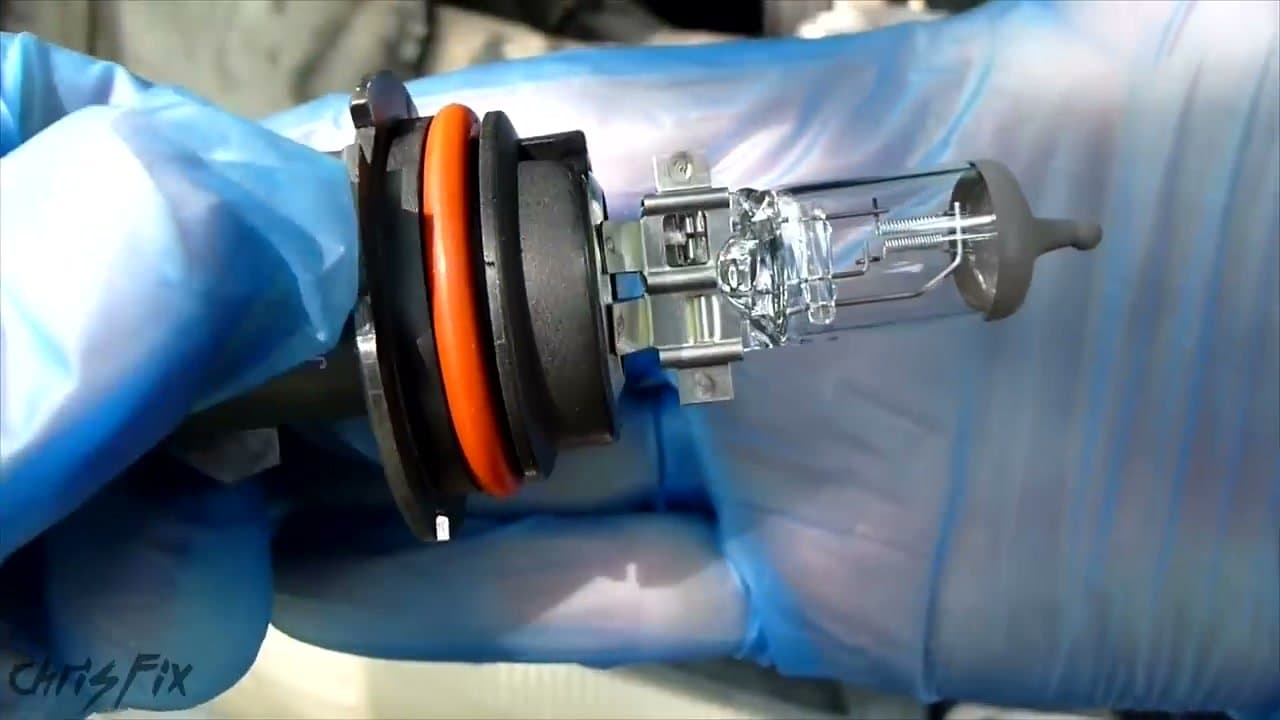
Once you know which one is out, grab the owner's manual. There's a section for headlamp bulb replacement that lists the exact bulb code your car takes (something like 9007, H11, or 9005). If you don't have the manual, the auto parts store can look it up by year, make, and model.

Tip

Always replace headlight bulbs in pairs. The other side is the same age and is usually close to failing too. Twin-packs are cheaper than two singles.

2

Step 2: Open the hood and find the bulb housing

0:42
Step 2: Step 2: Open the hood and find the bulb housing

Pop the hood and prop it open. The headlight assembly sits at the very front corner of the engine bay, and the bulb screws into the back of it.

Reach behind the assembly and feel for the round housing where a wire harness plugs in. That's your target. On some cars you have great access from above. On others you'll need to come at it from underneath the front bumper or from the wheel well. The owner's manual diagram will tell you which.

Tip

Make sure the headlights and the car are off before you start. You don't want power running through the connector while you're working on it.

3

Step 3: Pop the retaining clip on the back of the housing

2:24
Step 3: Step 3: Pop the retaining clip on the back of the housing

Most halogen bulbs are held in by a thin metal spring clip that pivots over the back of the bulb. Squeeze it toward the bulb to release the tension, then swing it up and out of the way.

Pay attention to how it sits before you pop it. Snap a quick phone photo if you need to. You'll be reversing this exact motion to lock the new bulb in.

Tip

If your car uses a twist-lock socket instead of a spring clip, rotate the whole bulb assembly counterclockwise about a quarter turn and it'll come free.

4

Step 4: Pull the old bulb out and inspect the filament

2:39
Step 4: Step 4: Pull the old bulb out and inspect the filament

With the clip released, pull the old bulb straight out of the housing. Hold it up to the light and look at the two thin coiled filaments inside the glass. One is the high beam, the other is the low beam.

A working filament looks like a clean, intact spring. A blown one will be broken, sagging, or visibly burned through. Confirming this before you install the new bulb tells you the bulb really was the problem and not a fuse or relay.

Tip

If both filaments look fine, the issue might be a fuse or the headlight relay. Check the fuse box (location is in the owner's manual) before you keep going.

5

Step 5: Slide the new bulb in without touching the glass

3:09
Step 5: Step 5: Slide the new bulb in without touching the glass

Put on a pair of nitrile gloves before you open the new bulb. Skin oil left on a halogen bulb creates a hot spot that shortens its life and can crack the glass when it heats up.

Hold the new bulb only by the plastic base. Line up the tabs with the slots in the housing and slide it straight in. There's only one orientation that fits, so if it doesn't seat flush, rotate it and try again.

Tip

If you don't have gloves, hold the bulb with a clean cotton cloth or paper towel. If you do touch the glass by accident, wipe it with rubbing alcohol before installing.

6

Step 6: Snap the clip closed and reconnect the wire harness

3:24
Step 6: Step 6: Snap the clip closed and reconnect the wire harness

Swing the spring clip back over the base of the new bulb and push it forward until it snaps into place. It should feel firm, not floppy. If the bulb wiggles, the clip didn't seat correctly - reseat it and try again.

Plug the wire harness back into the connector on the bulb base. Most clip on with a satisfying click. Give the harness a gentle tug to make sure it's locked in.

7

Step 7: Test the headlight and replace the matching bulb on the other side

3:39
Step 7: Step 7: Test the headlight and replace the matching bulb on the other side

Hop in the car, turn the key to accessory, and switch the headlights on. Walk around to the front and confirm the new bulb is shining at the same brightness as the other side. Try the high beams too.

If everything looks even, do the other side now while you're already set up. Headlight bulbs age together, and a fresh bulb next to a dim three-year-old one looks lopsided at night. Twenty minutes of work saves a second driveway session in two months.

Tip

If the new bulb looks dimmer than the old one on the opposite side, the older bulb is on its way out. That confirms the pairs rule - swap it now.

Products Used

Your Guide

ChrisFix

As an Amazon Associate we earn from qualifying purchases. Links on this page may be affiliate links - clicking them and buying doesn't change your price, but helps support ShowMeStepByStep.

Tags

Related Tutorials