How to Sew a French Seam

SewingEasy7:5110 stepsPart of Crafting for BeginnersBrowse more →
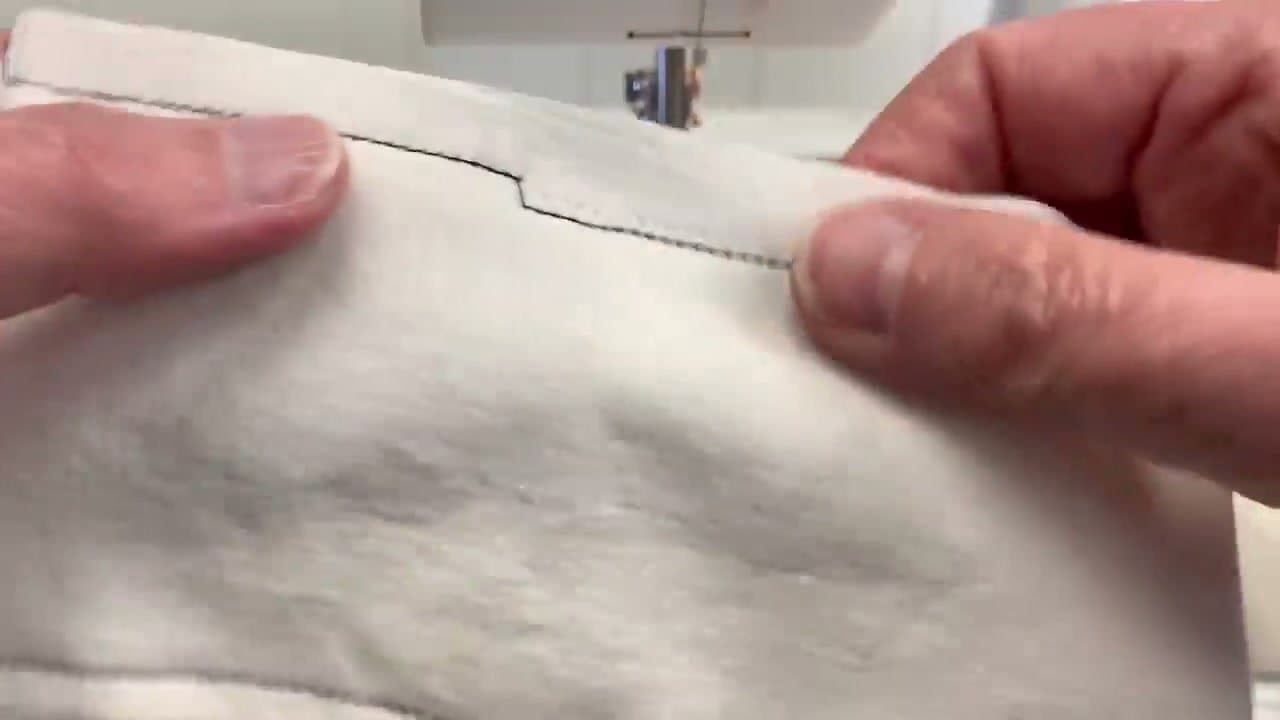
The finished result: How to Sew a French Seam

By Show Me Step by StepPublished

Based on a video by Made to Sew.

A French seam hides every raw edge inside a tidy little tube of fabric. There is nothing to fray and nothing to snag, and the inside of the garment looks as neat as the outside. Ana from Made to Sew shows the whole method on a regular sewing machine, using printed cotton so you can tell the right side from the wrong side at every stage. You sew two seams instead of one. That is the only extra work.

When to use a French seam

French seams shine on lightweight and sheer fabrics: silk, chiffon, voile, lawn and cotton batiste. Those fabrics fray fast, and on a sheer blouse a zigzagged edge shows straight through. They are also the classic finish on a pillowcase, a baby dress, a lingerie bag or an unlined skirt. No serger? A French seam gives you a clean inside without one.

Skip it on thick fabrics like denim or wool coating. Four layers of bulk will not press flat. French seams also struggle on tight curves such as armholes. Use them on straight or gently curved seams: side seams, shoulder seams and center back seams.

The seam allowance math

This method assumes a 5/8 inch (1.5 cm) seam allowance, which most commercial patterns use. The first seam takes 3/8 inch. After trimming, the second seam takes 1/4 inch. Add them up and you are back at 5/8. If your pattern uses a smaller allowance, such as 1/4 inch, add extra width when you cut the pieces, or the finished garment will come out a little too tight.

Tips for silk and slippery fabric

  • Test the iron heat and steam on a scrap before pressing the real seam.
  • Use a pressing cloth on silk to avoid shine and water marks.
  • Shorten the stitch a little, to about 2 mm, on very fine fabric.
  • Tie off thread tails by hand instead of backstitching. Some silks pucker at the backstitch.
  • Pin the second seam too. A press alone will not hold a slippery fabric in place.

New to the machine? Practice on a few scraps with how to sew a straight line first. Even stitching matters here because the second seam has to run parallel to the first one hidden inside the fold.

Common French seam mistakes

  • Right sides together at the start. This is the one people get wrong. The first seam goes in with the wrong sides touching. It feels backwards. It is correct.
  • Whiskers poking through. Little threads showing on the right side mean the trim was not close enough. Trim to 1/8 inch so the edges sit well inside the 1/4 inch second seam.
  • A lip of fabric at the fold. Roll the first seam right to the edge before you press, or the second seam ends up crooked.
  • A bulky, wavy seam. Press after every stage. It takes a minute and makes the difference between homemade and handmade.

Where to try it next

A pillowcase is the perfect first project. Every seam is straight and the French seam keeps it from fraying in the wash. Try it on how to sew a pillowcase. A cotton apron is another good match. If you still need a refresher on threading and stitch length, start with how to use a sewing machine.

What you'll need

Step-by-Step Guide

10 steps · about 8 minutes.Check off each step as you go and your progress saves automatically.

1

Place the Fabric Wrong Sides Together for a French Seam

1:14
Step 1: Place the Fabric Wrong Sides Together for a French Seam - How to Sew a French Seam

This is the most important part, so go slow. With a normal seam you put the right sides of the fabric together. A French seam does the opposite. Lay your two pieces with the wrong sides touching and the right sides facing out. Line up the raw edges along the seam you plan to sew and smooth the layers flat with your hands.

Tip

Practice on printed cotton first. The difference between the right and wrong side makes each stage easy to follow.

2

Pin the French Seam Edges With Pin Heads Facing You

1:24
Step 2: Pin the French Seam Edges With Pin Heads Facing You - How to Sew a French Seam

Pin along the matched edges. Ana places her pins in line with the seam, with the heads facing toward her, so they slide out easily as she sews. On a garment she pins and sews from the hem up. That keeps the hem edges lined up even if the layers creep a little toward the top. Keep a magnetic pin caddy close.

Tip

Sew from the hem up on side seams so the hem stays even.

3

Sew the First French Seam 3/8 Inch From the Raw Edge

1:52
Step 3: Sew the First French Seam 3/8 Inch From the Raw Edge - How to Sew a French Seam

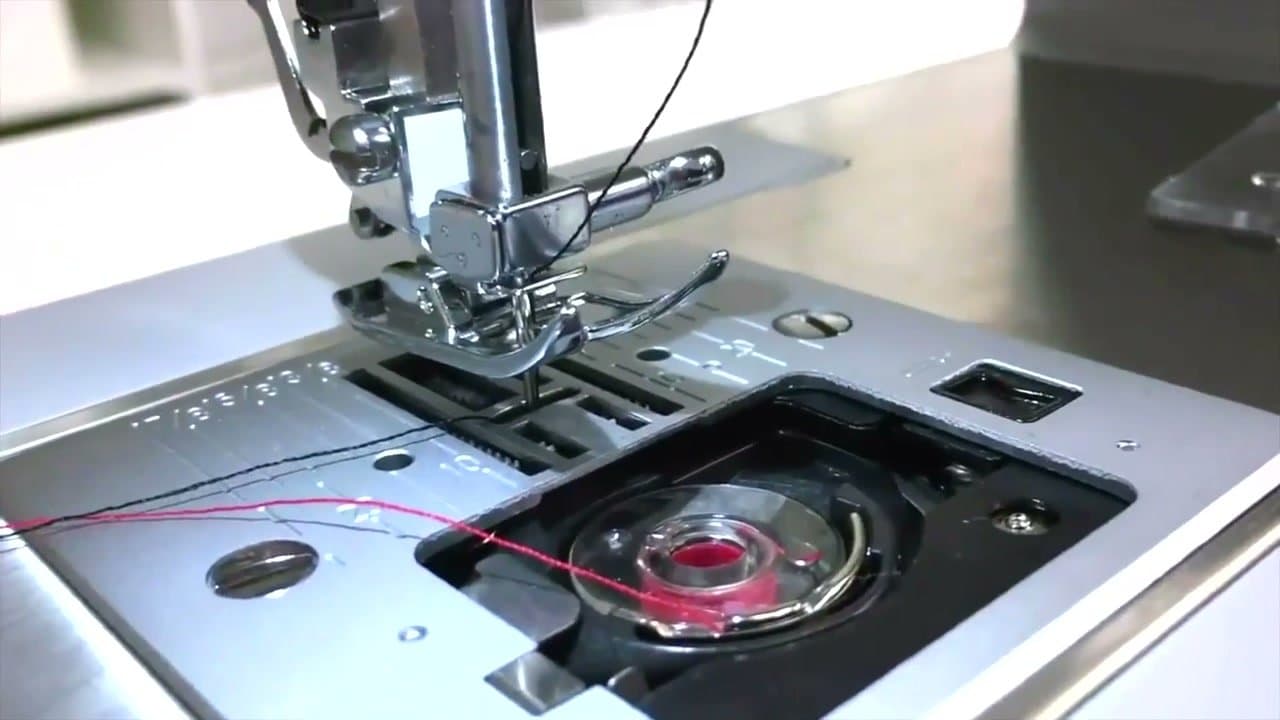
Take the fabric to the machine. Sew a straight stitch, 2.5 mm long, 3/8 inch (1 cm) from the raw edge. Line the edge up with the 3/8 marking on your throat plate. Backstitch at both ends as usual and pull the pins out as you reach them. Ana uses a contrast thread so you can see the stitching. Use a matching thread on a real project.

Tip

On silk, tie off the threads instead of backstitching, and test a smaller stitch on a scrap.

4

Press the First Seam Flat, Then Press It Open

3:16
Step 4: Press the First Seam Flat, Then Press It Open - How to Sew a French Seam

Press the seam flat the way you sewed it. That sets the stitches into the fabric and takes out small puckers. Then open the fabric with the right side facing up and press the seam allowances open. Test your fabric with the iron heat and steam first. Use a pressing cloth if the fabric is delicate or marks easily.

Tip

Pressing at every stage is what makes a French seam look crisp. Do not skip it.

5

Trim the French Seam Allowances Down to 1/8 Inch

3:46
Step 5: Trim the French Seam Allowances Down to 1/8 Inch - How to Sew a French Seam

Pick up a small pair of sharp scissors. Trim both seam allowances down to 1/8 inch (3 mm). Cut only the allowance, never the main fabric. They have to be this narrow because the second seam is only 1/4 inch wide. Anything wider gets caught and pokes through to the right side as little whiskers of thread.

Tip

Small embroidery scissors give you more control than big shears on this close cut.

6

Fold the Fabric Right Sides Together and Roll the Seam to the Edge

4:44
Step 6: Fold the Fabric Right Sides Together and Roll the Seam to the Edge - How to Sew a French Seam

Now fold the fabric the other way, with the right sides together and the wrong side facing up. The trimmed edges are now trapped inside the fold. Roll the fold between your fingers until the first line of stitching sits right on the edge. This matters for a neat finish. Work along the whole seam a few inches at a time.

Tip

If the stitching sits back from the edge, the finished seam ends up wider and lumpy.

7

Press the Folded French Seam Edge Flat

4:50
Step 7: Press the Folded French Seam Edge Flat - How to Sew a French Seam

Press along the fold as you go, keeping the first seam right on the edge. Work your way down the length of the seam with the iron. A good press holds the layers in place well enough that you may not need pins for the next seam. On slippery fabric like silk, add pins from the hem up with the heads facing you.

Tip

A pressing ham helps when the seam has a gentle curve.

8

Sew the Second French Seam 1/4 Inch From the Fold

5:42
Step 8: Sew the Second French Seam 1/4 Inch From the Fold - How to Sew a French Seam

Back to the machine. Sew a standard straight stitch 1/4 inch (5 mm) from the pressed fold. This second seam encloses the trimmed raw edges completely. Backstitch or lock the stitch at both ends, or tie the threads off on flimsy silk. Keep the distance even all the way along so nothing peeks out.

Tip

A 1/4 inch presser foot or a strip of tape on the throat plate keeps the line steady.

9

Press the Enclosed French Seam Allowance to One Side

6:24
Step 9: Press the Enclosed French Seam Allowance to One Side - How to Sew a French Seam

Trim the thread tails and press the seam flat as sewn. Then open the fabric with the wrong side up. You now have one narrow seam allowance, so it cannot be pressed open. Press it to one side, toward the back of the garment. Look at that inside. Every raw edge is gone.

Tip

On side seams, press the allowance toward the back of the garment.

10

Check the Finished French Seam From the Right Side

7:06
Step 10: Check the Finished French Seam From the Right Side - How to Sew a French Seam

Turn the fabric over and look at the right side. It should look like a plain, crisp seam. Press from the front too if it needs it, checking your fabric first. Stray threads poking through mean the trim was not close enough. Unpick a short stretch, trim tighter and sew it again.

Tip

Keep a finished sample by your machine as a reminder of the order: wrong sides first.

How to Hem Pants by Hand With an Invisible Blind Stitch

Keep going

How to Hem Pants by Hand With an Invisible Blind Stitch

10 steps · about 13 minutes

Products Used

The Checklist

How to Sew a French Seam

Tools
7
Materials
2
Steps
10
Video
8 min

Tools we recommend

Your Guide

Made to Sew

As an Amazon Associate we earn from qualifying purchases. Links on this page may be affiliate links - clicking them and buying doesn't change your price, but helps support Show Me Step by Step.

Tags

Sunday How-To

New sewing tutorials, every Sunday

One short email with the week's best step-by-step guides. Free, no spam, unsubscribe anytime.

Did this work for you?

What's next

Weekly Digest

Liked this sewing tutorial?

Pick the categories you want to hear about. Weekly digest of new step-by-step tutorials. No spam, easy unsubscribe.

Send me tutorials about

We only email about new tutorials. Easy unsubscribe anytime.