How to Use Oil Pastels

PaintingEasy7:0910 stepsPart of Crafting for BeginnersBrowse more →
The finished result: How to Use Oil Pastels
Also in:Drawing

By Show Me Step by StepPublished

Based on a video by Lets Create Something.

Oil pastels look like crayons, but they behave more like thick, creamy paint. You scribble color down, then smear it with a finger until the strokes melt together. That is most of the technique. The artist behind Lets Create Something shows the whole process twice: once on smooth drawing paper with an orange lily, and once on textured pastel paper with a blue whale. The video uses a $3 set on purpose, to show what cheap pastels can do.

What you need to start

  • A set of oil pastels. 24 to 50 colors is plenty.
  • Smooth drawing paper, or pastel paper with a little tooth
  • A pencil for a light sketch
  • Your fingers, or paper blending stumps
  • Baby wipes or a damp rag to clean your fingers between colors

Cheap vs better oil pastels

You do not need artist-grade pastels to learn. Still, price does change the feel. Budget sets are harder and waxier, so they skip on the paper and take more rubbing to blend. Mid-range sets like Pentel or Mungyo are softer and blend with less pressure. Professional sticks such as Sennelier are almost like lipstick. Start cheap, and upgrade the colors you use most.

Smooth paper vs pastel paper

On smooth paper the color glides and blends easily, but the paper fills up after two or three layers. Pastel paper has a fine texture that grabs pigment, so it holds more layers. Toned pastel paper, like the gray sheet under the whale, adds a middle value for free. Bright colors pop on it and you can skip painting a background.

Five habits that keep colors clean

  • Start with white. A white base gives the next color something to blend into and keeps it bright.
  • Always blend two colors. One color smeared alone looks flat. Two colors smeared together look painted.
  • One finger per color. Use a different fingertip for yellow, orange and red, and wipe them often. That stops muddy brown.
  • Go light to dark. Dark pastel is hard to cover with light.
  • Leave some lines. Not every stroke needs to be smudged. A few crisp lines on top add detail.

Common oil pastel problems

  • Muddy color. Too many colors rubbed together, or a dirty finger. Wipe your hands and add a fresh layer of the lighter color.
  • Waxy shine that will not take more color. The paper is full. Scrape a little off with a palette knife, or move to pastel paper next time.
  • Smudged finished piece. Oil pastels never fully dry. Store the drawing under a sheet of glassine or parchment, or frame it behind glass.

Where to go next

A flower is the classic first subject. Try the same shapes in paint with how to paint a flower. If you like the hands-on blending, colored pencils and watercolor pencils use the same layering idea with a lighter touch. Gouache is a good next step toward opaque paint.

What you'll need

Step-by-Step Guide

10 steps · about 7 minutes.Check off each step as you go and your progress saves automatically.

1

Choose a Set of Oil Pastels for Beginners

1:12
Step 1: Choose a Set of Oil Pastels for Beginners - How to Use Oil Pastels

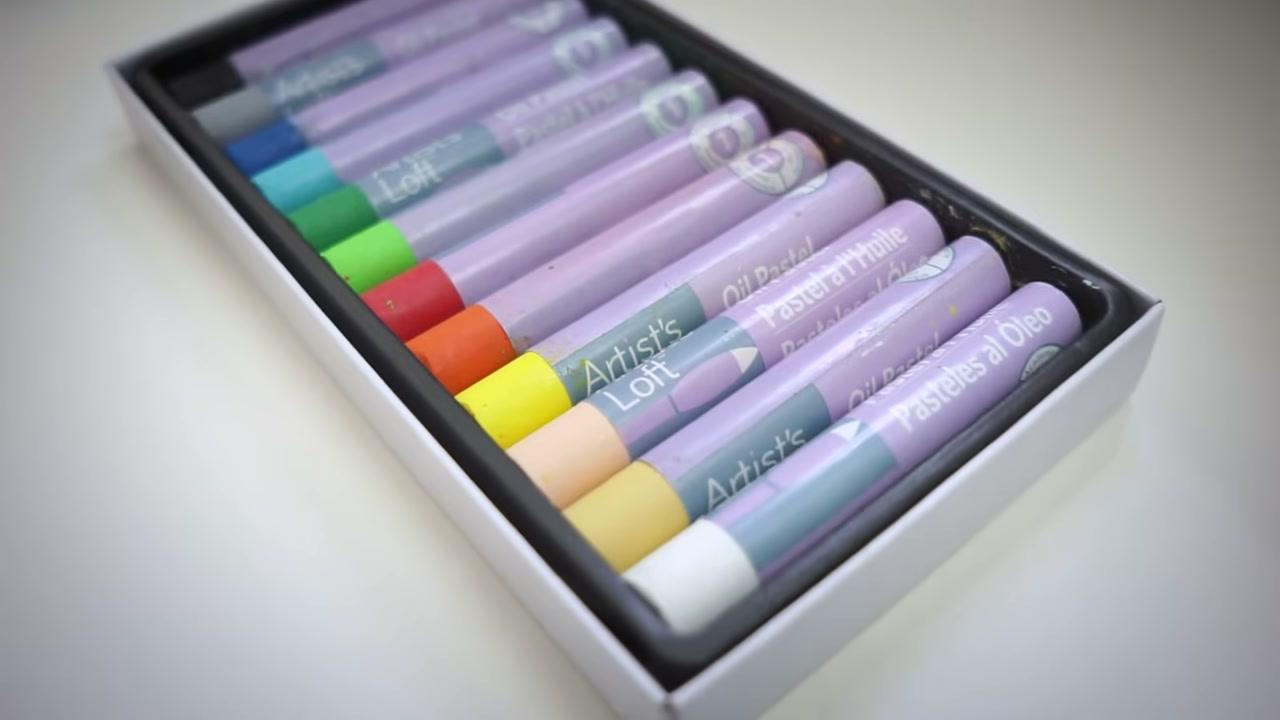
Pick a set of oil pastels and two kinds of paper. The video uses the cheapest set available, a box of Artist's Loft pastels for about $3, to show they still work. Cheaper sticks are waxier and blend less easily, and pricier ones blend more. A mid-range set is the sweet spot. Grab smooth drawing paper and some textured pastel paper so you can compare.

Tip

Keep baby wipes nearby. Your fingers are the main blending tool and they get colorful fast.
2

Scribble Color Into the Oil Pastel Flower Petals

2:10
Step 2: Scribble Color Into the Oil Pastel Flower Petals - How to Use Oil Pastels

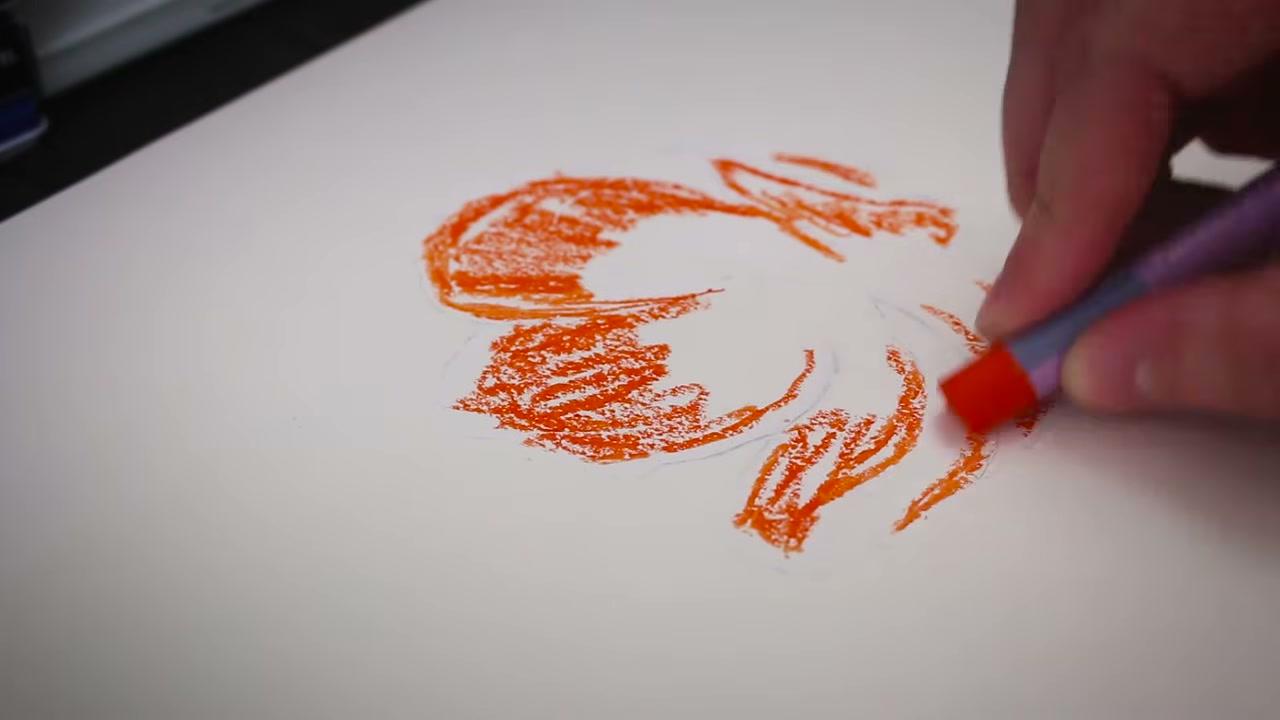
Draw a very light pencil sketch of a flower. Go over the shapes with white oil pastel first. White gives the colors something to blend with. Then scribble color into the petals. The video uses orange here, with loose strokes that do not need to be neat. You are blocking in color that you will smooth out later.

Tip

Press lightly on this first layer. Heavy pressure fills the paper texture too soon.

3

Outline the Oil Pastel Flower in a Darker Color

2:26
Step 3: Outline the Oil Pastel Flower in a Darker Color - How to Use Oil Pastels

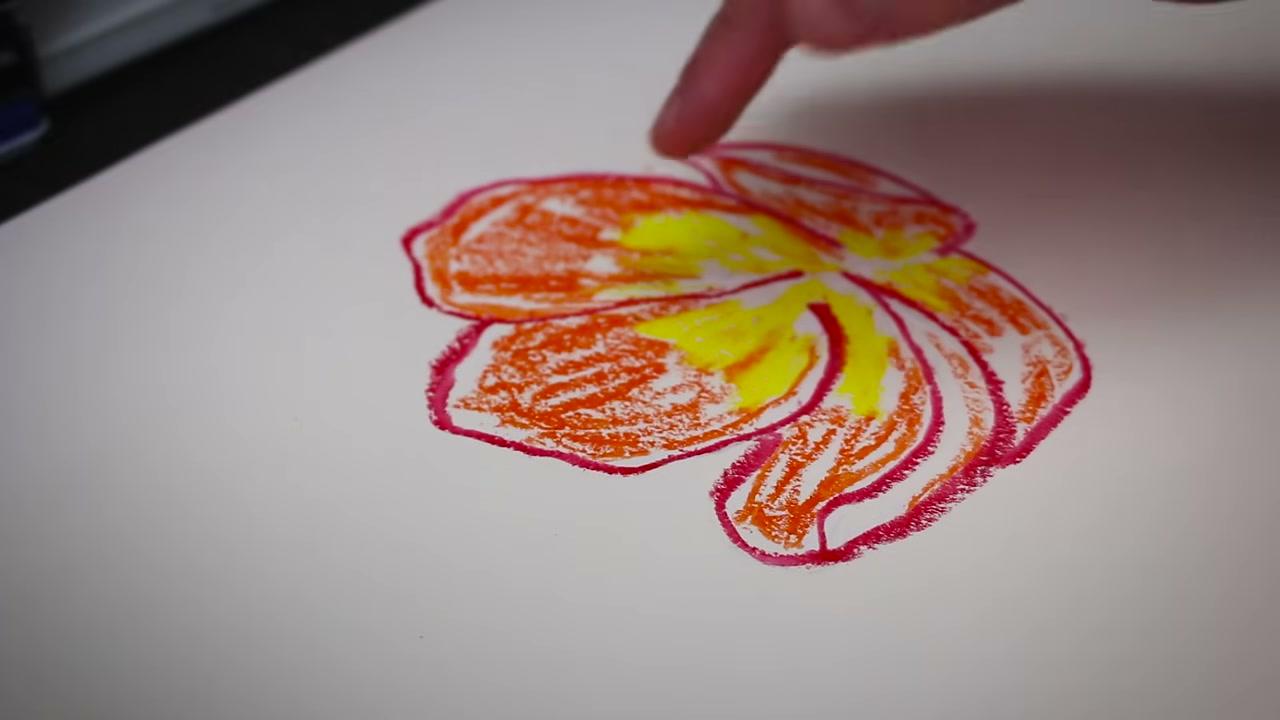
Add a second color where the light would hit, like yellow in the center of each petal. Then outline every petal in a darker color. The video uses red. The outline gives the shape a clean edge, and some of it will blend into the orange later for a warm shadow. Cover the whole drawing before you start blending.

Tip

Lay down more pastel than looks right. You need enough color on the paper to push around.

4

Blend the Oil Pastel Petals With Your Finger

2:30
Step 4: Blend the Oil Pastel Petals With Your Finger - How to Use Oil Pastels

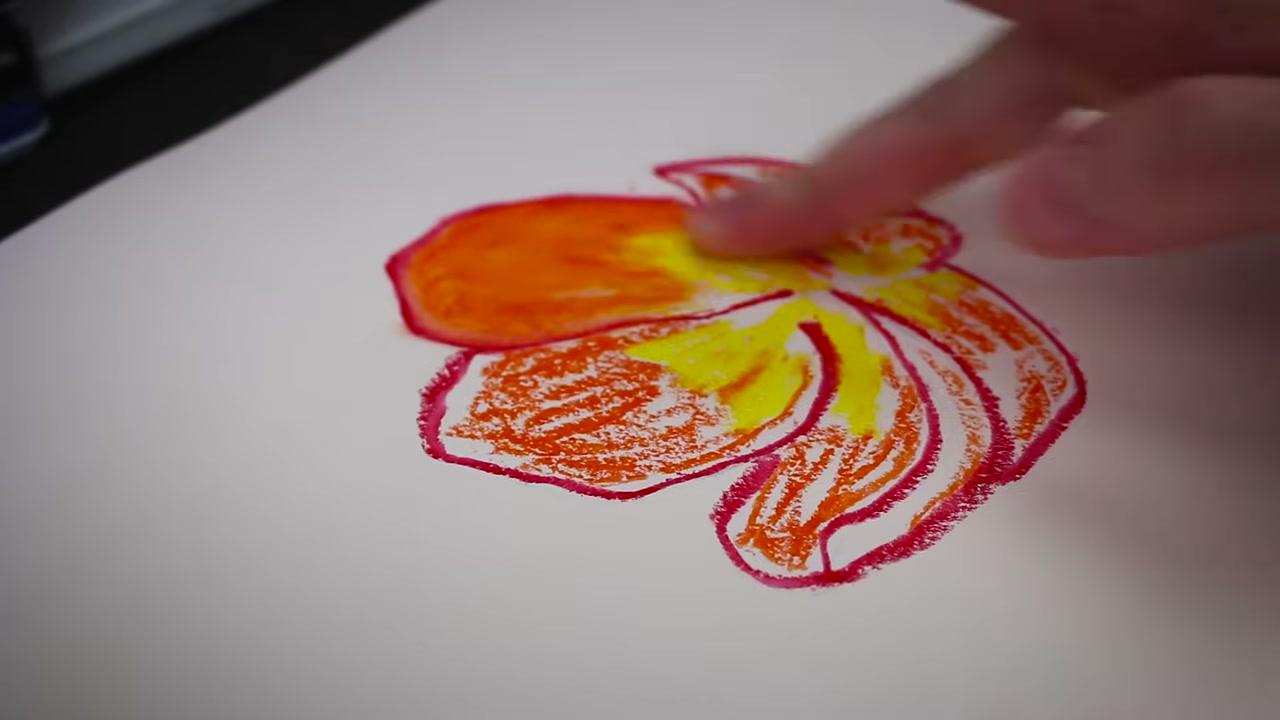
Now rub. Use your fingertip to smear and blend the colors together until the scribbles melt into smooth color. To keep things bright, use one finger per color: one for yellow, one for orange, one for red. That stops the colors turning muddy. A paper blending stump works too if you prefer clean hands.

Tip

Blend from light colors into dark ones, not the other way, to keep highlights clean.

5

Scribble an Oil Pastel Background Around the Flower

2:46
Step 5: Scribble an Oil Pastel Background Around the Flower - How to Use Oil Pastels

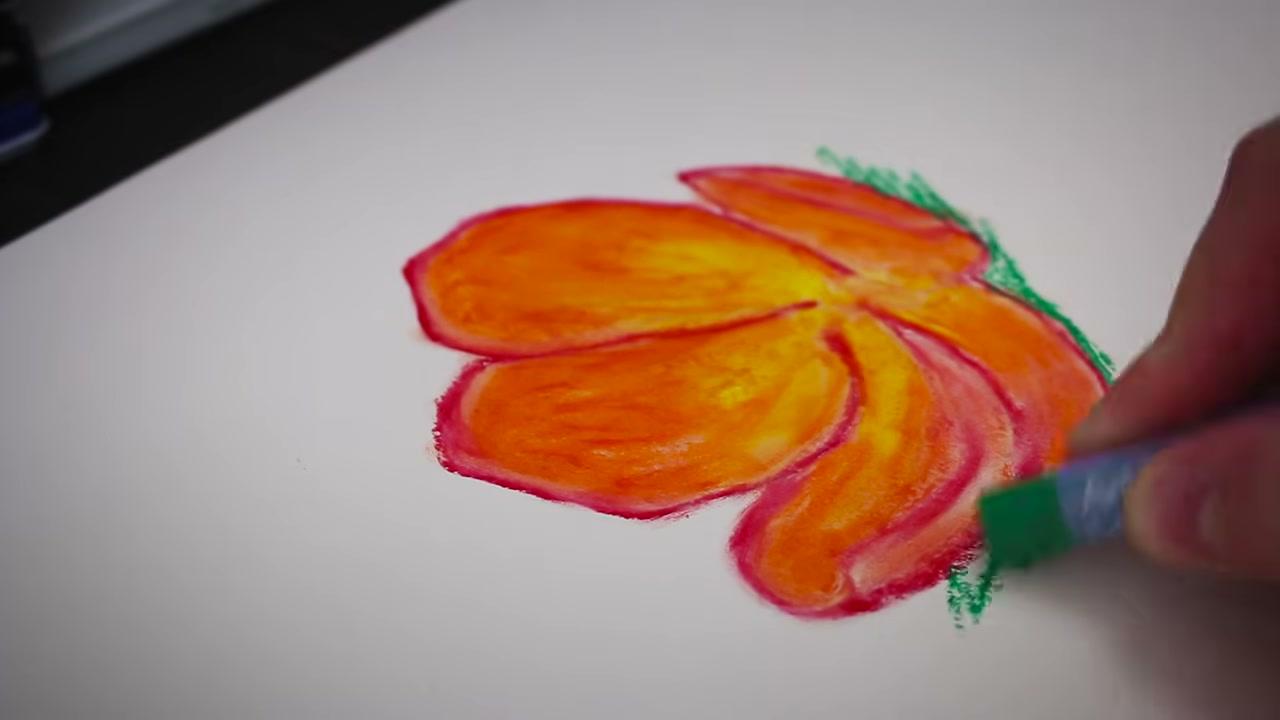
On white paper, a background helps the flower stand out. Scribble green around the edges of the flower. Then add a second green, lighter or brighter, so the background has something to blend with. One color smeared alone looks flat. Two colors smeared together look painted. Blend the background until most of the white paper is gone.

Tip

Use vertical strokes for the background so it reads as leaves and grass.

6

Add Oil Pastel Detail Lines Over the Blended Layer

3:02
Step 6: Add Oil Pastel Detail Lines Over the Blended Layer - How to Use Oil Pastels

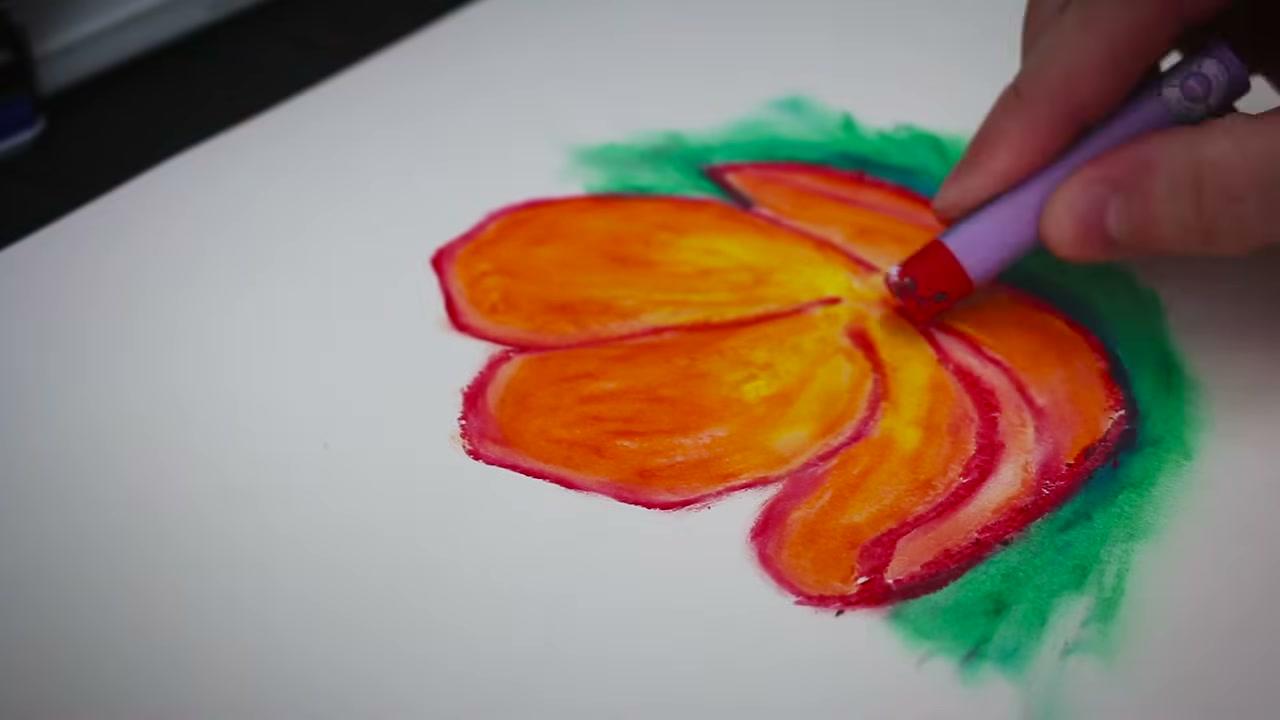
Go back in with more color for a second layer. The artist adds red lines along the petals, darker accents and a few white dots for the stamens. Blend some of them in. Leave others as crisp lines. You do not have to smudge everything. Keep going back and forth until you are happy with it.

Tip

Stop when it looks good to you. Overworking a waxy layer can lift color off.

7

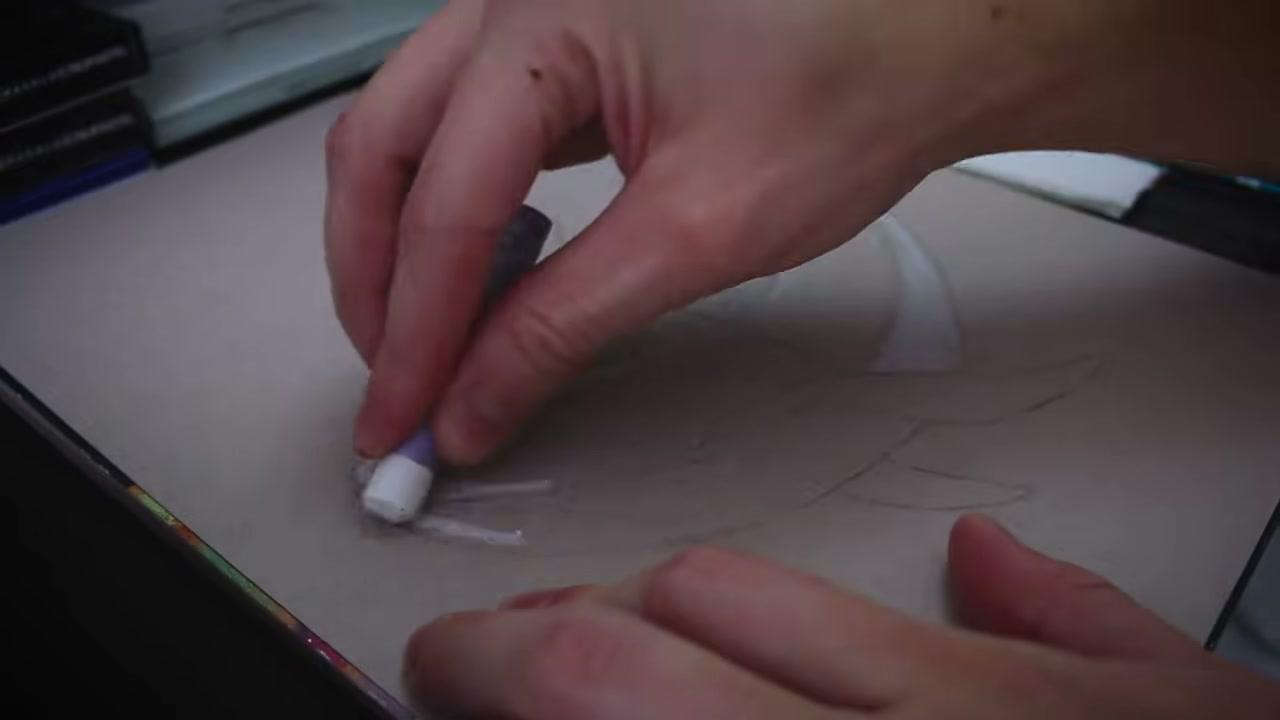
Start the Whale With White Oil Pastel on Pastel Paper

4:24
Step 7: Start the Whale With White Oil Pastel on Pastel Paper - How to Use Oil Pastels

Now try textured pastel paper. The video starts with a light sketch of a whale on gray paper. Start the same way, with white oil pastel over the belly and lighter areas. Look closely and you will see a tiny pattern in the surface. That texture grabs pigment and holds more layers than smooth paper does.

Tip

Toned paper means you can skip the background later. The gray already does the work.

8

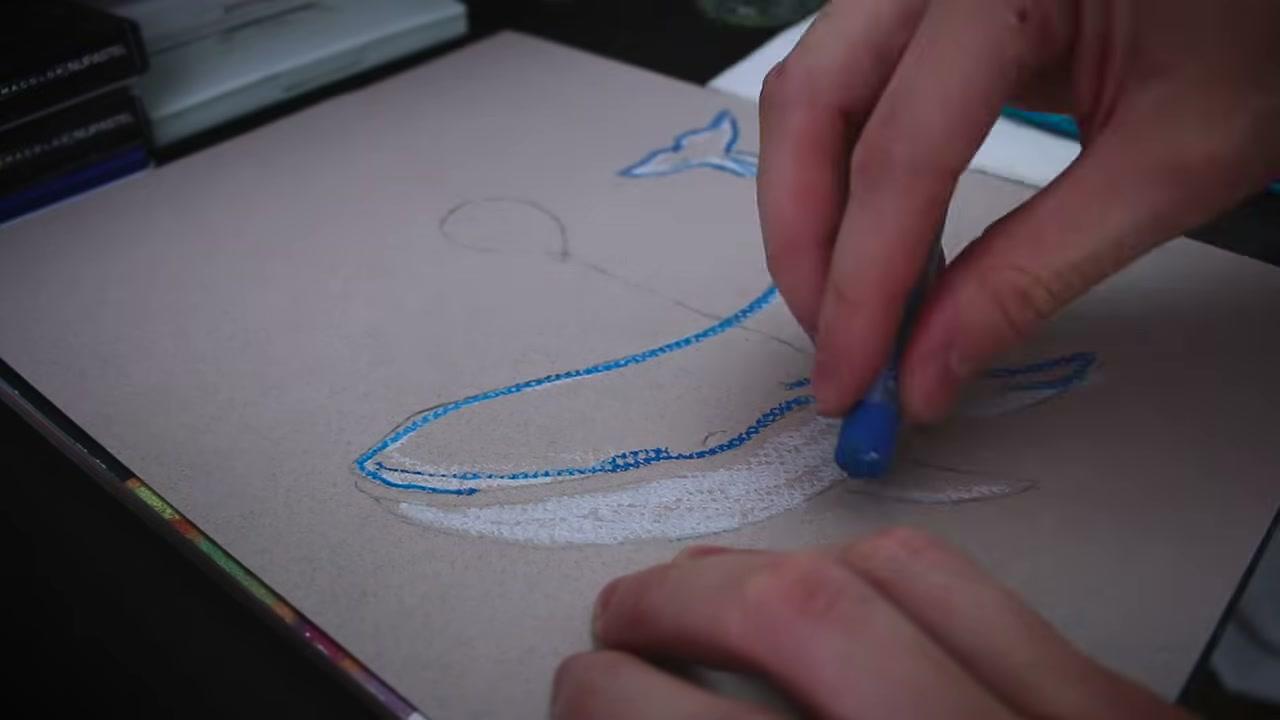
Block In the Whale With Blue Oil Pastel

4:36
Step 8: Block In the Whale With Blue Oil Pastel - How to Use Oil Pastels

Outline the whale in blue and start blocking in the color over the white. Fill the space fully so you have enough oil pastel to blend. The pastel catches on the paper texture and leaves a speckled look at this stage. That is normal. It smooths out once you blend it.

Tip

Use two blues, a dark one along the back and a lighter one near the belly.

9

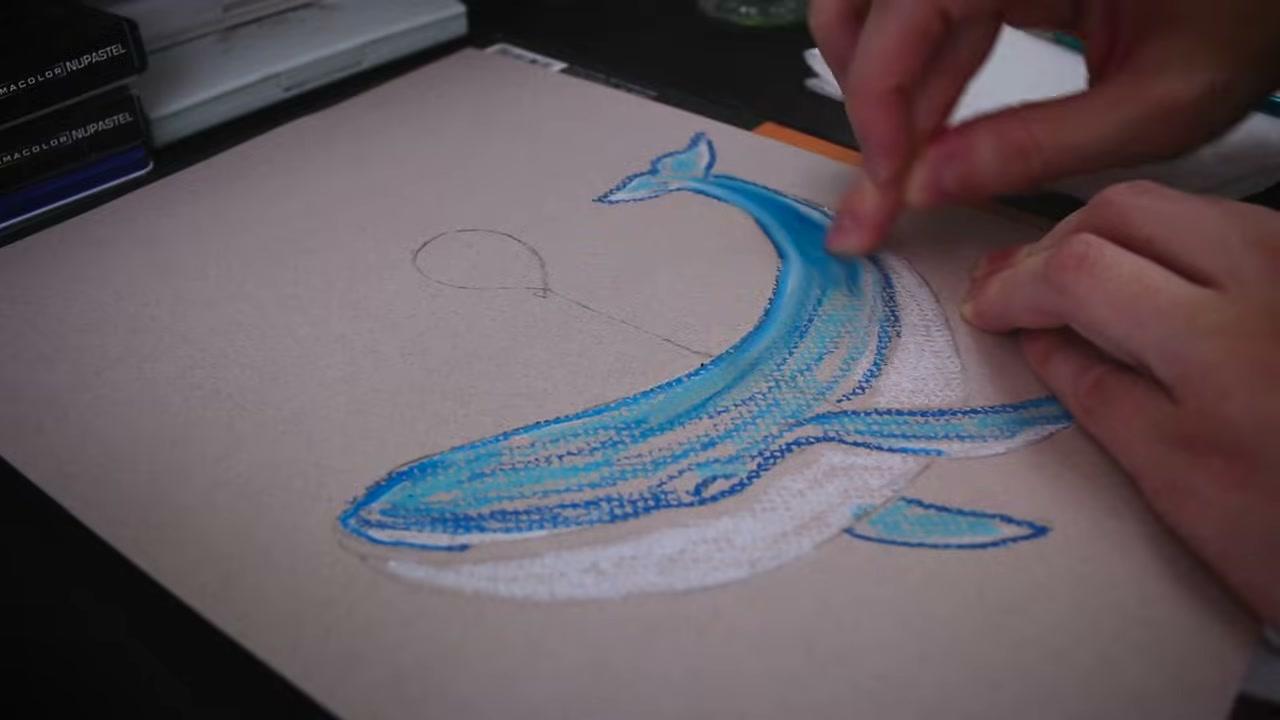
Blend the Blue Oil Pastel Whale With Your Fingers

4:48
Step 9: Blend the Blue Oil Pastel Whale With Your Fingers - How to Use Oil Pastels

Push the color around with your fingers, the same way you did on the flower. Even on textured paper, oil pastel blends well. Work the blue into the white to get a soft gradient from back to belly. Then go back with a second layer, adding color where you want it and blending only where you want to.

Tip

Wipe your fingers before touching the white belly so it stays clean.

10

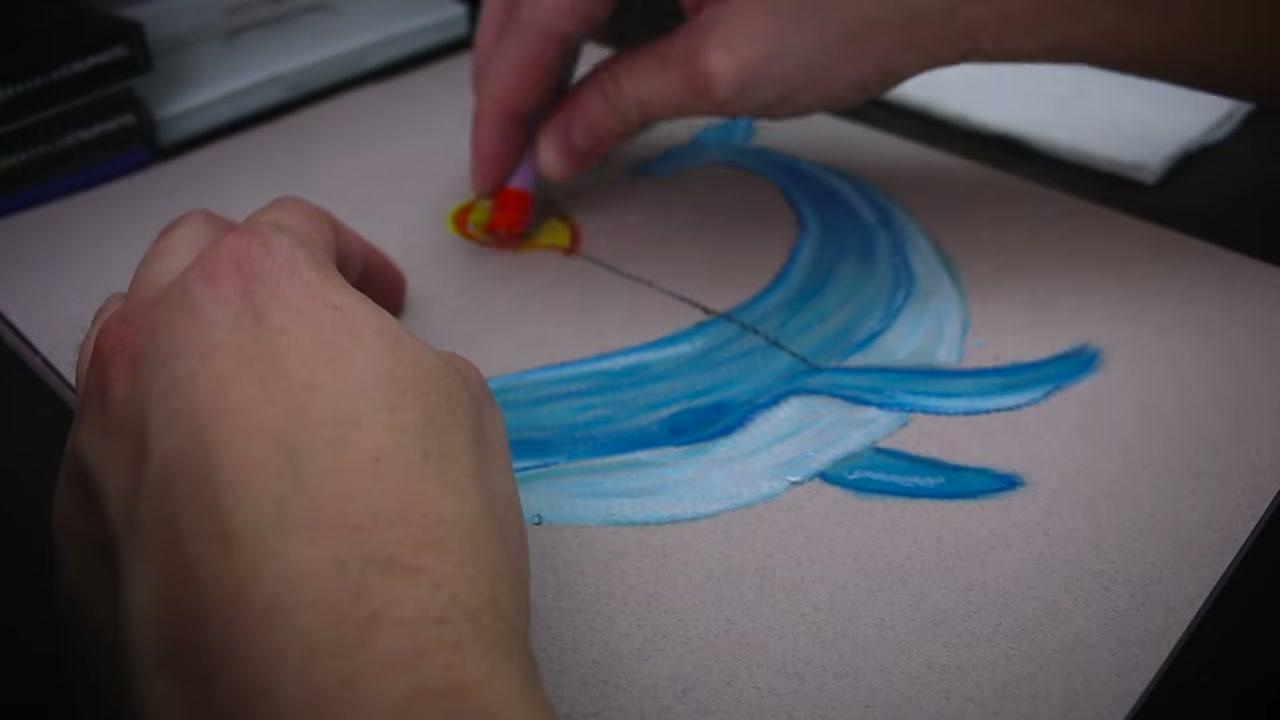
Add the Final Oil Pastel Details to the Whale Drawing

5:48
Step 10: Add the Final Oil Pastel Details to the Whale Drawing - How to Use Oil Pastels

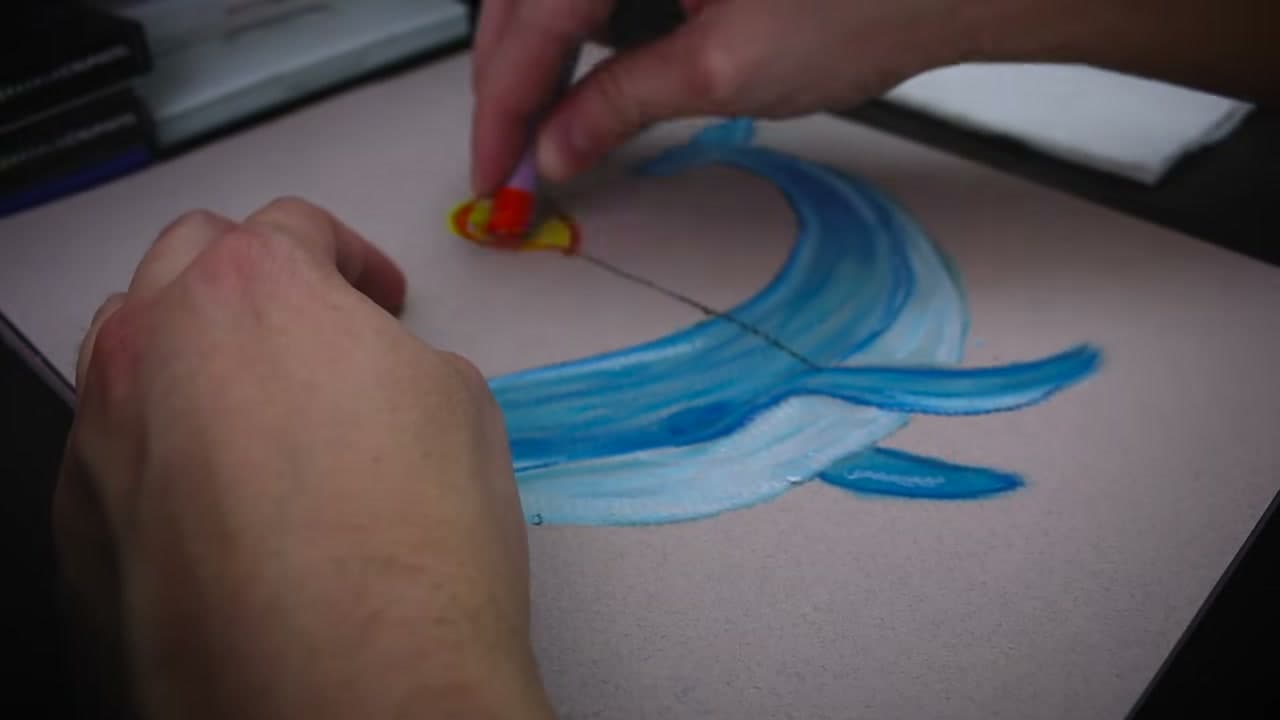
Add the finishing details last. The artist draws a dark string from the whale's fin and colors a red and yellow balloon at the end. Small bright accents on top of a blended layer bring a drawing to life. On toned paper you can leave the background bare. It looks finished as it is.

Tip

Practice every other day. Scribble a few colors and blend them to learn how they mix.

How to Use Acrylic Retarder to Slow Drying Time

Keep going

How to Use Acrylic Retarder to Slow Drying Time

Products Used

The Checklist

How to Use Oil Pastels

Tools
3
Materials
3
Steps
10
Video
7 min

Tools we recommend

Your Guide

Lets Create Something

As an Amazon Associate we earn from qualifying purchases. Links on this page may be affiliate links - clicking them and buying doesn't change your price, but helps support Show Me Step by Step.

Tags

Sunday How-To

New painting tutorials, every Sunday

One short email with the week's best step-by-step guides. Free, no spam, unsubscribe anytime.

Did this work for you?

What's next

Weekly Digest

Liked this painting tutorial?

Pick the categories you want to hear about. Weekly digest of new step-by-step tutorials. No spam, easy unsubscribe.

Send me tutorials about

We only email about new tutorials. Easy unsubscribe anytime.