How to Paint Mountains with Acrylics

PaintingEasy10:587 stepsBrowse more →

By ShowMeStepByStepPublished

Based on a video by Allison Prior Art and Music.

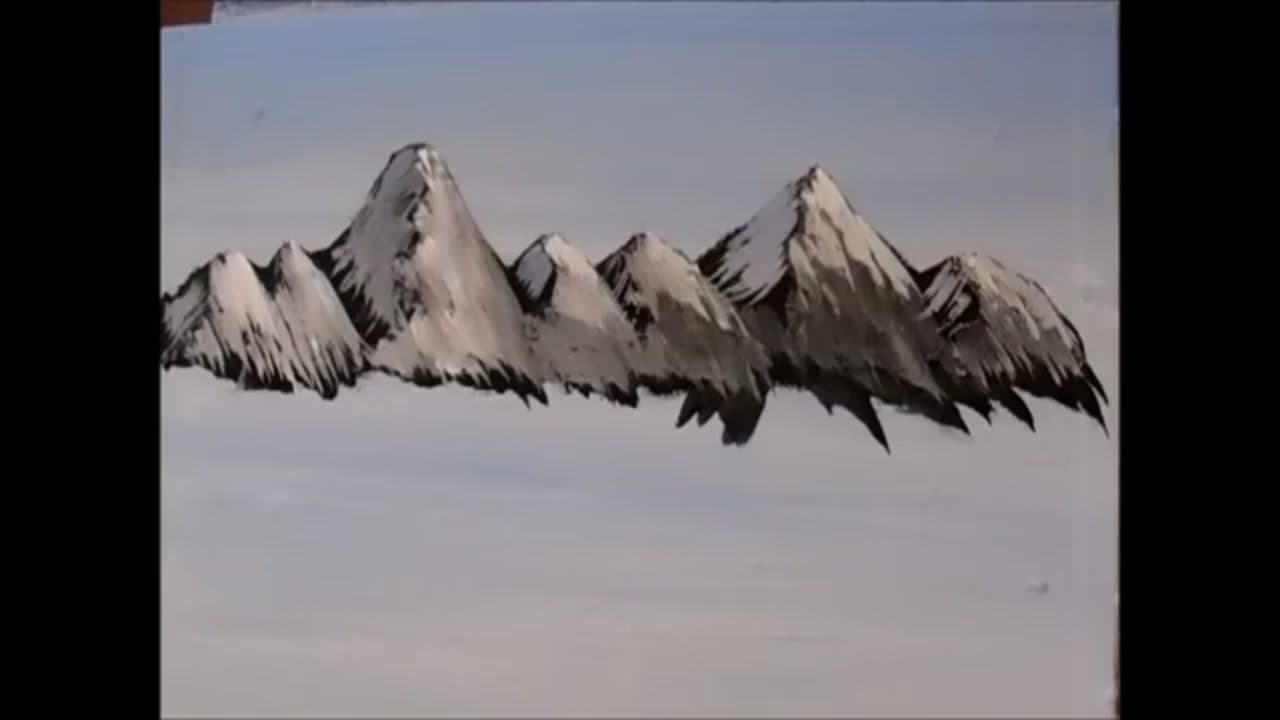
Painting mountains looks hard until someone shows you the shortcut. In this lesson, artist Allison Prior of Allison Prior Art paints a full snow-capped range using only a flat brush, a fan brush, and two colors.

The trick is a piece of chalk. You sketch the shapes first, then draw squiggly guide lines that tell you exactly where to pull your highlights. No guessing, no palette knife, no getting lost halfway through.

By the end you will have a row of mountains with light on one side and cool shadow on the other. It is a great first landscape if you are new to acrylics.

Step-by-Step Guide

1

Step 1: Sketch the Mountains with Chalk

0:40
Step 1: Step 1: Sketch the Mountains with Chalk

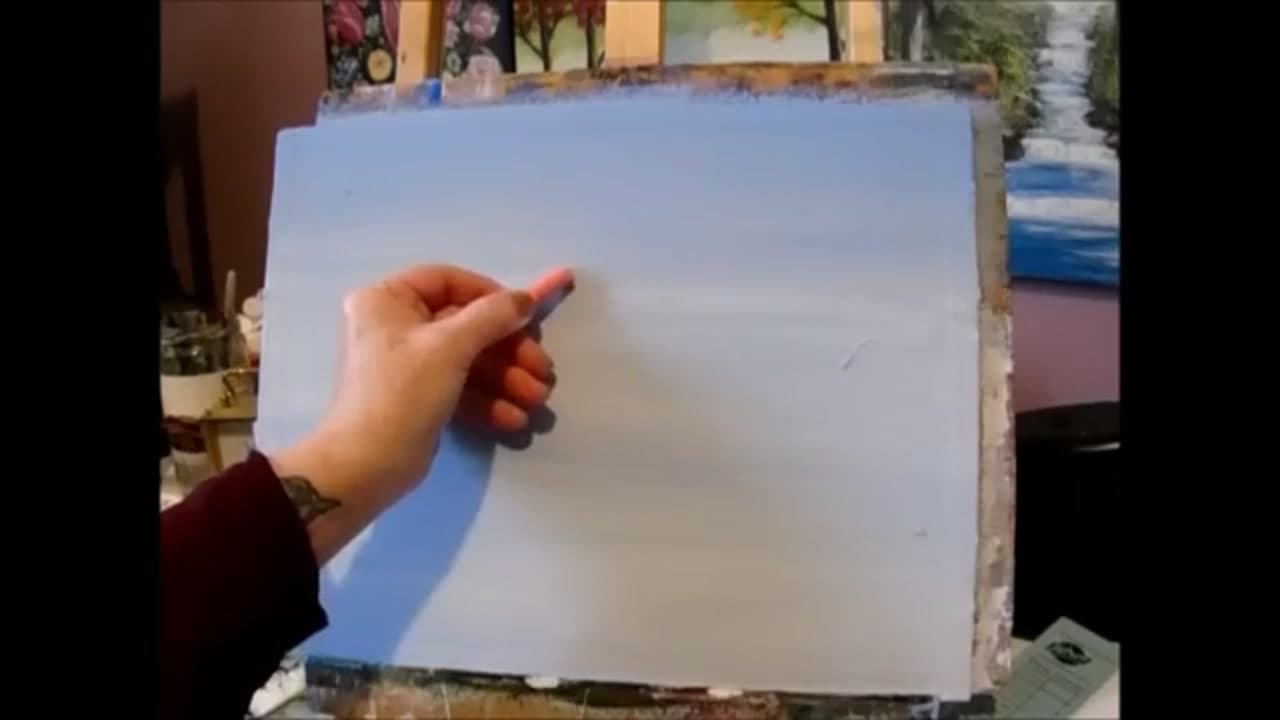
Start with a piece of chalk and sketch your mountain shapes right onto the canvas. Draw a row of humps at different heights - a small hill, a taller one, then a couple more. Any shape works, so play with it. Chalk wipes off like a chalkboard, so if a peak looks wrong you just rub it out and try again. Getting the shapes down first takes all the pressure off the painting part.

Tip

Look at a photo of real mountains and copy a few of the shapes you like. It beats guessing.

Products used in this step

2

Step 2: Fill In the Shapes with Dark Paint

2:30
Step 2: Step 2: Fill In the Shapes with Dark Paint

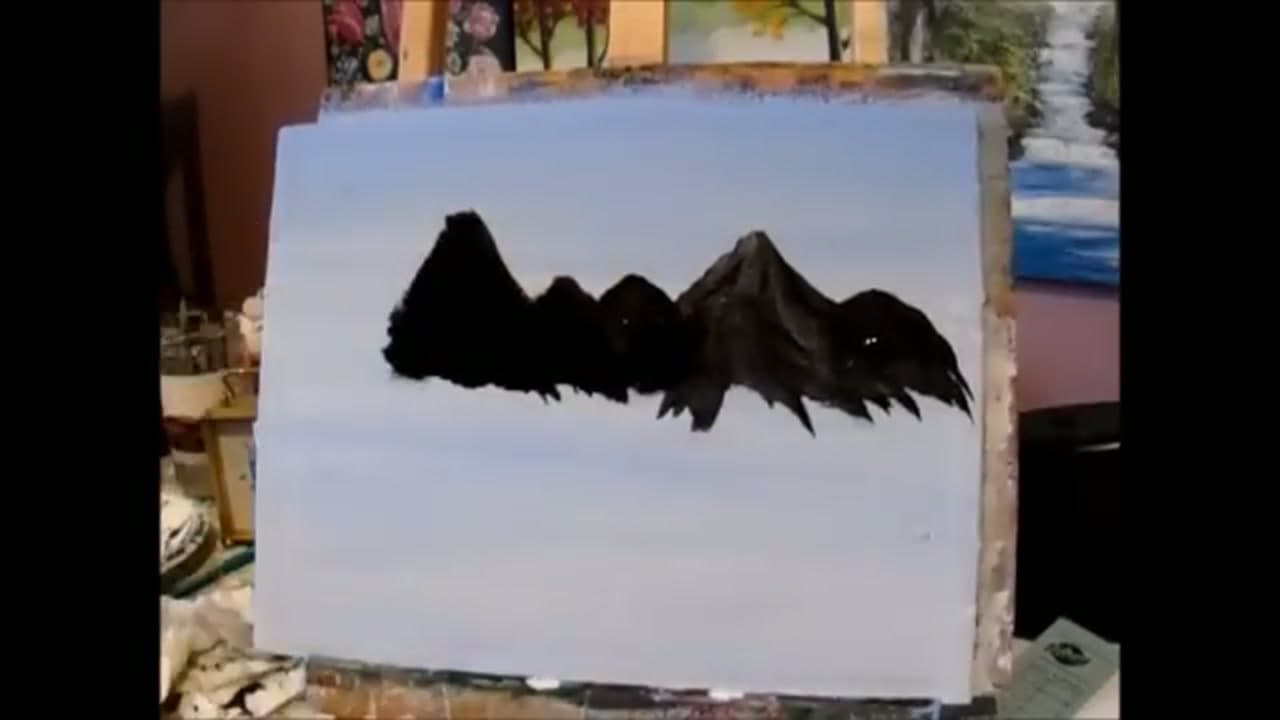
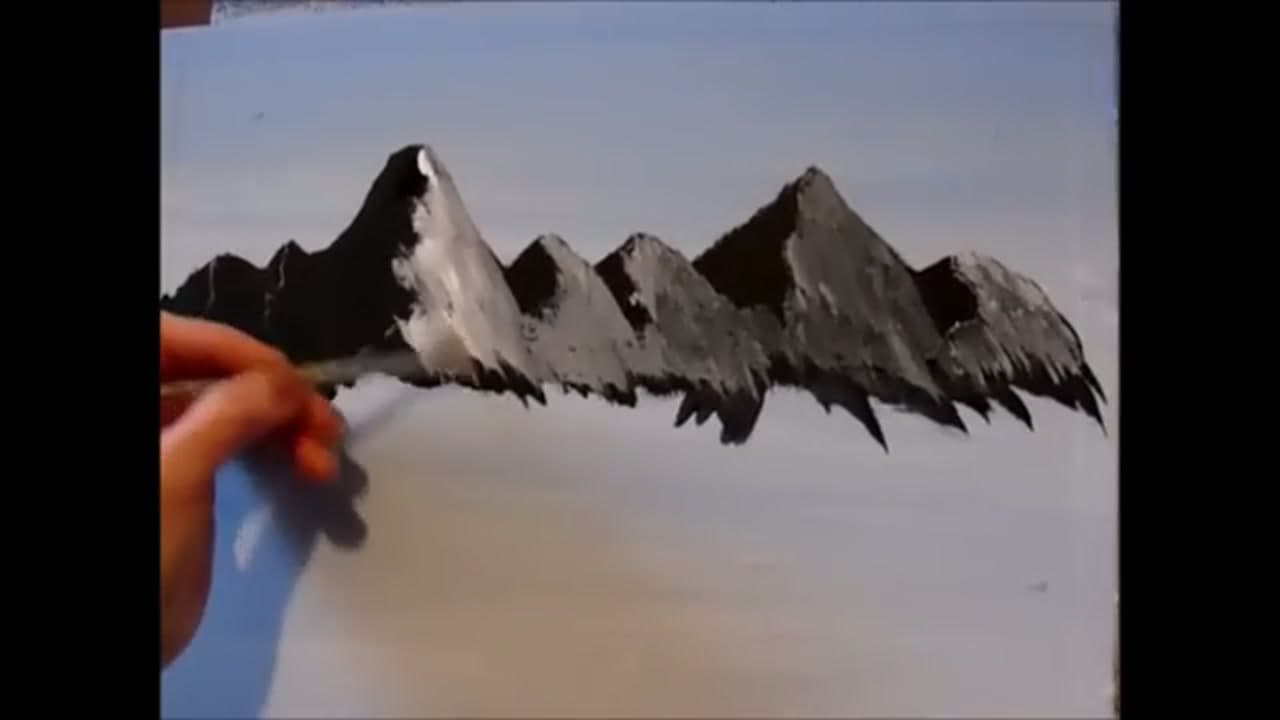
Grab a flat chisel-edge brush and fill your mountain shapes with a dark color. Allison uses black, but any deep color works - a dark red, an orange, or a mix. Run the chiseled edge right up against your chalk lines so the silhouette stays crisp. Keep the bottoms jagged where the peaks meet the ground. Now you can see the whole range, and you can still fix any shape before it dries.

Tip

Pick your dark color based on your plan. Going for snow later? Black gives you the strongest contrast.

3

Step 3: Draw Squiggly Guide Lines

5:10
Step 3: Step 3: Draw Squiggly Guide Lines

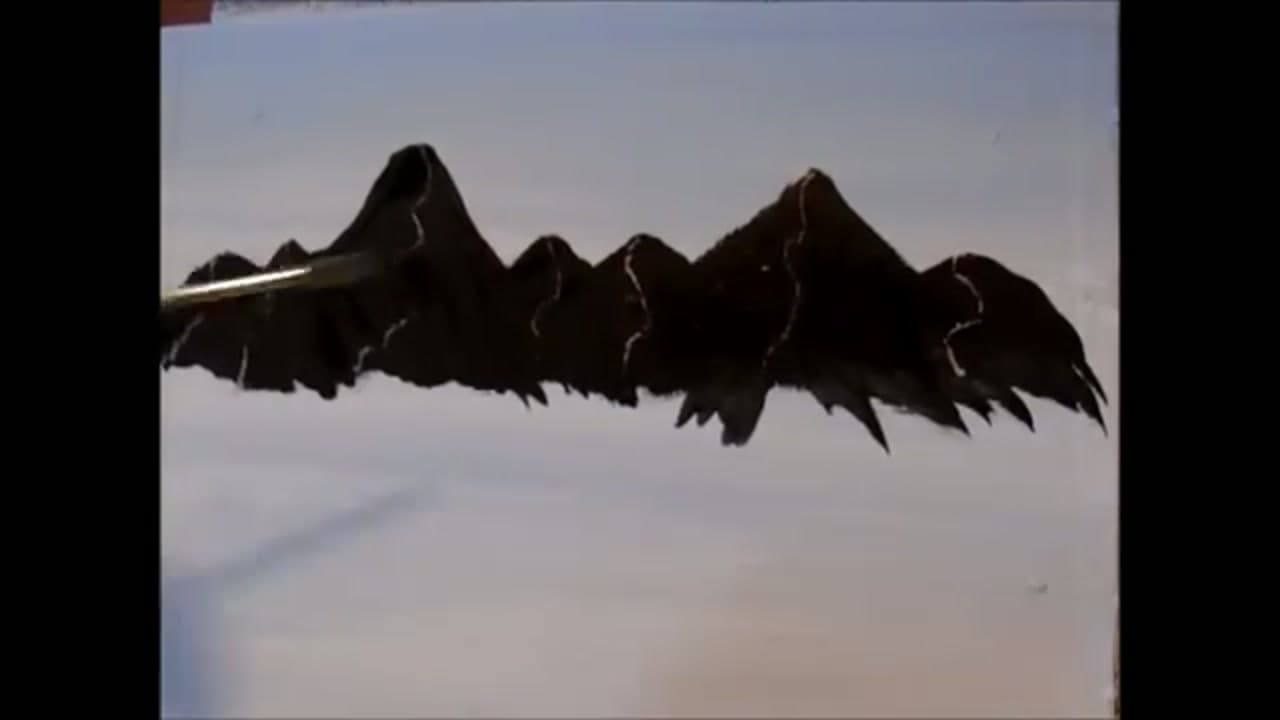
Take your chalk again and draw a squiggly line from the top of each peak down through the middle of the range. These little lines are the secret to good mountain shapes. They mark where the light meets the shadow, so when you highlight you know exactly where to stop. This is the part most beginners struggle with, and the squiggly line does the hard thinking for you.

Products used in this step

4

Step 4: Highlight with the Fan Brush

6:30
Step 4: Step 4: Highlight with the Fan Brush

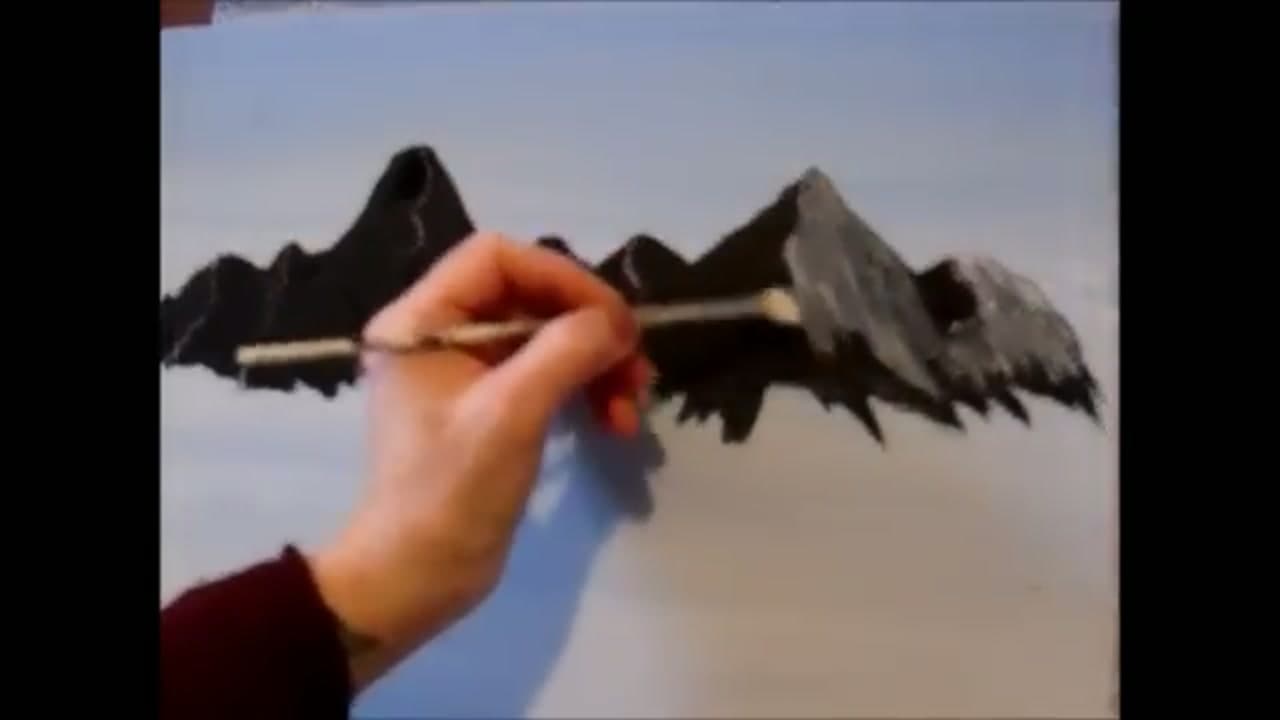
Now the fun part. Mix white with a touch of black to soften it, then load your fan brush. Go to the top of a peak and pull down diagonally, staying inside that squiggly line. Do not go past it. Each stroke lays a bright edge on the sunny side while the dark stays put underneath as shadow. Work peak to peak and watch the mountains start to pop off the canvas.

Tip

Pull diagonally, not straight down. The angle is what makes the rock face read as a slope.

Products used in this step

5

Step 5: Keep the Darks Showing Through

7:50
Step 5: Step 5: Keep the Darks Showing Through

Go easy on the pressure. Use just the very tip of the fan brush so you drag a thin, broken highlight instead of a solid wall of grey. You want the black underpainting peeking through between the strokes - that is what gives the rock its texture and depth. If you push too hard you lose the darks and the mountain flattens out. Light hand, lots of little strokes.

Products used in this step

6

Step 6: Add Cool Blue Shadow

9:10
Step 6: Step 6: Add Cool Blue Shadow

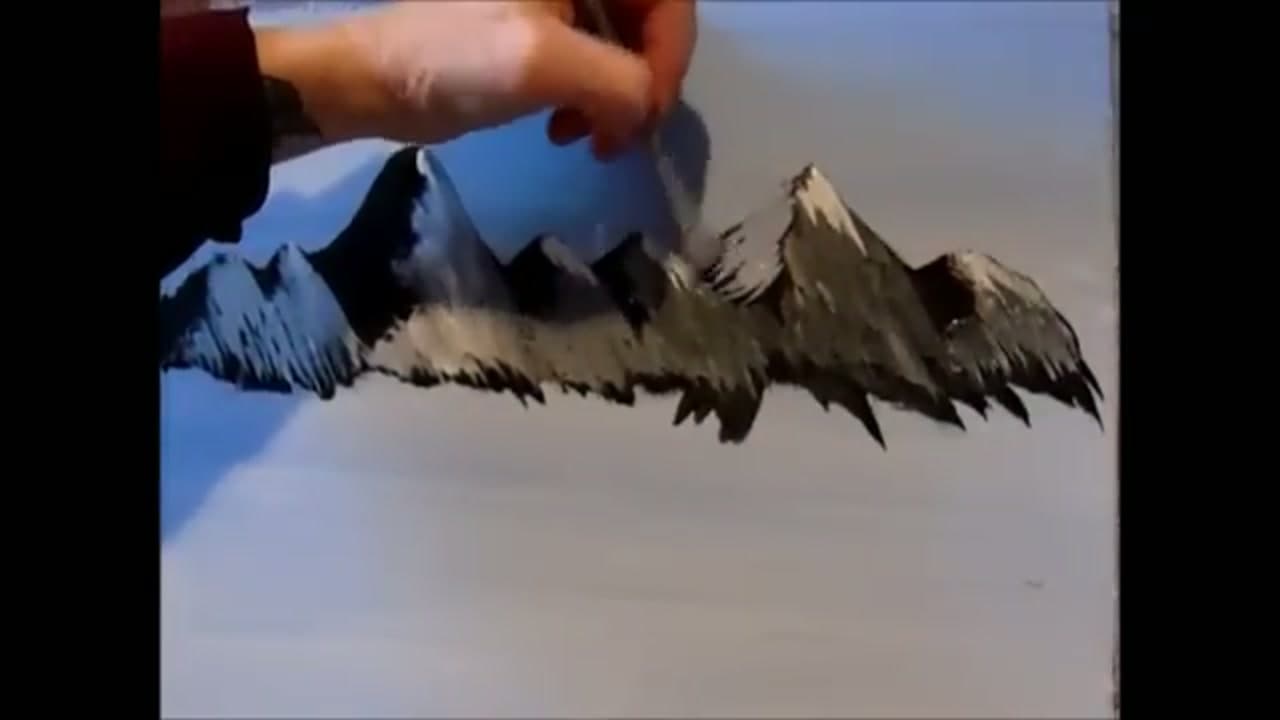
Mix a little blue with white for a soft shadow color. Say the sun is coming from the right, so the shadow falls on the left of each peak. Pull that blue down the shaded side with the corner of your fan brush, and dab it into the smaller gaps too. The blue cools those areas down and pushes them back, so the sunlit faces feel even brighter. Now you have real shape.

Tip

Keep the blue subtle. A hint of it reads as shadow; too much turns your mountains purple.

Products used in this step

7

Step 7: Your Finished Mountain Range

10:45
Step 7: Step 7: Your Finished Mountain Range

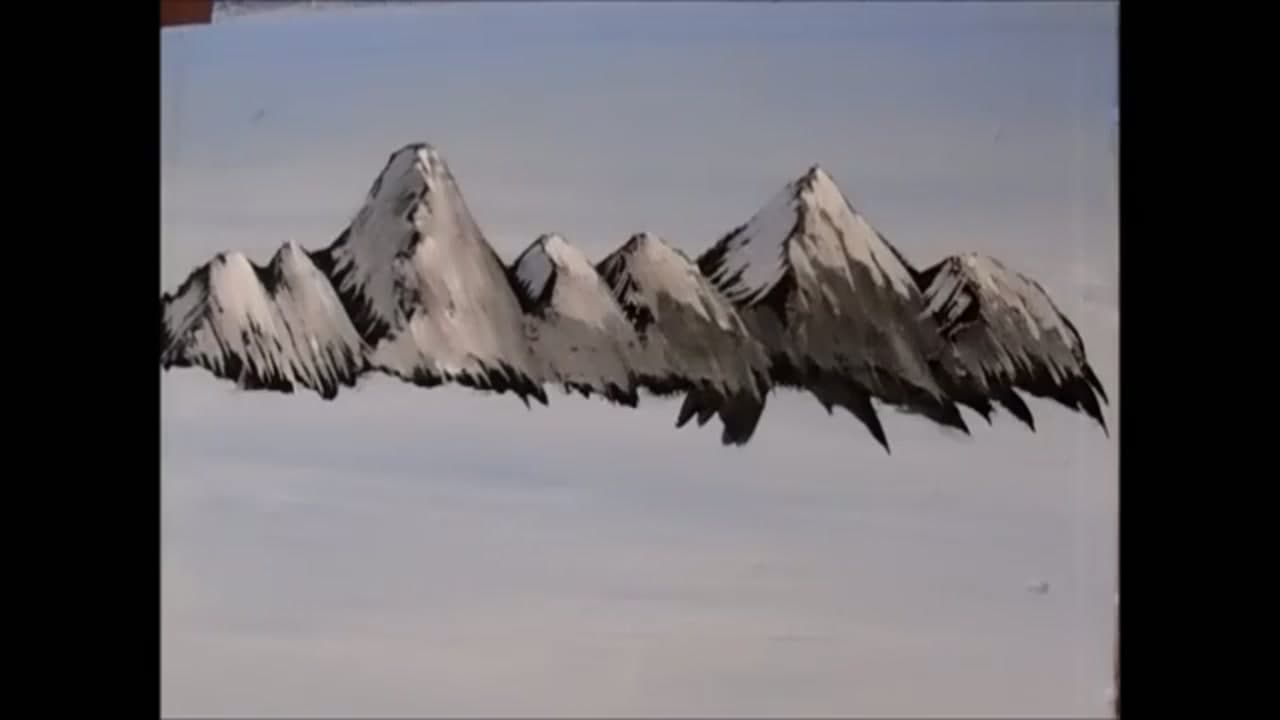
There they are - a full range of mountains with snow-capped peaks, warm light on the right and cool shadow on the left. From here you can do anything you want. Add more snow, drop in some trees, or push the highlights brighter. The shapes are locked in, so you get to have fun. If you want, you can even go back over it with a palette knife now that the layout is all in place.

Products used in this step

Products Used

☐ The Checklist

How to Paint Mountains with Acrylics

Tools
5
Materials
2
Steps
7
Video
11 min

Your Guide

Allison Prior Art and Music

As an Amazon Associate we earn from qualifying purchases. Links on this page may be affiliate links - clicking them and buying doesn't change your price, but helps support ShowMeStepByStep.

Tags

Did this work for you?

What's next

Weekly Digest

Liked this painting tutorial?

Pick the categories you want to hear about. Weekly digest of new step-by-step tutorials. No spam, easy unsubscribe.

Send me tutorials about

We only email about new tutorials. Easy unsubscribe anytime.