How to Paint a Forest with Acrylics (Beginner Step-by-Step)

Also in:Crafts

By ShowMeStepByStepPublished

Based on a video by easypeasy art.

A forest scene is the painting that turns a row of brown sticks into a real place you can imagine walking into. The trick is layers - back to front, light to dark, big shapes to small details. Get the order right and the rest of it almost paints itself.

This walkthrough follows along with easypeasy art's forest pathway painting on a small canvas with eight basic acrylic colors. The finished piece has depth, dappled sunlight, and a path you want to follow. If you've already painted a single tree or a sunset with acrylics, this is the natural next step up. By the end you'll have a small landscape that holds its own on a wall.

Step-by-Step Guide

1

Step 1: Block In the Green Base

0:25
Step 1: Step 1: Block In the Green Base

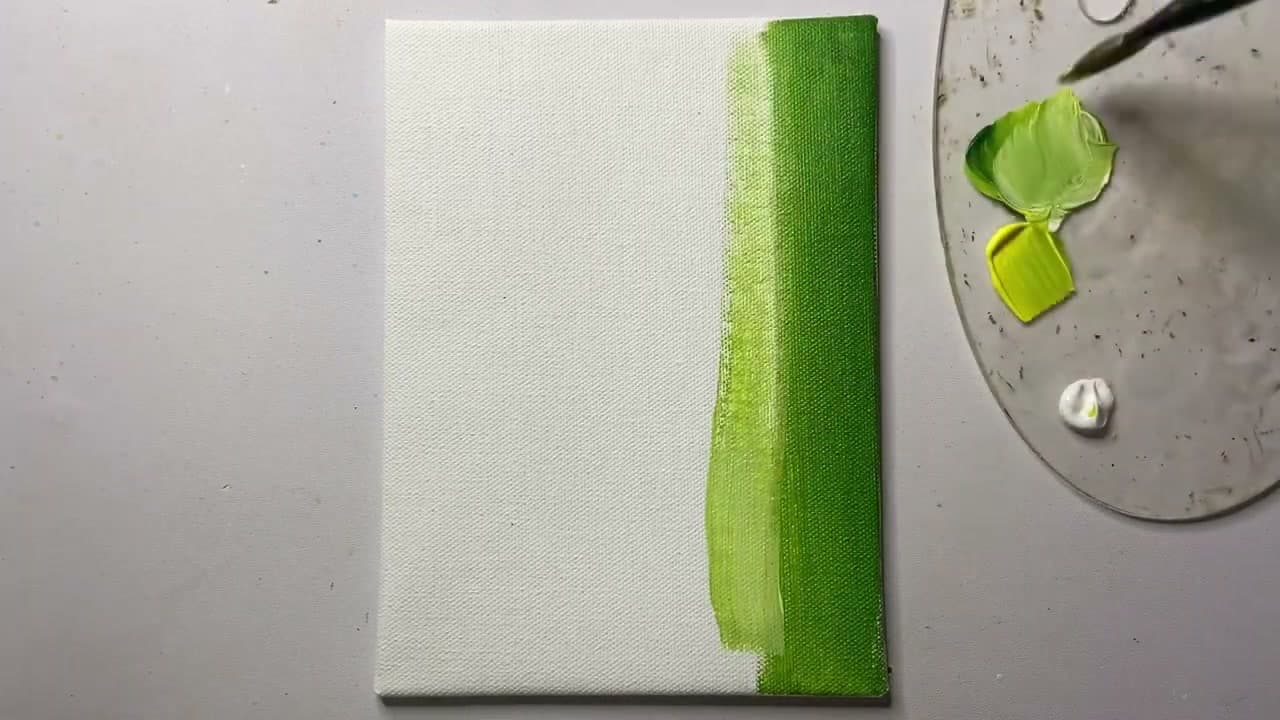
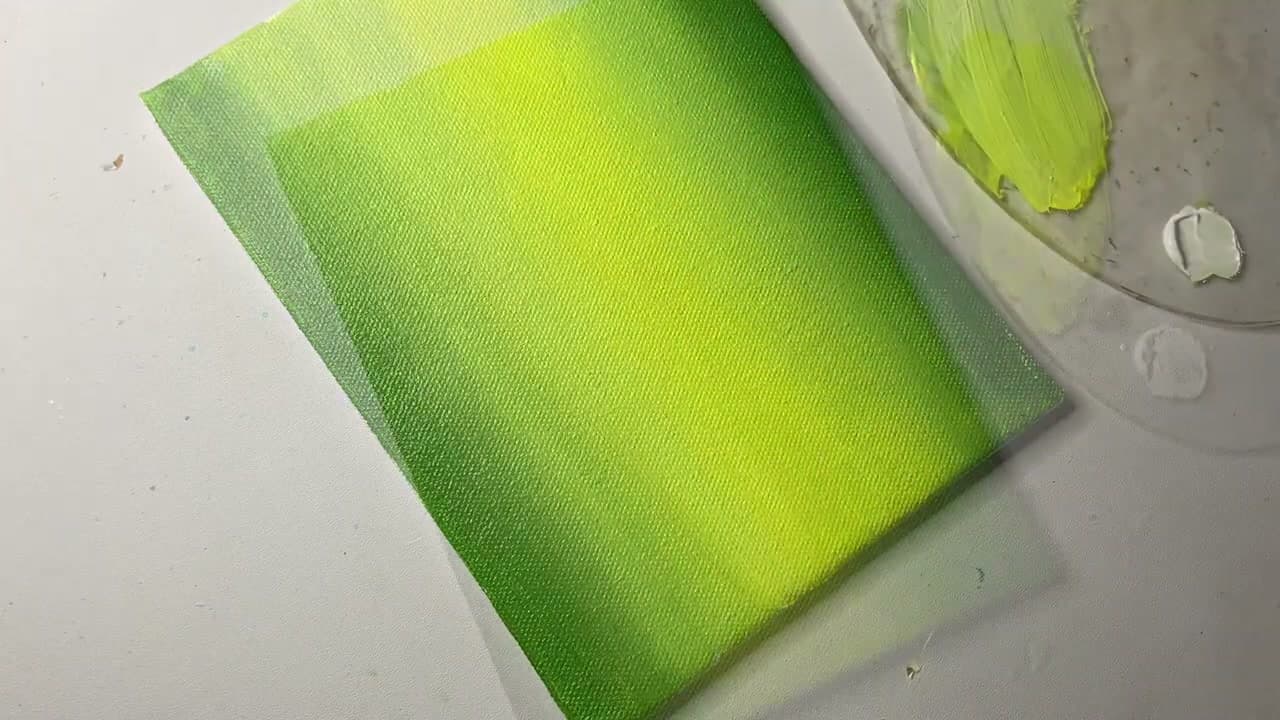
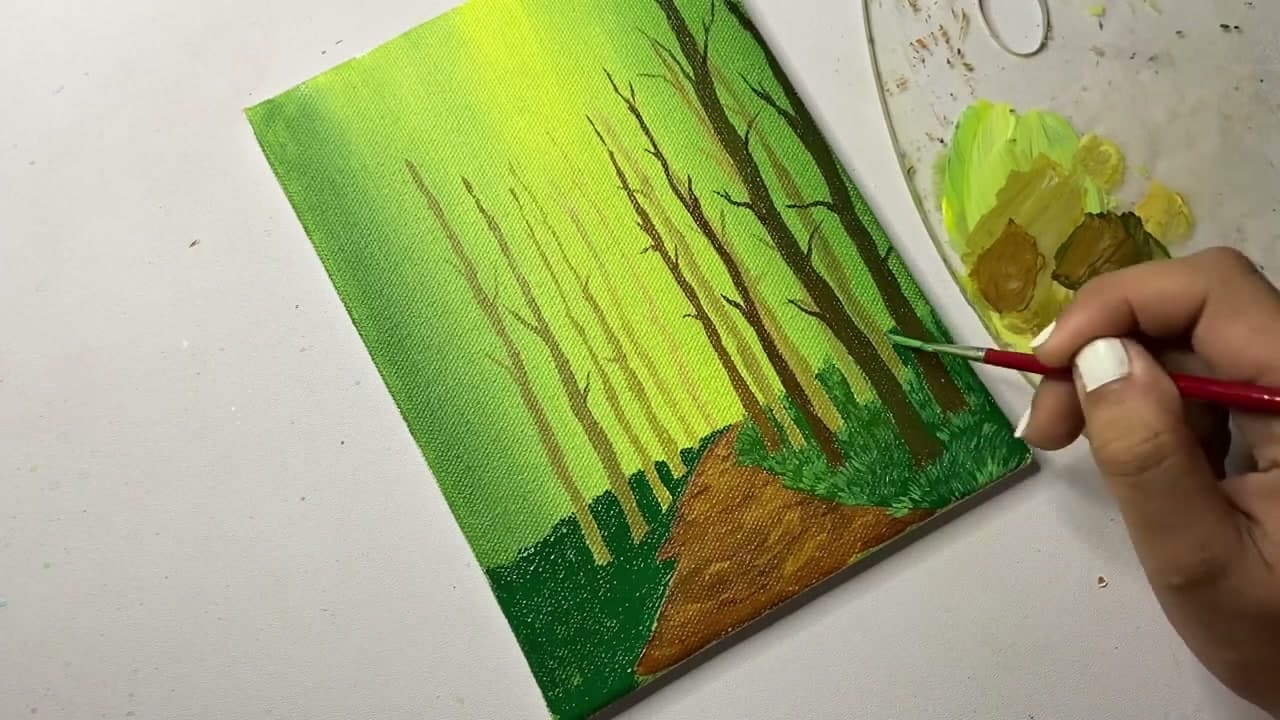
Squeeze out a generous puddle of sap green on your palette. Load a one-inch flat brush and pull broad vertical strokes from the edges of the canvas inward. The strokes don't need to be neat - this layer becomes the deep forest and most of it gets covered later.

Leave the center of the canvas lighter than the edges. That bright center is where the sunlight is going to break through the trees. Keep the paint a little thicker on the outside, a little thinner toward the middle.

Tip

If your green base dries before you get to step 2, it's fine - acrylics are forgiving. Just lightly re-wet the center with clean water before you blend in the yellow.

2

Step 2: Blend a Sunlit Center with Yellow

0:55
Step 2: Step 2: Blend a Sunlit Center with Yellow

Rinse the brush, then load it with cadmium yellow. Tap the yellow into the still-wet green at the middle of the canvas. Don't paint a sharp shape - dab it on in a loose vertical zone and let it bleed into the surrounding green.

Now wipe the brush dry on a paper towel and gently sweep across the seam where yellow meets green. You're not adding more paint, you're softening the edge. The goal is a smooth gradient from bright yellow at the core to deep green at the outside. This becomes the light source that makes the whole forest feel atmospheric.

Tip

If the yellow looks too acid against the green, mix in a touch of titanium white. The softer cream color reads more like sunlight and less like neon.

3

Step 3: Sketch the Distant Tree Trunks

1:40
Step 3: Step 3: Sketch the Distant Tree Trunks

Wait until the base layer is dry to the touch. Mix a small amount of burnt umber with a lot of water on the palette - you want a thin wash, not opaque paint. Load a size 4 round brush.

Pull thin vertical lines straight up from the bottom of the canvas. Vary the height. Some trunks should reach two-thirds up, some only halfway. Leave gaps between them. These are the trees deepest in the woods, so they should be soft, broken, and faint. If a line looks too dark, dab it back with a damp paper towel.

Tip

Hold the brush near the very end of the handle. The loose grip gives you a wobbly, organic line that looks more like a real tree than a perfectly straight one.

4

Step 4: Add Middle Trees and Start the Dirt Path

3:15
Step 4: Step 4: Add Middle Trees and Start the Dirt Path

Without rinsing, load slightly more burnt umber for a denser line. Paint a second row of trees in front of the background ones - thicker trunks, a bit more defined. Place them so they overlap the lighter background, which immediately creates depth.

Now switch to a size 6 round and mix burnt umber with a touch of yellow ochre. Block in a triangular dirt path coming up from the bottom-right corner of the canvas. The wide end is at the bottom edge, the point reaches up into the trees - this is the vanishing point that pulls the viewer's eye into the scene.

Tip

The path doesn't have to be perfectly straight. A slight curve to one side makes the forest feel more inviting than a ruler-straight line.

5

Step 5: Paint the Bold Foreground Trees

4:20
Step 5: Step 5: Paint the Bold Foreground Trees

Mix burnt umber with a small amount of mars black for the foreground trunks. Load the size 6 round and place a tall, thick tree right at the edge of the canvas - one on each side if you want the framing effect. These trees should run the full height of the canvas and look heavier than anything in the background.

Add a few thin branches reaching toward the center of the painting. Use the very tip of the brush and a lighter touch. Branches should taper as they extend, not stay the same thickness. A handful of thin twigs near the canopy sells the foreground perspective.

Tip

Lift the brush off the canvas as you reach the end of a branch. The natural taper happens automatically when you let the brush leave the surface mid-stroke.

6

Step 6: Build the Dark Foliage Layer

5:30
Step 6: Step 6: Build the Dark Foliage Layer

Load a small round brush or a stiff fan brush with hooker's green plus a touch of mars black. Don't smooth it on - stipple. Tap the brush against the canvas in tight clusters. Work along the top third where the canopy lives, and along the edges of the dirt path where bushes grow.

This is the deepest layer of leaves. It should feel almost too dark on its own, because the next layer of brighter green is going to sit on top of it. Keep the clusters loose and irregular. Even spacing reads fake.

Tip

If you have an old, beaten-up brush with a frayed tip, this is the step for it. The uneven bristles make leaf clusters that look more natural than a fresh new brush.

7

Step 7: Layer Medium and Light Green Leaves

7:00
Step 7: Step 7: Layer Medium and Light Green Leaves

Switch to sap green and stipple a second layer of leaves over the dark base. Cover most of the dark green but let some of it peek through at the edges of each leaf cluster - that's how you get the illusion of leaves in front of leaves.

Now mix sap green with cadmium yellow for a third pass. Stipple these brighter highlights only where the sunlight would land - right around the bright center of the canvas, on the tops of the leaf clusters facing the light. Three layers of stippling, getting brighter each time, gives the canopy real dimension.

Tip

Less highlight is more. If you cover everything in bright yellow-green, the canopy goes flat. Only the side of the leaves catching the sun should be the brightest color.

8

Step 8: Finish with Grass Tufts and Final Lights

8:30
Step 8: Step 8: Finish with Grass Tufts and Final Lights

Load a fine liner brush with a mix of sap green and cadmium yellow. Flick tiny upward strokes along the edges of the dirt path. These are grass blades - thin, slightly curved, and clustered in little tufts rather than spread evenly.

Step back from the canvas. Look at where your eye lands - that's where the final highlights go. Add one more pass of pure cadmium yellow on the brightest leaves at the center of the canopy and on the brightest grass blades near the path. Sign the corner with a thin brush in burnt umber. You're done.

Tip

If the painting feels muddy at the end, a few small pure white dots on the brightest highlights will pop it back. Use a toothpick or the very tip of a liner for these specks - any bigger and they look like snow.

Products Used

☐ The Checklist

How to Paint a Forest with Acrylics (Beginner Step-by-Step)

Tools
9
Materials
8
Steps
8
Video
9 min

Your Guide

easypeasy art

As an Amazon Associate we earn from qualifying purchases. Links on this page may be affiliate links - clicking them and buying doesn't change your price, but helps support ShowMeStepByStep.

Tags

What's next

Weekly Digest

Liked this painting tutorial?

Pick the categories you want to hear about. Weekly digest of new step-by-step tutorials. No spam, easy unsubscribe.

Send me tutorials about

We only email about new tutorials. Easy unsubscribe anytime.