How to Make Cinnamon Ornaments

By ShowMeStepByStepPublished

Based on a video by Our Upcycled Life.

Cinnamon applesauce ornaments are one of those crafts that look like they took all afternoon and actually took about ten minutes of hands-on time. Three ingredients you already own. No oven required if you're patient. The whole house smells like a Christmas market the moment the bowl comes out.

The recipe is half a cup of ground cinnamon, half a cup of applesauce, and one tablespoon of plain school glue. The glue is what holds the ornament together for years - skip it and they crack. Press them flat with a rolling pin, cut shapes with whatever cookie cutters you have, and either dry them low and slow in a 200 degree oven for a couple of hours or leave them on the counter overnight. Tie a loop of red and white baker's twine through each hole and they're ready for the tree.

This is a perfect grandparent-and-grandkids project. Little hands can mix the dough, press the cutters, and poke the holes with a straw. The dough is non-toxic but not edible - keep that part clear if you're crafting with toddlers. Once they dry, the ornaments keep their cinnamon smell for two or three seasons and gift well in a small bag with a tag.

Looking for more no-bake Christmas projects? Try how to make salt dough ornaments for the classic white version, or how to make a paper snowflake to pair on the same tree.

Step-by-Step Guide

1

Gather Your Three Pantry Ingredients

0:10
Step 1: Gather Your Three Pantry Ingredients

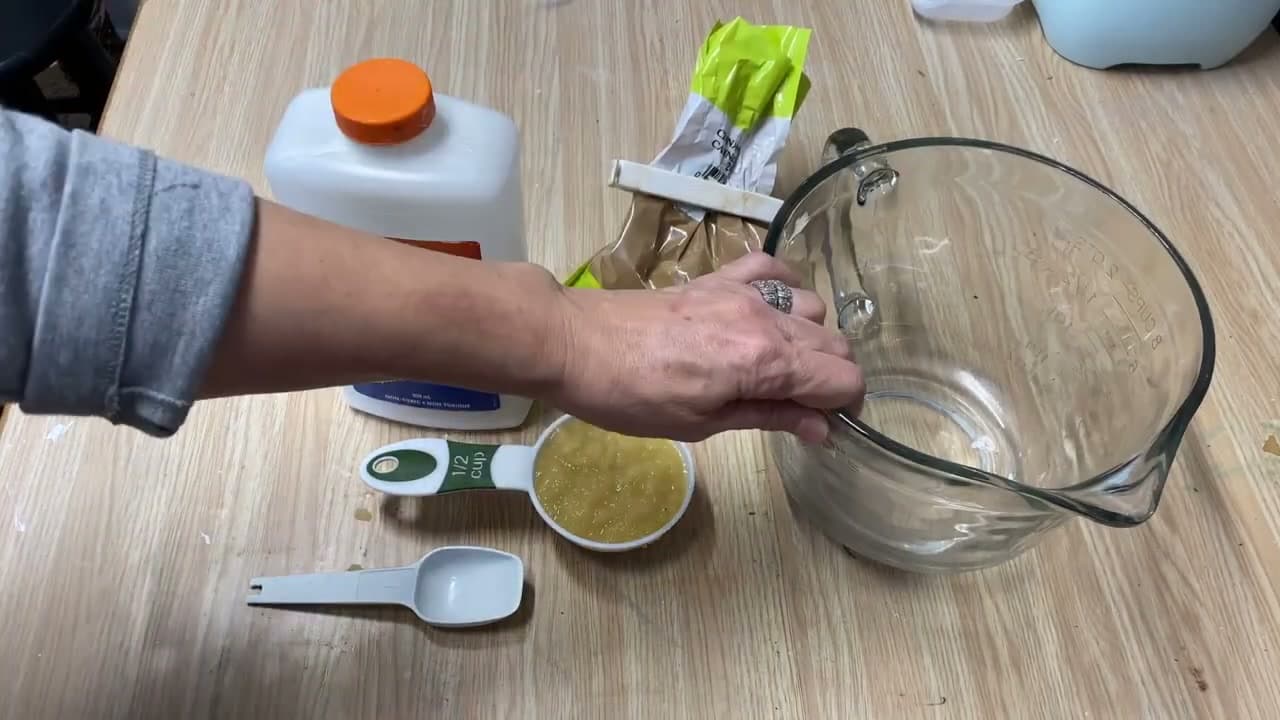
Set out half a cup of unsweetened applesauce, half a cup of ground cinnamon, and a bottle of plain white school glue. Any brand of school glue works. A glass measuring cup with a pour spout makes mixing and pouring easier later, but a regular mixing bowl is fine.

If you have it, add a teaspoon of nutmeg or pumpkin pie spice to the cinnamon for a deeper holiday scent. Toddlers and kids can help with this part safely - the dough is non-toxic, just not for eating.

Tip

Buy ground cinnamon in bulk from the spice aisle. Tiny jars from the baking aisle cost twice as much per ounce.

2

Add One Tablespoon of School Glue

0:40
Step 2: Add One Tablespoon of School Glue

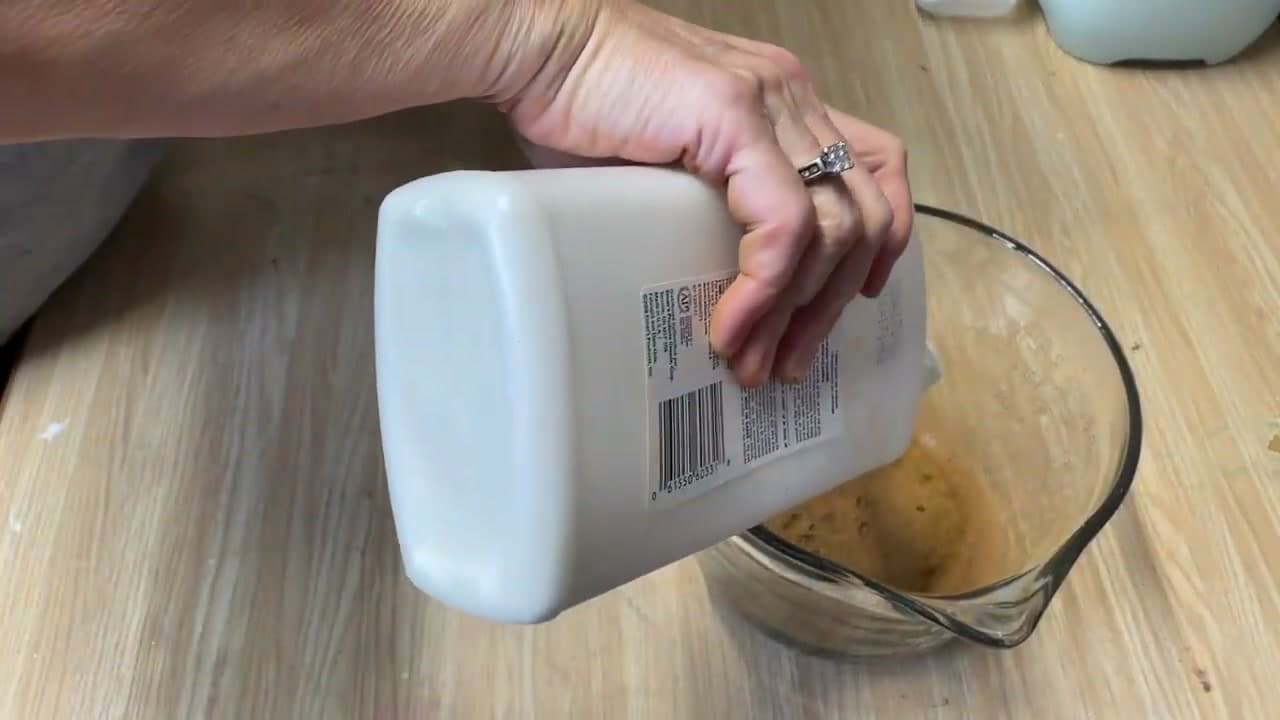
Pour one tablespoon of plain white school glue right into the bowl with the cinnamon and applesauce. The glue is what keeps the ornaments from cracking as they dry, so don't skip it. A jug of Elmer's works, but so does any cheap kids' craft glue.

One tablespoon is the right amount for the half-cup recipe. More glue won't make the ornaments stronger and can make them gummy. Less and they get brittle.

Tip

White school glue only. Hot glue, super glue, or fabric glue all bring chemicals you don't want around a holiday scent and around kids.

3

Mix Until It Forms a Cookie-Dough Ball

0:50
Step 3: Mix Until It Forms a Cookie-Dough Ball

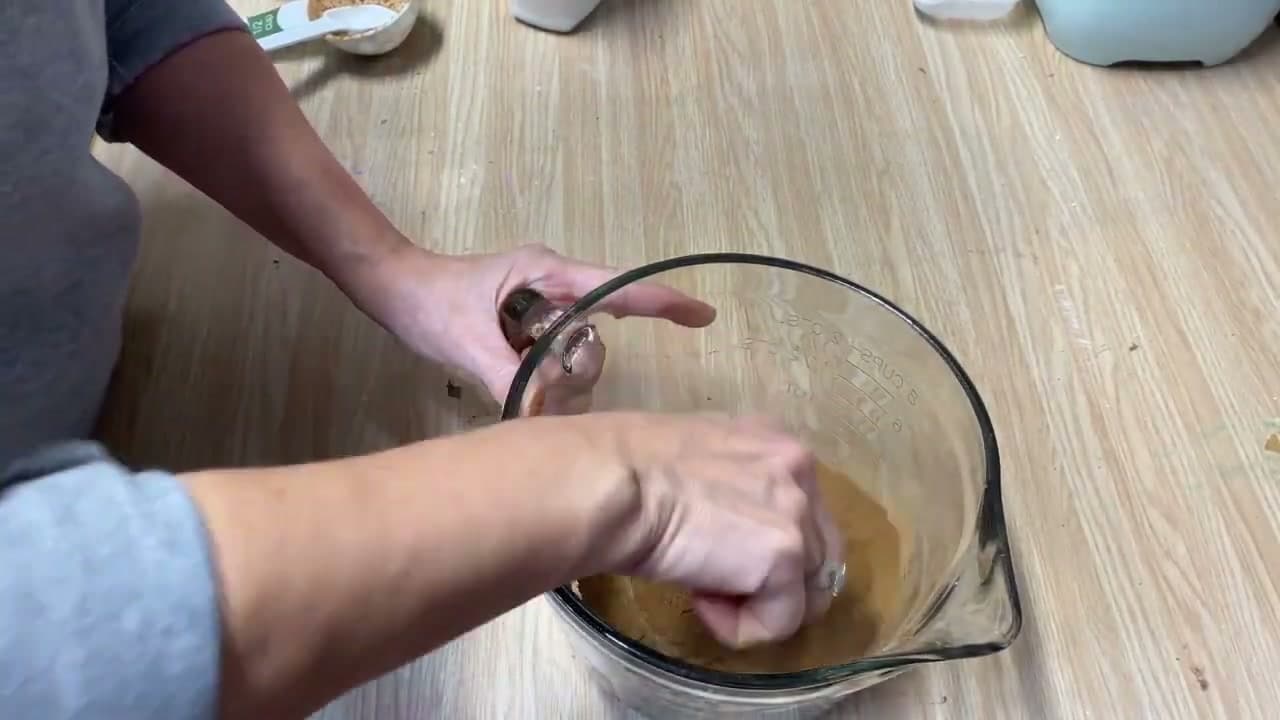
Stir everything together with a spoon at first, then switch to your hands once it starts coming together. The mixture should pull away from the side of the bowl and form a soft ball that feels like Play-Doh or cookie dough.

If the ball is sticky and won't hold its shape, add another tablespoon of cinnamon. If it's crumbly and won't come together, add a teaspoon more applesauce. The recipe is forgiving - adjust by feel until you get a workable dough.

Tip

The mixing bowl smells incredible while you do this. Don't be surprised when the whole kitchen smells like the holidays five minutes in.

4

Roll the Dough Between Two Sheets of Parchment Paper

1:45
Step 4: Roll the Dough Between Two Sheets of Parchment Paper

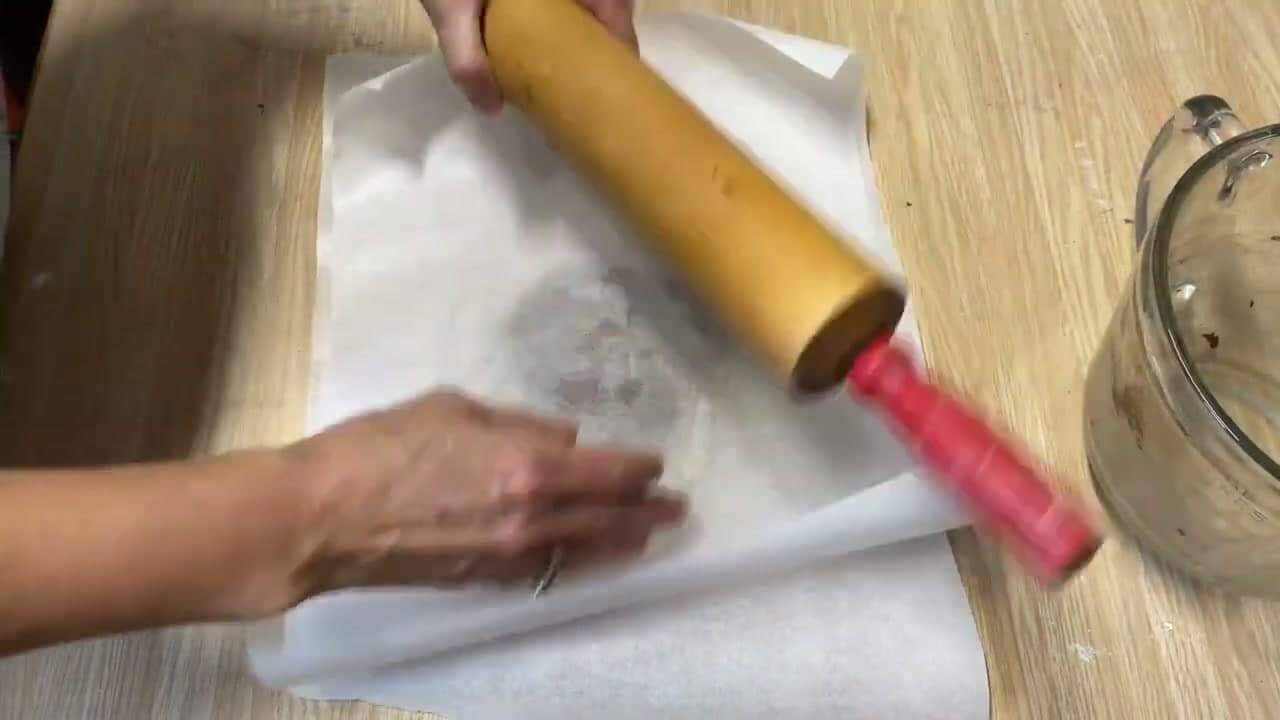
Place the dough on a sheet of parchment paper and lay a second sheet on top. The parchment keeps the dough from sticking to your rolling pin or to the counter, so you don't need any extra cinnamon to dust the surface.

Roll the dough out to about a quarter inch thick. Any thinner and the ornaments crack while they dry. Any thicker and they take days to dry through. A quarter inch is the goldilocks number.

Tip

A wine bottle works as an emergency rolling pin if you don't have one. Wipe it down first.

5

Cut Out Ornament Shapes With Cookie Cutters

2:05
Step 5: Cut Out Ornament Shapes With Cookie Cutters

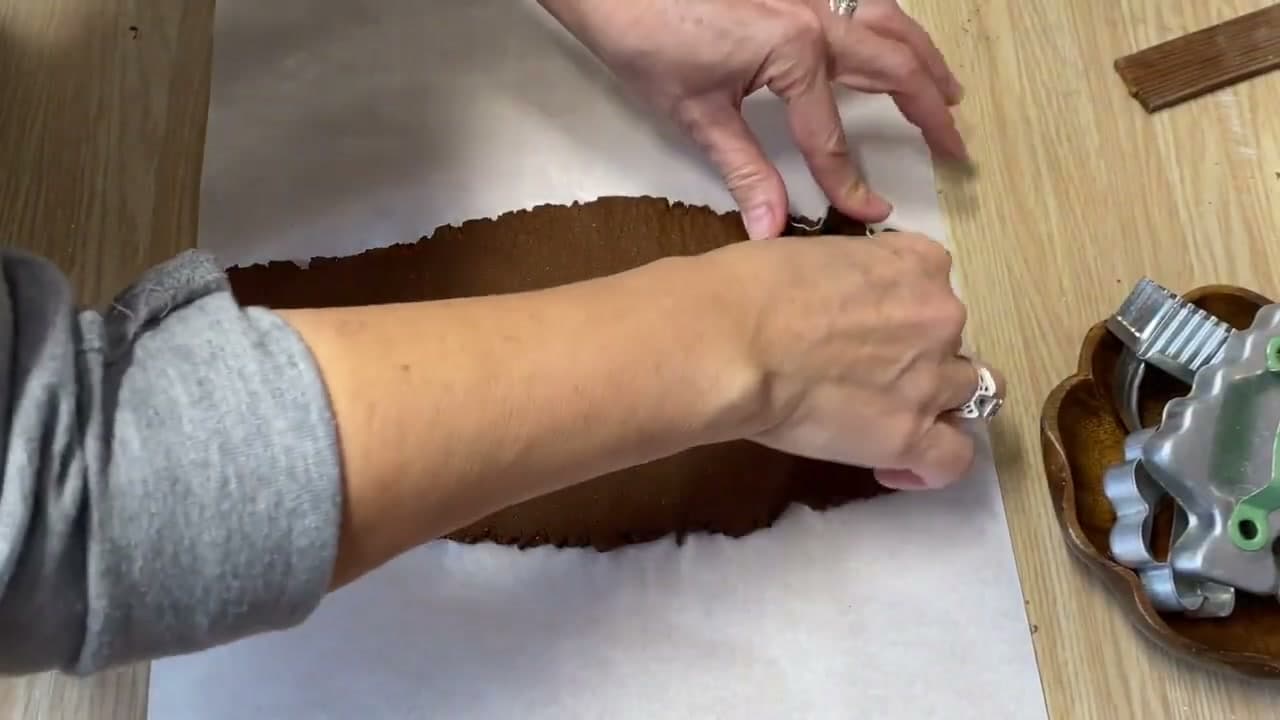
Press cookie cutters into the rolled dough to cut out shapes. Christmas trees, stars, snowflakes, gingerbread people, and simple circles all work. Plastic and metal cutters both do the job. Vintage tin cutters from a thrift store have the best character.

Cut shapes close together to get the most out of your dough. Peel away the extra dough around the cutouts and re-roll it for a second batch. Leave the shapes on the parchment paper - it makes transferring them to a baking sheet effortless.

Tip

Wash the cutters and dry them right after cutting. Cinnamon dough will rust un-coated tin cutters if you leave it on overnight.

6

Punch a Hole Near the Top of Each Ornament

3:15
Step 6: Punch a Hole Near the Top of Each Ornament

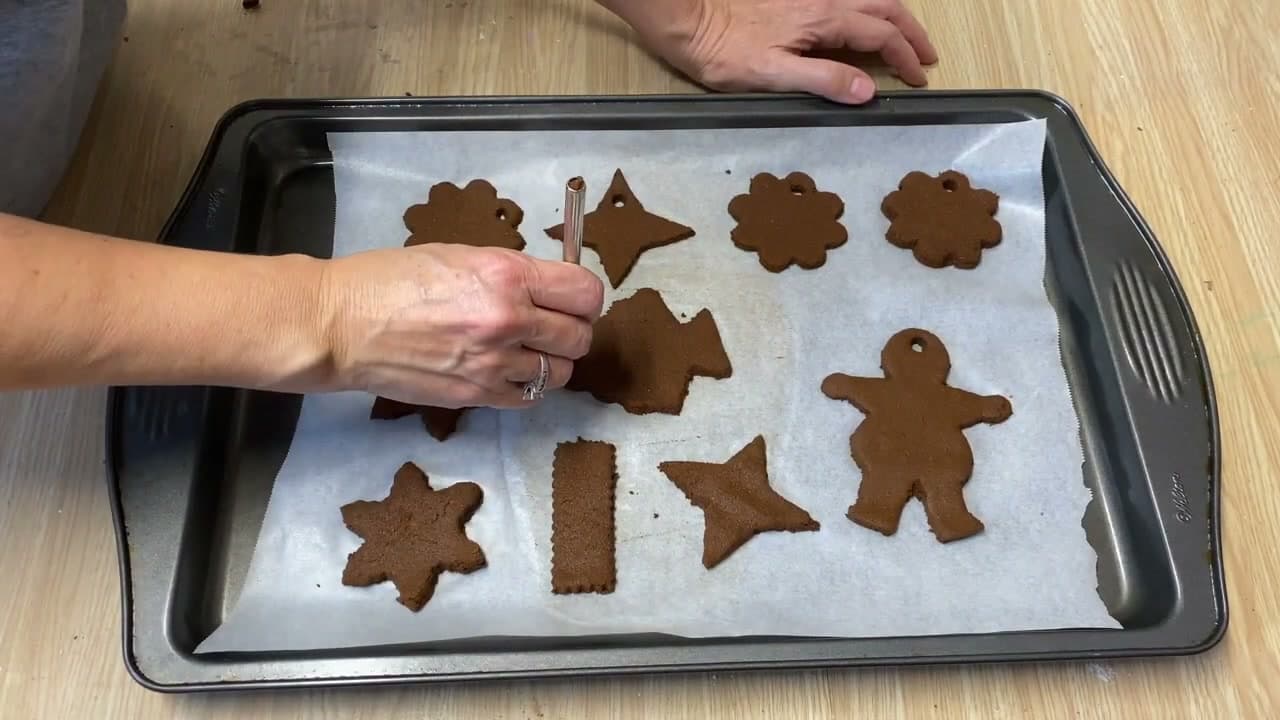
Slide a stainless steel straw, a wooden skewer, or the back of a pencil through the dough near the top of each shape. Twist it once before pulling out so the hole stays clean. The hole has to go in now while the dough is soft - drilling one after the ornaments dry just cracks them.

Aim for a hole big enough for baker's twine or thin ribbon, maybe a quarter inch in. Position it close to the top edge but not so close that the loop tears through later.

Tip

Reusable metal straws make perfect ornament hole-punchers. Cleaner edges than a skewer.

7

Dry the Ornaments and Tie a Ribbon Loop

3:50
Step 7: Dry the Ornaments and Tie a Ribbon Loop

Two drying options. The fast one: transfer the parchment-and-ornaments onto a baking sheet and bake at 200 degrees Fahrenheit for two to three hours, flipping them halfway through. The patient one: leave them on a wire rack at room temperature for one to two days. Both give you a hard, fragrant ornament.

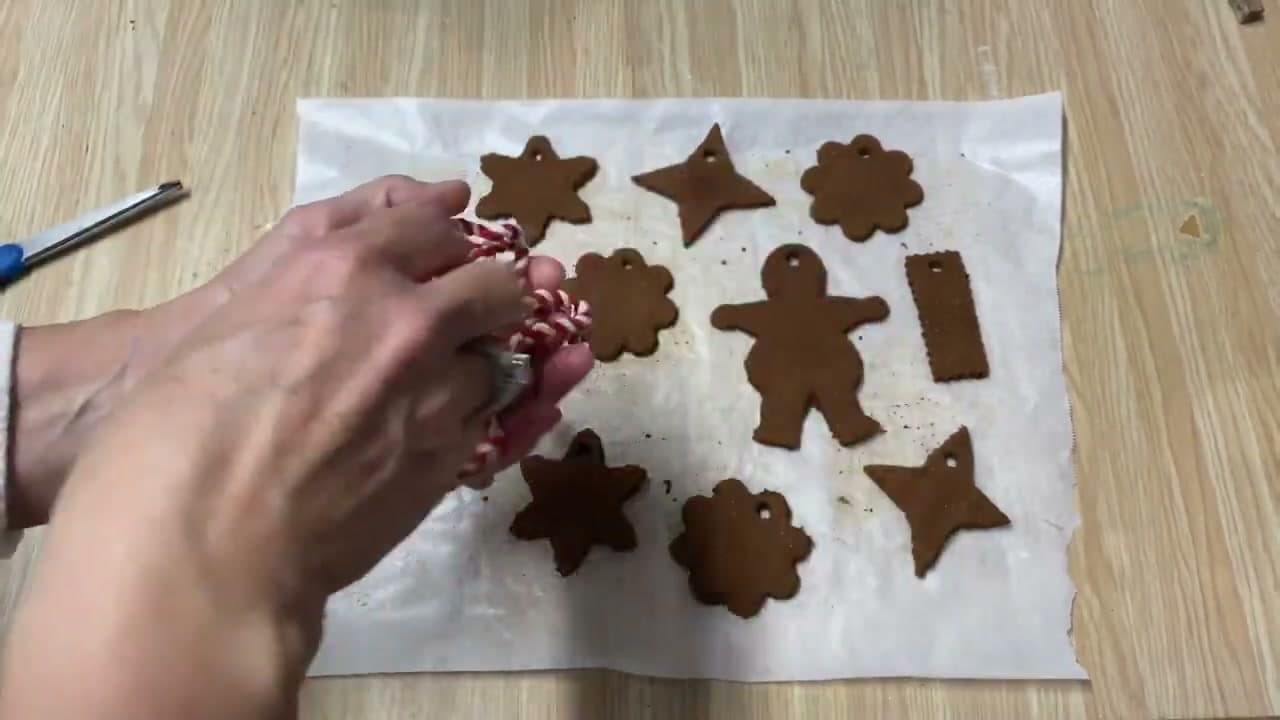
Once they're dry, thread a six-inch piece of red and white baker's twine, jute, or thin ribbon through each hole and tie a loop. Hang straight on the tree or use as gift tags. Skip the paint for that rustic brown look, or seal with a coat of Mod Podge if you want to brush on color.

Tip

The cinnamon smell fades a little each year but lasts two or three seasons. Rub a dried ornament with a few drops of cinnamon essential oil to bring it back.

Products Used

☐ The Checklist

How to Make Cinnamon Ornaments

Tools
7
Materials
5
Steps
7
Video
4 min

Your Guide

Our Upcycled Life

As an Amazon Associate we earn from qualifying purchases. Links on this page may be affiliate links - clicking them and buying doesn't change your price, but helps support ShowMeStepByStep.

Tags

Test your knowledge

Did the lesson stick? Find out in 2 minutes.

5 quick questions covering what you just read. No signup, no score saved — just a gut check.

Quick reference

Key takeaways from How to Make Cinnamon Ornaments

5 questions, answers, and one-line explanations. Tap to expand.

  1. 1.What three ingredients?

    Answer: Unsweetened applesauce, ground cinnamon, white school glue

    Applesauce + cinnamon + a tablespoon of white glue is the whole recipe.

  2. 2.Why add the school glue?

    Answer: Keeps the ornaments from cracking as they dry - don't skip it

    Glue is the crack-prevention agent; more glue won't make them stronger.

  3. 3.What's the target dough texture?

    Answer: Like Play-Doh or cookie dough (soft pliable ball that holds shape)

    Pliable ball; adjust with more cinnamon if sticky, more applesauce if crumbly.

  4. 4.Why roll the dough between TWO sheets of parchment paper?

    Answer: Stops the dough from sticking to the rolling pin or counter without needing extra cinnamon dust

    Parchment top and bottom = no sticking, no dust, no extra ingredients.

  5. 5.What are the two drying options?

    Answer: Bake at 200 F for 2-3 hours flipping halfway, OR air dry at room temp for 1-2 days

    Fast oven OR patient air-dry - both produce hard, fragrant ornaments.

What's next

Weekly Digest

Liked this crafts tutorial?

Pick the categories you want to hear about. Weekly digest of new step-by-step tutorials. No spam, easy unsubscribe.

Send me tutorials about

We only email about new tutorials. Easy unsubscribe anytime.