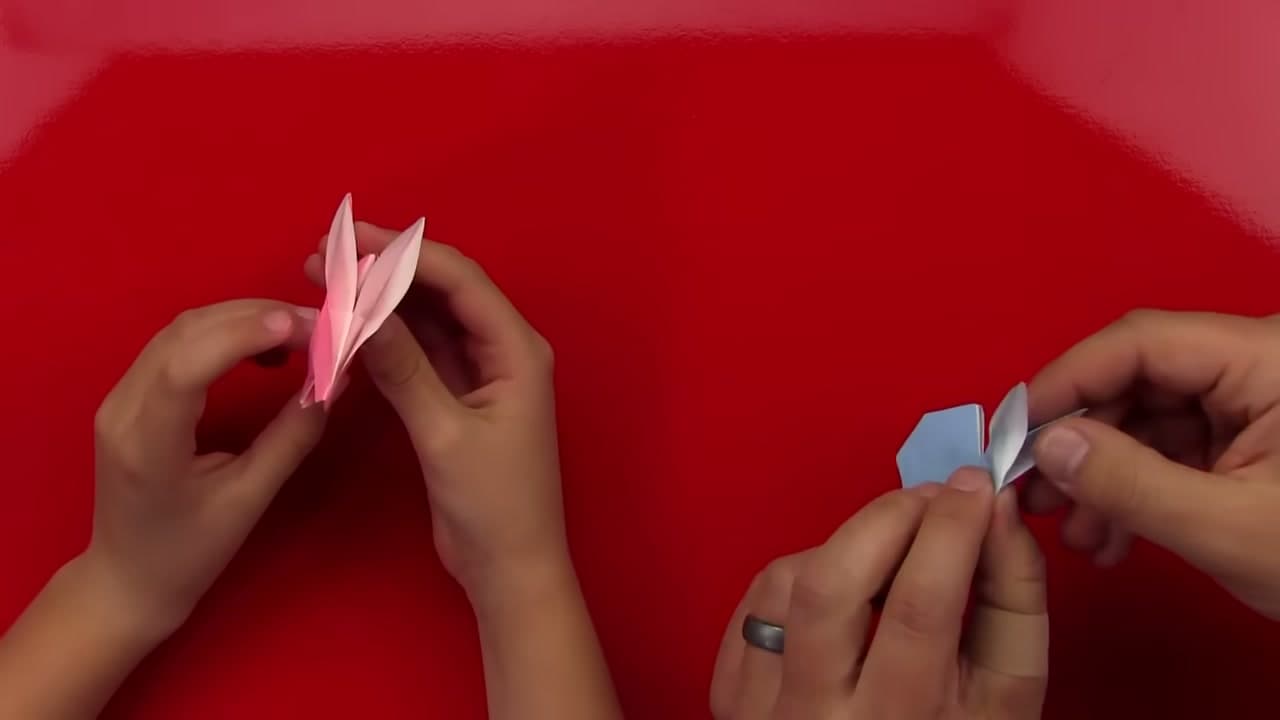
How to Make a Paper Easter Bunny

Paper CraftsEasy14:0410 stepsPart of Crafting for BeginnersBrowse more →
The finished result: How to Make a Paper Easter Bunny
Also in:Crafts

By Show Me Step by StepPublished

Based on a video by Art for Kids Hub.

This paper Easter bunny is folded from one square of origami paper. There is no glue and no cutting. By the end it sits up on its own feet with two tall ears that open to show a white lining. The design comes from Rob of the Art for Kids Hub channel, who folds it alongside his son. It is a sweet project for a quiet afternoon with a grandchild in the weeks before Easter.

What you need for a paper Easter bunny

  • Paper. One square of origami paper. Rob likes paper that is coloured on one side and white on the other, so the inside of each ear turns out white.
  • No origami paper? Printer paper works. Fold one corner down to the opposite edge, trim off the strip, and you have a square. Thin gift wrap or a page from a magazine also folds well.
  • Helpful extras. A pencil for the ear guide line, and a bone folder or the back of a spoon for sharp creases.

Size and how long it takes

A 6 inch square makes a bunny about 3 inches long. Small hands find an 8 inch square easier, and the bunny comes out bigger too. Plan on 15 minutes for your first one and about 10 once you know the folds. The ears and the reverse folds near the end take the most care.

Who it suits

Children from about seven can follow along, with a grown-up helping on the reverse folds. Fold a row of them as place cards for Easter lunch, tuck one into each grandchild's Easter basket, or hand them out at a Sunday school or classroom party. They are light enough to post in a card.

Easter variations

  • Colours. Pastel pink, yellow, mint and lilac look like Easter. White paper makes a classic snowy bunny.
  • Faces. Add two small googly eyes and draw a nose and whiskers with a fine marker.
  • A spring version. Fold them in soft green and cream and leave them on a shelf with origami tulips well after Easter.
  • A softer bunny. If you crochet, try a crochet bunny to sit beside the paper ones.

Troubleshooting

  • The squash folds tear. The paper is too thick. Use origami paper or thin printer paper, and open each pocket slowly.
  • The ears are uneven. The guide pinch was off centre. Unfold, line the edge up with the pinch, and crease again.
  • The head flops down. Squeeze the crease at the neck harder once the head is where you want it.
  • The bunny will not stand. Tuck the feet in a little further so both sides sit level.
  • A child is getting frustrated. Fold your own bunny one step ahead and set it next to theirs. Matching a finished fold is easier than following words.

New to folding? How to make origami covers the basic folds used here.

Storing your bunnies for next year

Paper bunnies keep well. Store them in a shallow box or an egg carton, one per cup, so the ears do not get crushed. For more Easter table ideas, a little crochet basket makes a home for a few of them.

What you'll need

Step-by-Step Guide

10 steps · about 14 minutes.Check off each step as you go and your progress saves automatically.

1

Fold the Origami Paper in Half and Bring Both Edges to the Centre

1:26
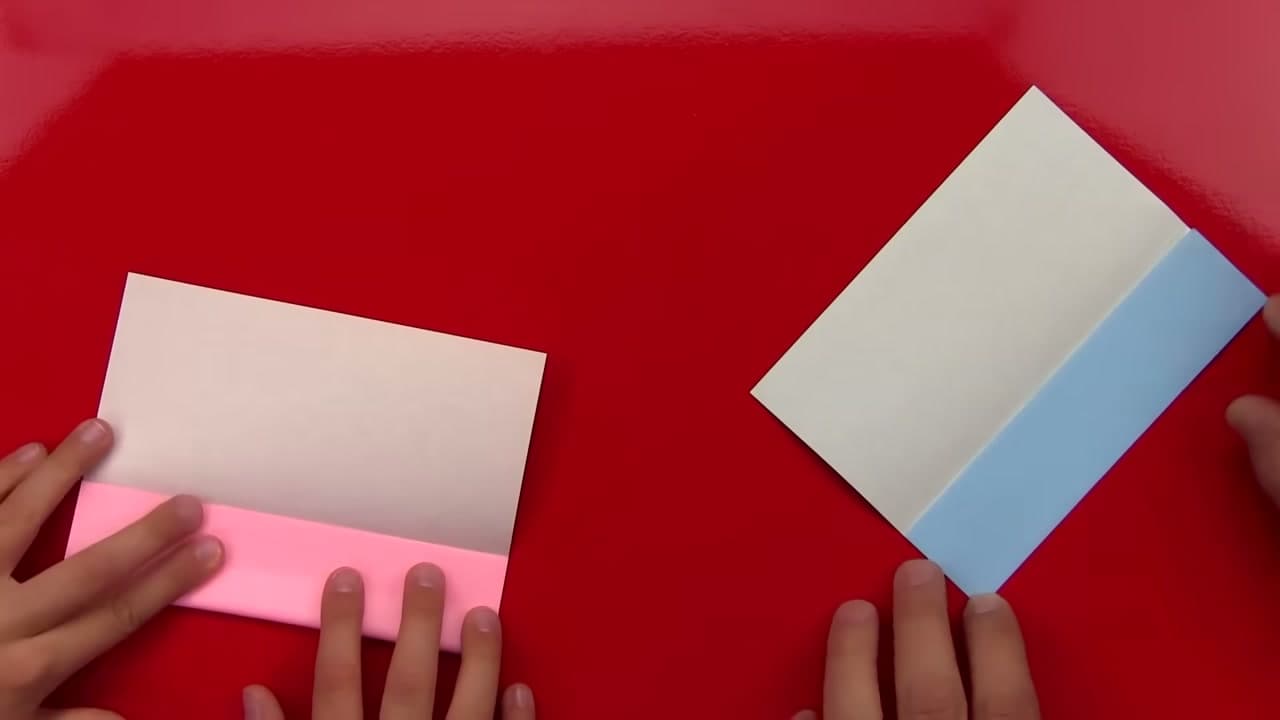
Step 1: Fold the Origami Paper in Half and Bring Both Edges to the Centre - How to Make a Paper Easter Bunny

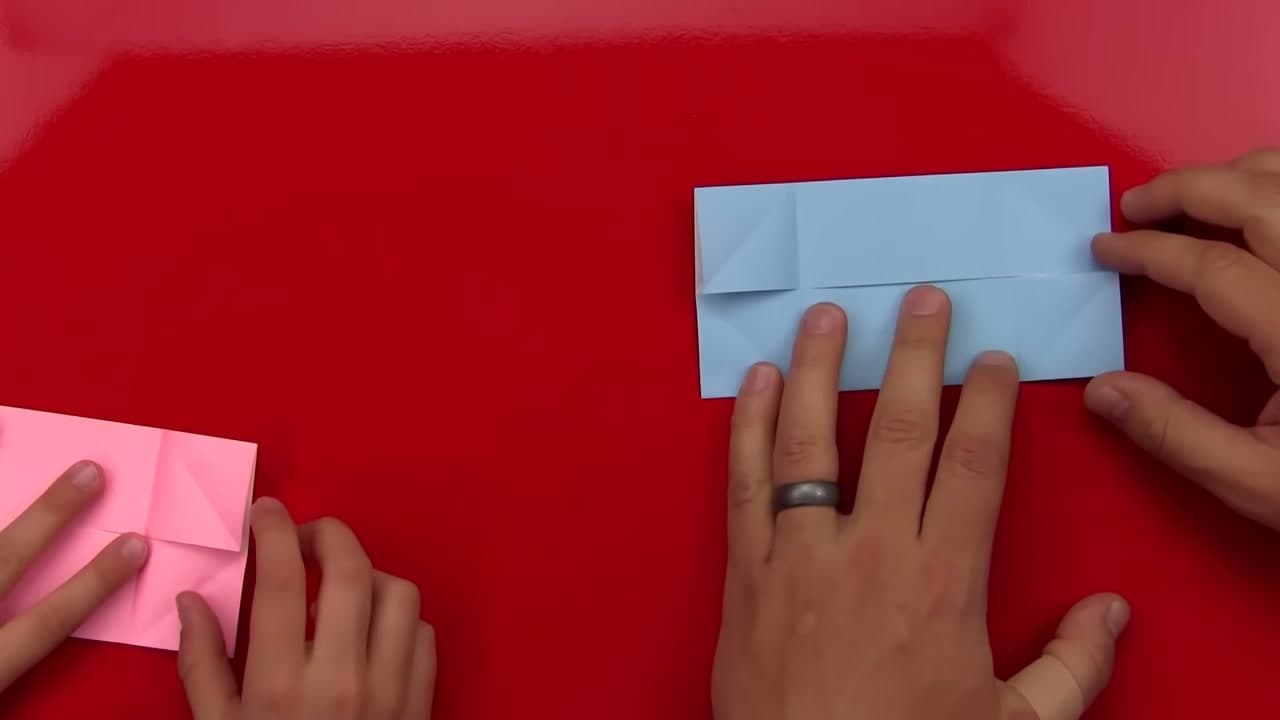
Lay your square of origami paper coloured side down. Fold it in half, press a crisp crease, then open it up again. Fold the bottom edge up to meet that centre crease and press it flat. Turn the paper around and fold the other edge to the centre too. You now have a long strip with two flaps that meet in the middle. Folders call this a cupboard fold.

Tip

Sharp creases matter in origami. Run a fingernail along every fold before you move on.
2

Fold the Corners of the Paper Strip Into the Centre Line

2:26
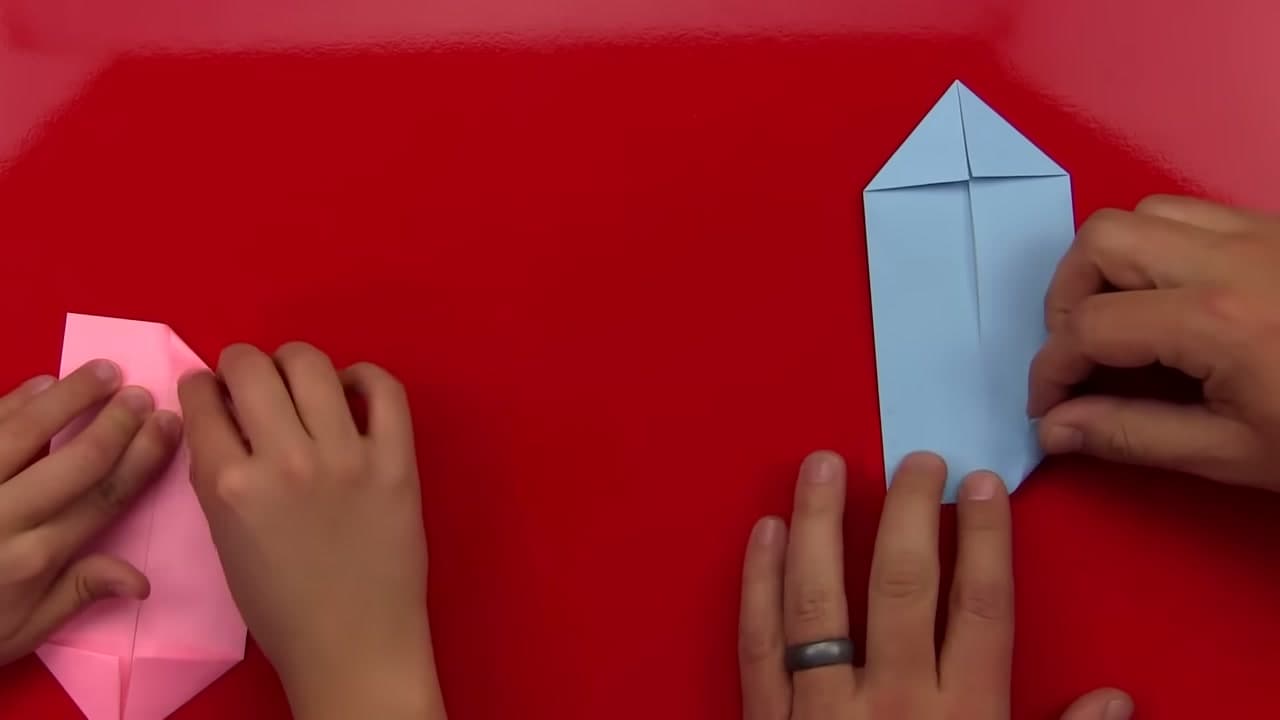
Step 2: Fold the Corners of the Paper Strip Into the Centre Line - How to Make a Paper Easter Bunny

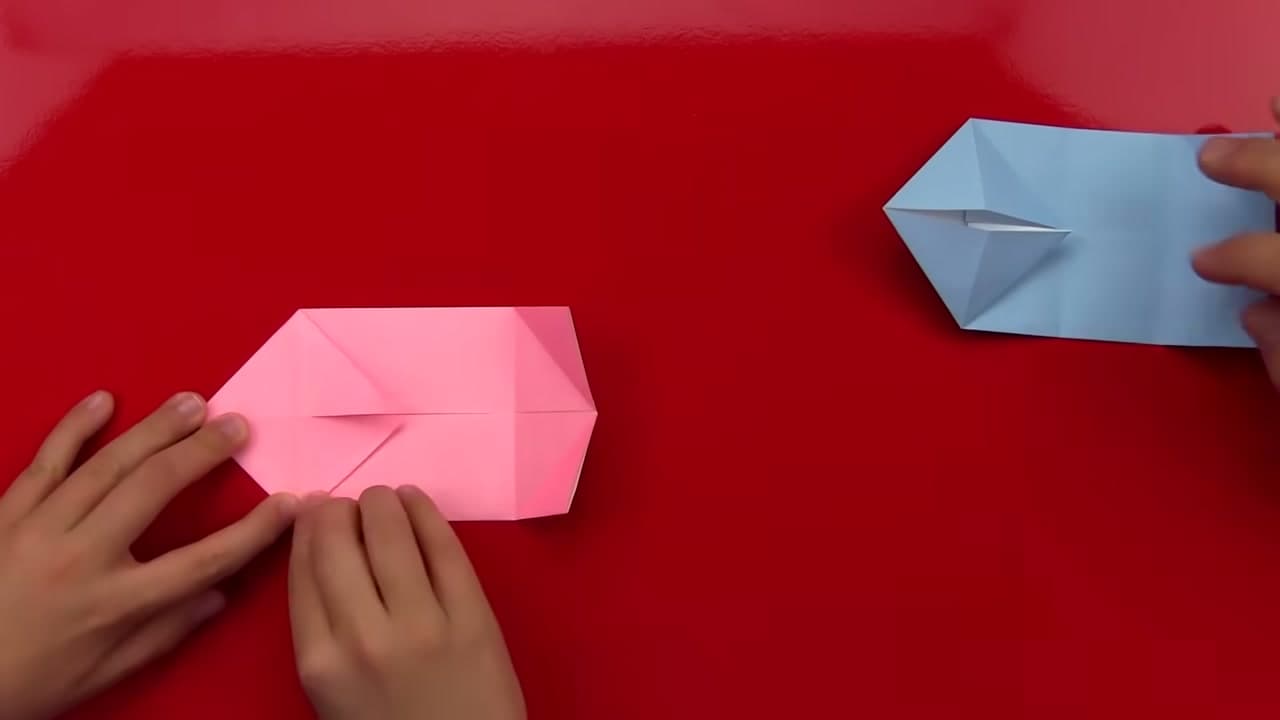
Take one corner at the end of the strip and fold it in so its edge lies along the centre line. Fold the corner beside it in the same way, so that end of the strip comes to a point. Turn the strip around and fold the two corners at the other end. Both ends now have points, and the strip looks like a long six-sided shape.

Tip

Line the corner up with the centre line before you press. Small slips add up later.

3

Fold the Ends of the Origami Strip In to Meet in the Middle

3:53
Step 3: Fold the Ends of the Origami Strip In to Meet in the Middle - How to Make a Paper Easter Bunny

Open the four corners back out so you see their diagonal creases. Fold one short end of the strip in toward the middle, lining it up with the point where the diagonal crease meets the side. Do the other end the same way so the two ends meet in the middle. If you want a guide, fold the strip in half and pinch only the edges.

Tip

A pinch at the edges gives you a marker without leaving a crease through the middle.

4

Squash Fold the Corners Into Triangles to Make Two Diamonds

4:43
Step 4: Squash Fold the Corners Into Triangles to Make Two Diamonds - How to Make a Paper Easter Bunny

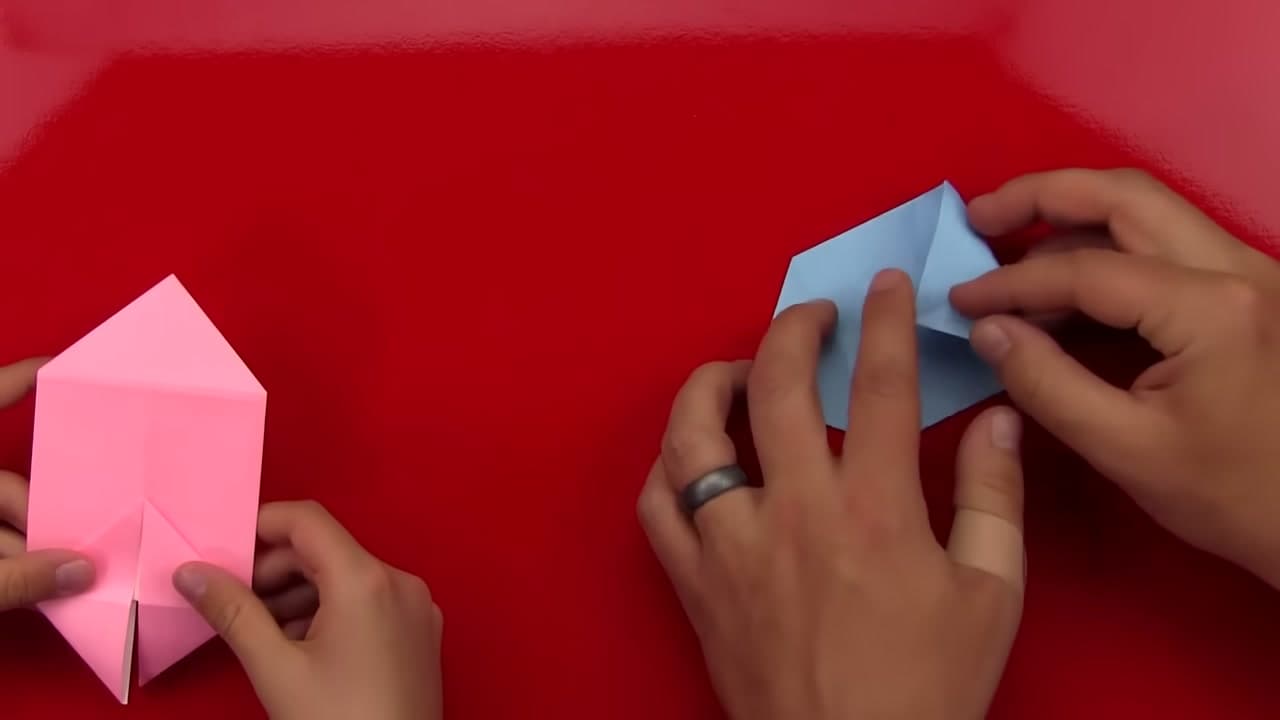
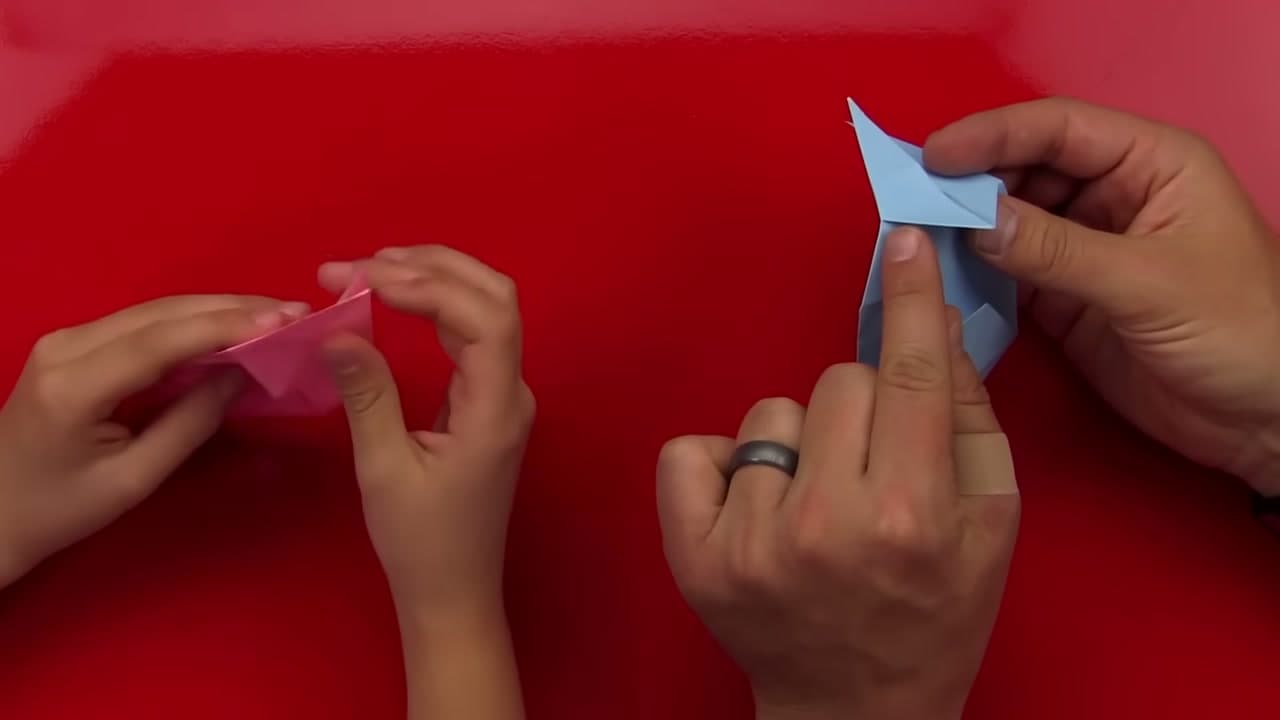
Open the folded ends part way, back to where they were before. Lift one corner, open the pocket underneath, and press it flat into a small triangle. This is a squash fold. Repeat on every corner, flipping the paper when you need to. When you finish you should see two diamond shapes side by side. Go slowly and open each pocket only as far as the existing creases allow.

Tip

If a corner opens too far, fold it back and try again. The creases from step 2 show you where.

5

Fold the Points of the Diamonds to the Middle of the Bunny Base

5:20
Step 5: Fold the Points of the Diamonds to the Middle of the Bunny Base - How to Make a Paper Easter Bunny

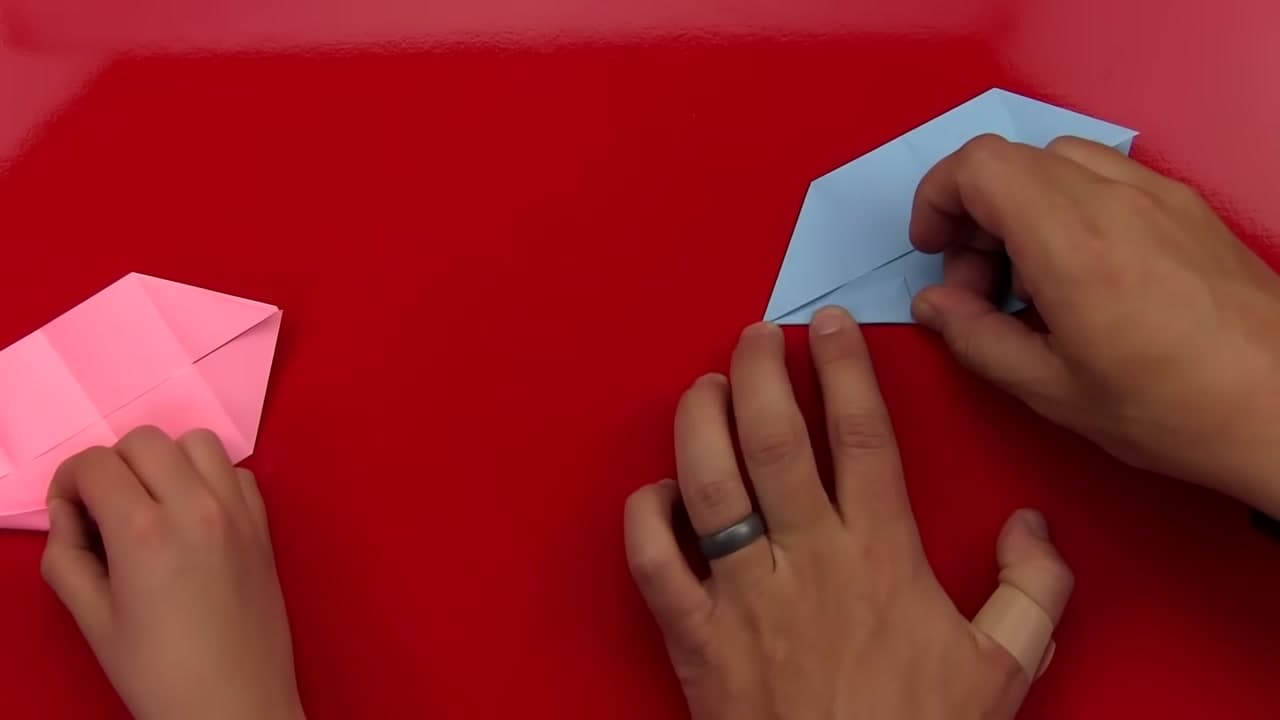
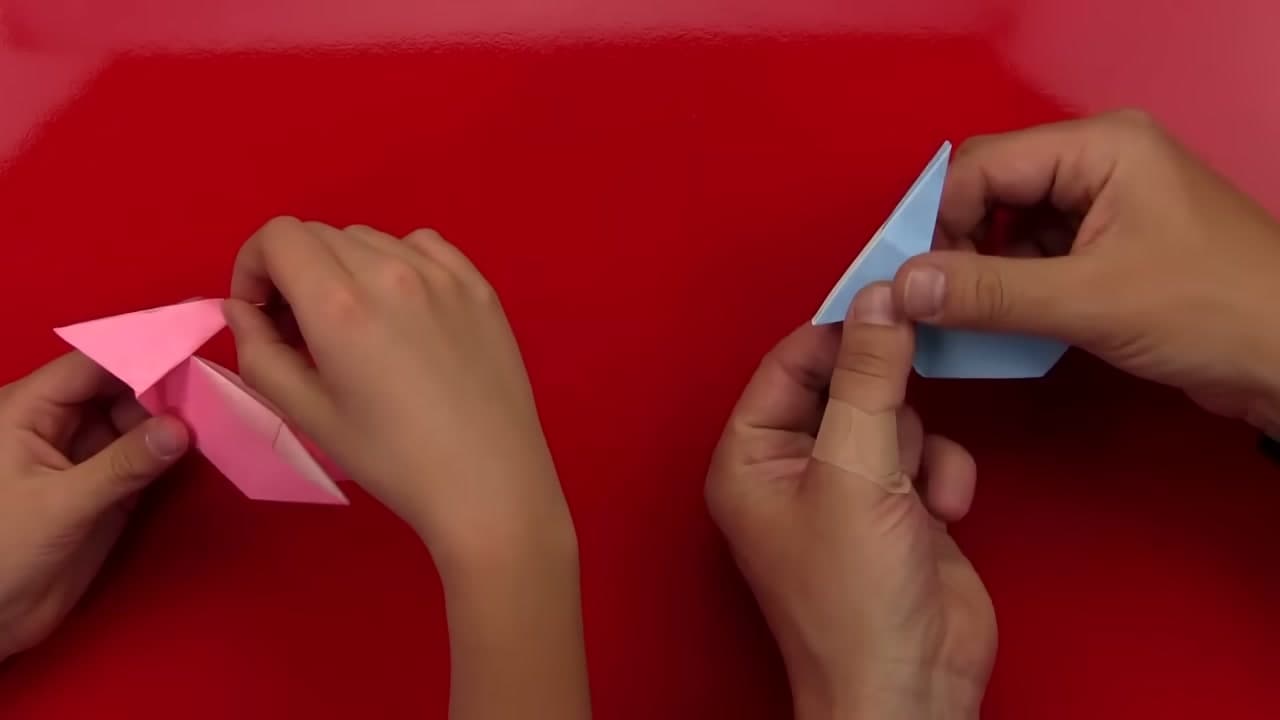
Turn the model over. Take the point on one side and fold it in to the middle of the paper. As you do, let the flaps hiding on the back swing out to the front. Press it flat. Do the same with the point on the other side. This shape is the base for the bunny's ears, head and body, so smooth every fold well.

Tip

Do not force the back flaps. If they stick, ease them out with a fingertip before you crease.

6

Fold the Bunny Ears From the Corner to the Middle Crease

6:45
Step 6: Fold the Bunny Ears From the Corner to the Middle Crease - How to Make a Paper Easter Bunny

Turn the model back over and fold it in half for a moment, pinching only the outer corners as a guide. Open it again. Fold one flap from the corner down to that middle pinch, so the flap narrows into a long point. The fold does not reach the centre. Rob draws a pencil line to show where it goes. Flip the model and fold the matching ear on the back.

Tip

Drawing a light pencil line first helps if a child is folding the ears.

7

Fold the Bunny Head Back and Fold the Model in Half

8:02
Step 7: Fold the Bunny Head Back and Fold the Model in Half - How to Make a Paper Easter Bunny

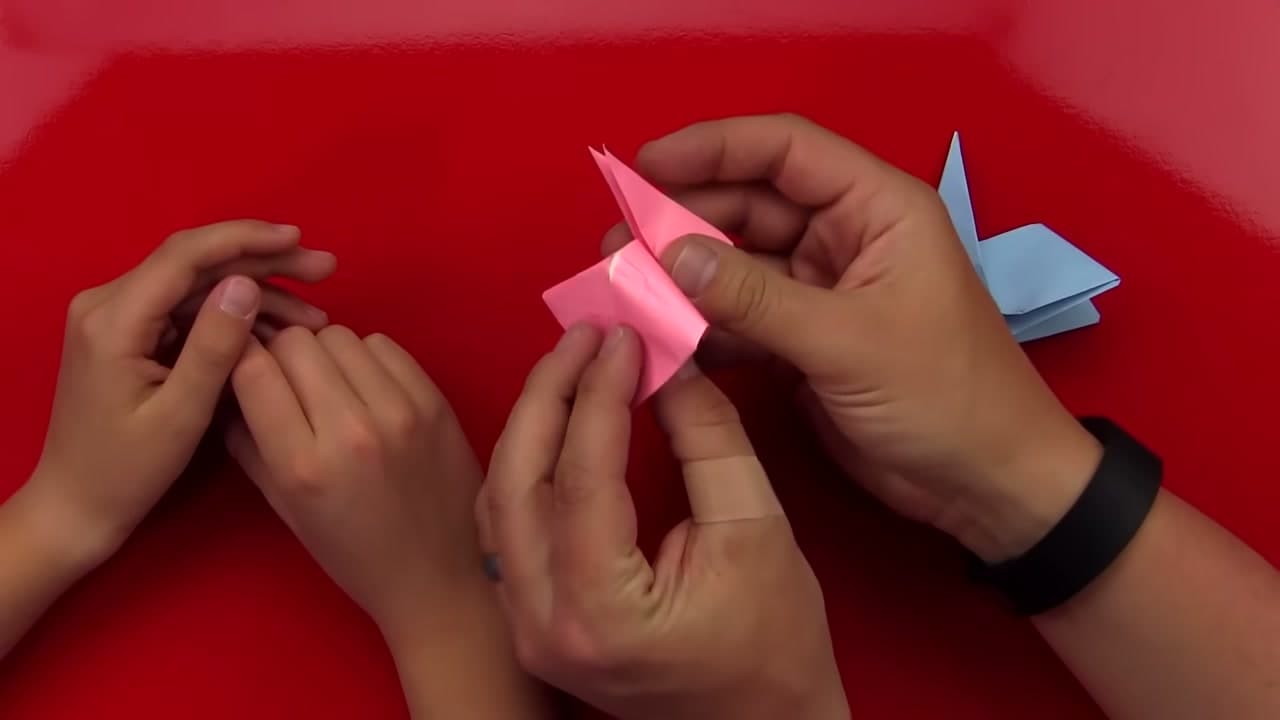
Turn the model over so the ears are behind and the little head point faces you. Fold the head back as far as it will go, all the way to where it is joined, and crease it hard. The head now sits behind the ears. Fold the whole bunny in half along its length so the ears lie together on one side.

Tip

The fold for the head goes only as far as the paper allows. Do not tear it by pushing past the join.

8

Pull Up the Bunny Head and Ears, Then Flatten the Nose

8:55
Step 8: Pull Up the Bunny Head and Ears, Then Flatten the Nose - How to Make a Paper Easter Bunny

Pinch the two ears together and pull the head up to the angle you like. High makes ears that stand up tall. Lower makes a bunny with ears leaning back. Squeeze the crease at the neck so it stays. For the nose, fold the sharp point behind the head, then open it and push it back inside on that crease. The bunny now has a flat nose.

Tip

Hold the ears with one hand and the body with the other while you squeeze the neck crease.

9

Tuck the Bunny Feet Inside and Round Off the Tail

11:52
Step 9: Tuck the Bunny Feet Inside and Round Off the Tail - How to Make a Paper Easter Bunny

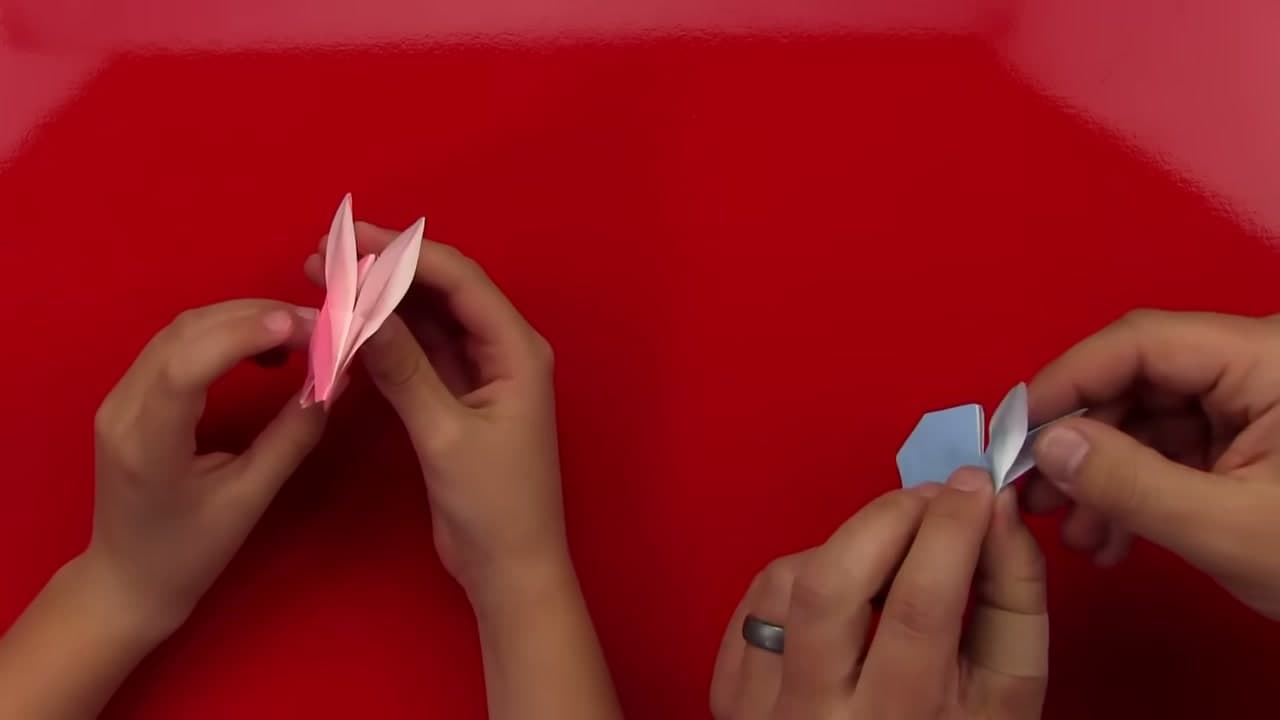
Fold the back end of the bunny behind its body so the little feet poke out along the bottom. Crease it, then unfold. Open the layers slightly and push that section inside on the creases you made. This is a reverse fold. Do the same with the pointed back corner so the tail is rounder. Check both sides match.

Tip

Unfold and try again as often as you need. Reverse folds follow the creases you already made.

10

Open the Paper Bunny Ears and Stand Your Easter Bunny Up

13:26
Step 10: Open the Paper Bunny Ears and Stand Your Easter Bunny Up - How to Make a Paper Easter Bunny

The ears are flat and pointed for now. Slide a fingernail into each ear and gently open it, so the white inside shows. Squeeze the head with your other hand while you do this, so it does not come open. Shape both ears the same way. Set the bunny down and it stands on its feet. Add eyes and a nose if you like.

Tip

Small self-adhesive googly eyes stick well to origami paper and need no glue.

How to Make Paper Beads From Magazines - Easy Recycled Craft

Keep going

How to Make Paper Beads From Magazines - Easy Recycled Craft

8 steps · about 5 minutes

Products Used

The Checklist

How to Make a Paper Easter Bunny

Tools
3
Materials
2
Steps
10
Video
14 min

Tools we recommend

Your Guide

Art for Kids Hub

As an Amazon Associate we earn from qualifying purchases. Links on this page may be affiliate links - clicking them and buying doesn't change your price, but helps support Show Me Step by Step.

Tags

Sunday How-To

New paper crafts tutorials, every Sunday

One short email with the week's best step-by-step guides. Free, no spam, unsubscribe anytime.

Did this work for you?

What's next

Related collections

Curated theme pages that include this tutorial.

Weekly Digest

Liked this paper crafts tutorial?

Pick the categories you want to hear about. Weekly digest of new step-by-step tutorials. No spam, easy unsubscribe.

Send me tutorials about

We only email about new tutorials. Easy unsubscribe anytime.