How to Draw a Sunset With Colored Pencils

DrawingEasy11:1610 stepsPart of Crafting for BeginnersBrowse more →
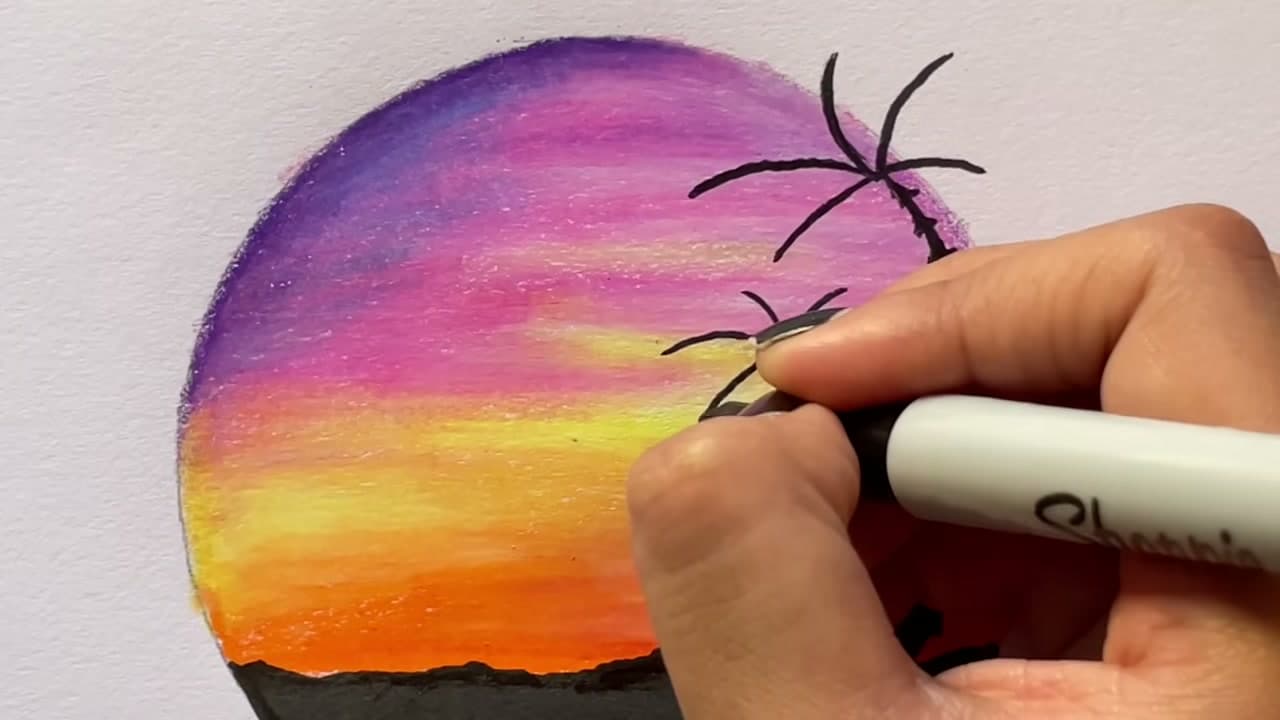
The finished result: How to Draw a Sunset With Colored Pencils

By Show Me Step by StepPublished

Based on a video by Arts Core.

A sunset is one of the most satisfying things you can draw with colored pencils. You need no drawing skill for the sky. It is all color, layered and blended until it glows. This tutorial follows a video by Arts Core, who builds a purple, pink and orange sky inside a small circle, then adds a dark beach and two palm trees in black marker. The circle keeps the drawing small, so you can finish it in one sitting.

How to draw a sunset: what you need

  • Colored pencils. Arts Core uses Prismacolor Premier: violet, hot pink, magenta, orange, lemon yellow, non-photo blue and white. Any soft, waxy pencil works. Harder student pencils blend less, so press a bit firmer.
  • Paper. Smooth drawing paper or mixed media paper. Thin copy paper will not hold many layers.
  • Something round to trace. A roll of tape, a jar lid or a mug.
  • Black markers. A paint marker or thick marker for the ground and a fine Sharpie for the palm trees.

Why layers matter

Colored pencil looks flat and scratchy after one pass. The color comes alive on the third or fourth. Start every color with light pressure. You are only staining the paper. Each new layer fills more of the paper's tooth, and the white specks disappear. If you press hard on the first layer, the wax seals the paper and nothing else will stick. Patience is the whole trick here.

Sunset color order

Real sunsets run from cool at the top to warm at the horizon. Keep that order and the sky will look right even if your strokes are loose.

AreaColors
Top of the skyViolet, then a touch of blue
Upper middleHot pink and magenta
Glow bandLemon yellow, then white
HorizonOrange, with magenta at the edges

Blending without a blender

You do not need blending pencils or solvent. Where two colors meet, color over the seam with the lighter of the two. Orange over magenta softens it. Yellow over orange warms it. A white pencil on top burnishes everything into a smooth, glowing finish. Small circles blend better than long straight lines.

Common problems

  • The sky looks muddy. Too much blue or violet went into the yellow. Keep cool colors at the top.
  • White specks show through. Add another light layer, or burnish with white.
  • Pencil will not take another layer. The wax is built up. Stop and call that area done.
  • Marker bled into the sky. Fill the ground first and let it dry before the trees.

Ideas to try next

Swap the palm trees for a lone pine, a lighthouse or birds in a V. Draw the sunset over water and add a reflection with these water tips. Add streaky clouds, or learn more pencil basics in how to draw with colored pencils. Prefer a brush? See how to paint a sunset.

What you'll need

Step-by-Step Guide

10 steps · about 11 minutes.Check off each step as you go and your progress saves automatically.

1

Trace a Circle for the Sunset Drawing

0:07
Step 1: Trace a Circle for the Sunset Drawing - How to Draw a Sunset With Colored Pencils

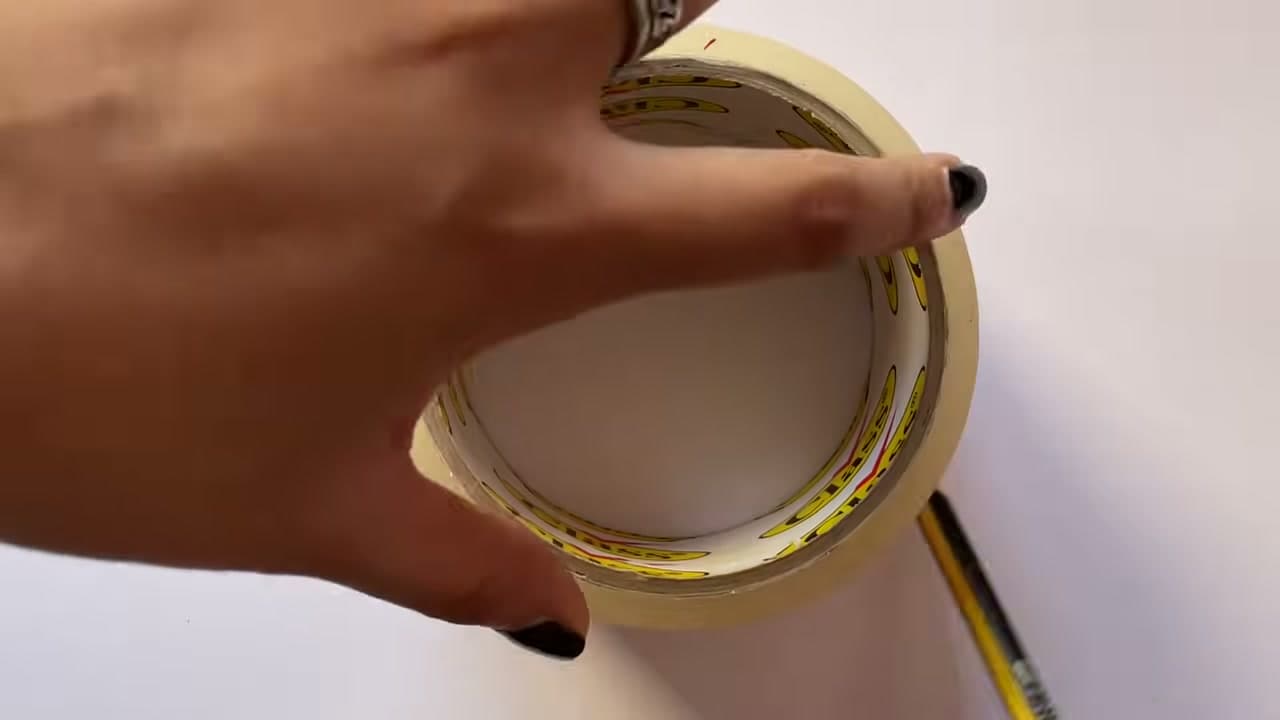
Set a roll of tape, a jar lid or any round object on your paper. Hold it steady with one hand and run a pencil around the edge. Keep the line light. The circle frames the whole sunset, and a small one is quicker to fill with color. Arts Core uses a tape roll about three inches across, which is a good size to start.

Tip

Tape the paper to the table first so it does not slide while you trace.
2

Shade the Top of the Sunset Sky With Violet Pencil

0:48
Step 2: Shade the Top of the Sunset Sky With Violet Pencil - How to Draw a Sunset With Colored Pencils

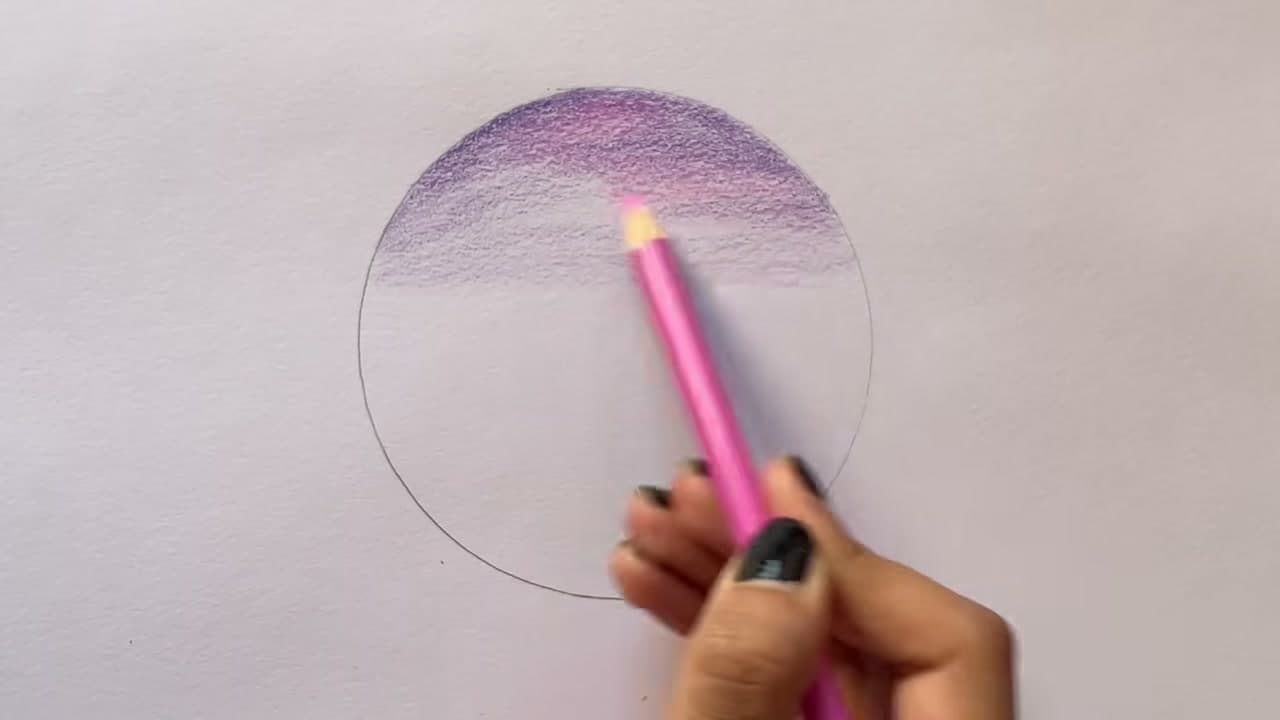
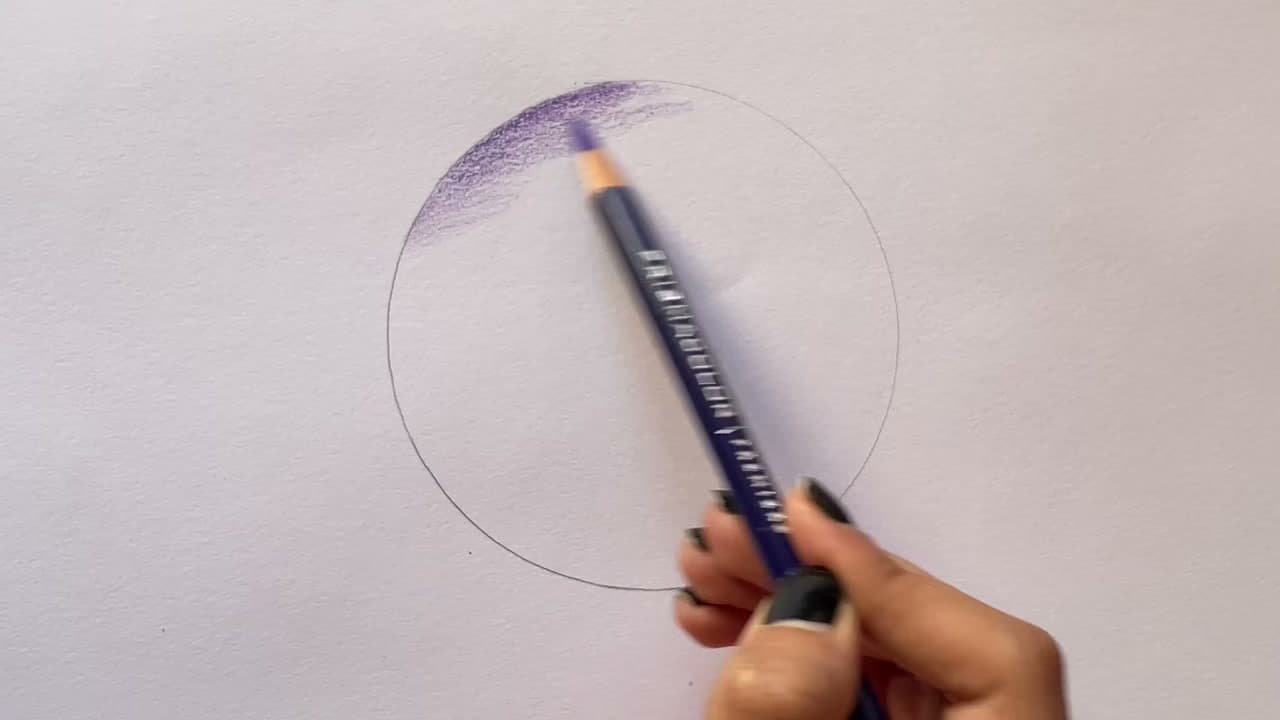
Take a violet colored pencil and start at the top of the circle. Use light pressure and small strokes. Make it darkest along the top edge and let it fade as you move down. This is only the first layer, so the paper should still show through. Leave the middle and bottom of the circle white for now.

Tip

Hold the pencil further back on the barrel. It keeps your pressure light.

3

Add Hot Pink Under the Violet Sunset Sky

1:45
Step 3: Add Hot Pink Under the Violet Sunset Sky - How to Draw a Sunset With Colored Pencils

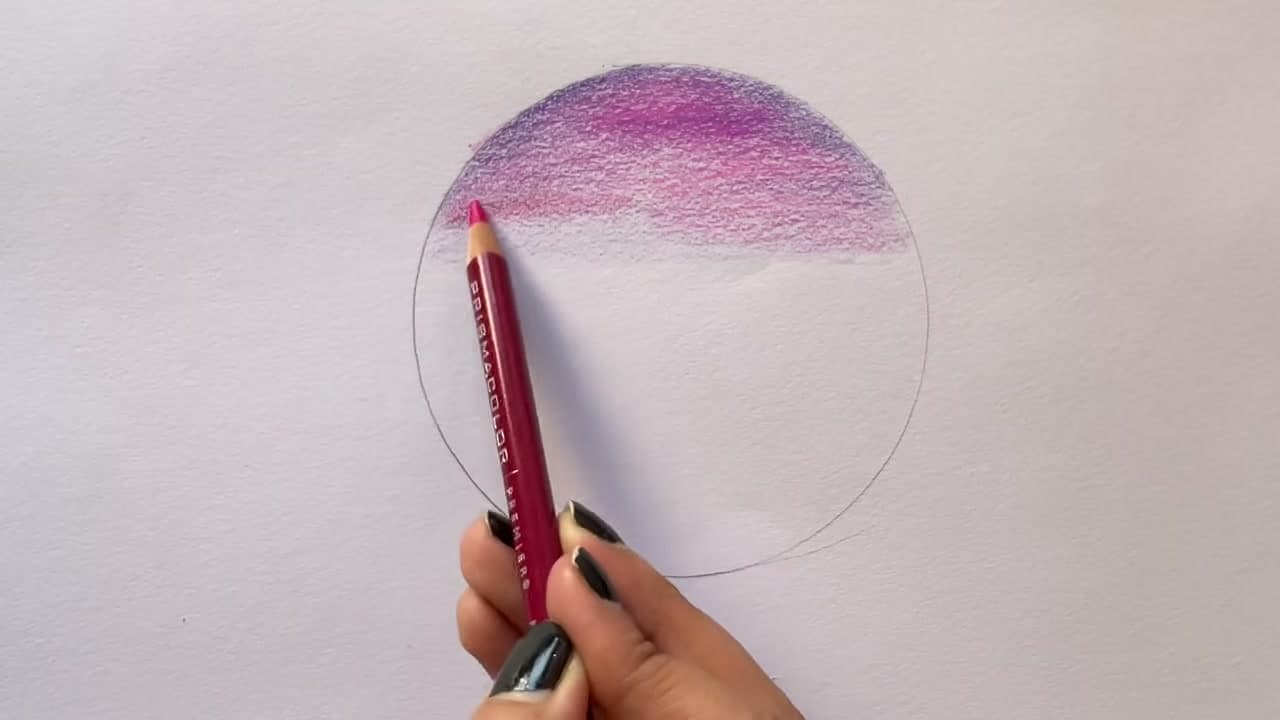
Switch to hot pink and color lightly into the middle area, overlapping the bottom of the violet. The two colors start to mix on the paper. Keep your strokes going the same direction as the violet so the sky looks smooth. Stop about a third of the way down the circle and leave a white gap below.

Tip

Overlap each new color with the last one. Gaps between colors are hard to fix later.

4

Deepen the Left Side of the Sunset With Magenta

2:25
Step 4: Deepen the Left Side of the Sunset With Magenta - How to Draw a Sunset With Colored Pencils

Take magenta or another dark pink and color the left side of the sky. This gives the sunset some depth, so one side looks further from the sun than the other. Work it into the hot pink with short strokes. Keep the pressure light. You will come back with more magenta on the right later.

Tip

Sunsets are rarely even. A little more color on one side looks natural.

5

Fill the Center of the Sunset With Lemon Yellow

3:06
Step 5: Fill the Center of the Sunset With Lemon Yellow - How to Draw a Sunset With Colored Pencils

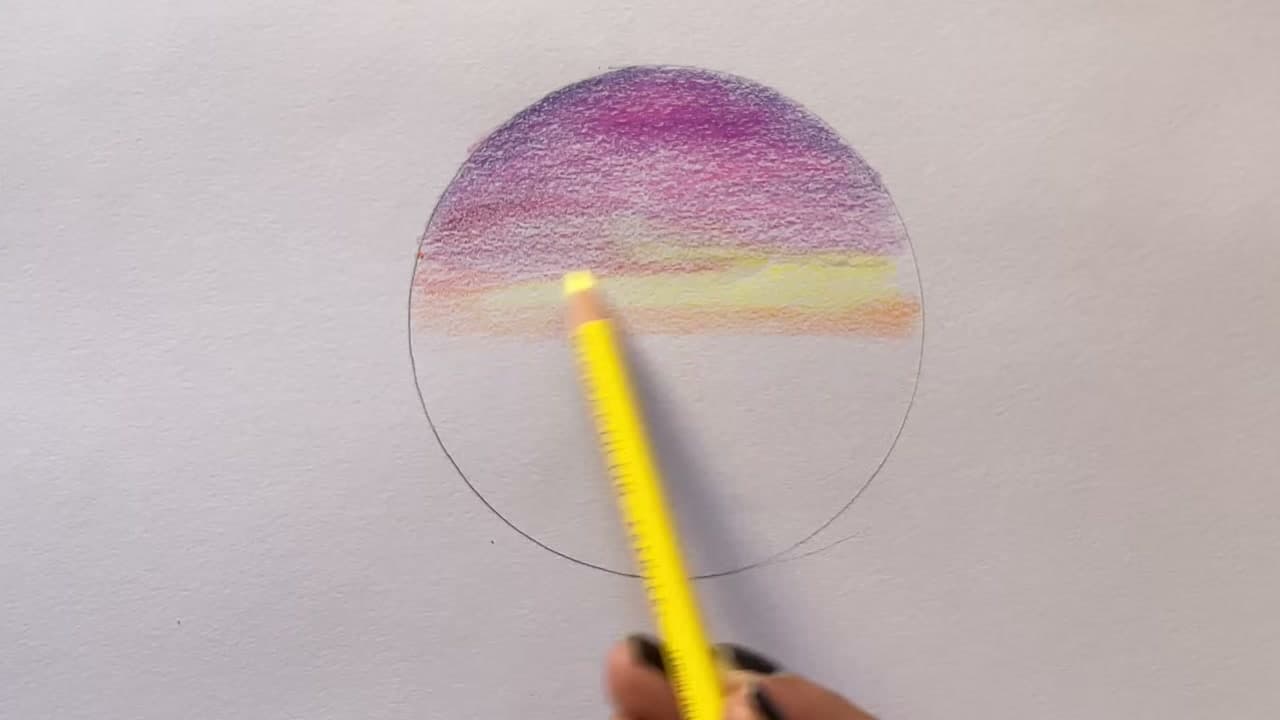
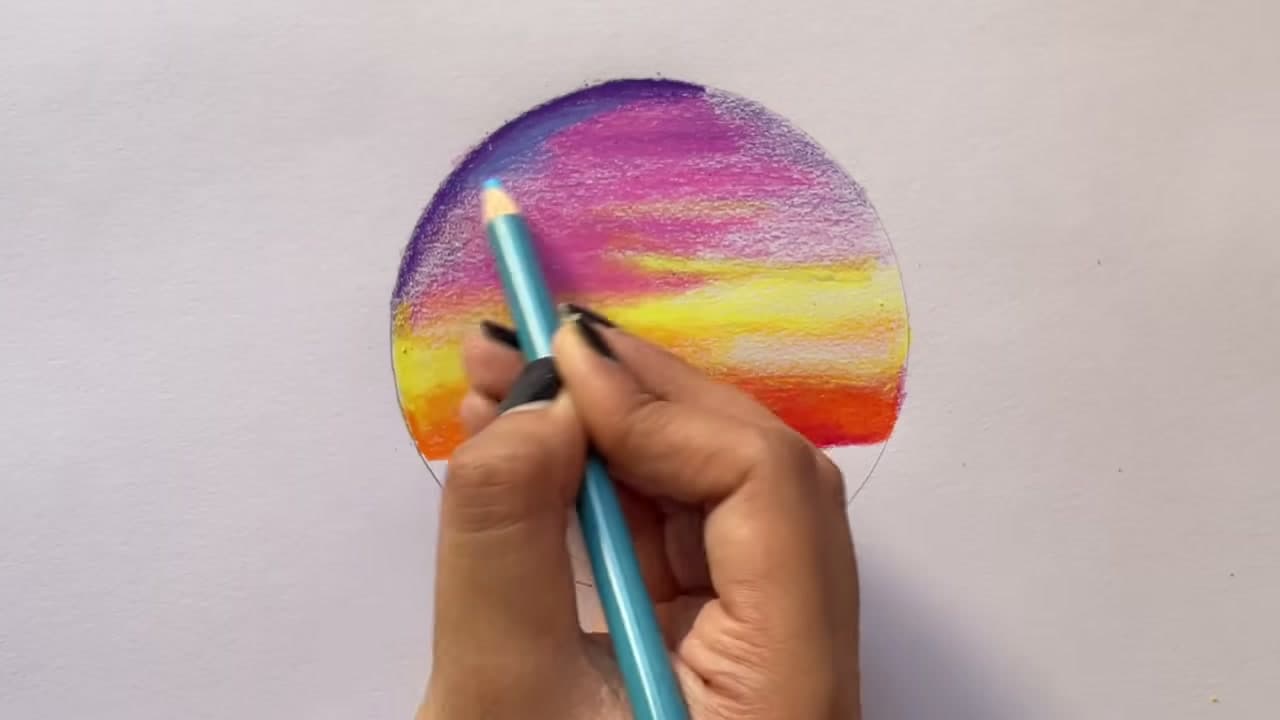
Pick up lemon yellow and fill the white band you left across the middle. This is where the sun glows brightest, so keep it clean and bright. Let the yellow run up into the bottom of the pink. Below the yellow, color a thin orange band and move downward toward the bottom of the sky.

Tip

Sharpen the yellow often. A sharp point fills the paper tooth better.

6

Build the Orange Horizon Band of the Sunset

4:16
Step 6: Build the Orange Horizon Band of the Sunset - How to Draw a Sunset With Colored Pencils

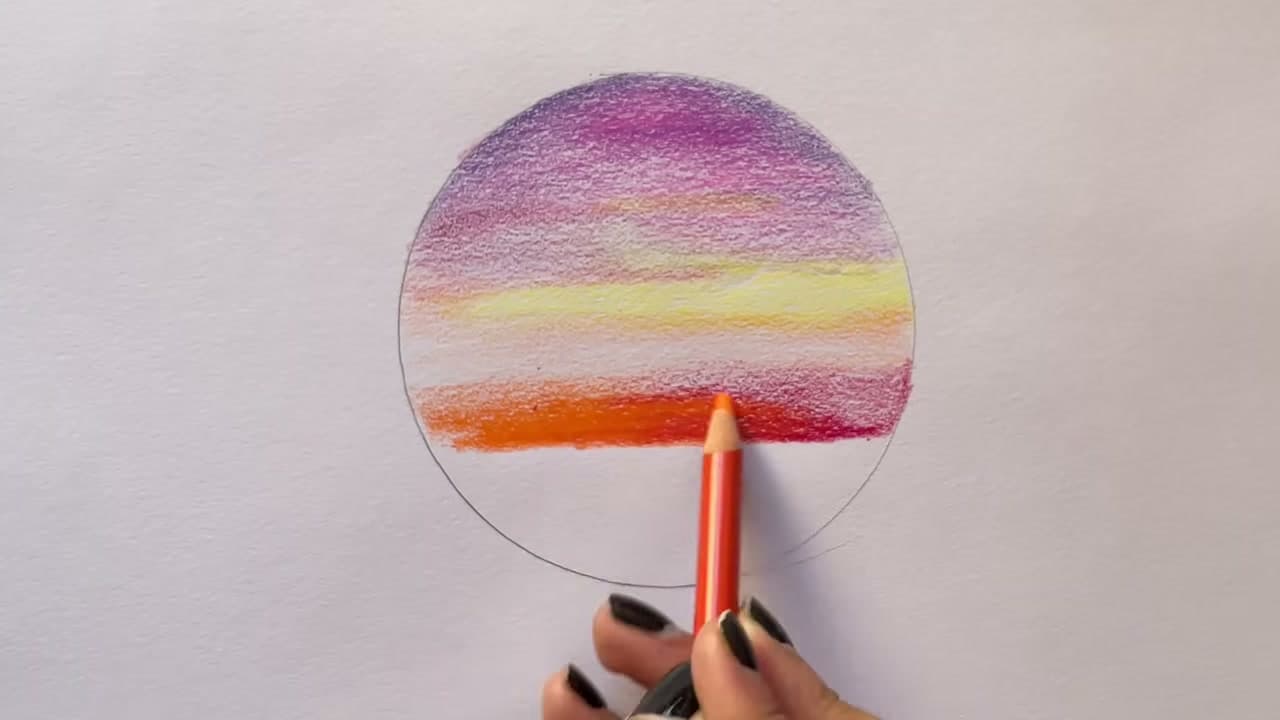
Go back in with orange along the lower edge of the sky. Add magenta again on the right side, then take orange and blend the two colors together where they meet. Use small circles. Follow with lemon yellow across the middle to soften the line between yellow and orange. The sky now runs from purple to pink to yellow to orange.

Tip

Blend with the lighter color on top. It smooths the edge without dulling it.

7

Layer Pink, Violet and Blue Into the Sunset Sky

6:32
Step 7: Layer Pink, Violet and Blue Into the Sunset Sky - How to Draw a Sunset With Colored Pencils

Add a second layer of hot pink across the top. Then put violet on the upper left and a little non-photo blue over it. The blue cools the corner furthest from the sun. Add more violet where you want it darker, then color hot pink over the whole upper section to blend it all together. The white specks start to disappear.

Tip

Use the blue sparingly. Too much turns the purple grey.

8

Burnish the Sunset Glow With a White Pencil

8:15
Step 8: Burnish the Sunset Glow With a White Pencil - How to Draw a Sunset With Colored Pencils

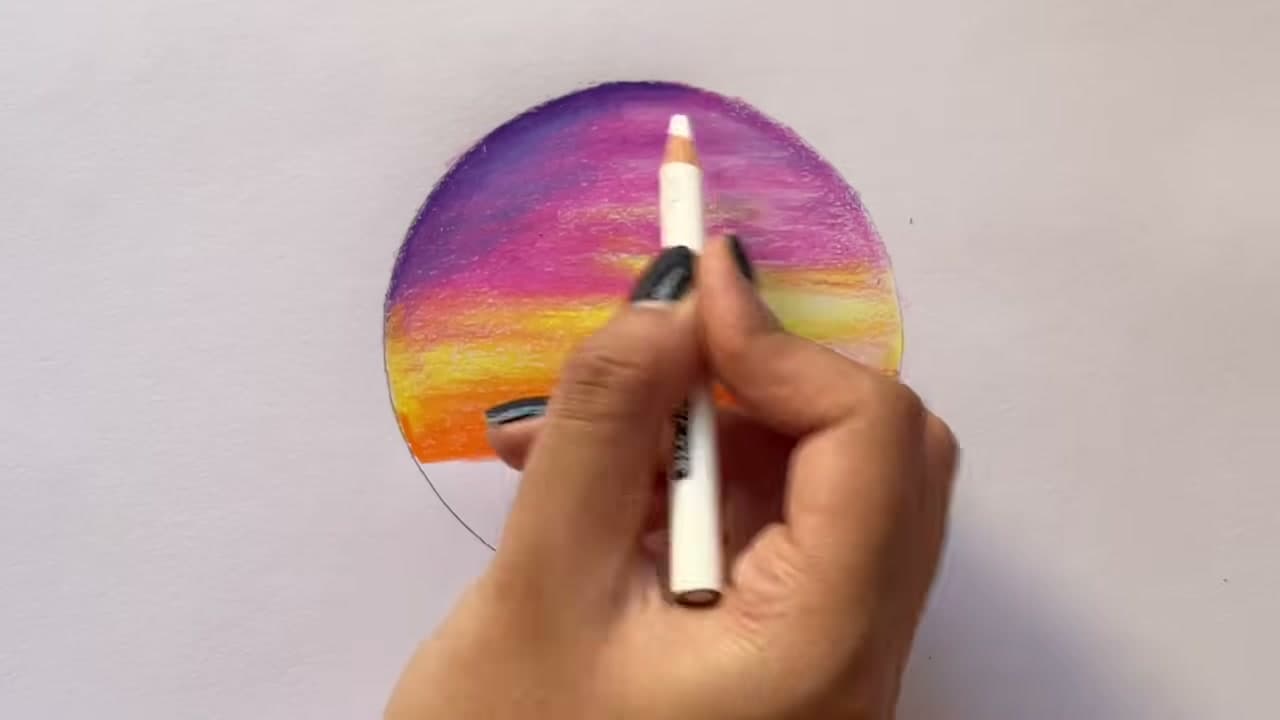
Take a white colored pencil and press firmly over the yellow and orange areas. White lightens the color and pushes the layers into the paper. The result is smooth and almost shiny, like the light is coming through. Work slowly over the glow band, then lightly across the pinks where you want them to fade.

Tip

Wipe the white pencil tip on scrap paper often. It picks up color as you go.

9

Color the Ground Below the Sunset in Black Marker

9:28
Step 9: Color the Ground Below the Sunset in Black Marker - How to Draw a Sunset With Colored Pencils

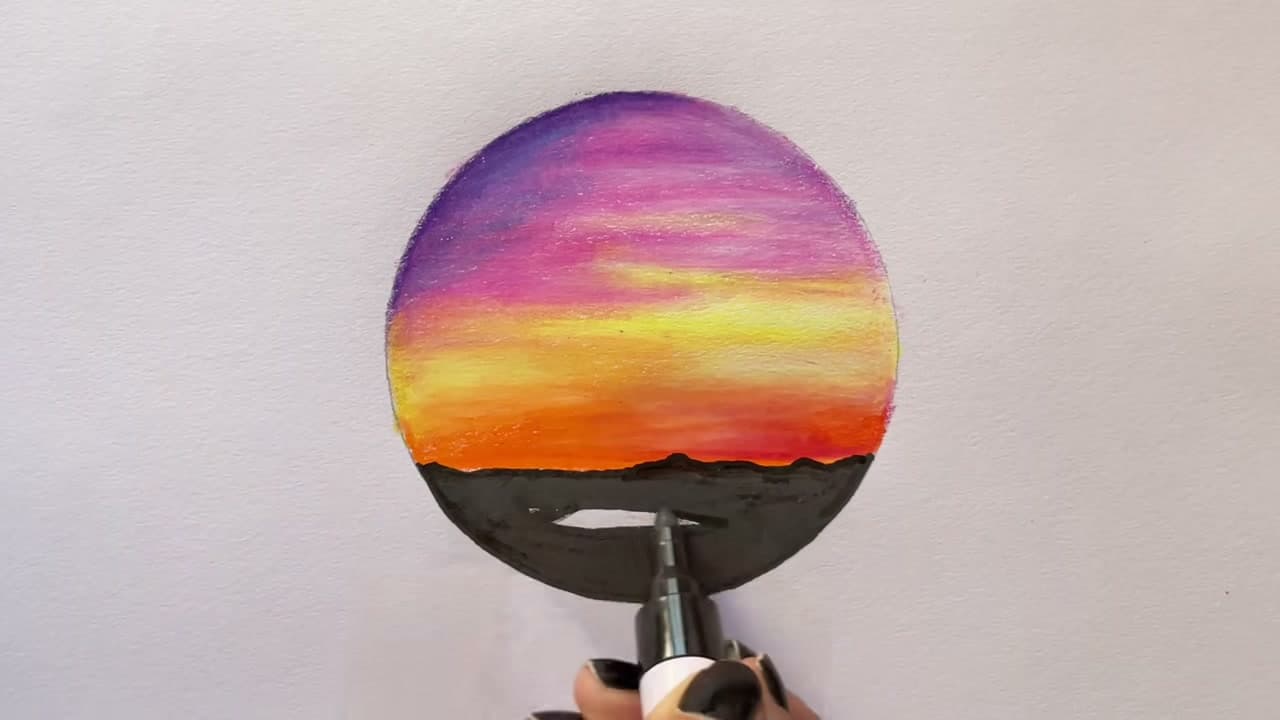
Draw a bumpy horizon line across the bottom of the sky with a black marker. Small hills look more natural than a flat line. Then fill the whole lower part of the circle with black. A paint marker gives solid coverage in a few passes. Let it dry before you draw the trees.

Tip

Outline the edge of the circle first, then fill toward the middle. The edge stays neat.

10

Draw Palm Tree Silhouettes Against the Sunset

10:40
Step 10: Draw Palm Tree Silhouettes Against the Sunset - How to Draw a Sunset With Colored Pencils

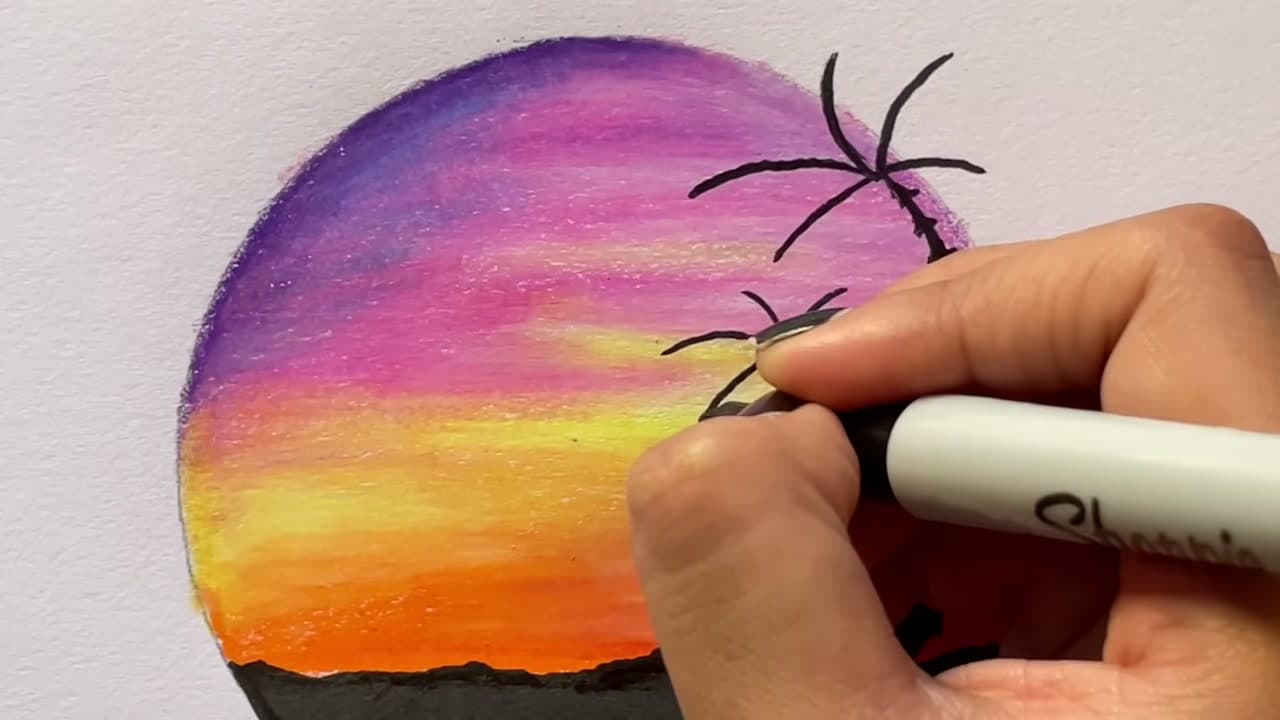
From the right side, draw two palm trunks rising from the ground with a fine Sharpie. Make them curve a little and add short notches down each trunk. At the top, draw a few long curved fronds. Then flick tiny strokes upward from each frond for the leaves. The black shapes make the colors behind them glow.

Tip

Draw one tree taller than the other. Uneven heights look more natural.

How to Draw a Snowy Owl

Keep going

How to Draw a Snowy Owl

Products Used

The Checklist

How to Draw a Sunset With Colored Pencils

Tools
3
Materials
4
Steps
10
Video
11 min

Tools we recommend

Your Guide

Arts Core

As an Amazon Associate we earn from qualifying purchases. Links on this page may be affiliate links - clicking them and buying doesn't change your price, but helps support Show Me Step by Step.

Tags

Sunday How-To

New drawing tutorials, every Sunday

One short email with the week's best step-by-step guides. Free, no spam, unsubscribe anytime.

Did this work for you?

What's next

Related collections

Curated theme pages that include this tutorial.

Weekly Digest

Liked this drawing tutorial?

Pick the categories you want to hear about. Weekly digest of new step-by-step tutorials. No spam, easy unsubscribe.

Send me tutorials about

We only email about new tutorials. Easy unsubscribe anytime.